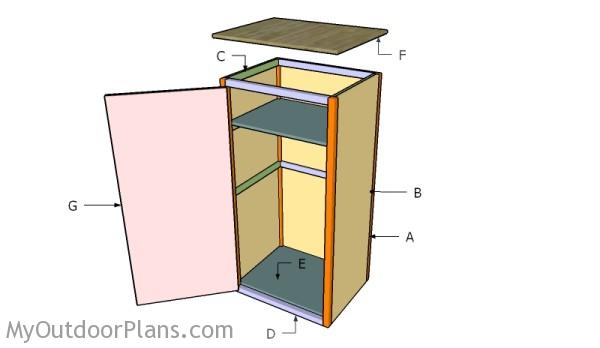
This step by step diy woodworking project is about free gun cabinet plans. This simple wooden gun cabinet is both roomy and simple to build. You can easily adjust the size, shape and the design of the project to suit your needs. The cabinet features a large front door for easy access. Make sure you take a look over the rest of plans to see alternatives and more projects for your garden.
Work with attention and don’t forget that a good planning will save you from many issues and it will keep the costs withing the total budget. Invest in high quality materials, such as pine, redwood or cedar. Drill pocket holes before inserting the galvanized screws, to prevent the wood from splitting. Add waterproof glue to the joints, in order to enhance the rigidity of the structure. See all my Premium Plans HERE.
Projects made from these plans
Free Gun Cabinet Plans
Building a gun cabinet
Cut & Shopping Lists
- A – 4 piece of 2×2 lumber – 60″ long LEGS
- B – 2 pieces of 3/4″ plywood – 21″x60″ long, 1 piece – 27″x60″ long PANELS
- C – 8 pieces of 1×2 lumber – 21″ long CLEATS
- D – 4 pieces of 1×2 lumber – 27″ long, 2 pieces of 2×2 lumber – 27″ long CLEATS
- E – 2 pieces of 3/4″ plywood – 21 3/4″x28 1/2″ long SHELVES
- F – 1 piece of 3/4″ plywood – 24 3/4″x31 1/2″ long TOP
- G – 1 piece of 3/4″ plywood – 26 3/4″x56 3/4″ long, 2 pieces of 1×2 lumber – 53 3/4″ long, 2 pieces – 26 3/4″ long, 1 piece – 23 3/4″ long DOOR
- 1 piece of 2×4 lumber – 8′
- 4 pieces of 2×2 lumber – 8′
- 2 pieces of 3/4″ plywood – 4’x8′
- 4 pieces of 1×2 lumber – 8′
- 2 1/2″ screws
- 1 1/4″ screws
- wood putty, wood stain
Tools
![]() Hammer, Tape measure, Framing square, Level
Hammer, Tape measure, Framing square, Level
![]() Miter saw, Drill machinery, Screwdriver, Sander
Miter saw, Drill machinery, Screwdriver, Sander
Time
![]() One day
One day
Related
Building a wood gun cabinet
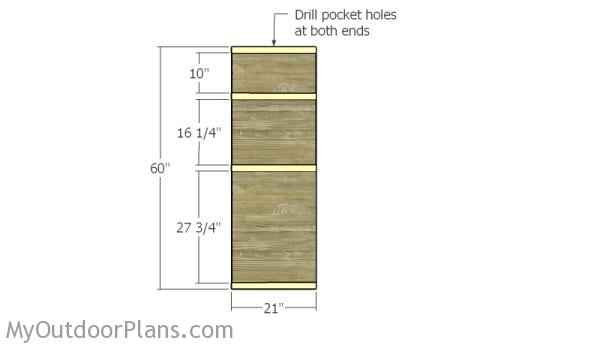
Building the side panels
The first step of the project is to build the sides for the gun cabinet. As you can easily notice in the diagram, you need to use 3/4″ plywood for the panels and 1×2 lumber for the cleats. Drill pocket holes at both ends of the cleats. Use 1 5/8″ nails and glue to lock the cleats to the plywood panels. Leave no gaps between the components.
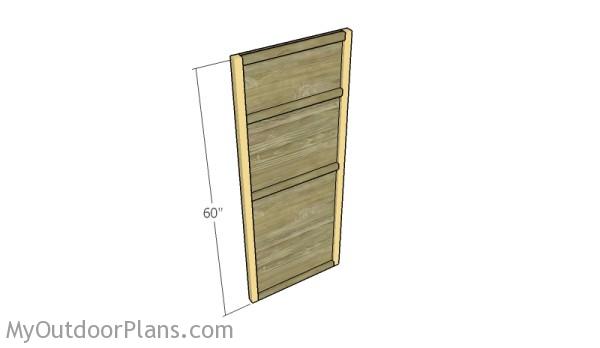
Building the sides
Next, you need to attach the 2×2 legs to the side panels. Align the components with attention and insert 2 1/2″ screws through the cleats into the legs.
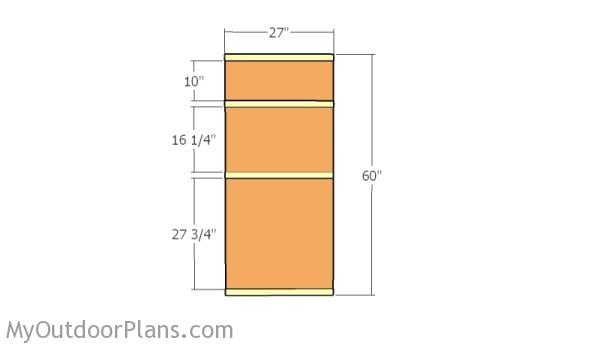
Building the back panel
Build the back wall from 1×2 lumber and 3/4″ plywood. Use 1 5/8″ nails and glue to lock the trims to the panel. Drill pocket holes through the cleats and insert 2 1/2″ screws into the vertical legs.
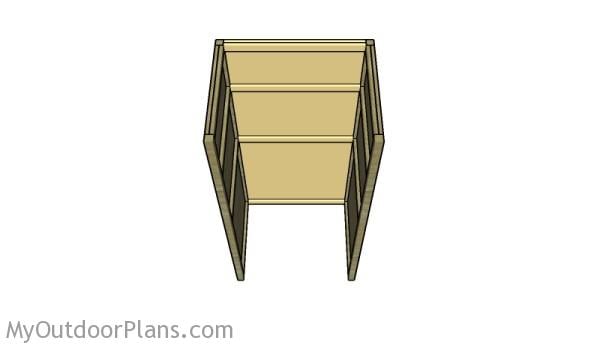
Assembling the gun cabinet
Make sure the corners are square and leave no gaps between the components.
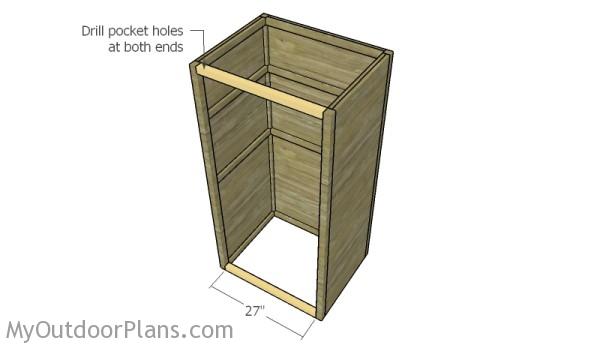
Fitting the front supports
Fit 2×2 supports to the front of the gun cabinet. Drill pocket holes at both ends of the supports and secure them to the legs using 2 1/2″ screws. Make sure the corners are square and leave no gaps between the components.
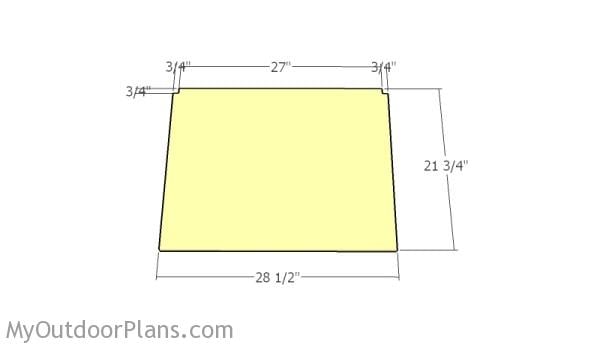
Shelves
Build the shelves from 3/4″ plywood. Make small notches to the back of the shelves using a circular saw. Smooth the edges with sandpaper.

Fitting the shelves
Fit the shelves to the cleats and lock them into place with 1 5/8″ nails.
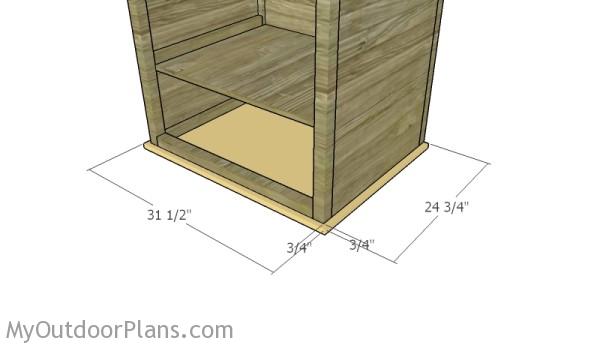
Fitting the top
Build the top of the gun cabinet from 3/4″ plywood. Smooth the edges with sandpaper. Lay the gun cabinet to the top, as shown in the diagram. Drill pilot holes through the supports and insert 2″ screws into the top. Add glue to the joints for a durable bond.
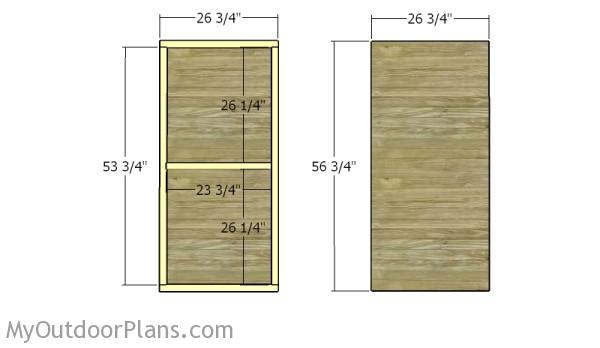
Building the front door
Build the front door from 3/4″ plywood and 1×2 trims. Add the trims to the plywood panel and secure the trims into place with 1 5/8″ nails and glue.
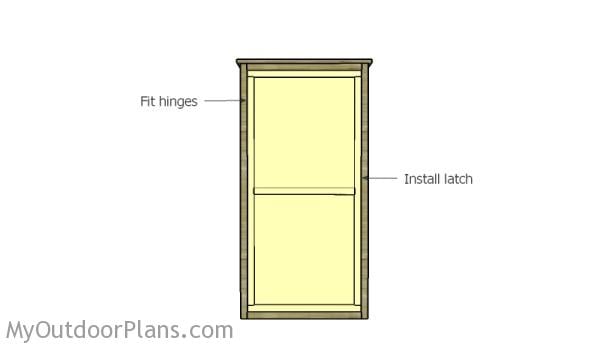
Fitting the front door
Fit the door to the opening and make sure there is a gap of 1/8″ around the four edges. Use hinges to secure the door to the vertical legs. In addition, install a lock to keep the door closed.
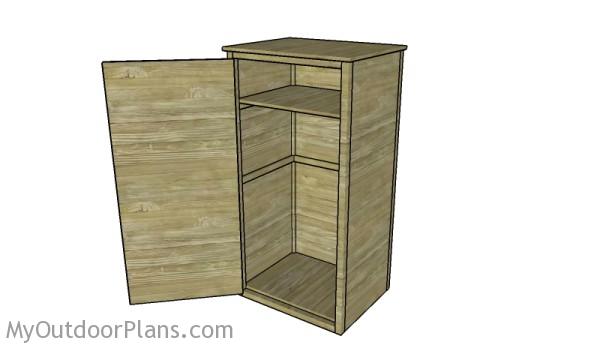
Gun Cabinet Plans
Make sure you install some brackets to the interior walls.
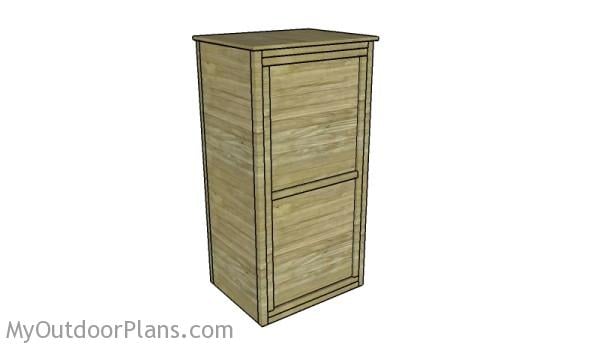
Free gun cabinet plans
Fill the holes with wood putty and let them dry out for a few hours. Smooth the surface with 100-200 grit sandpaper and remove the residues with a damp cloth.
Top Tip: Apply a few coats of paint or stain to the components, to enhance the look of the project.
This woodworking project was about free gun cabinet plans. If you want to see more outdoor plans, check out the rest of our step by step projects and follow the instructions to obtain a professional result.
9 comments
my brother told about this site and I am very interested in doing easy wood working projects now that I am retired
Glad to have you aboard. I have over 1000 woodworking projects you can choose from. Let me know if I can help you with anything and I’m looking forward to seeing your projects!
What is a “pocket hole?”
It is a method to join wood boards. You use a jig and make some pocket holes, then you insert the screws.
I would like free plains for ten gun cabnet made of pine wood the hight will be 80″ high 48 ” wide with double doors and i will be put glass in the doors or plywood 1/4 ” thick and the bottom is going to be 18″high and 48″ wide with solid wooden double doors that will be 18 x 24″ i need free plains for this free i just need plains hope i can get them for free i can’t find them anywhere . thank you
stephen kenyon
These plans are a little off I had to cut a notch in the back cleats
I thought these plans are free. They do not do me any good if I am unable to download the plans.
Read the site FAQs
About how much does it cost to purchase all of the materials for this project?