This step by step diy project is about queen size platform bed frame plans. I designed this modern platform bed that can accommodate a standard queen size mattress. As always, my woodworking plans come with step by step diagrams and full Cut / Shopping lists, so you can build this chair in a few hours with basic tools and materials you can find at most DIY stores. See all my Premium Plans in the Shop.
It is essential to choose the right materials before starting the construction and the assembly of the bed. As you will see in the project, you need to choose durable lumber with a nice appearance, such as pine, cedar or redwood. Make sure the components are in a good visual condition and choose professional tools when adjusting their size. Take accurate measurements and join the components with glue and screws.
Projects made from these plans
Building a queen size farmhouse bed
Building-a-queen-size-bed
Cut + Materials List
Tools
![]() Hammer, Tape measure, Framing square, Pocket Hole Jig
Hammer, Tape measure, Framing square, Pocket Hole Jig
![]() Miter saw, Drill machinery, Screwdriver, Sander
Miter saw, Drill machinery, Screwdriver, Sander
Time
![]() One weekend
One weekend
Queen Size Bed Frame Plans – PDF Download
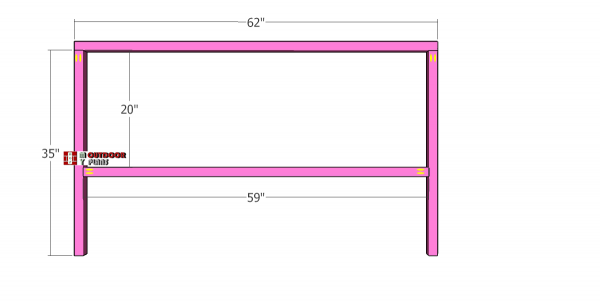
Assembling-the-frame-of-the-headboard
The first step of the project is to build the frame for the headboard. Therefore, cut the components from 2×2 lumber and drill pocket holes as shown in the diagram. Therefore, drill pocket holes at both ends of the middle component and at the top of the vertical components.
Align everything with attention and check if the corners are square. Insert 2 1/2″ screws to assemble the frame together tightly.
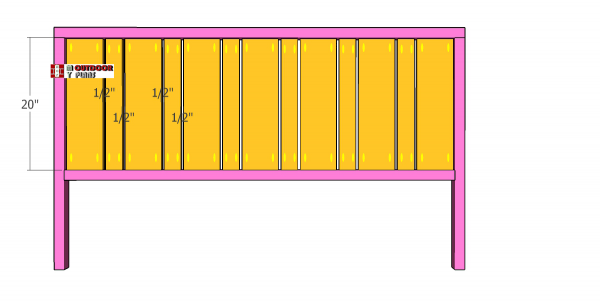
Fitting-the-headboard
Next, we need to attach the 1×6 and the 1×3 to the headboard. Drill pocket holes at both ends of the boards and insert 1 1/4″ screws into the frame. Make sure you set the pocket holes on the interior, so they are not visible from the front.
Make sure the boards are flush with the front frame of the headboard.
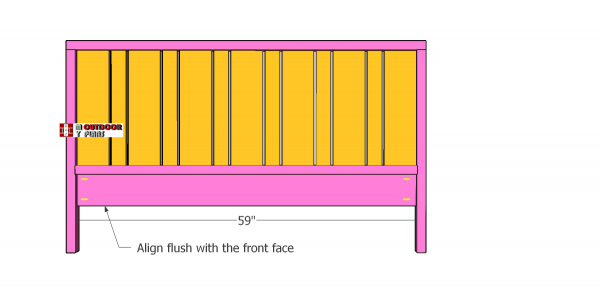
Headboard-base-slat
Next, we need to attach the 1×6 board to the base of the headboard. Drill pocket holes at both ends of the board, align the edges flush with the front and insert 1 1/4″ screws to lock it into place tightly.
Assembling-the-side-panels
Next we need to assemble the two side panels using 2×2 lumber and 1×6 boards. Drill pocket holes at both ends of the 2×2 components, so we can lock later on to the headboards.
Drill pocket holes along the top and bottom edges of the panels. Align the edges flush and insert 1 1/4″ screws to assemble the panels. Use glue and clamps to leave no gaps between the components.
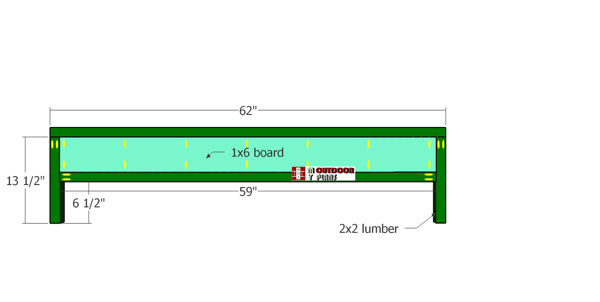
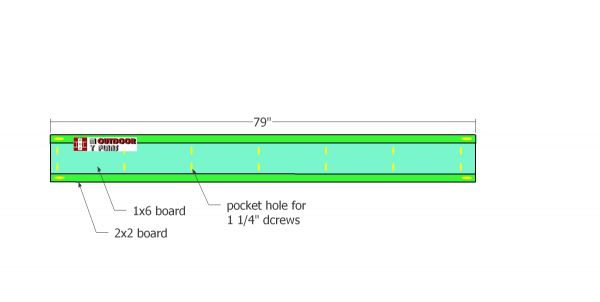
Assembling-the-footboard
Assemble the footboard using 2×2 lumber and 1×6 board. Drill pocket holes along the top and bottom edges of the 1×6 board. Drill pocket holes at both ends of the middle 2×2 components and at the top of the legs. Assemble the frame of the footboard using 2 1/2″ screws. Attach the 1×6 board with 1 1/4″ screws.
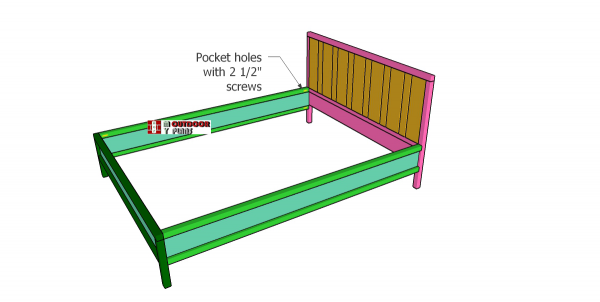
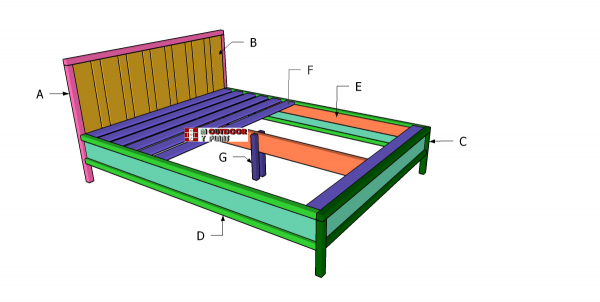
Assembling-the-frame-of-the-bed
Assembling the frame of the queen size bed by attaching the side panels to the footboards. Insert 2 1/2″ screws to lock the panels into place. Align the edges flush and make sure the corners are square.
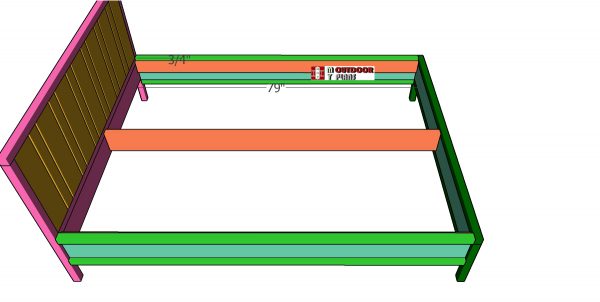
Fitting-the-cleats
Fit the 1×4 cleats to the side panels of the bed. Offset the cleats 3/4″ from the top of the side panels. Drill pilot holes and insert 1 1/4″ screws to lock them into place tightly.
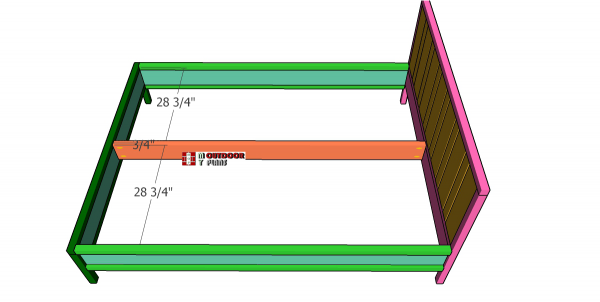
Fitting-the-middle-cleat
Use 2×6 lumber for the middle cleat. Drill pocket holes at both ends and attach it into place with 1 1/4″ screws. Center the support to the headboards.
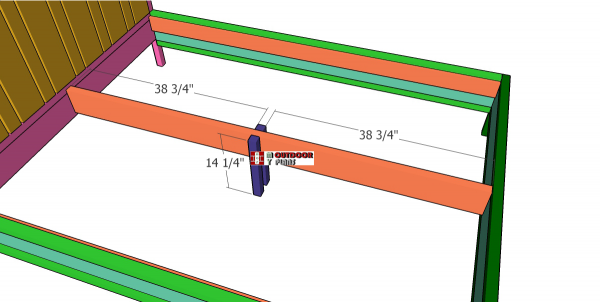
Fitting-the-middle-posts
For extra support, add 2 pieces of 2×2 lumber to the middle of the center cleat. Plumb the posts, drill pilot holes and insert 2 1/2″ screws to lock it into place tightly.
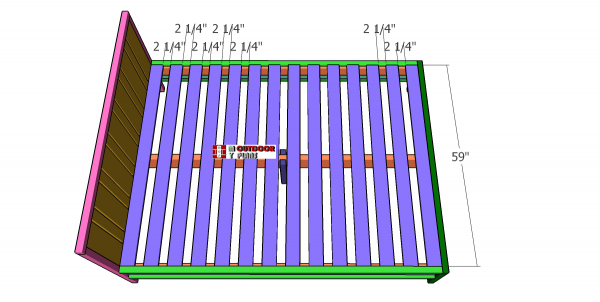
Fitting-the-top-slats
Fit the 1×4 boards to the bed frame. Use a 2 1/4″ piece of wood between the slats to create even gaps. Drill pilot holes and insert 1 5/8″ screws to lock them to the cleats.
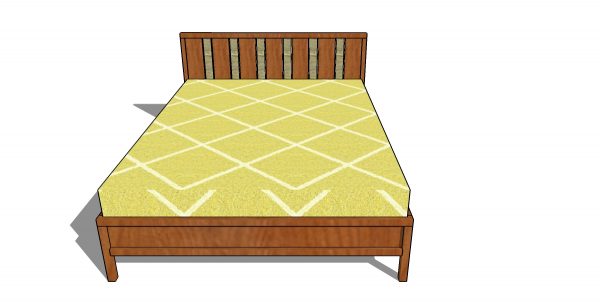
queen platform bed plans – front view
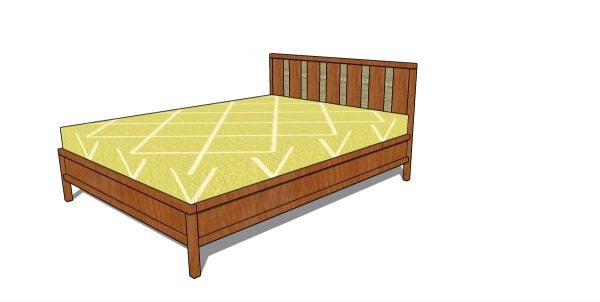
queen platform bed plans
This is a simple platform bed frame that you can build in a few days. I also have Premium Plans for this, a full PDF file that also comes with a cut layout diagram (shows you how to cut the components from the materials, so you get minimum waste). See all my Premium Plans HERE. Check the button bellow for the PDF file.

This woodworking project was about farmhouse queen size plans. If you want to see more outdoor plans, we recommend you to check out the rest of our step by step projects. LIKE us on Facebook to be the first that gets our latest plans. Send us pictures with your plans.
EXPLORE MORE IDEAS FOR:
 |
 |
 |
 |