This step by step diy woodworking project is about octagonal planter plans. The project features instructions for building a nice octagonal planter out of 2×2 lumber. The best part of the project is that you can get the job done by yourself with common tools and adjust the size of the planter to suit your needs. The planter is more like a mask that should cover a blunt plastic container.
When buying the lumber, you should select the planks with great care, making sure they are straight and without any visible flaws (cracks, knots, twists, decay). Investing in cedar or other weather resistant lumber is a good idea, as it will pay off on the long run. Use a spirit level to plumb and align the components, before inserting the galvanized screws, otherwise the project won’t have a symmetrical look. If you have all the materials and tools required for the project, you could get the job done in about a day. See all my Premium Plans HERE.
Projects made from these plans
Octagonal Planter Plans
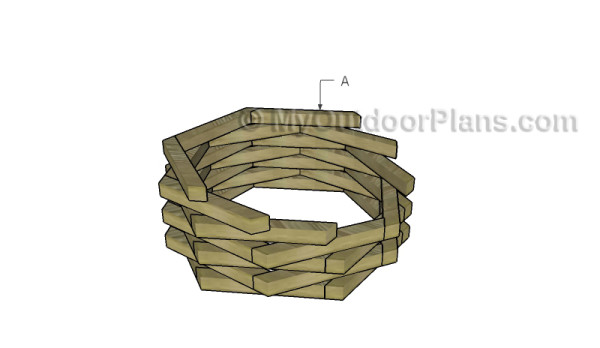
Building the wood planter
Cut & Shopping Lists
- A – 64 pieces of 2×2 lumber – 13 3/4″ long FRAME
- 11 pieces of 2×2 lumber – 8 ft
- 1 piece of 1/2″ pressure treated plywood – 4’x4′
- 1 1/4″ screws
- 1 5/8″ screws
- 2 1/2″ screws
- filler, stain
- glue
Tools
![]() Hammer, Tape measure, Framing square, Level
Hammer, Tape measure, Framing square, Level
![]() Miter saw, Drill machinery, Screwdriver, Sander
Miter saw, Drill machinery, Screwdriver, Sander
Time
![]() One day
One day
How to build an octagonal planter
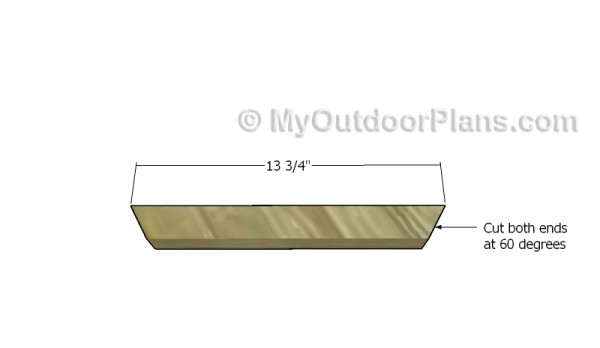
Building the components
The first step of the woodworking project is to build the components for the octagons. Use a miter saw to cut both ends of the pieces at 60 degrees. You can adjust the size of the components to suit your needs.
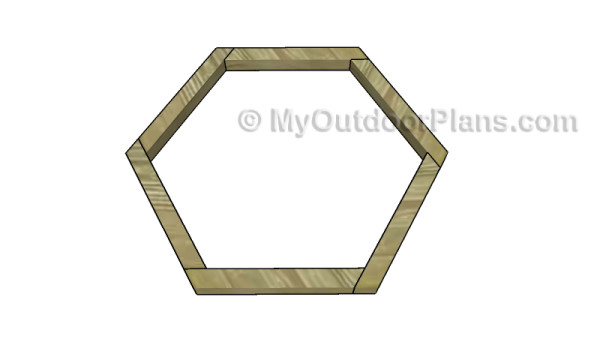
Assembling the octagons
After cutting the eight components for the octagons, you need to lock them together tightly with nails or screws and waterproof glue. Align the edges with attention and make sure there are no gaps between the components. Build the other layers using the same techniques described above.
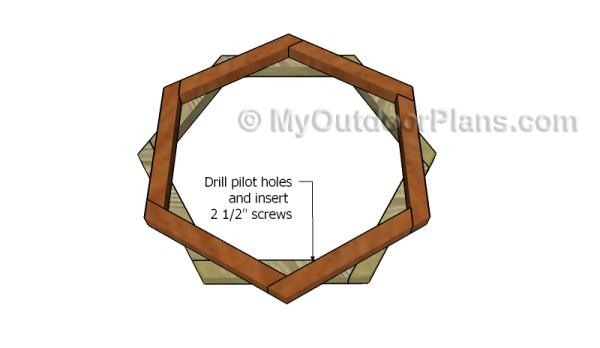
Assembling the planter
Next, you need to lock the layers together. Lay the second layer to the base octagon, as shown in the diagram. Drill pilot holes through the top layer and secure it to the base use 2 1/2″ screws and glue. Add more layers until you reach the wanted height for the planter.
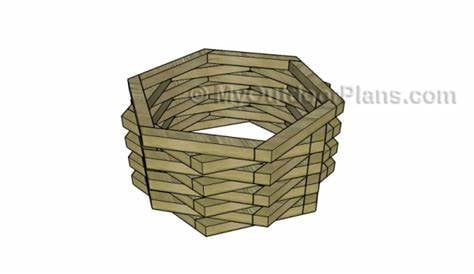
Fill the holes and dents with wood putty and let it dry out for several hours. Use 120-200 grit sandpaper to smooth the surface. The best part of the project is that you can adjust the size of the octagonal planter to suit any container.
Top Tip: If you want to enhance the look of the project and to protect the planter box, we recommend you to cover the components with paint or stain.
This woodworking project was about octagonal planter plans. If you want to see more outdoor plans, we recommend you to check out the rest of our step by step projects. LIKE us on Facebook and Google + to be the first that gets out latest projects and to hep us keep adding free woodworking plans for you.

7 comments
I am of the understanding ‘octoanal’ implies eight sides rather than six.
Then add 2 more sides and make it legit.
Adding two more pieces is not enough, as the 60 degree angle will always end up as a hexagon, unless you want to spiral the two extra pieces on top.
To make it an octagon you need 8 pieces and to cut the ends at 45 degree angles.
This would be a good application for pocket screws into the underside of each joint. I will make a hexagon jig to hold it all in alignment for driving in the screws.
I’m very confused as these Octagonal plans are showing Hexagon photos. Octagonal is 8 sides and Hexagon is 6 side.
Yes, that is true. This is actually a hexagon planter. It is an error.
What is the inside diameter of the planter?