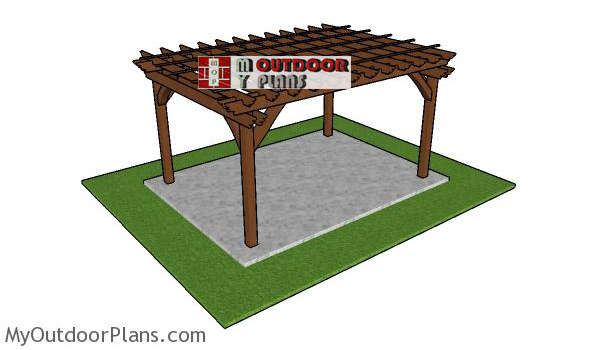
This step by step diy project is about 10×14 pergola plans. This is a relatively small pergola, but you should always look at the bright side of things: this will not require a fortune to build. Therefore, if you want to build a beautiful free standing pergola in your garden, make sure you check out my latest design. Take a look over the rest of my woodworking plans, if you want to get more building inspiration.
When buying the lumber, you should select the planks with great care, making sure they are straight and without any visible flaws (cracks, knots, twists, decay). Investing in cedar or other weather resistant lumber is a good idea, as it will pay off on the long run. Use a spirit level to plumb and align the components, before inserting the galvanized screws, otherwise the project won’t have a symmetrical look. If you have all the materials and tools required for the project, you could get the job done in about one weekend. See all my Premium Plans HERE.
Projects made from these plans
10×14 Pergola Plans – Free PDF Download
10×14-pergola-plans
Cut + Shopping Lists
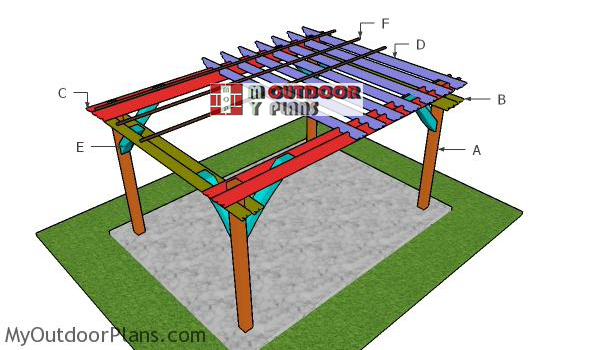
- A – 4 pieces of 6×6 lumber – 8′ long POSTS
- B – 4 piece of 2×8 lumber – 12′ long BASE BEAMS
- C – 4 pieces of 2×8 lumber – 16′ long SUPPORT BEAMS
- D – 12 pieces of 2×6 lumber – 12′ long SHADE ELEMENTS
- E – 4 pieces of 6×6 lumber – 36″ long, 4 pieces – 46 1/4″ long BRACES
- F – 5 pieces of 1×2 lumber – 16′ long SLATS
- 8 pieces of 6×6 lumber – 8′
- 4 piece of 2×8 lumber – 12′
- 4 pieces of 2×8 lumber – 16′
- 12 pieces of 2×6 lumber – 12′
- 5 pieces of 1×2 lumber – 16′
- 1 5/8″ screws
- 5 1/2″ screws
- 6×6 post anchor 4 pieces
- post to beam connector 8 pieces
- rafter ties
- 16 pieces of 9″ carriage bolt
- wood filler , wood glue, stain/paint
Tools
![]() Hammer, Tape measure, Framing square, Level
Hammer, Tape measure, Framing square, Level
![]() Miter saw, Drill machinery, Screwdriver, Sander
Miter saw, Drill machinery, Screwdriver, Sander
Time
![]() One week
One week
Related
How to build a 10×14 pergola

Laying-out-the-10×14-pergola
The first step of the pergola project is to layout the posts. Use batter boards and string to layout the location of the posts. Apply the 3-4-5 rule to every corner and then measure the diagonals to make sure they are perfectly equal. You need to make adjustments until you get the desired result. As you can see in the image, this pergola has a 10×14 base.
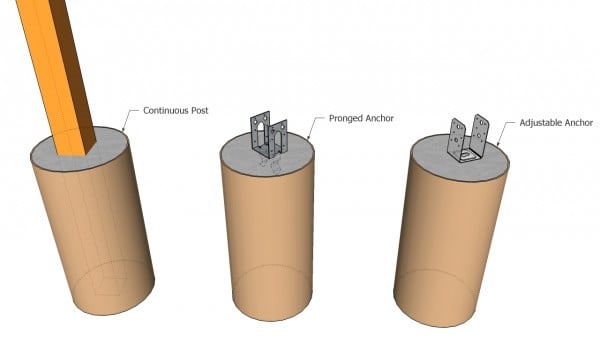
Anchoring the posts of the anchor
There are a few ways to secure the 6×6 posts into place. You can set the posts in concrete or you can use adjustable anchors and pour footings. Dig the holes 3′ deep (or under the front line) and about 12-13″ in diameter. Compact a layer of gravel to the bottom of the holes and then fit the tube forms. Fit the posts, align them and plumb them with a spirit level. Fill the forms with concrete, while the posts are locked into place with temporarily braces. If you use anchors, you need to align and set them into concrete. Fit the posts after the concrete dries, using lag screw.
Smart tip: Read the local building codes, so you dig the holes at the appropriate depth. For this project, I will assume you will use post anchors, so if you set the posts into concrete, make sure you add 3′ to the posts size.
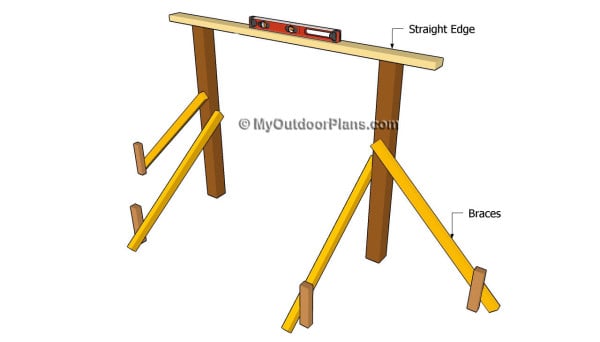
Installing the posts
Check if the posts are level and user a circular saw to make corrections. Notice the temporarily braces that hold the posts plumb.
Building the pergola roof
Base beams – 10×14 Pergola
Continue the diy pergola project by making the base beams. Use 2×8 lumber for these beams.
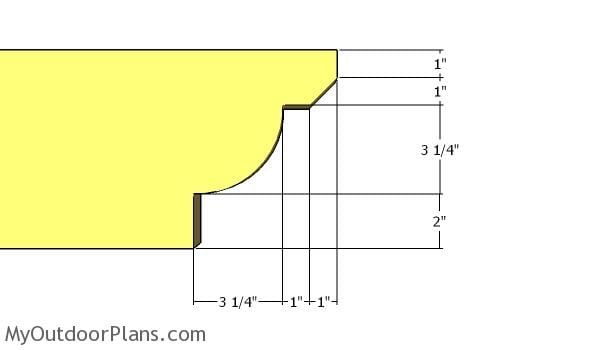
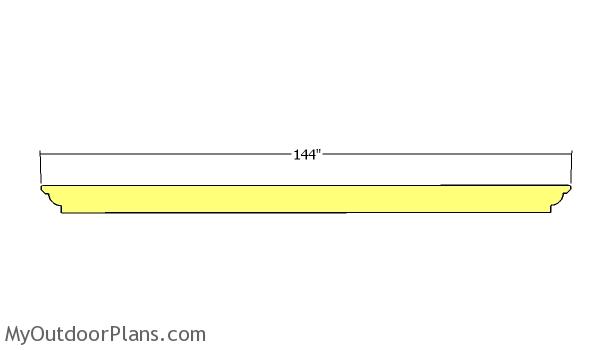
Rafters – end decorative cuts
You can add a lot of value to your pergola by making decorative cuts to both ends of the beams. Use a circular saw for the straight cuts and a jigsaw for the curved cuts. Smooth the edges with sandpaper thoroughly.
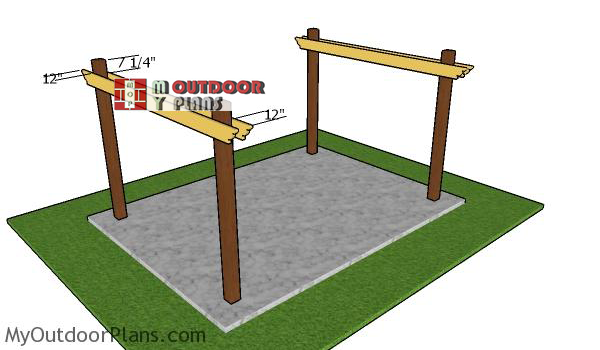
Fitting-the-base-beams
Fit the beams to the posts and use a spirit level to make sure they are perfectly horizontal. Clamp the beams to the posts and drill pilot holes. Insert 9″ carriage bolts to lock everything with attention. Use washers on both beams.
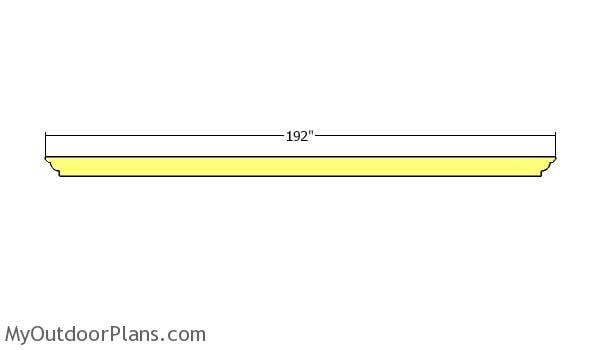
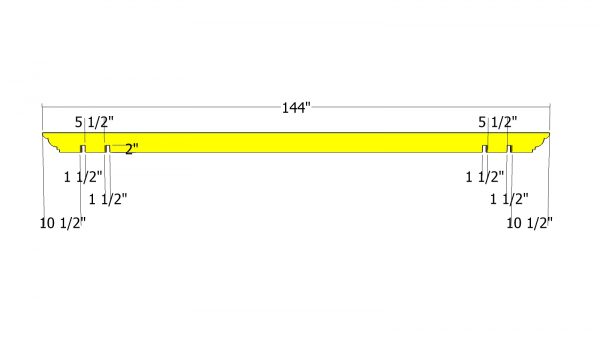
Support beams – 10×14 Pergola
Next, use 2×8 lumber for the support beams, as well. Make decorative cuts to both ends of the beams, using the pattern shown above.
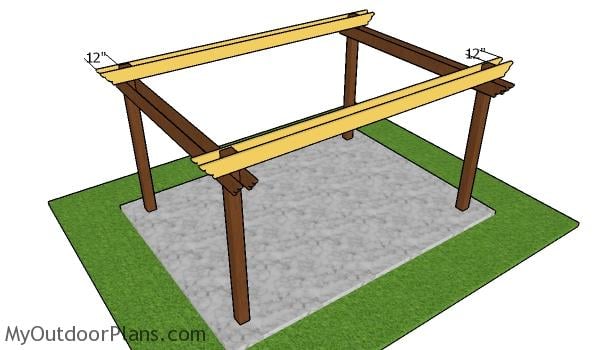
Fitting the support beams – 10×14 Pergola
Fit the beams to the pergola, perpendicular to the base beams. Center the beams to the top of the posts, leaving equal 12″ overhangs on both sides. Drill pilot holes through the beams and through the posts and insert 9″ carriage bolts. Make sure you plumb the posts again, before attaching the support beams. All corners should also be right angled.
Rafters for pergola
Next, use 2×6 lumber for the rafters. As you can see in the plans, you need to make a few slots to the beams so you can lock them to the support beams. Make parallel cuts inside the marked areas and then remove the excess with a chisel.
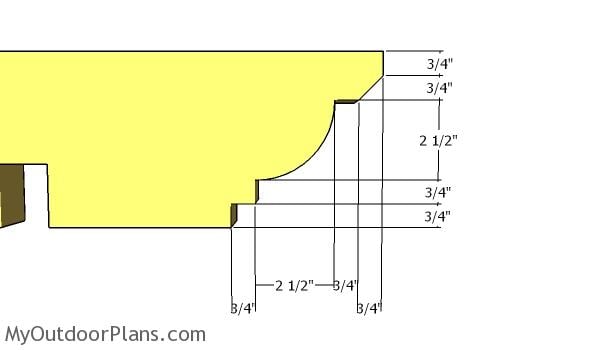
Rafter end – Decorative cut
Furthermore, use a jigsaw to make the curved cuts to both ends of the rafters. Use a circular saw for the straight cuts.

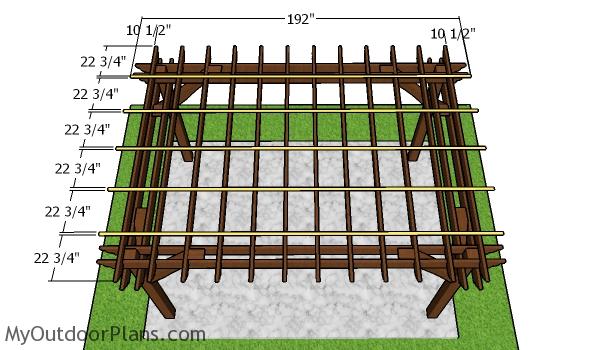
Fitting-the-rafters-10×14-pergola
Fit the rafters to the top of the pergola frame. Place the rafters equally spaced, as shown in the diagram. Use rafter ties or just drill pilot holes and insert 5 1/2″ screws to lock the rafters to the supports beams.
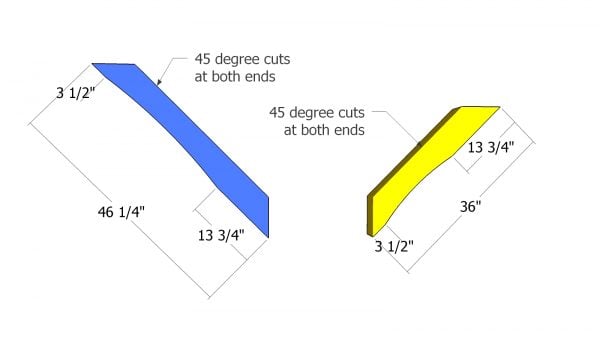
Braces for pergola
Continue the project, use 6×6 lumber for the braces. Use a saw to make 45 degree cuts at both ends of the pieces. Use a jigsaw to make the curved cuts that will enhance the look of the backyard pergola. These braces will reinforce the structure of the pergola and make it much more stable to high winds.
Fitting the braces
Next, use a spirit level to plumb the posts and then fit the braces into place, as shown in the diagram. Drill pilot holes and insert 5 1/2″ screws to secure the braces into place tightly. Use at least 2 screws for each joint. Make sure there are no gaps between the components, when attaching the braces.
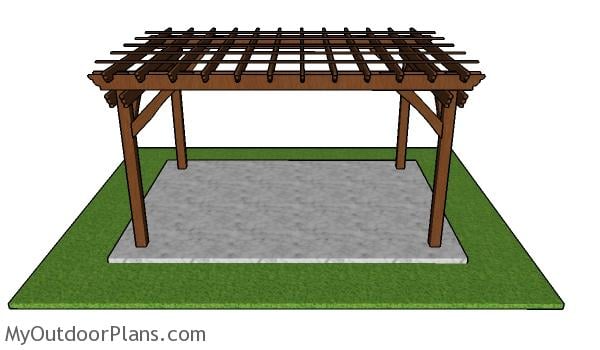
Fitting the top slats
Also, fit the 1×2 slats to the top of the pergola. Place these slats equally spaced for a professional result. Make sure the overhangs are equal. Center the slats to the rafters and then drill pilot holes, before inserting the 1 5/8″ screws. If installed properly, these slats will keep the rafters equally spaced on the long run.
How to build a 10×14 pergola
Last but not least, you need to take care of the finishing touches. Therefore, fill the holes with wood putty and then smooth the surface with 120-220 grit sandpaper. Apply a few coats of paint or stain over the components, to enhance the look of the patio pergola and to protect the components from decay.
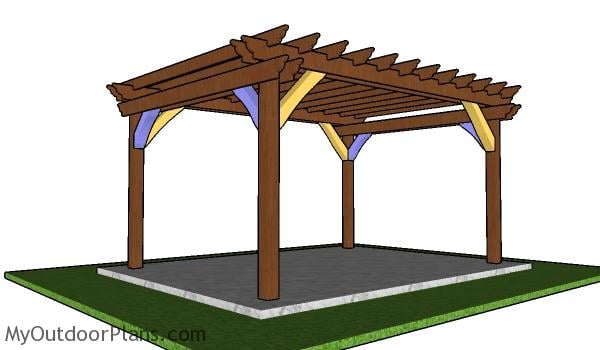
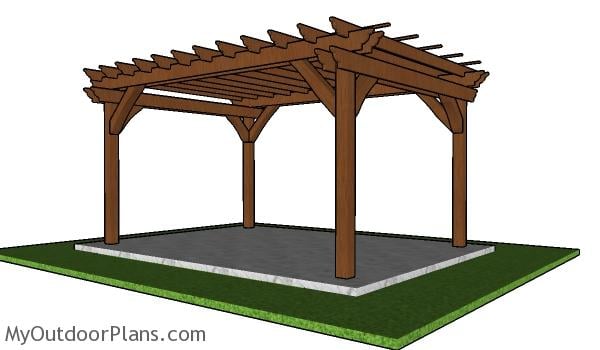
How-to-build-a-10×14-pergola-free-standing
This pergola has a stylish design so you shouldn’t be worried that it might not fit the design of your property. In addition, you should adjust the distance between the shade elements to create the amount of shade you desire.
10×14 Pergola Plans – Free PDF Download
If you want to add charm and unique appeal to your garden, I recommend you to check out these plans. This pergola can be built by any person with basic woodworking skills and it is also very budget friendly. You can make a lot of adjustments to the design so it suits your tastes and needs. Check out the rest of my pergola plans, as I have many designs and sizes you can choose from. In addition, I have over 1500 free woodworking plans on the blog, if you need more building inspiration. See HERE a list with all my free plans.
This woodworking project was about 10×14 pergola plans free. If you want to see more outdoor plans, check out the rest of our step by step projects and follow the instructions to obtain a professional result.
EXPLORE MORE IDEAS FOR:
 |
 |
 |
 |