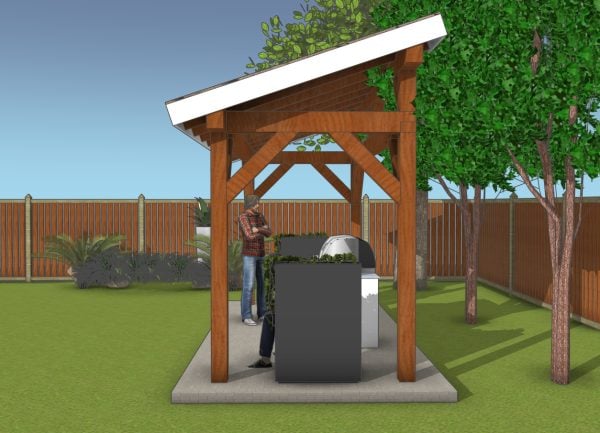
This step by step diy woodworking project is about a 6×16 pavilion lean to roof plans. This is PART 2 of the large grill cover project, where I show you how to build the slanted roof. This roof has a 4:12 pitch, but you can adjust it, as well. Take a look over the rest of my woodworking plans, if you want to get more building inspiration.
When buying the lumber, you should select the planks with great care, making sure they are straight and without any visible flaws (cracks, knots, twists, decay). Investing in cedar or other weather resistant lumber is a good idea, as it will pay off on the long run. Use a spirit level to plumb and align the components, before inserting the galvanized screws, otherwise the project won’t have a symmetrical look. If you have all the materials and tools required for the project, you could get the job done in about a day.
Projects made from these plans
6×16 Pavilion Lean to Roof Plans
Building-a-6×16-lean-to-pavilion
Cut and Shopping Lists
Tools
![]() Hammer, Tape measure, Framing square, Level
Hammer, Tape measure, Framing square, Level
![]() Miter saw, Drill machinery, Screwdriver, Sander
Miter saw, Drill machinery, Screwdriver, Sander
Time
![]() One day
One day
Related
- PART 1: 6×16 Grill Gazebo Plans
- PART 2: 6×16 Pavilion Lean to Roof Plans
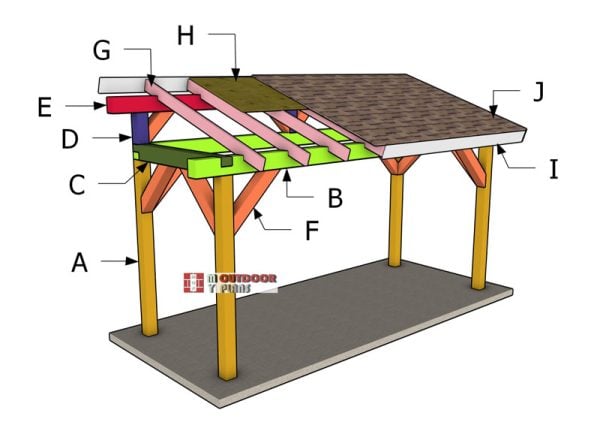
How to build a 6×16 lean to pavilion roof
Rafters—lean-to-grill-gazebo
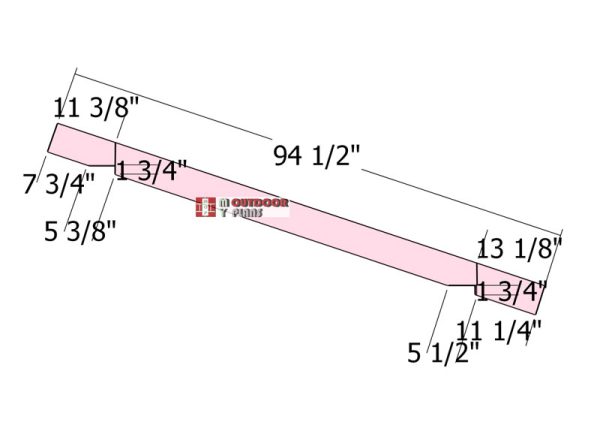
Use 2×6 lumber for the rafters. Mark the cut lines to the rafters and then get the job done with a circular saw. Smooth the edges with sandpaper. Make the birdsmouth notches into the rafters, so you can fit them into place tightly.
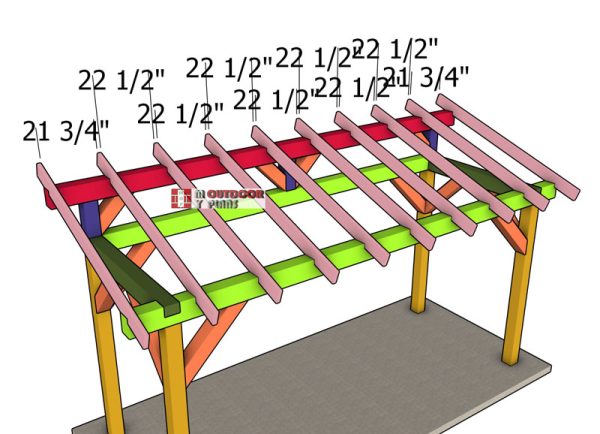
Fitting-the-rafters
Rafter-detail
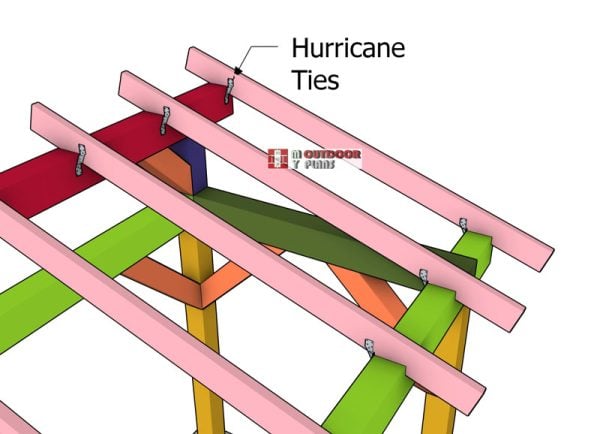
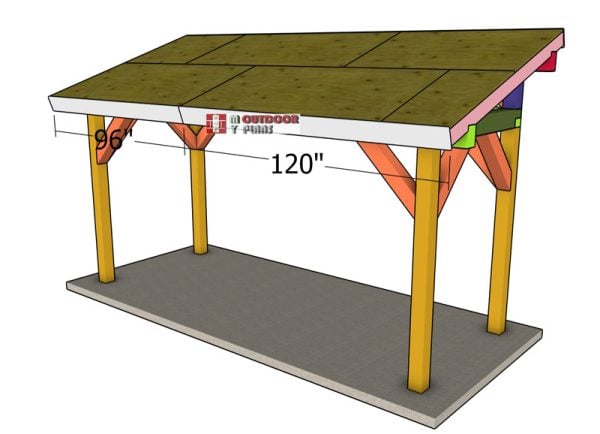
Fit the rafters to the top of the pavilion, using the information from the diagram. It is important to space the rafters properly (every 24″ on center), otherwise you won’t be able to attach the roofing sheets. Use hurricane rafters ties and 1 1/2″ structural screws, to lock the rafters to the support beams.
Fitting-the-roof-rafters
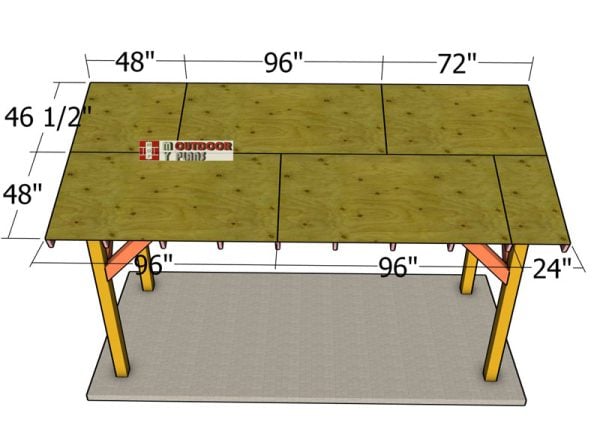
Securely fasten 3/4″ plywood panels to the roof framework of your lean-to pavilion to create a reliable overhead cover. With proper installation, these panels provide excellent protection from the elements while adding a rustic charm to your outdoor space. Use 2 1/2″ screws every 8″ along the rafters.
Front-roof-trims—6×16-gazebo
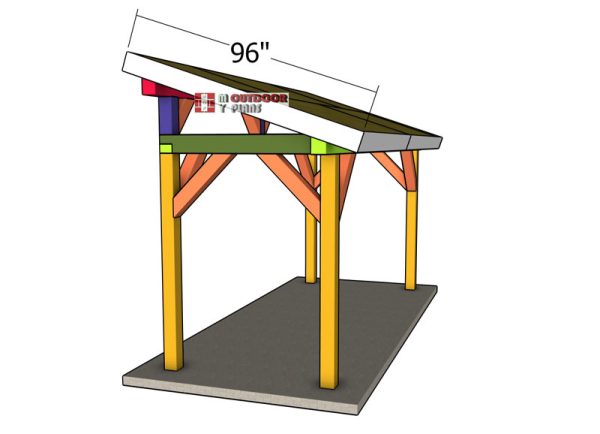
Fit 1×8 trims to the front and back of the pavilion. Align the edges with attention and insert 2″ nails to lock them into place tightly.
Side-roof-trims
Fit the 1×8 trims to the sides of the pavilion. Make the angle cuts to the trims before locking them into place with 2″ nails.
Installing-the-roofing
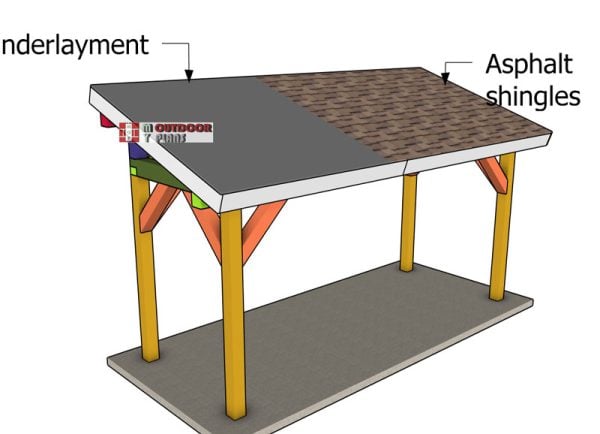
To install asphalt shingles on a small lean-to roof, begin by laying down an underlayment and securing drip edge flashing along the eaves. Start shingling from the bottom edge, nailing each shingle in place and staggering joints to prevent water infiltration.
Trim the shingles as needed around obstructions and install ridge caps at the roof ridge, sealing them with roofing cement for added protection. Finally, inspect the roof for any loose shingles or leaks, and apply sealant where necessary to ensure a weather-resistant finish.
How to build a 6×16 lean to pavilion
Fill the holes with wood putty and let them dry out for a few hours. Smooth the surface with 100-200 grit sandpaper and remove the residues with a damp cloth. Apply a few coats of stain or paint to enhance the look of the pavilion.
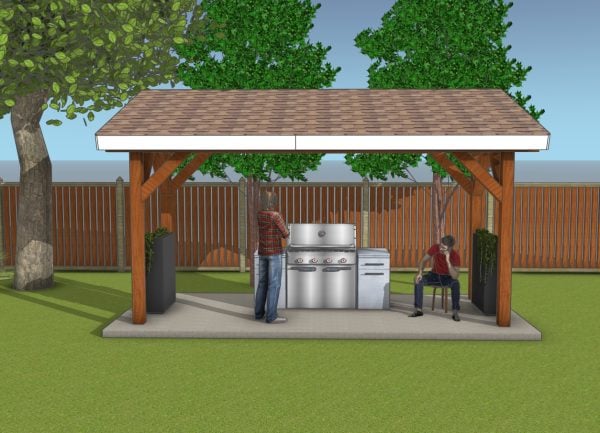
6×16 pavilion – front view
Don’t forget to take a look over PART 1 of the project, so you learn how to build the frame of the 12×18 pavilion. This free standing pavilion is sturdy and it features a very elegant design that puts and emphasis on cost efficiency and durability. With several modifications to the roof, you can alter the design and attach it to an already existing building.
What I like the most about this pavilion is that you can easily modify the height of the post, so it suits your needs and fits your space. See all my woodworking plans, sorted by category.
This woodworking project was about 6×16 backyard pavilion roof plans. If you want to see more outdoor plans, check out the rest of our step by step projects and follow the instructions to obtain a professional result.

EXPLORE MORE IDEAS FOR:
 |
 |
 |
 |