This step by step diy woodworking project is about a 18×12 outdoor pavilion roof plans. In part 2 of the project, I’ll guide you through constructing the roof, starting with the assembly of the rafters for a robust framework. Followed by installing the roof panels and shingles, this section ensures a durable and weather-resistant finish to your pavilion. Take a look over the rest of my woodworking plans, if you want to get more building inspiration. Check out the Shop, as well, for full list of Premium Plans.
When buying the lumber, you should select the planks with great care, making sure they are straight and without any visible flaws (cracks, knots, twists, decay). Investing in cedar or other weather resistant lumber is a good idea, as it will pay off on the long run. Use a spirit level to plumb and align the components, before inserting the galvanized screws, otherwise the project won’t have a symmetrical look. If you have all the materials and tools required for the project, you could get the job done in about a day. See all my Premium Plans HERE.
Projects made from these plans
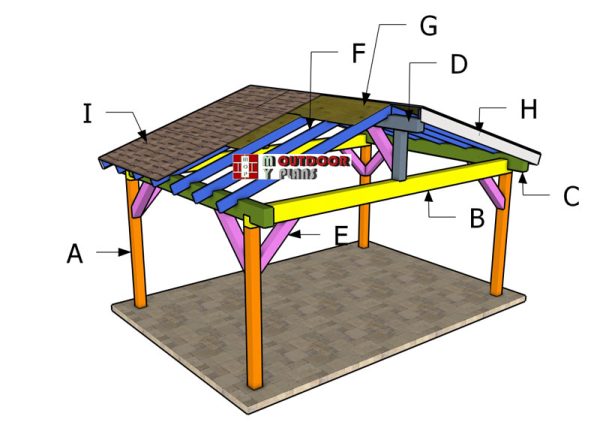
18×12 Outdoor Pavilion Roof Plans
Building-a-18×12-gable-pavilion
Cut and Shopping Lists
Tools
![]() Hammer, Tape measure, Framing square, Level
Hammer, Tape measure, Framing square, Level
![]() Miter saw, Drill machinery, Screwdriver, Sander
Miter saw, Drill machinery, Screwdriver, Sander
Time
![]() One day
One day
Related
- PART 1: 18×12 Gable Pavilion Plans
- PART 2: 18x12 Gable Pavilion Roof Plans
How to build a 18×12 pavilion roof
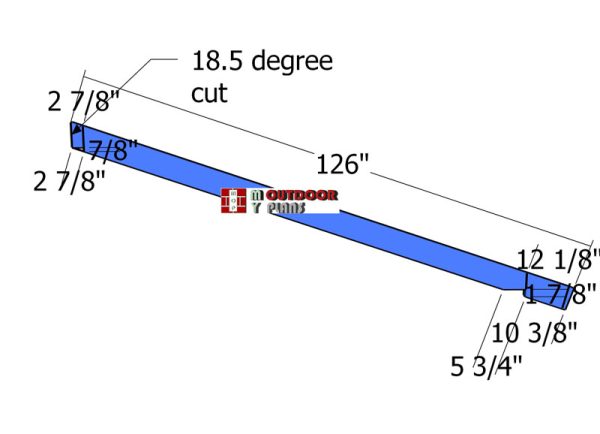
Rafters
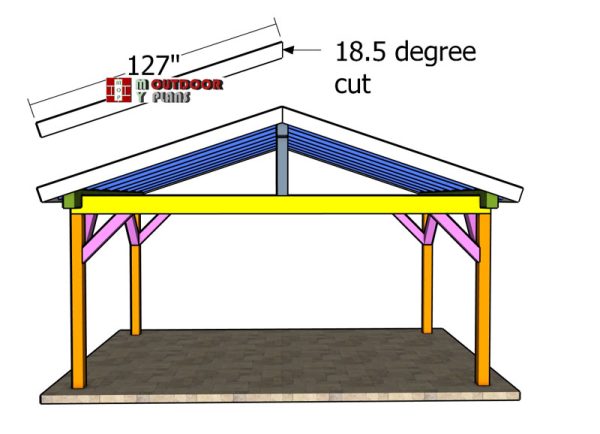
Use 2×6 lumber for the rafters. Use a circular saw to make the 18.5 degree angle cuts to the boards. Smooth the edges with sandpaper. Make the notches to the rafters, as shown in the plans. Mark the lines before doing the cuts.
Birdsmouth cuts are essential because they allow rafters to securely rest on and be attached to the top plate of the supporting wall, ensuring proper weight distribution and structural stability. These cuts provide a proper fit, preventing the rafters from sliding and maintaining the rigidity of the roof’s alignment.
Attaching-the-rafters
Rafter-detail
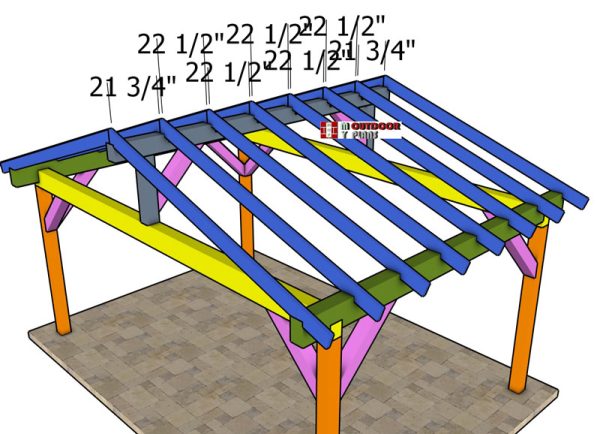
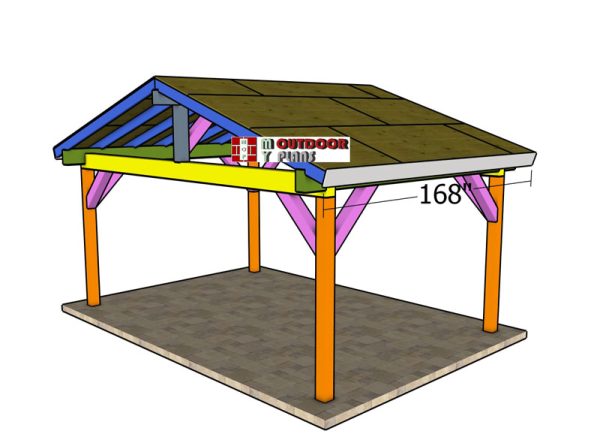
Fit the rafters to the top of the pavilion, using the information from the diagram. It is important to space the rafters properly (every 24″ on center), otherwise you won’t be able to attach the roofing sheets.
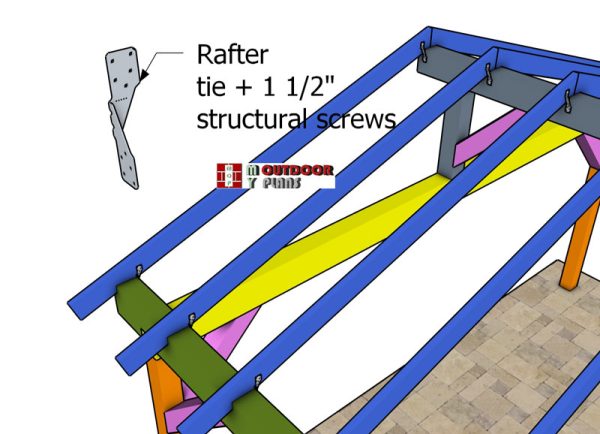
Use rafters ties to lock the rafters to the beams. Insert 1 1/2″ structural screws for the rafter ties. Use 2 ties for each rafter, one at each end. See the diagram for the gaps between the rafters.
Rafter ties are crucial at both ends of the rafters to prevent the outward thrust caused by the weight of the roof and wind uplift. By connecting the rafters to the support beams, rafter ties distribute the load evenly, minimizing the risk of roof spreading or collapse.
Fitting-the-roof-sheets
Fitting-the-roof-sheets
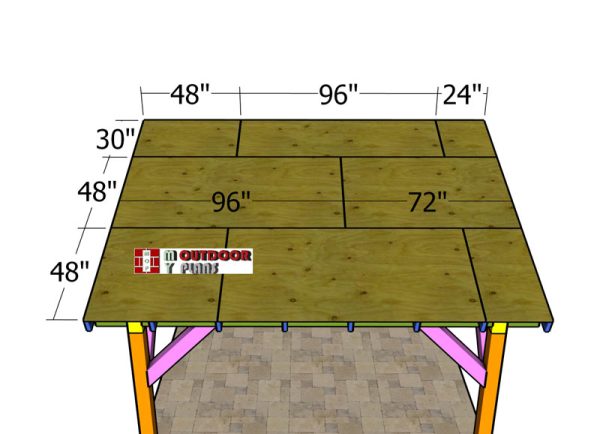
Use 3/4″ plywood for the roof of the pavilion. Cut the sheets at the right dimensions and then lay them to the top of the pavilion. Leave no gaps between the sheets and then insert 1 5/8″ / 2 1/2″ screws, every 8″ along the rafters, so you can secure them into place tightly.
Using 3/4″ plywood for a roof based on 24″ OC (on center) rafters provides sufficient strength and support for the roofing materials and any potential loads such as snow or wind. This thickness ensures structural integrity and helps to prevent sagging or deformation over time, maintaining the durability and longevity of the roof.
Attaching-the-side-trims
Gable-end-trims
Fit 1×8 trims to the sides of the pavilion. Align the edges with attention and insert 2″ nails to lock them to the ends of the rafters.
Fit the 1×8 trims to the front and back of the pavilion. Make sure you make a 24.5 degree cut to one end of the gable end trims. Lock them into place with 2″ nails.
Fitting-the-roofing
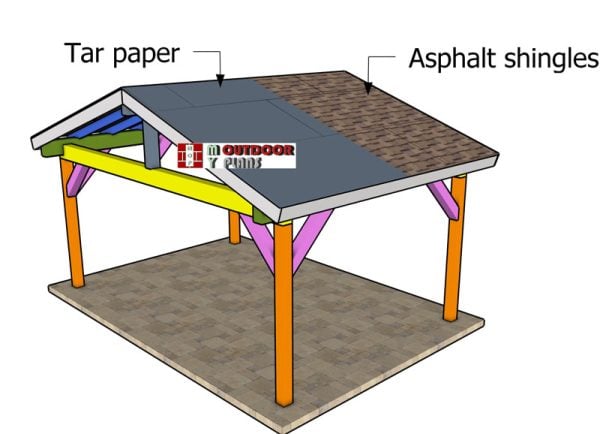
Cover the roof with tar paper and then install the asphalt shingles. Attach the ridge cap, as well. Make sure you also install the appropriate drip edges, so you can seal the shed roof. Read the manufacturer’s instructions for a tight fit.
Fill the holes with wood putty and then smooth the surface with 120-220 grit sandpaper. Apply a few coats of paint / stain to enhance the look of the pavilion and to protect them from the elements.
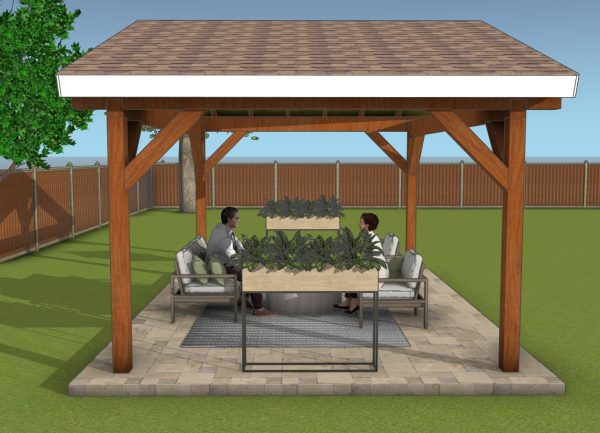
18×12 pavilion – side view
Don’t forget to take a look over PART 1 of the project, so you learn how to build the frame of the wide pavilion.
A family can use an 18×12 pavilion as a versatile outdoor space for various activities, such as hosting barbecues, picnics, or outdoor parties, providing ample room for dining, socializing, and relaxation. Additionally, it can serve as a sheltered area for hobbies like gardening or crafting.
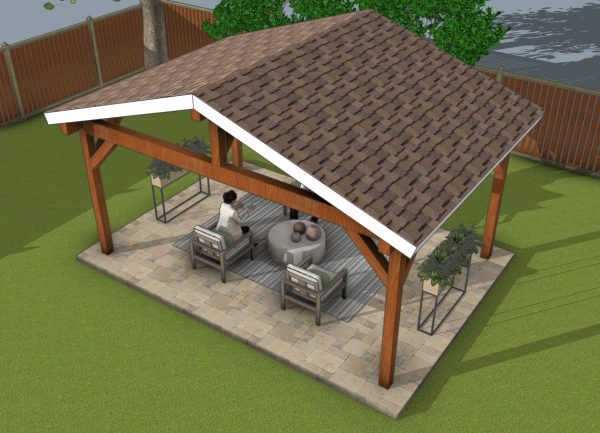
Top view – 18×12 pavilion
Converting the roof to a metal sheet roof can be relatively straightforward, requiring the installation of appropriate underlayment, and attachment of the metal sheets using screws or nails. With proper preparation and installation techniques, this roofing option can be durable and low-maintenance roofing solution for the pavilion.
This woodworking project was about 18×12 gable pavilion roof plans. If you want to see more outdoor plans, check out the rest of our step by step projects and follow the instructions to obtain a professional result.

EXPLORE MORE IDEAS FOR:
 |
 |
 |
 |