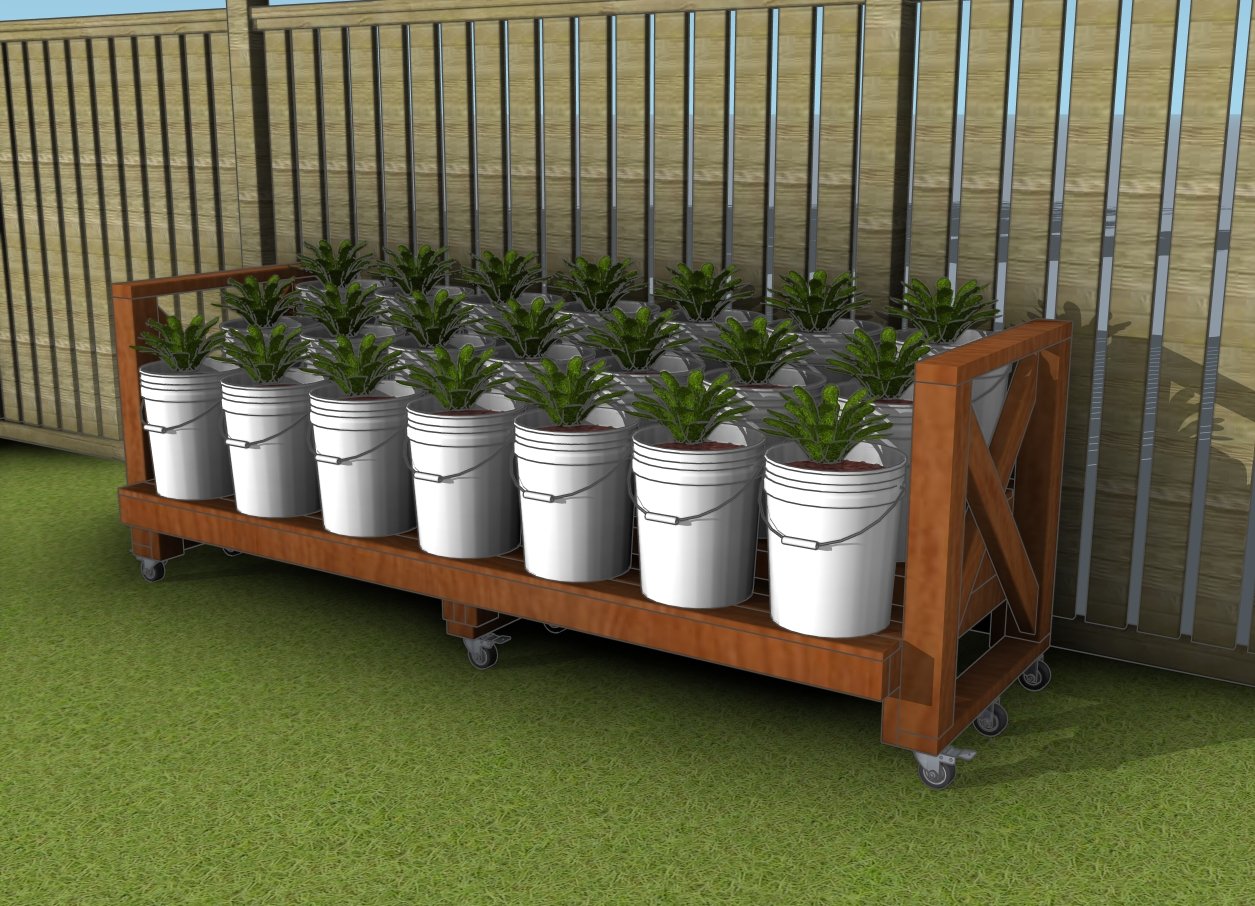
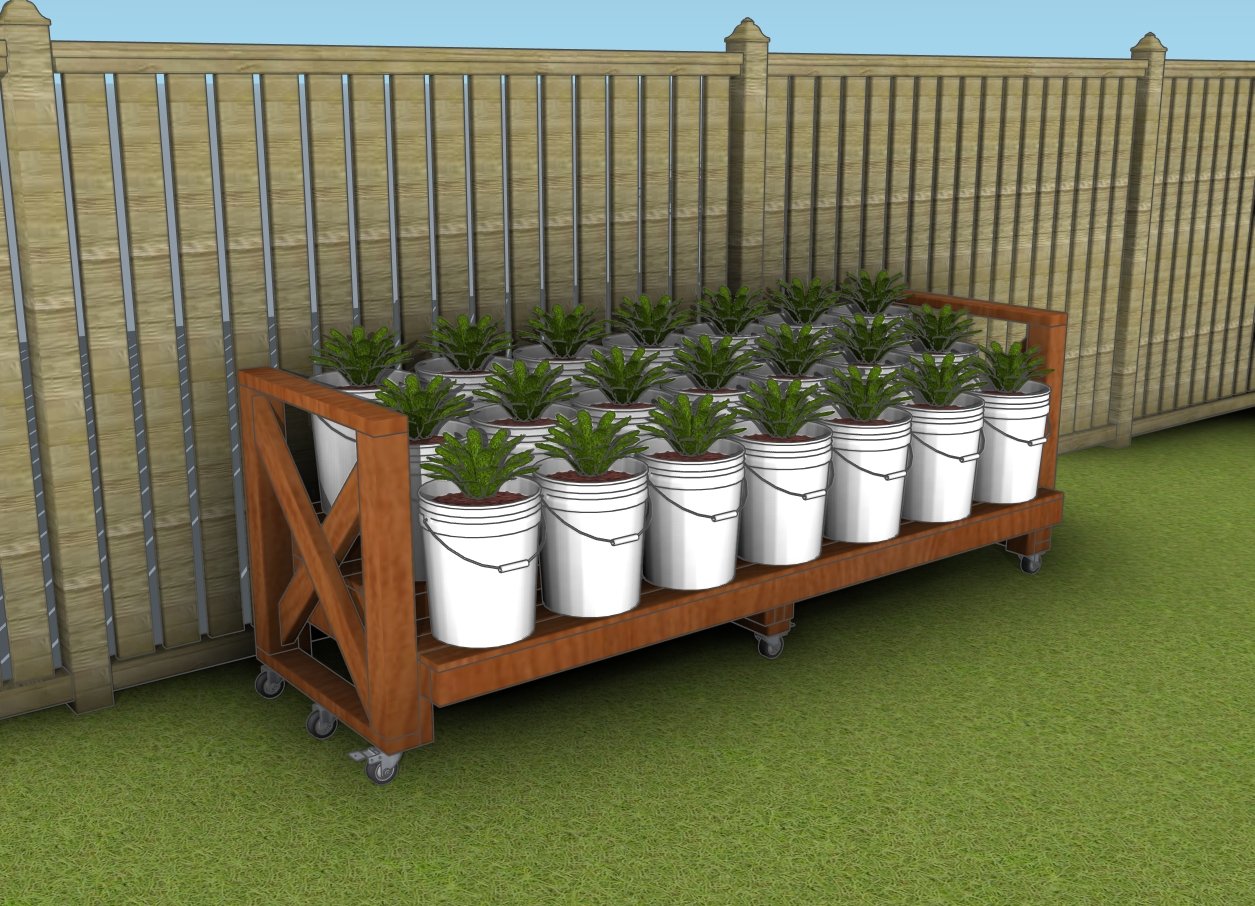
Looking to grow a serious garden in a small space? My large bucket garden stand plans are the perfect solution for maximizing your gardening potential, holding 21 five-gallon buckets and supporting everything from herbs to veggies! Whether you’re an urban gardener or just need more room for your plants, this sturdy stand lets you grow big without taking up too much ground. Let’s dive into these large bucket garden stand plans and see how you can build your own to transform your gardening game!
This 3-tier large bucket garden stand features stylish X-shaped trims on both sides, adding both stability and a touch of design flair. Depending on your location and the type of wood you choose, the total material cost for this project typically ranges from $100 to $150. You can expect to complete this project in 8-10 hours, making it a great weekend build. With these large bucket garden stand plans, you’ll have a sturdy, attractive stand that transforms your gardening space in no time! Take a look over the rest of my woodworking plans, if you want to get more building inspiration. Premium Plans for this project available in the Shop.
For this project, I recommend using cedar or hardwood for their durability and natural resistance to the elements. Cedar is a fantastic option because it’s lightweight, rot-resistant, and has a beautiful, rustic look. Hardwood, on the other hand, provides superior strength and longevity, making your project a sturdy and stylish addition to your home.
Projects made from these plans
21 Bucket Garden Stand – Free Plans
Building-a–large-bucket-garden-stand
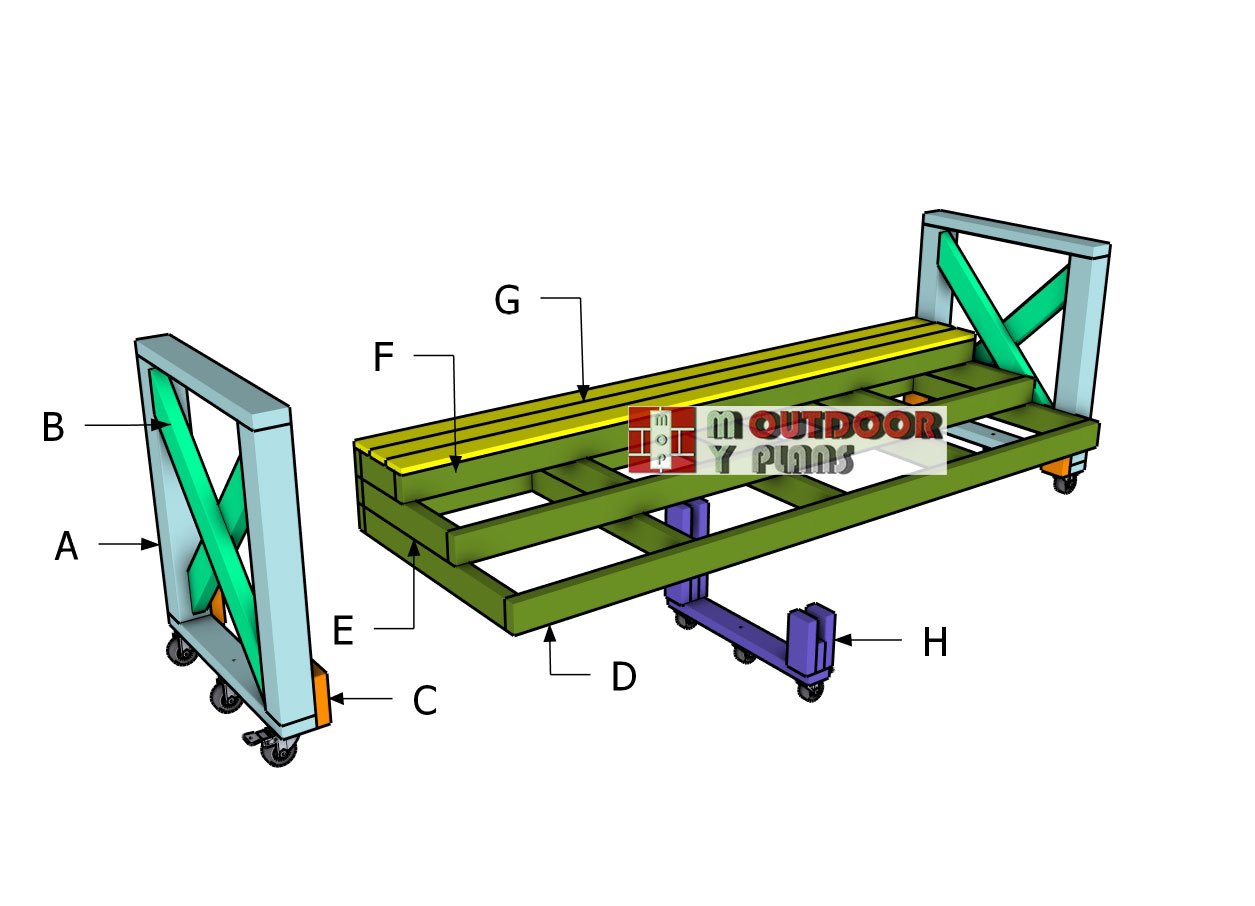
Cut and Shopping Lists
A – SIDES – 4×4 lumber 30″ long – 4 pieces
A – SIDES – 2×4 lumber 30 1/2″ long – 4 pieces
B – X Trims – 2×4 lumber 36 3/4″ long – 4 pieces
C – SUPPORTS – 2×4 lumber 5 1/2″ long – 4 pieces
D – FRAME – 2×4 lumber 96″ long – 2 pieces
D – FRAME – 2×4 lumber 31 1/2″ long – 5 pieces
E – FRAME – 2×4 lumber 96″ long – 2 pieces
E – FRAME – 2×4 lumber 20″ long – 5 pieces
F – FRAME – 2×4 lumber 96″ long – 2 pieces
F – FRAME – 2×4 lumber 8 1/2″ long – 5 pieces
G – SHELVES – 1×4 lumber 96″ long – 9 pieces
H – MIDDLE LEGS – 2×4 lumber – 7 1/2″ long – 2 pieces
H – MIDDLE LEGS – 2×4 lumber – 4″ long – 2 pieces
H – MIDDLE LEGS – 2×4 lumber – 14 1/2″ long – 2 pieces
H – MIDDLE LEGS – 2×4 lumber – 29″ long – 1 piece
- 1 piece of 4×4 lumber – 10 ft
- 12 pieces of 2×4 lumber – 8 ft
- 1 piece of 2×4 lumber – 10 ft
- 9 pieces of 1×4 lumber – 8 ft
- 50 pieces of 3 1/2″ screws
- 100 pieces of 2 1/2″ screws
- 100 pieces of 1 5/8″ screws
- Wood glue – 1 can
- Stain – 1 can
- caster wheels – 9 pieces
Tools
![]() Hammer, Tape measure, Framing square, Level
Hammer, Tape measure, Framing square, Level
![]() Miter saw, Drill machinery, Screwdriver, Sander
Miter saw, Drill machinery, Screwdriver, Sander
![]() Safety Gloves, Safety Glasses
Safety Gloves, Safety Glasses
Time
![]() One weekend
One weekend
Related
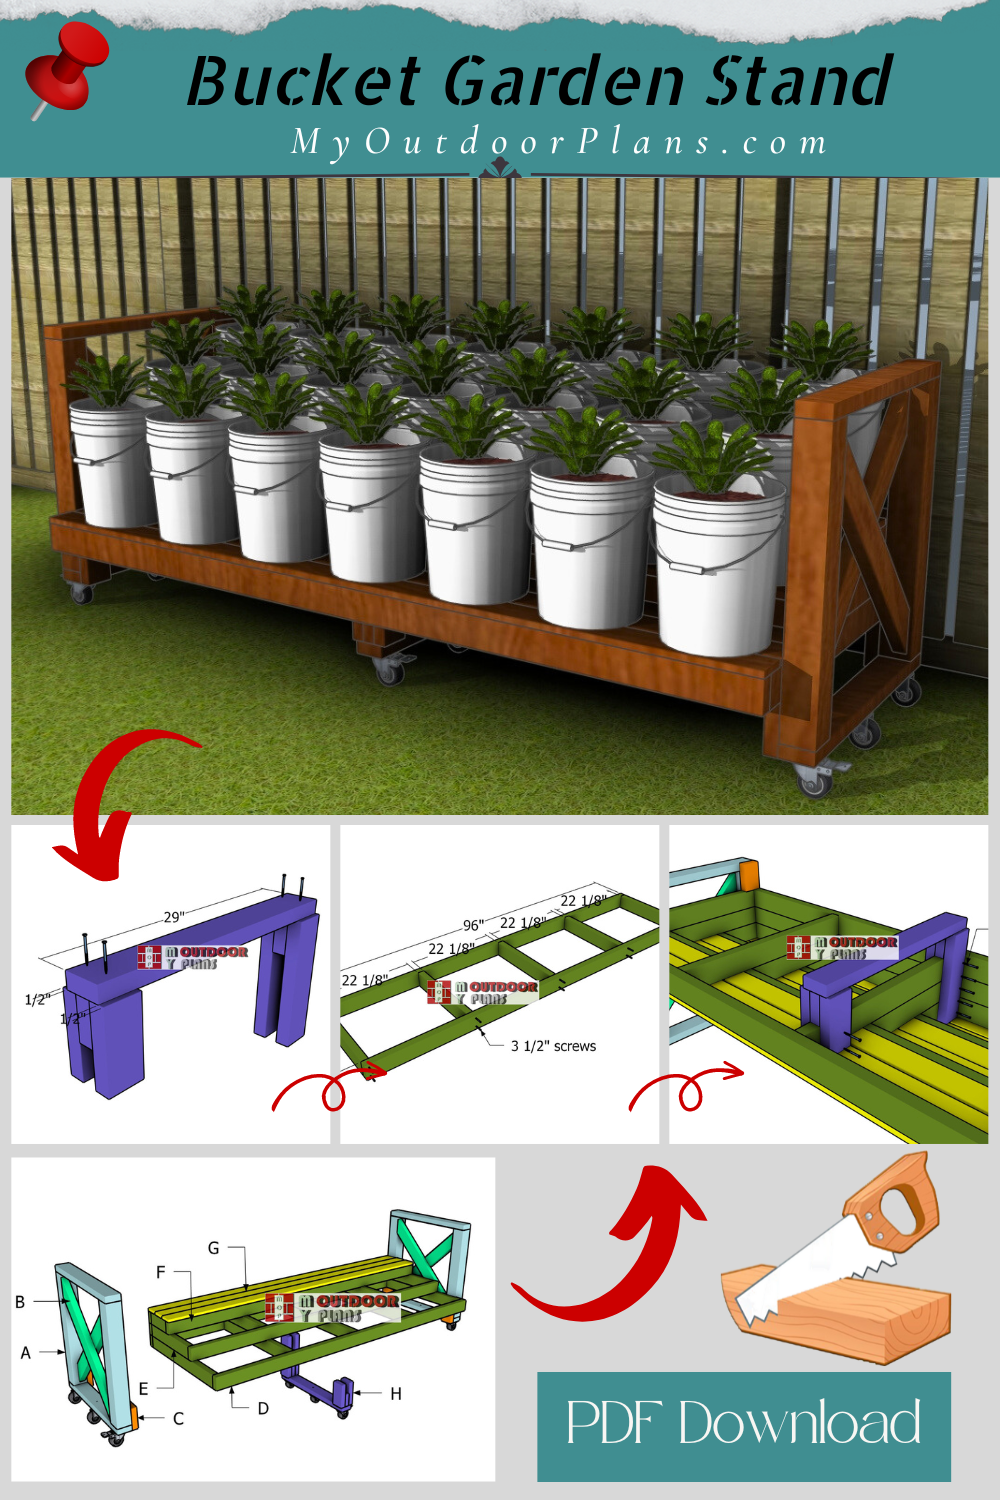
Pin for Later!
Building the sides

Assembling-the-side-frames
The first step in building your large bucket garden stand is to construct the frames. You’ll want to use 4×4 lumber for the vertical legs to provide strong support and 2x4s for the horizontal braces. Make sure the edges are perfectly flush and check that your corners are square using a speed square for accuracy.
Once everything is aligned, drill pilot holes in the supports and attach them to the posts using 2 1/2″ screws—this will ensure your frame is both solid and built to last.
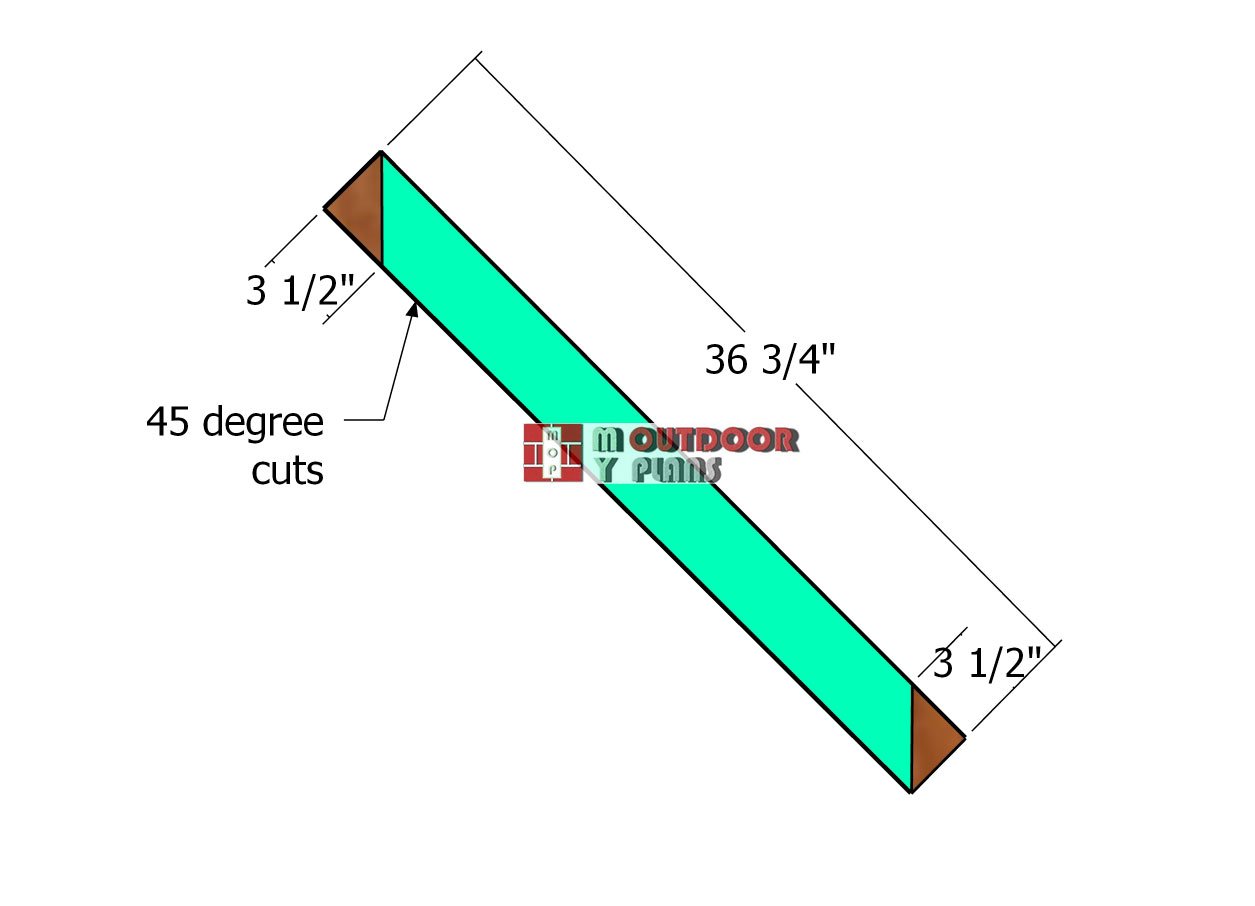
X-elements
To create the X elements, grab some 2×4 lumber and make **45-degree cuts** at both ends of each board using a saw. This angled cut ensures that the pieces fit together neatly, forming those iconic X-shaped supports.
Not only do these add a stylish touch to your garden stand, but they also enhance the overall stability of the structure, making it both functional and attractive.
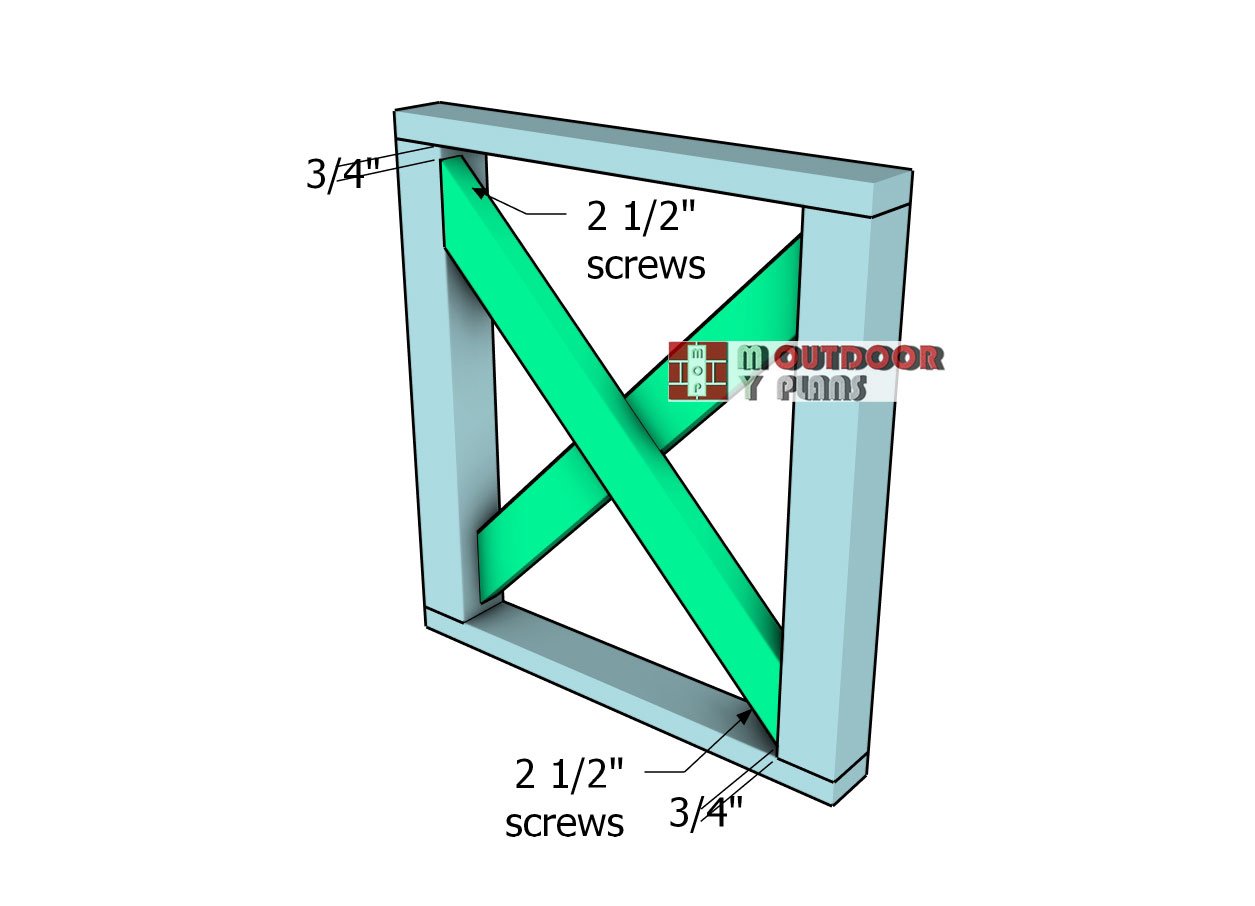
Fitting-the-X-trims
Fit the X elements into the frames, making sure to center them as shown in the diagram. Once you’ve got everything lined up, drill pilot holes through the X elements and secure them to the frame with 2 1/2″ screws.
For extra strength, join the two intersecting pieces at the center with additional 2 1/2″ screws, which will further reinforce the entire structure and ensure long-lasting stability. This step not only locks everything into place but adds durability to the garden stand.

Fitting-the-supports
Next, it’s time to attach the 2×4 supports to the inside of the side frames, which will act as the foundation for your shelves. Cut the 2×4 boards to the correct length, ensuring a snug fit, and secure them in place using 2 1/2″ screws.
These supports are key to holding your shelves steady, providing the strength needed to handle the weight of the buckets while keeping the entire structure sturdy and reliable.
Building the shelves
Building-the-base-frame
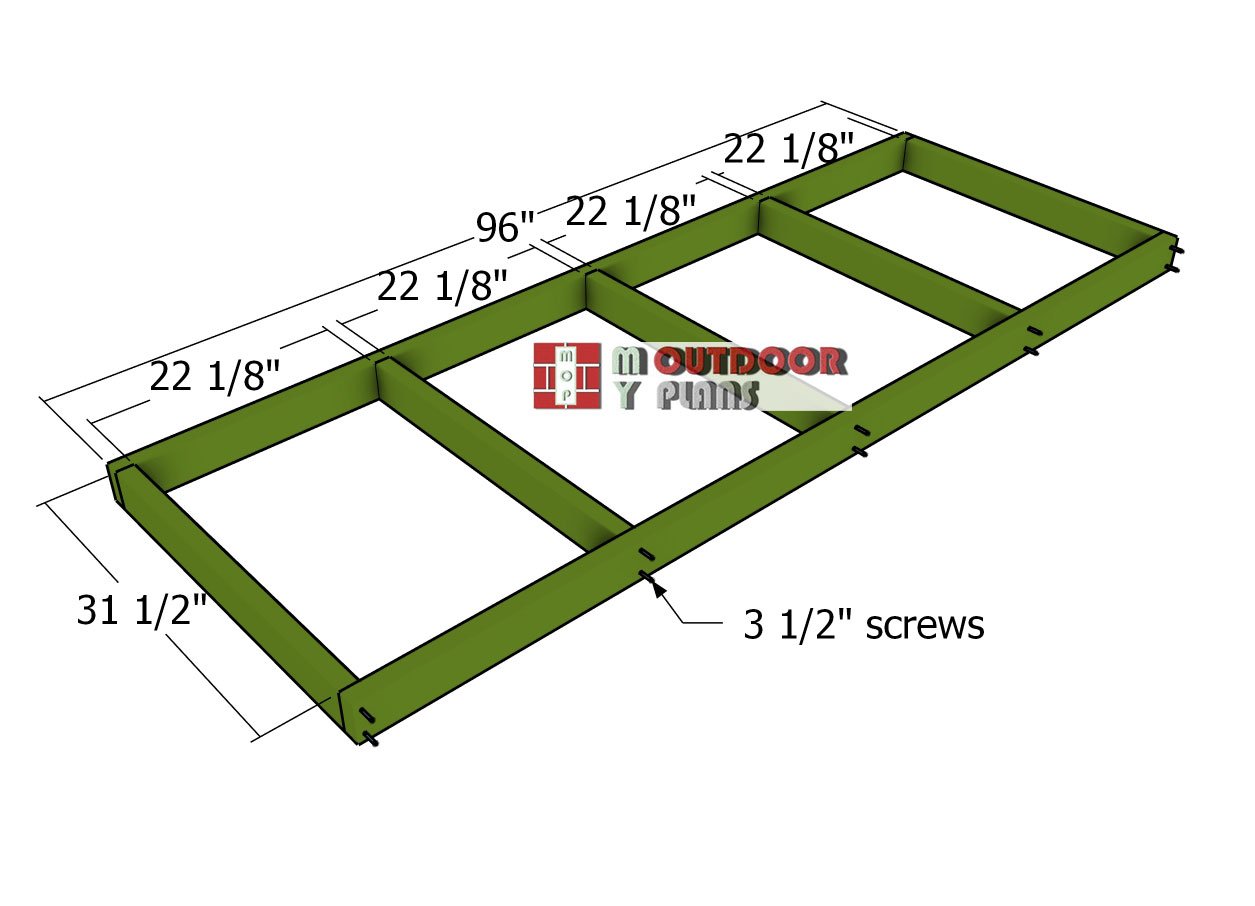
Now it’s time to build the 8-foot long frames for the shelves, starting with the bottom frame. Begin by cutting all the components from 2×4 lumber to the specified dimensions. Lay the pieces out on a level surface to ensure everything is even, then drill pilot holes through the 48″ boards.
Assemble the bottom frame by securing the pieces together with 2 1/2″ screws, and use a speed square to ensure that all corners are perfectly square. This step is crucial for a sturdy and well-aligned base to support the weight of the buckets.
Middle-frame-assembly
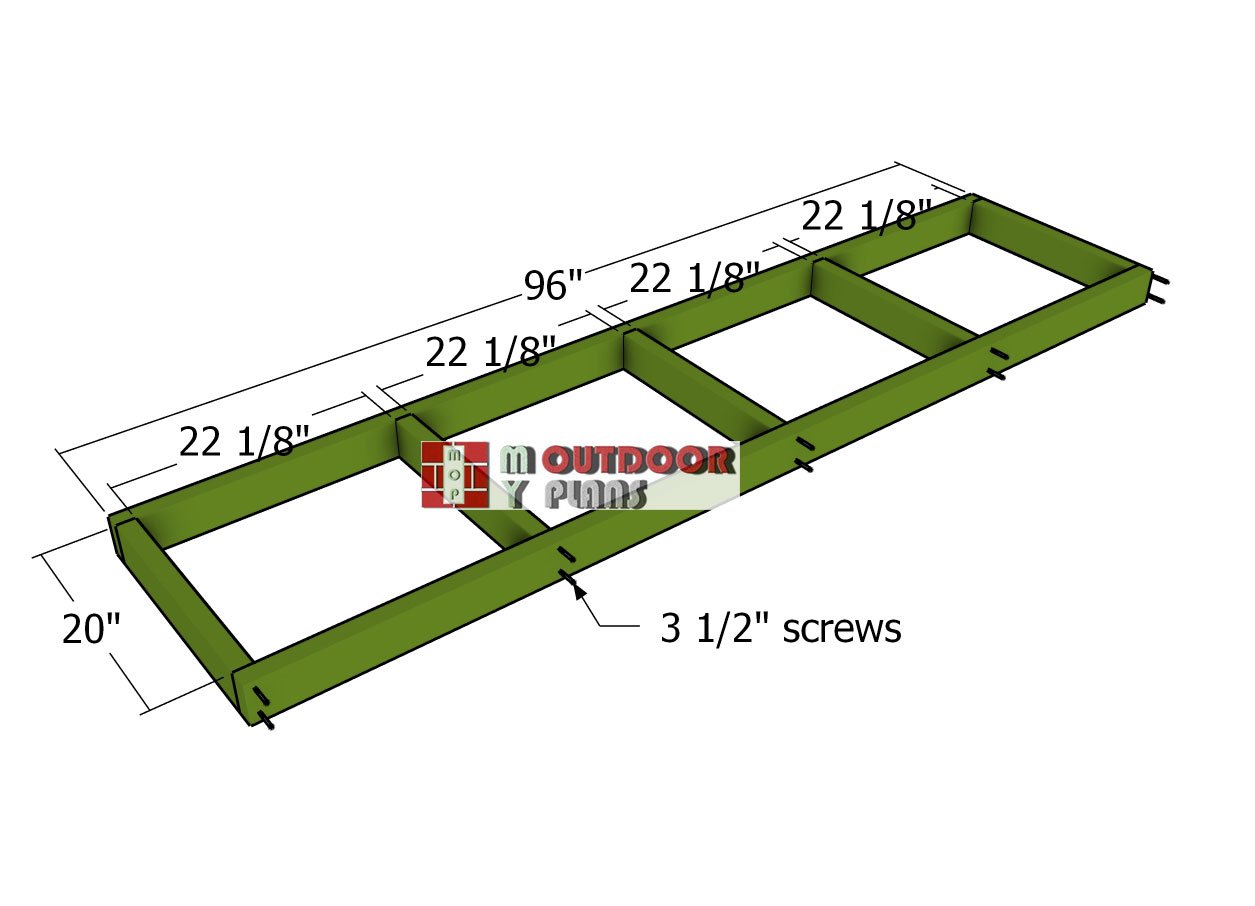
Assemble the middle frame using 2x4s, following the same steps as for the bottom frame. Lay the components out on a level surface, drill pilot holes, and secure the pieces together with 3 1/2″ screws.
Be sure to use a speed square to check that all corners are perfectly square, just like before, to keep the frame aligned and sturdy. This will ensure that your garden stand maintains its structure and provides solid support for the middle tier of buckets.
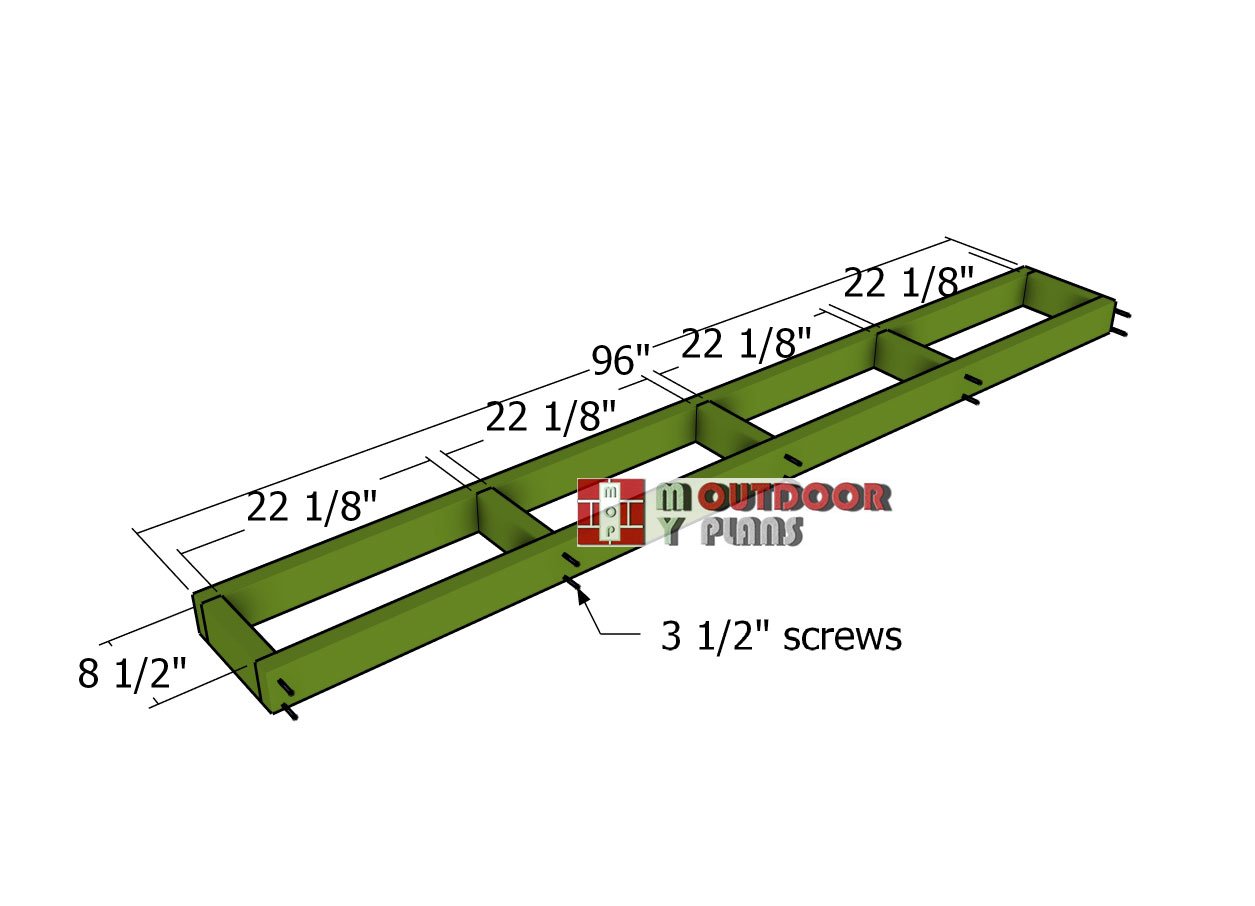
Top-frame
Next, move on to assembling the top frame, using the same techniques as before. Lay out the 2×4 components on a level surface, drill pilot holes, and fasten the pieces together with 3 1/2″ screws. As always, use your speed square to double-check that all corners are square, ensuring the top frame is strong and perfectly aligned. This will complete the structure for the shelves, ready to support the final tier of buckets.
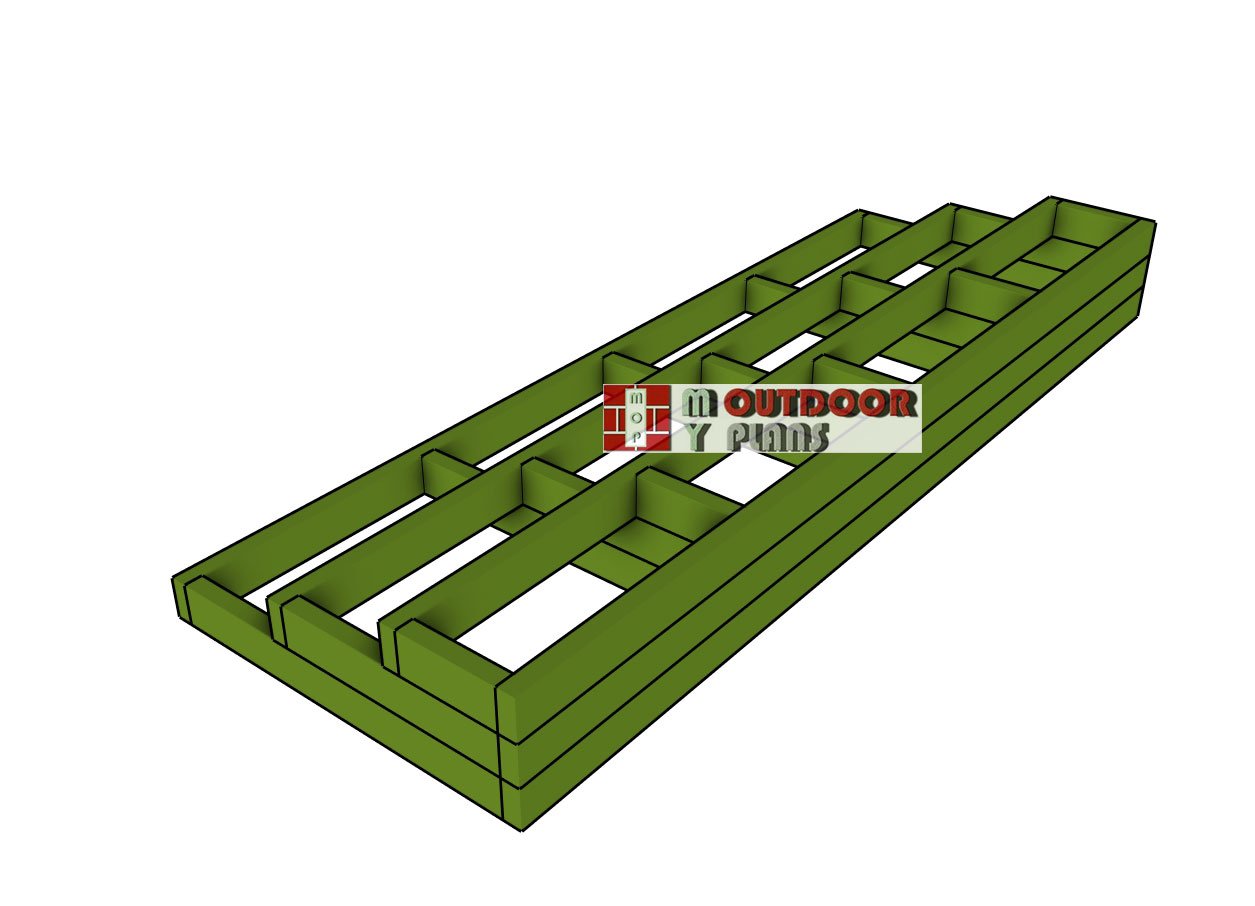
Stacking-the-frames
Stack the three frames one on top of the other, aligning them carefully. To further strengthen the structure, lock the frames together by driving screws at an angle where the frames meet.
This technique, known as toe-nailing, will add extra stability to the stand, ensuring that the shelves remain solid and secure. With this reinforcement, your garden stand will be able to support the full load of the buckets without any wobbling or shifting.
Fitting-the-shelf-slats
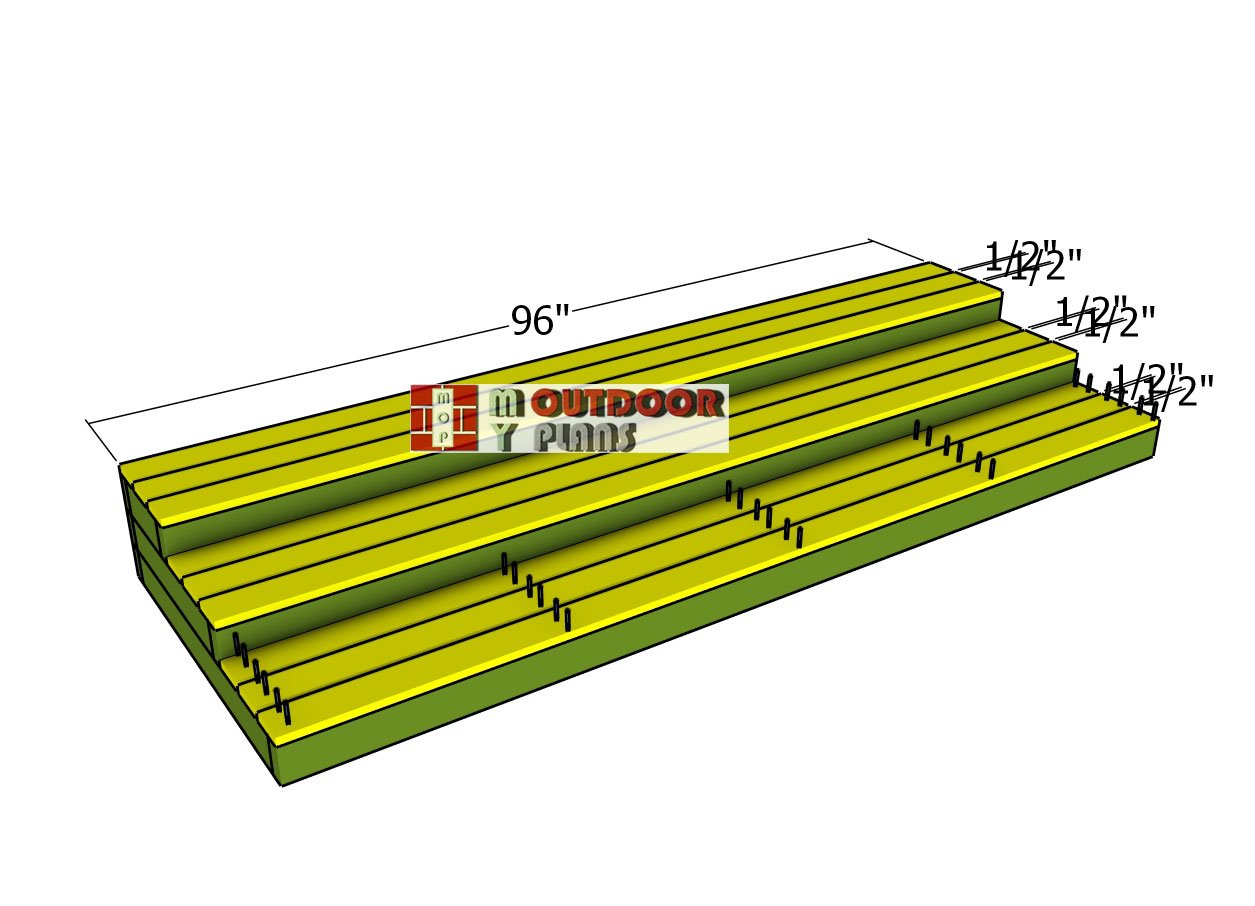
Once all three frames are stacked and secured, it’s time to attach the 1×4 boards to create the shelves. Carefully align the edges of the boards and use a 1/2″ spacer between them to maintain consistent, even gaps.
Drill pilot holes through the boards and secure them to the frames with 1 5/8″ screws, making sure everything is fastened tightly. This step ensures that your shelves are sturdy, well-supported, and ready to hold the weight of the buckets.
Attaching-the-frames
Next, fit the shelves into the side frames, making sure to align the shelf unit flush with the back of the stand as shown in the diagram. Drill pilot holes through the shelf frames and secure them to the side posts using 2 1/2″ screws.
If everything is aligned properly, the shelves should sit perfectly horizontal, and the side frames will remain plumb. This will ensure that your structure is sturdy, well-balanced, and ready to support your garden buckets.
Middle-legs
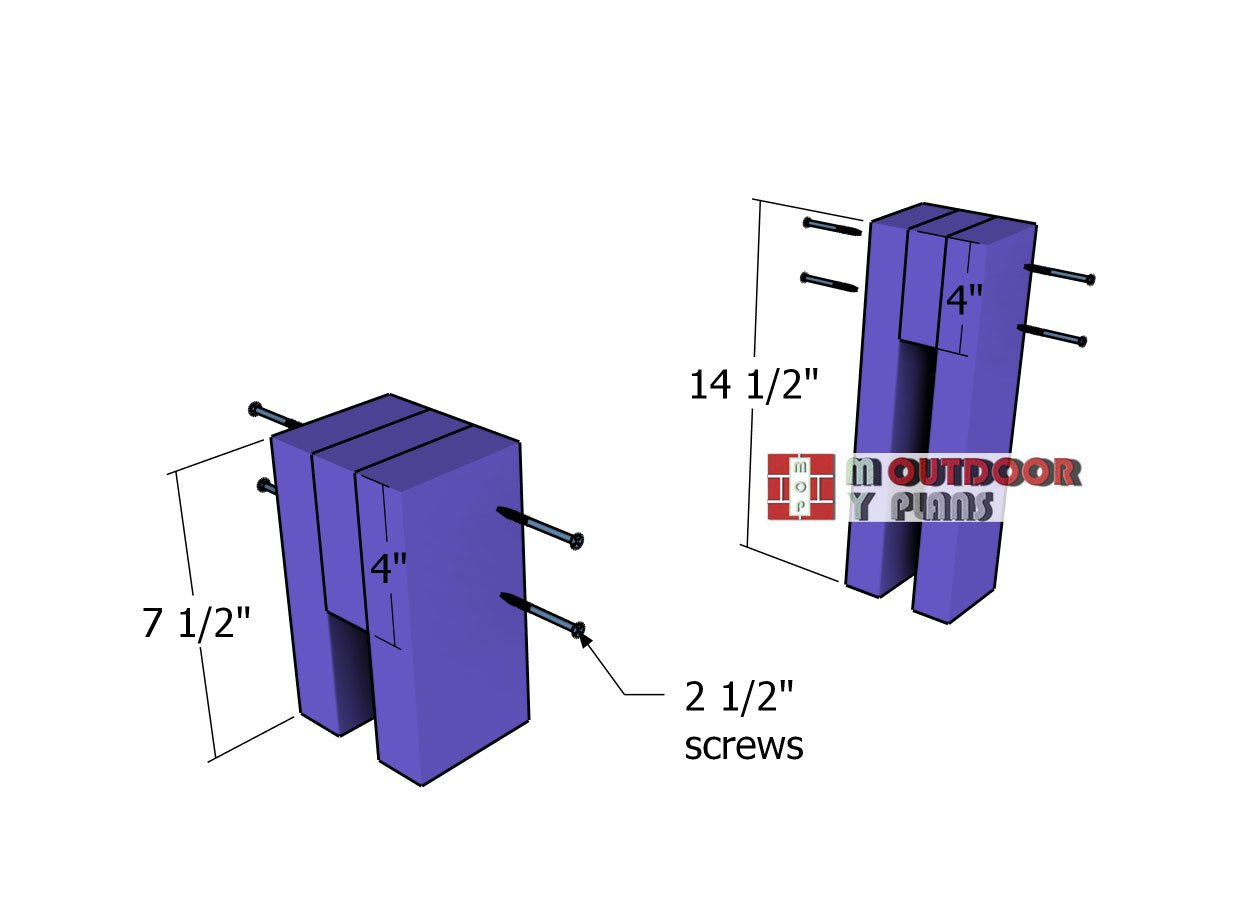
Due to the size and weight capacity of this 5-gallon bucket stand, it’s important to add middle legs for extra support. Cut the middle leg components from 2×4 lumber, ensuring they match the height of the stand. .
Assemble the legs using wood glue and secure them with 2 1/2″ screws. To strengthen the connection, insert screws from both sides, which will enhance the overall bond and stability of the structure, allowing it to easily support the weight of the buckets.
Assembling-the-middle-base
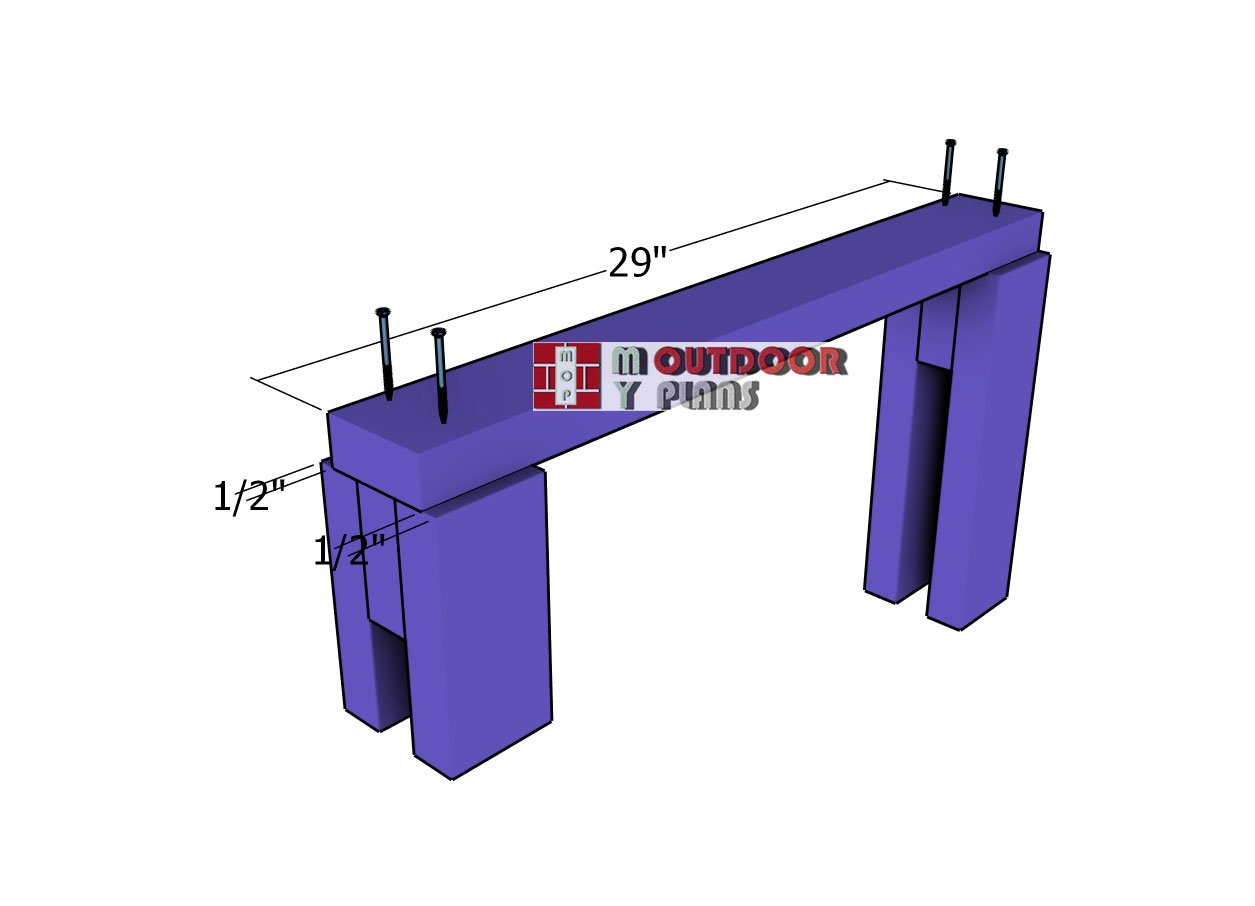
Fit the 2×4 support to the middle legs, making sure it is centered for even weight distribution. Once it’s in place, drill pilot holes through the support and into the middle legs. Secure everything tightly by inserting 2 1/2″ screws, locking the support in place. This step ensures the stand will have the additional strength needed to support the weight of the 5-gallon buckets, keeping the entire structure stable and durable.
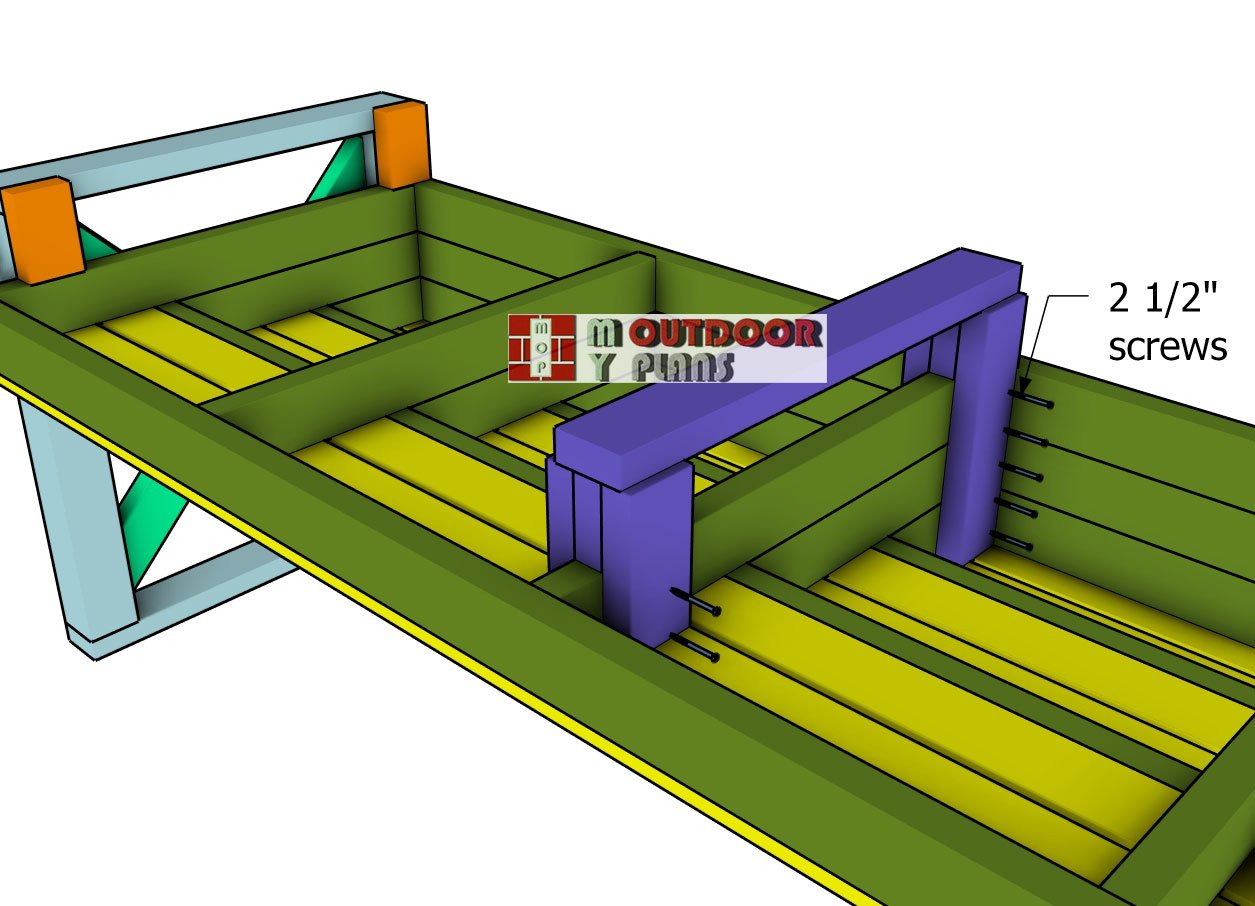
Attaching-the-middle-leg-supports
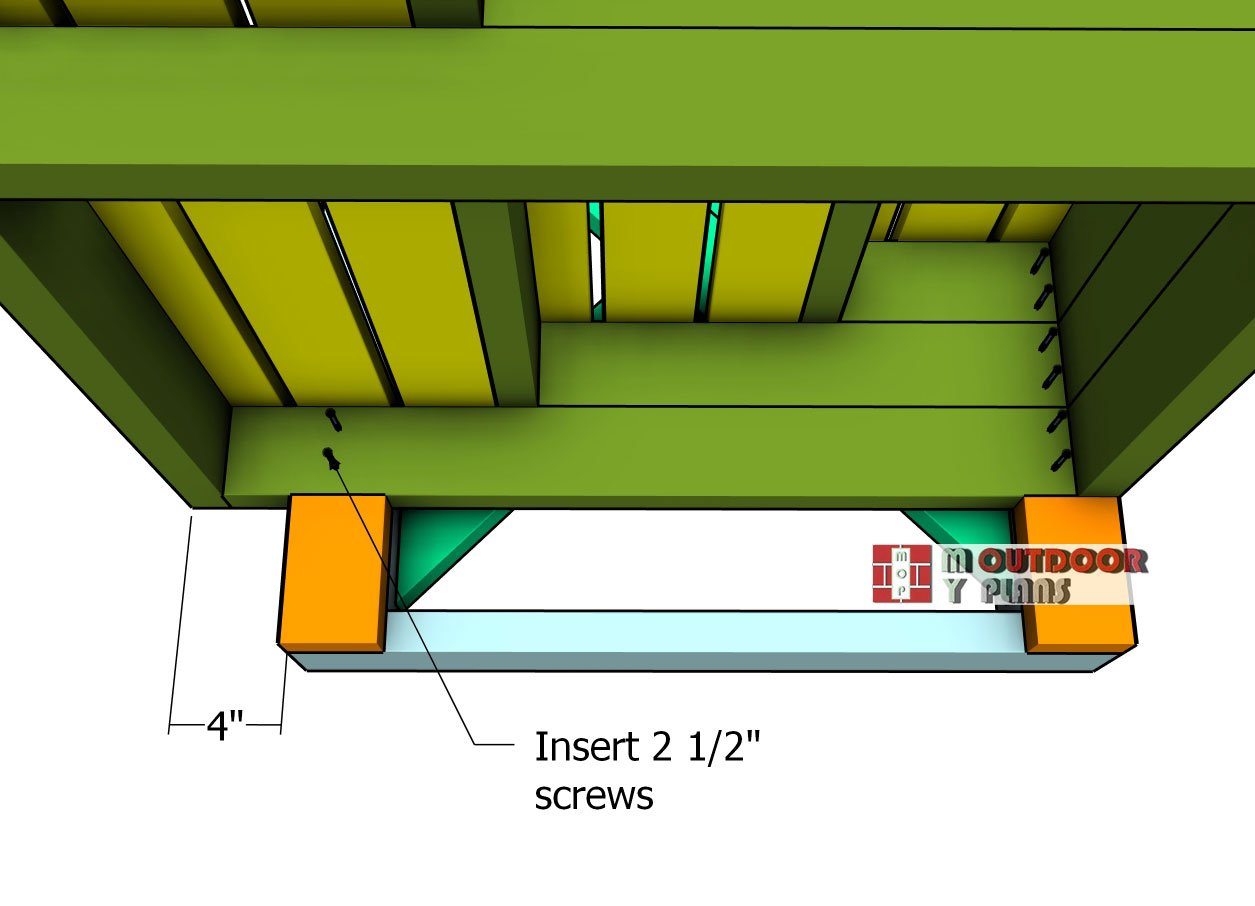
Fit the middle leg supports underneath the garden stand, making sure they are aligned with the back of the stand for optimal support. Once everything is positioned correctly, drill pilot holes through the supports and into the frame.
Secure them tightly with 2 1/2″ screws to lock the components into place. This will provide extra stability and reinforce the structure, ensuring it can handle the weight of the 21 buckets securely.
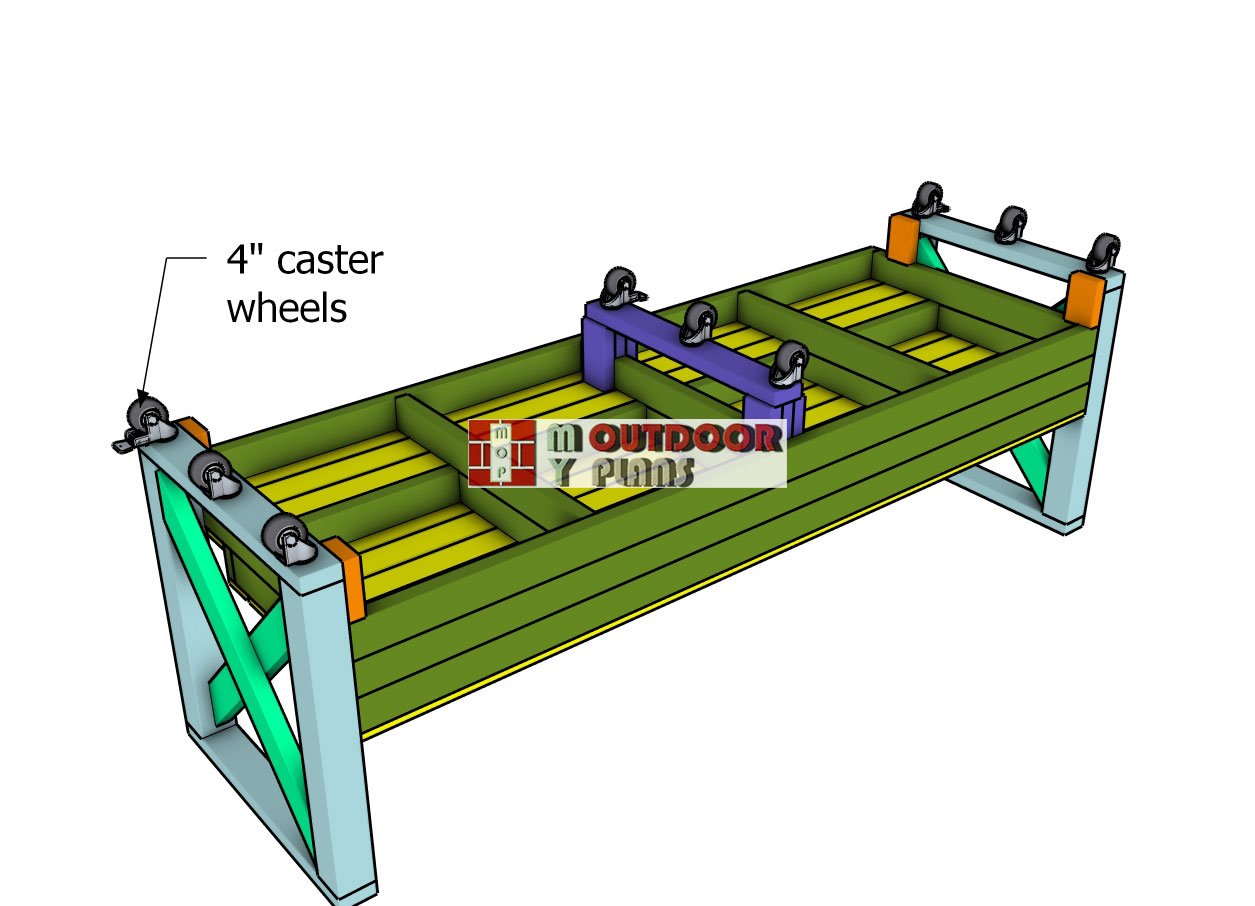
Fitting-the-caster-wheels
Fit the nine 2″ caster wheels to the bottom of the garden stand, ensuring they are evenly spaced to provide maximum stability. Secure each caster with screws, making sure they are tightly fastened to handle the load.
Be sure to use heavy-duty casters, as the filled 5-gallon buckets will add considerable weight, and you want the stand to roll smoothly without compromising its strength or stability. This step ensures that your garden stand remains mobile while securely supporting the heavy buckets.
Finishing touches
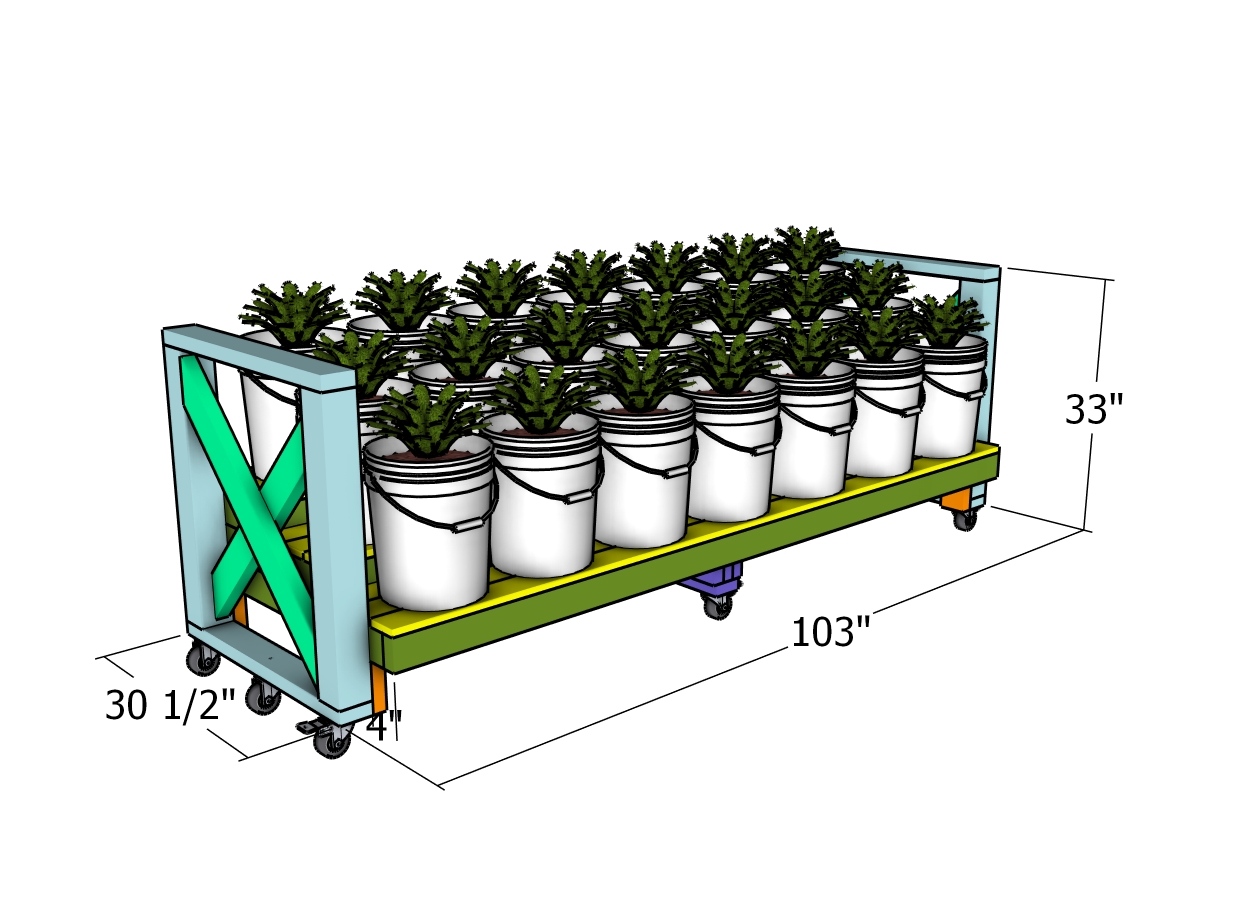
21 bucket garden stand plans – dimensions
For the final steps, give everything a good sanding to smooth out any rough edges and make the whole stand feel polished. Next, apply an outdoor sealant or paint to protect the wood from the weather, so it lasts for years. Double-check that all your screws are tight, and test those caster wheels to make sure the stand moves smoothly. Now, step back and admire your work—your garden stand is ready to support 21 buckets and take your gardening to the next level!
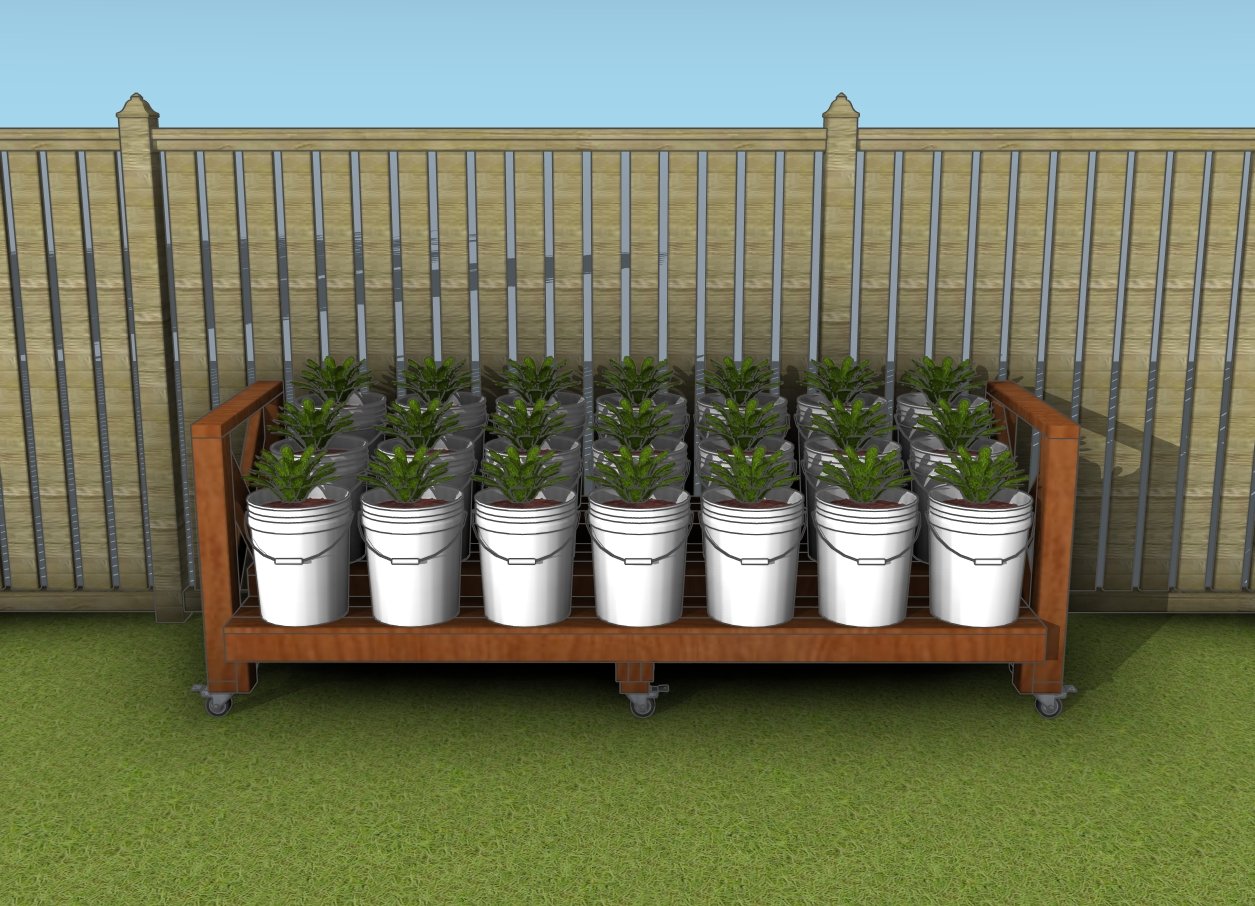
DIY bucket garden – free plans
Don’t let the size of this project intimidate you—if you follow the steps, you’ll be amazed at how quickly it comes together! With just a weekend’s worth of work, you’ll have a sturdy, stylish garden stand that can hold 21 buckets and transform your growing space. Give it a try, and you’ll not only gain a useful structure but also the satisfaction of building something with your own hands!
Large bucket garden stand plans
The main idea behind this project is to create a space-efficient, durable solution for growing a large variety of plants, even in smaller areas. By stacking 21 five-gallon buckets on a sturdy, mobile stand, you can maximize your gardening potential without taking up much ground space.
This design also makes it easy to move your garden around, whether you need to adjust for sunlight or protect your plants from the elements. It’s a smart, practical way to get more out of your gardening space, and you’ll love how much it simplifies your growing process!
How to build a large bucket stand
As you can see, building this large bucket garden stand is a rewarding project that not only gives you extra growing space but also adds a functional and stylish piece to your gardening setup. With just a bit of time and effort, you’ll have a durable, mobile stand that holds 21 buckets, making it perfect for urban gardeners or anyone looking to maximize their space. So grab your tools, follow the steps, and get ready to take your garden to the next level! Happy building, and I can’t wait to see what you grow!
If you want to get the Premium plans with all the extras, just press the GET PREMIUM PLANS button bellow. If you want to get the free plans, just read the blog FAQs.

This woodworking project was about DIY large 5-gallon bucket garden stand – free plans. If you want to see more outdoor plans, check out the rest of our step by step projects and follow the instructions to obtain a professional result.