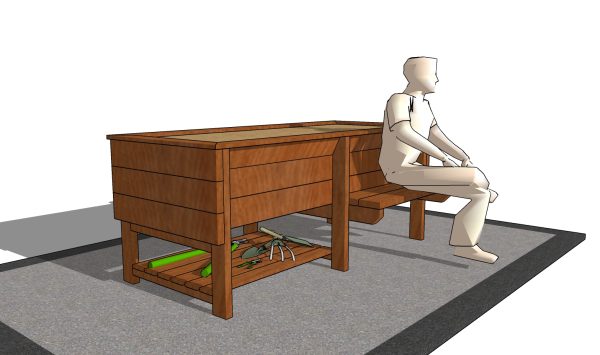
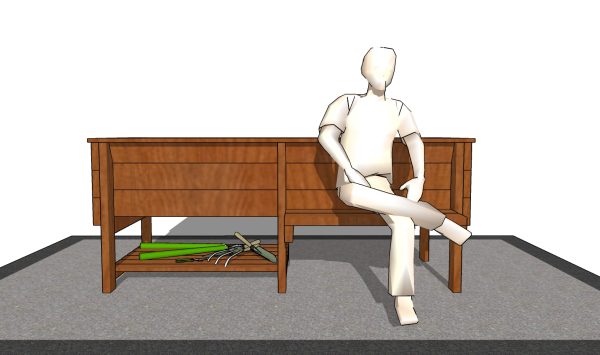
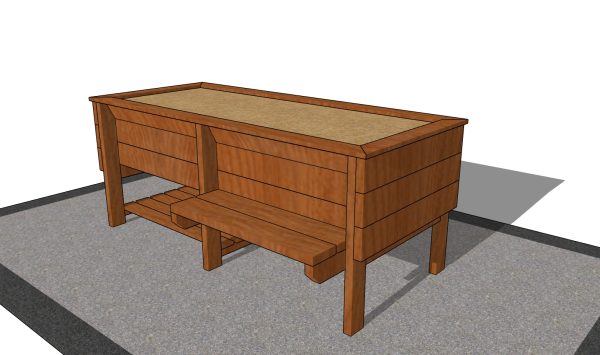
This step by step diy woodworking project is about off ground vegetable planter plans. I have designed this 6 ft long raised planter so you can grow vegetables in your own backyard. I attached a small bench to one side of the planter, so I hope this will be your favorite place in the garden to spend time. This planter features a bottom shelf so you can store the tools and materials need for gardening. Check out all my raised garden bed HERE. If you enjoy my design, don’t forget to take a look over the rest of my plans HERE.
There are so many designs and materials to choose from, that we really recommend you to spend some time researching the most suitable plans for your needs. If you still haven’t found what you are looking for, we strongly recommend you to pay attention to these instructions and to check out the related projects, if you want to get more ideas and potential projects for your home and garden.
Projects made from these plans
Raised Vegetable Planter Plans

Building-a-3×6-off-the-ground-planter
Cut and Shopping Lists
Tools
![]() Kreg Jig
Kreg Jig
![]() Hammer, Tape measure, Framing square, Level
Hammer, Tape measure, Framing square, Level
![]() Miter saw, Drill machinery, Screwdriver, Sander
Miter saw, Drill machinery, Screwdriver, Sander
![]() Post hole digger, Concrete mixer
Post hole digger, Concrete mixer
Time
![]() One day
One day
Related
It’s that easy to build a raised planter!
How to build a vegetable planter
Assembling-the-leg-frames
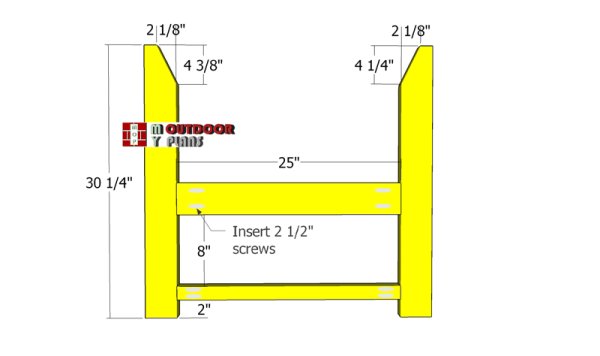
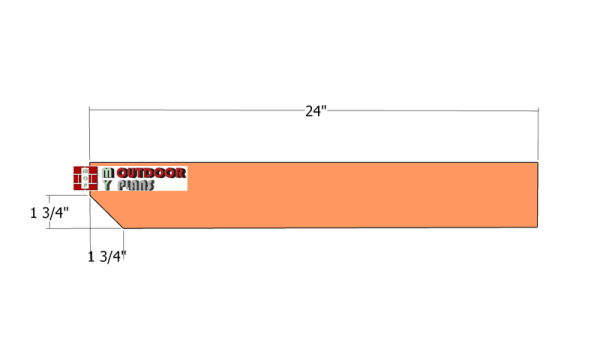
The first step of the project is to build the legs for the vegetable planter. As you can easily see in the diagram, you need to cut the components from 2×4 lumber. Make the angle cuts to the vertical legs with a circular saw. Use 2×2 lumber for the lower support.
Drill pocket holes at both ends of the horizontal supports. Lay everything on a level surface and make sure the edges are flush. Check if the corners are square. Insert 2 1/2″ screws to assemble the frames.
Remember that you need to build 3 frames. However, add the lower 2×2 support only to 2 frame out of 3.
Fitting-the-side-slats
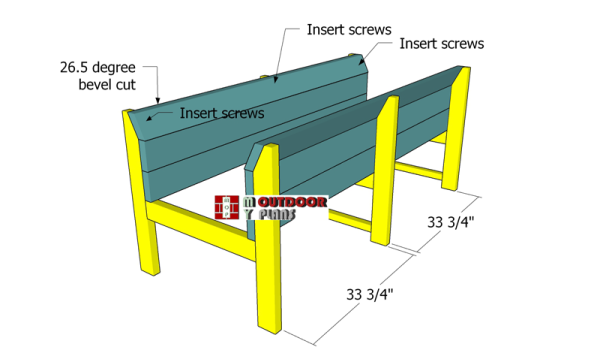
The next step of the project is to assemble the frames for the planter box. Cut the side boards from 2×6 lumber. Drill pilot holes and insert 2 1/2″ screws to lock the slats to the vertical legs, as shown in the image. Plumb the vertical frames with a spirt level.
Make sure you do 26.5 degree bevel cuts to the top slats. This is needed so we can install the top trims in the next steps.
Laying-the-bottom-slats
Attach the 2×6 boards to the bottom of the planter. Leave no gaps between the boards and align them at one end. Drill pilot holes through the slats and insert 2 1/2″ screws into the three supports.

Fitting-the-end-slats
Use 2×6 lumber for the end panels. Align the edges flush with the top and to the sides. Drill pilot holes and insert 2 1/2″ screws to lock the panels into place tightly.

Installing-the-top-slats
The next step of the project is to attach the decorative trims to the top of the vegetable box. Make 45 degree cuts to both ends of the trims. Offset the trims 1/2″ from the exterior edges of the planter box. Align the edges flush and insert 2″ nails to lock then into place tightly.
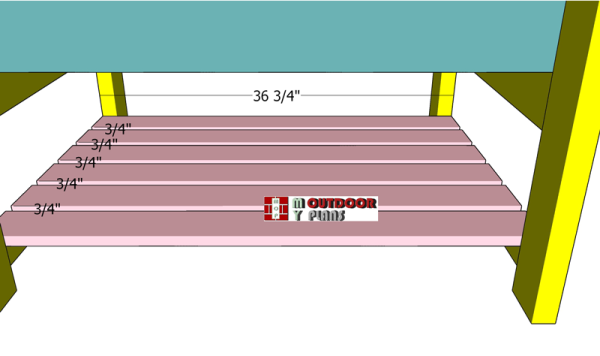
Fitting-the-lower-shelf-slats
Fit the 1×4 slats to the lower frame supports. Place 3/4″ spacers between the slats to create even gaps. Drill pilot holes and insert 1 5/8″ screws to lock them to the 2×2 supports. Use 2 screws for each joint
Bench-supports
Use 2×4 lumber for the interior supports. Make 45 degree decorative cuts to one end of the supports. Smooth the edges with sandpaper.
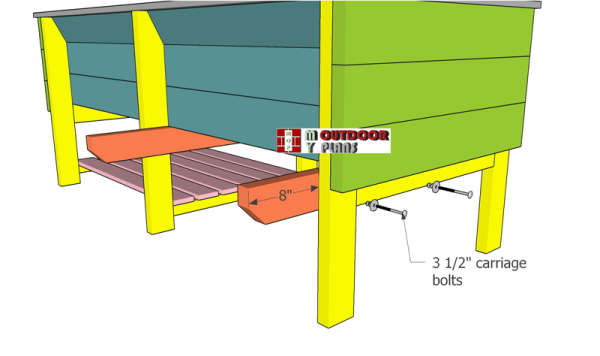
Fitting-the-supports-for-the-bench
Attach the supports to the frame of the planter. Clamp the supports to the frame of the garden bed and make sure they are horizontal. Drill pilot holes through the frame and supports and insert 3 1/2″ carriage bolts. Use nuts and a washer to lock the bolts.
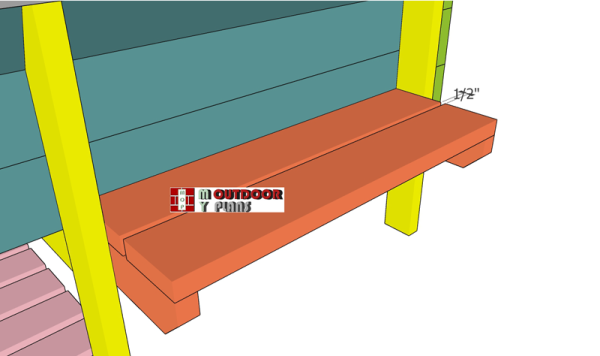
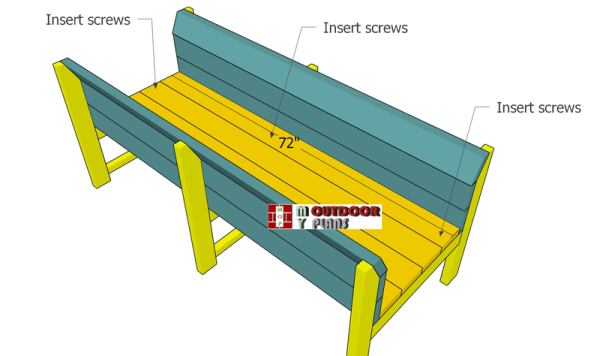
Bench-seat-slats
Fit the 2×6 slats to the frame. Place a 1/2″ spacer between the boards to create even gaps. Drill pilot holes and insert 2 1/2″ screws to lock them into place tightly.
Off ground vegetable planter
Ideally, you need to staple some landscape material to the interior of the planter box. The fabric will protect the wooden components from moisture and therefore you can use the planter for many years in a row.
Off ground vegetable planter – side view
Off ground vegetable planter – how to
This raised planter box is sturdy and it features many add-ons, so you can enjoy your time in the garden. In addition, the lower storage shelf is roomy enough for all your tools. If you like my project, I recommend you to take a look over the rest of my woodworking plans HERE. Choose from thousands of free designs and fill your life with DIY joy! Premium Plans for this project available in the SHOP.

This woodworking project was about off ground vegetable planter plans. If you want to see more outdoor plans, we recommend you to check out the rest of my step by step projects. LIKE us on Facebook and Google + to be the first that gets out latest projects.
EXPLORE MORE IDEAS FOR:
 |
 |
 |
 |