This step by step diy project is about 10×12 gambrel shed doors plans. This is PART 3 of the storage shed project, where I show you everything you want to know about framing the double doors and fitting the trims. Take a look over the rest of my woodworking plans, if you want to get more building inspiration. Remember that you need to select the site for the shed with attention and that you have to comply with a few legal regulations.
When buying the lumber, you should select the planks with great care, making sure they are straight and without any visible flaws (cracks, knots, twists, decay). Investing in cedar or other weather resistant lumber is a good idea, as it will pay off on the long run. Use a spirit level to plumb and align the components, before inserting the galvanized screws, otherwise the project won’t have a symmetrical look. If you have all the materials and tools required for the project, you could get the job done in about a day. See all my Premium Plans HERE.
Projects made from these plans
10×12 Shed Double Doors and Trims
Building-a-10×12-barn-shed
Cut & Shopping Lists
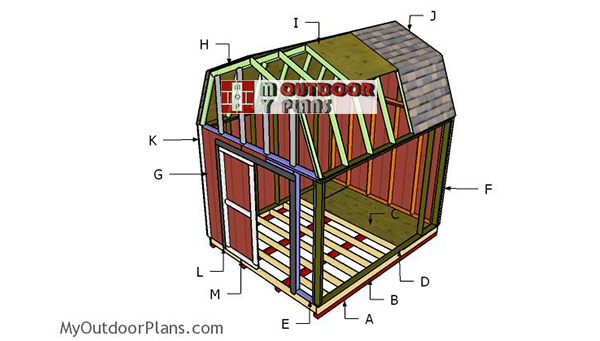
- K – 8 pieces of 1×4 lumber – 96″ long, 3 poieces – 114 1/4″ long, 4 pieces – 139 3/4″ long TRIMS
- L – 2 pieces of 2×4 lumber – 87 1/2″ long, 1 piece – 79″ long JAMBS
- M – 2 pieces of 2×4 lumber – 36″ long, 2 pieces – 80 1/2″ long, 1 piece – 29″ long, 2 pieces of T1-11 siding – 36″x87 1/2″ long 2xDOOR
- 10 pieces of 2×4 lumber – 8′
- 2 pieces of T1-11 siding – 4’x8′
- 9 pieces of 1×4 lumber – 8′
- 3 pieces of 1×4 lumber – 10′
- 4 pieces of 1×4 lumber – 12′
- shed hinges
- 2 1/2″ screws, 3 1/2″ screws, 1 5/8″ screws
- 4d nails, 16d nails, 6d nails
- wood filler , wood glue, stain/paint
Tools
![]() Hammer, Tape measure, Framing square, Level
Hammer, Tape measure, Framing square, Level
![]() Miter saw, Drill machinery, Screwdriver, Sander
Miter saw, Drill machinery, Screwdriver, Sander
Time
![]() One day
One day
Related
- PART 1: 10×12 Shed Plans
- PART 2: 10×12 Shed Roof Plans
- PART 3: Double Shed Doors Plans
Building double doors and trims for a barn shed

Fitting-the-door-jambs
First of all, you need to build the door jambs. Cut the jambs from 2×4 lumber and attach them around the opening. Make sure the edges are flush, drill pilot holes and insert 2 1/2″ screws.
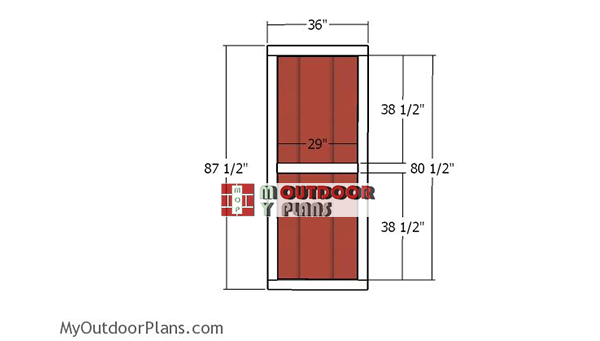
Building-the-doors
Build the door panels from T1-11 siding and the trims from 2×4 umber. Align the trims flush with the door panels and secure them together with glue and 1 5/8″ screws.
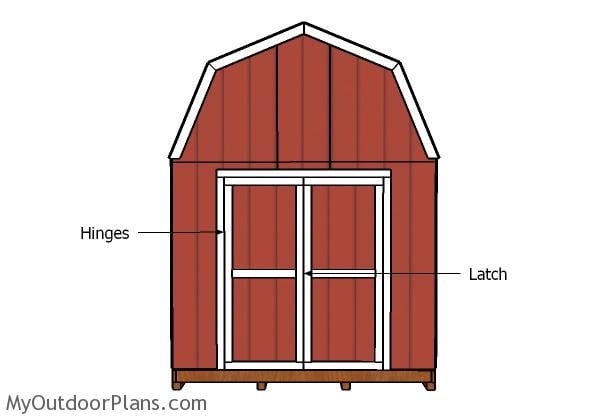
Fitting the double doors
Fit the double doors to the front opening and secure them to the jambs with hinges. Also install a latch to secure the front doors tightly together. Check of the doors open and close properly, before you continue the project.

Fitting the trims – Front
Attach the 1×4 trims to the front of the barn shed. Align the edges with attention and insert 2″ brad nails to secure them tightly into place.
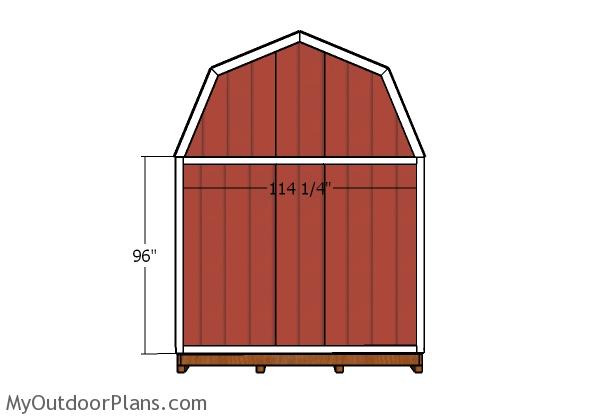
Trims – Back
Fit the1x4 trims to the back of the barn shed, as well.
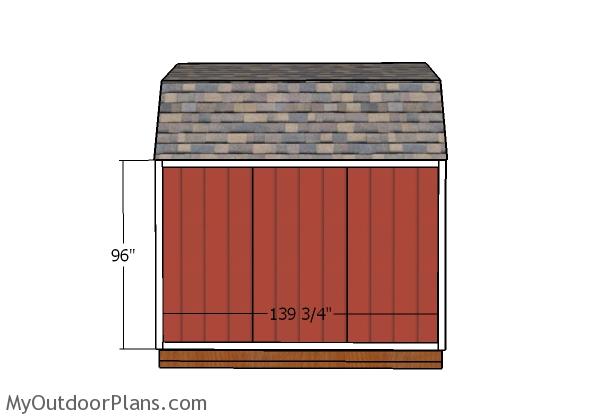
Trims – Sides
Use the information from the diagram to lock the trims to the sides of the barn shed, as well. Use 2″ brad nails to lock the trims into place tightly.
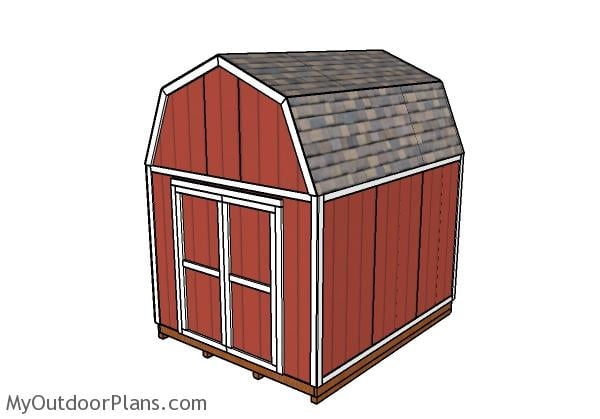
10×12 Barn Shed Plans
Taking care of the finishing touches will help you make the barn shed stand out. Cover the components with stain or paint so you protect them from decay and to enhance the look of the shed.
You need to check out PART 1 and 2 of the shed, so you learn how to build the frame and the roof for the barn shed. Moreover, I strongly recommend you to check out the rest of the shed projects that I have on the blog.
This woodworking project was about 10×12 barn shed doors and trims plans. If you want to see more outdoor plans, check out the rest of our step by step projects and follow the instructions to obtain a professional result.

4 comments
i was wondering if there is more to the plan for this shed. I like the plans so far. Thanks. Steve.
What do you mean by more?
Is there a complete lumber purchase list? I’m pretty sure some of this can’t be purchased as stated and has to be cut. I’m new to this kind of thing just need a list I can take to the lumber yard so I don’t buy lumber I don’t need.
The A to Z is the Cut list. The list bellow that is the Shopping list. Each part of the plans comes with its own lists. If you want a plan that comes with a consolidated Shopping list, check out the plans in the SHOP area.