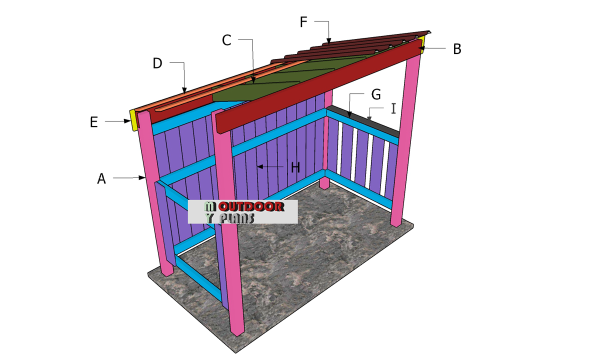
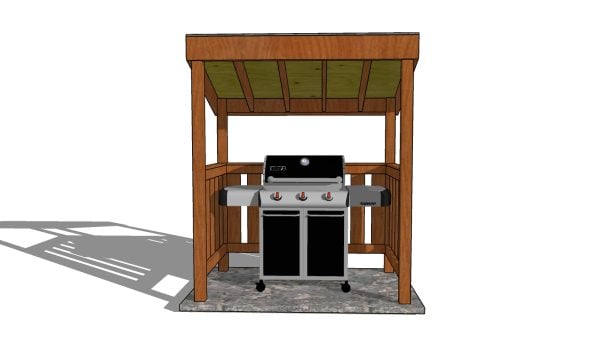
This step by step diy woodworking project is about 4×8 grill shelter plans. The project features instructions for building a 4×8 shelter for your grill made out of wood and with a 4:12 roof pitch. If you want to protect your stainless steel grill from rain, you should consider building a simple wooden structure. Make sure you check out the rest of plans to see alternatives and more projects for your garden.
When buying the lumber, you should select the planks with great care, making sure they are straight and without any visible flaws (cracks, knots, twists, decay). Investing in cedar or other weather resistant lumber is a good idea, as it will pay off on the long run. Use a spirit level to plumb and align the components, before inserting the galvanized screws, otherwise the project won’t have a symmetrical look. If you have all the materials and tools required for the project, you could get the job done in about a day. See all my Premium Plans HERE.
Projects made from these plans
4×8 BBQ Grill Shelter Plans
Building-a-4×8-bbq-shelter
Cut & Shopping Lists
Tools
![]() Hammer, Tape measure, Framing square, Level
Hammer, Tape measure, Framing square, Level
![]() Miter saw, Drill machinery, Screwdriver, Sander
Miter saw, Drill machinery, Screwdriver, Sander
Time
![]() One weekend
One weekend
How to build a bbq grill shelter
Fitting-the-posts—layout
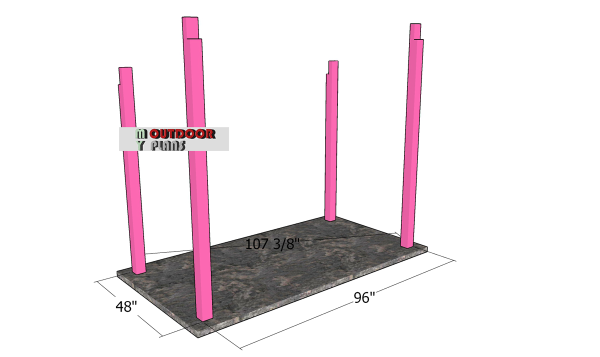
First of all, you need to lay out the posts for the shelter. Use batter boards and string to lay out the location for the posts. Measure the diagonals and make adjustments until they are perfectly equal. In addition, we recommend you to apply the 3-4-5 rule to the corners. This shelter has a 4 ft x 8 ft base, outside post to outside post.

Build the posts from 4×4 lumber, making sure you cut the notches to the top of the posts. Make 1 1/2″ deep parallel cuts inside the area and then remove the excess with a hammer and a chisel. Smooth the cut edges with sandpaper for a professional result.
Anchoring the posts of the anchor
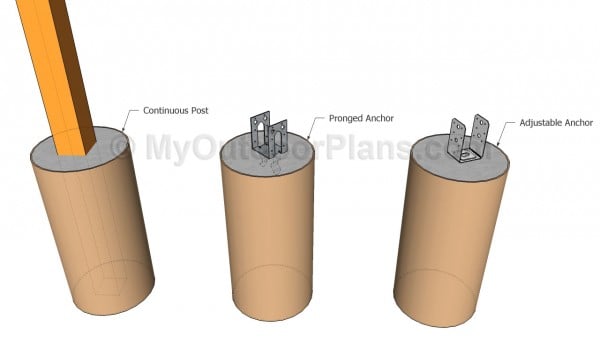
You can set the posts into concrete for about 2-3′ or you can pour footings and use posts supports. Use a post hole digger to make the 12″ in diameter holes, install tube forms and fill them with concrete. Install the post anchors, making sure everything is aligned properly. After a few days, you should set the posts to the anchors and plumb them with a spirit level. Drill pilot holes and insert 2 1/2″ carriage bolts to lock them into place tightly.
Fitting-the-support-beams
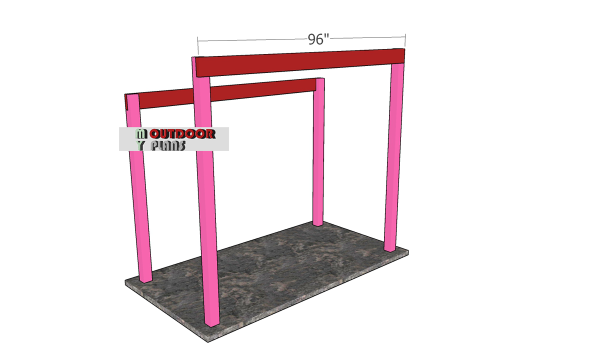
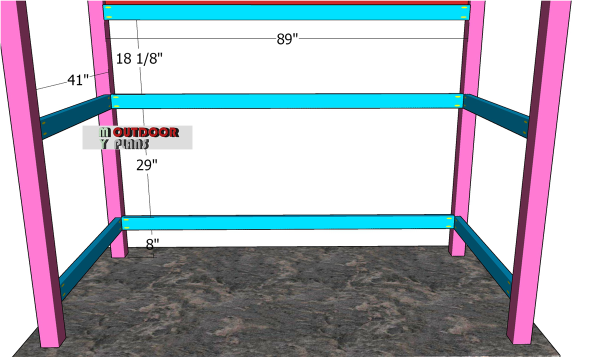
Fit the 2×6 support beams to the front and back of the shelter. Align the edges, make sure the corners are square, drill pilot holes through the beams and insert 3 1/2″ screws into the posts.
Fitting-the-cleats
Next, you need to attach the 2×4 cleats to the structure. Cut the components at the right dimensions and drill pocket holes at both ends. Fit the components to the structure and lock them into place using 2 1/2″ screws. Make sure the corners are square and the edges flush. You can adjust the distance between the rails to suit your needs.
Align the cleats to the interior edges of the posts.
Fitting-the-side-rails
Fitting-the-back-slats
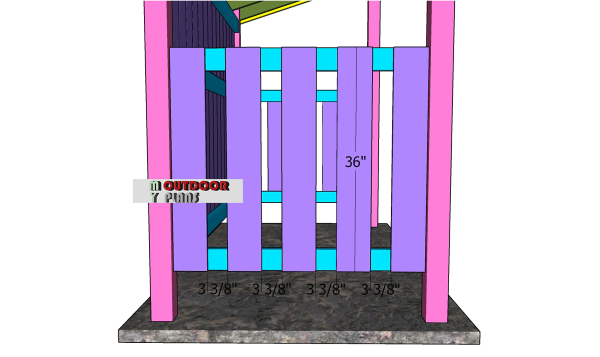
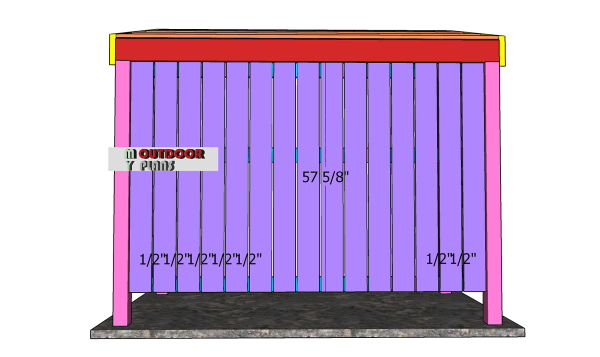
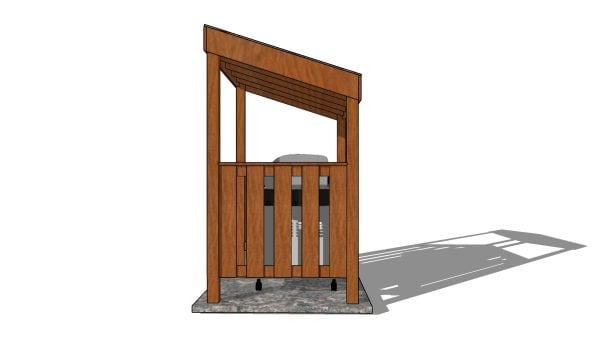
Next, you need to attach the vertical rails to the supports. Build the rails from 1×6 lumber. Fit the rails equally-spaced (use a 3 5/8″ and a 1/2″ wood block as spacer), drill pilot holes at both ends and lock them to the supports using 1 5/8″ screws.
Fitting-the-hand-rails
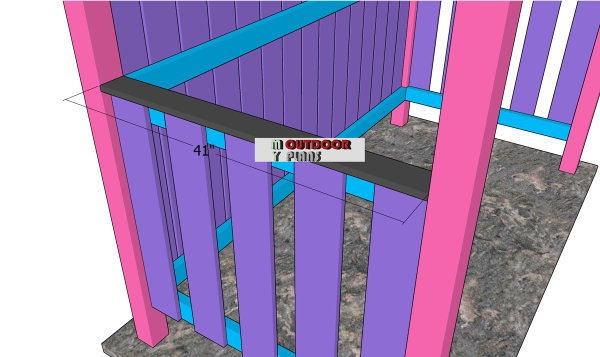
Last but not least, attach the 1×4 handrails. Align the boards between the posts and secure them into place with 2 1/2″ screws. Drill pilot holes before inserting the screws, to prevent the wood from splitting.
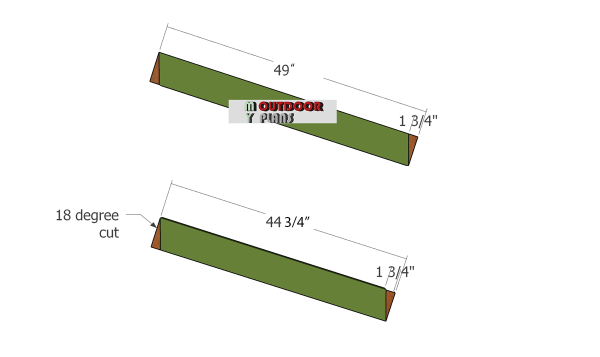
Build the rafters for the shelter using 2×6 lumber. The shorter rafters are the ones placed at both ends, between the posts.
Use a miter saw to make the 18 degree cuts to both ends of the rafters.
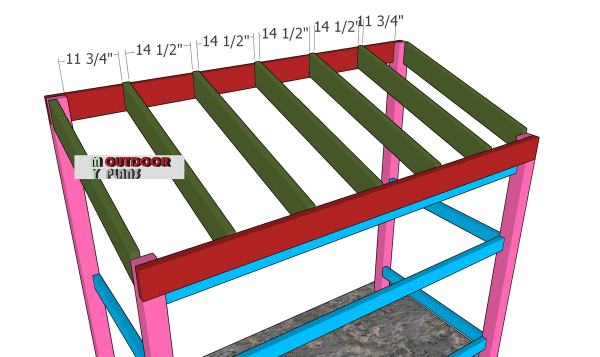
Fitting-the-rafters
Fit rafters to the top of the shelter, spacing them as shown in the diagram. Drill pilot holes though the support beams and insert 3 1/2″ screws into the rafters. Drill pilot pilot holes at angle through the end rafters and insert 3 1/2″ screws into the beams.
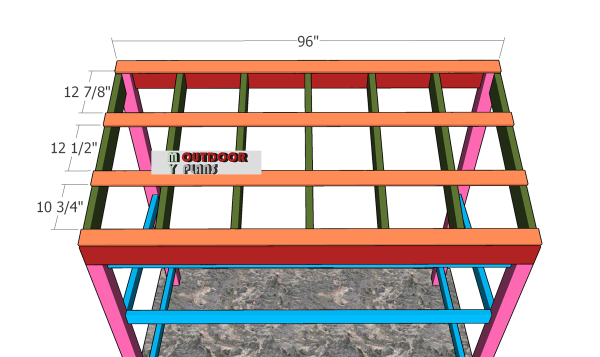
Fitting-the-purlins
Fit the 1×4 purlins to the top of the 4×8 shelter. Place the purlins every 16″ on center and lock them into place with 2 1/2″ screws.

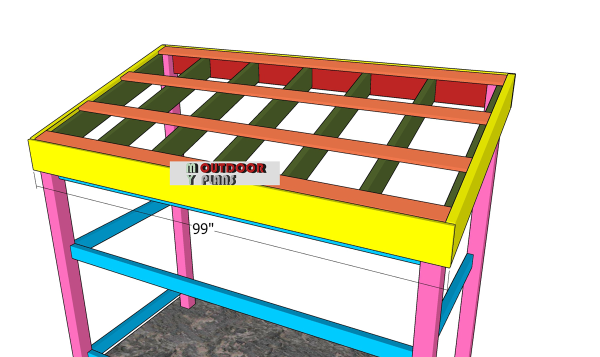
Side-roof-trims
Build the side trims for the roof using 2×8 lumber. Make 18 degree cuts to both ends of the trims and then secure them into place with 2″ nails.
Front-and-back-roof-trims
Next, attach the 1×8 trims to the front and to the back of the shelter. Use 2″ brad nails to lock them into place tightly.
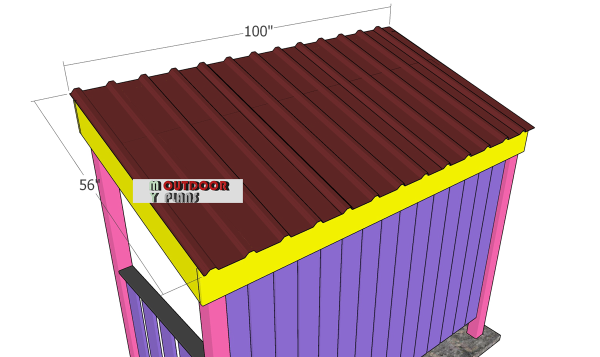
Fitting-the-roofing
Cover the roof with metal roofing sheets. Lay the sheets to the top of the pavilion and lock them into place with appropriate screws (compatible with the roofing sheets you buy).
As for the roofing sheets you can order them at 56″, or you can buy standard sheets and adjust their length to 56″ using tin snips.
4×6 bbq shelter plans – front view
4×6 bbq shelter plans – side view
Fill the holes with wood putty and smooth the surface with fine-grit sandpaper for a professional result. Apply a few coats of stain or paint to enhance the look of the shelter and to protect the components from decay.
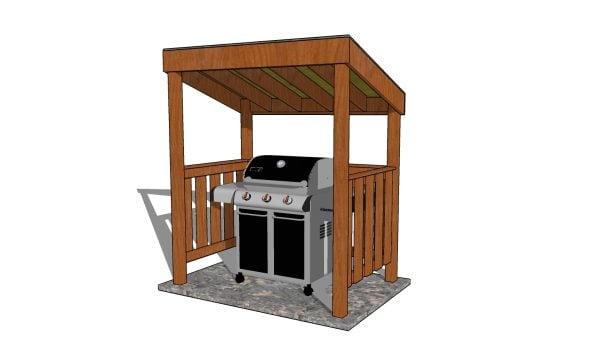
4×6 bbq shelter plans
If you want, you can easily adjust the size of the shelter to suit your needs. This lean to shelter will protect the bbq grill from the elements and you can be at peace when it’s raining cats and dogs. This is a basic structure that requires little woodworking skills and resources, so any homeowner can get the job done in a weekend.
Top Tip: Check out the rest of the projects, to see more building plans for your backyard.

This woodworking project was about bbq grill shelter plans. If you want to see more outdoor plans, check out the rest of our step by step projects and follow the instructions to obtain a professional result.
EXPLORE MORE IDEAS FOR:
 |
 |
 |
 |
2 comments
how the heck do I buy the plans?
See the GET PDF PLANS button at the end of the article. You press that button and then you fill in the fields with your info.