This step by step diy project is about chaise lounge plans. I have designed this chaise lounge so you can bask in the sun over the pool, patio or even on a beach. Moreover, this sun lounger should cost under 25 $ to build, making it a really great choice for a first woodworking project. You can even add wheels to the legs of the lounger, if you want to move the chairs easily. Take a look over the rest of our woodworking plans, if you want to get more building inspiration.
When buying the lumber, you should select the planks with great care, making sure they are straight and without any visible flaws (cracks, knots, twists, decay). Investing in cedar or other weather resistant lumber is a good idea, as it will pay off on the long run. Use a spirit level to plumb and align the components, before inserting the galvanized screws, otherwise the project won’t have a symmetrical look. If you have all the materials and tools required for the project, you could get the job done in about a day. See all my Premium Plans HERE.
Projects made from these plans
Chaise Lounge Plans

Building-a-chaise-lounge
Cut & Shopping Lists
- A – 2 pieces of 2×4 lumber – 85″ long, 3 pieces of 1×4 lumber – 21″ long FRAME
- B – 12 pieces of 1×4 lumber – 24″ long SLATS
- C – 2 pieces of 1×4 lumber – 37 1/2″ long, 9 pieces – 17″ long BACKREST
- D – 2 pieces of 2×2 lumber – 36″ long, 3 pieces – 17 1/2″ long FRAME
- E – 2 piece of 2×4 lumber – 12″ long, 2 pieces – 10 1/2″ long LEGS
- F – 1 piece of 2×6 lumber – 24″ long, 1 piece – 24″ long SUPPORT
- 3 pieces of 2×4 lumber – 8′
- 6 pieces of of 1×4 lumber – 8′
- 2 pieces of 2×2 lumber – 8′
- 100 pieces of 1 1/4″ pocket screws
- 100 pieces of 1 1/4″ screws
- 100 pieces of 2 1/2″ screws
- 2″ brad nails
- hinges
- wood glue, stain/paint
- wood filler
Tools
![]() Hammer, Tape measure, Framing square, Level
Hammer, Tape measure, Framing square, Level
![]() Miter saw, Drill machinery, Screwdriver, Sander
Miter saw, Drill machinery, Screwdriver, Sander
Time
![]() One day
One day
Related
How to build a sun lounger
Building-the-side-rails
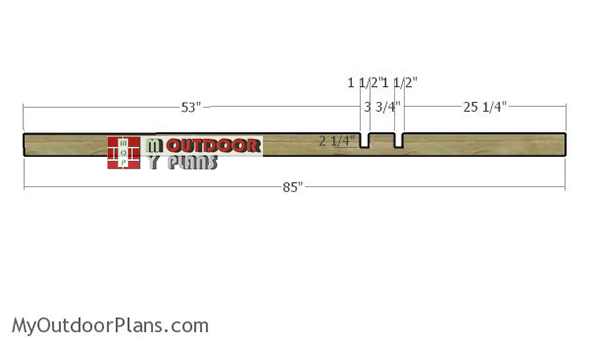
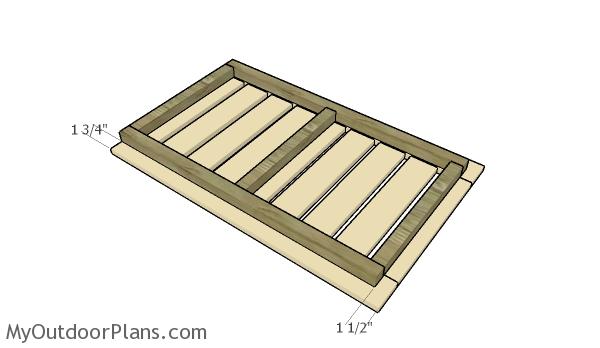
The first step of the project is to build the side rails for the frame of the chair. Mark the cut lines on the 2×4 beams and make the notches with a saw. Use a chisel to remove the excess and smooth the edges with sandpaper.
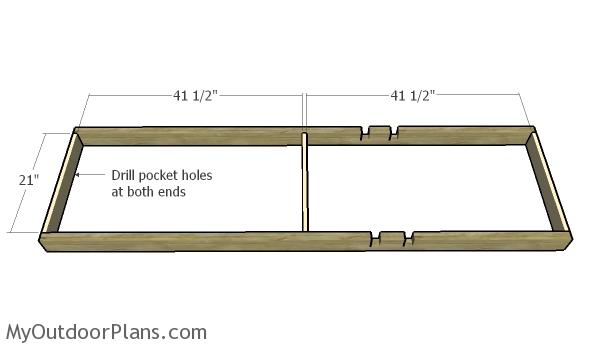
Building the frame of the chair
Continue the project by fitting the supports to the frame. Cut the components from 1×4 lumber and drill pocket holes at both ends. Fit the supports to the side rails and secure them into place with 1 1/4″ screws. Make sure the corners are right-angled and align the edges with attention before inserting the screws.

Attaching the legs
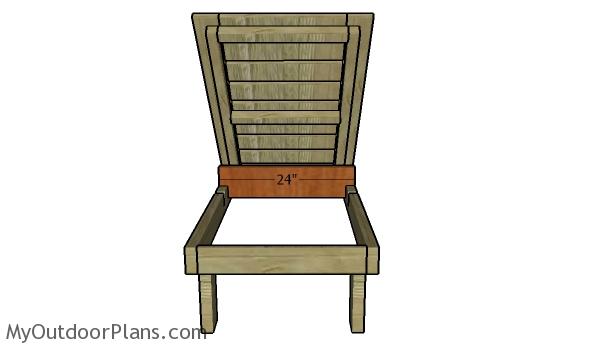
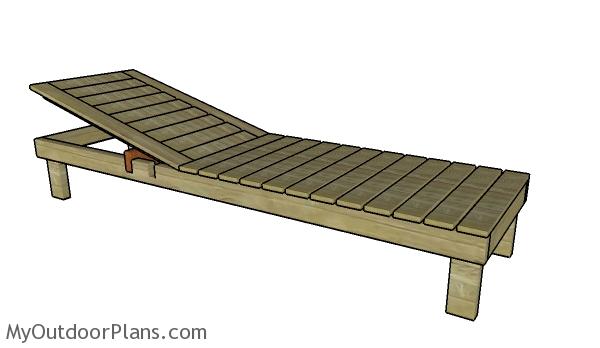
Build the legs for the chaise lounge from 2×4 lumber. Drill pilot holes through the legs and insert 2 1/2″ screws into the frame. Make sure the corners are right-angled for a professional result. As you can notice in the diagram, you need to cut the legs on the right shorter, to leave enough room for the backrest.

Fitting-the-slats-to-the-lounge-chair
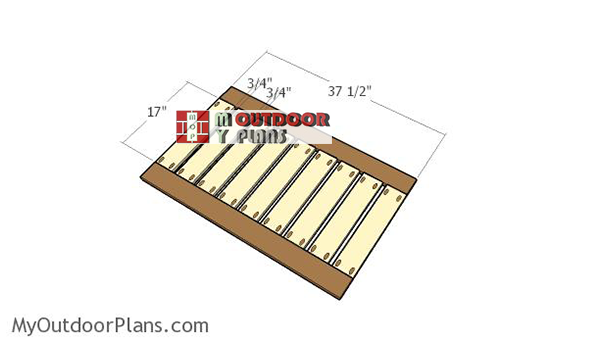
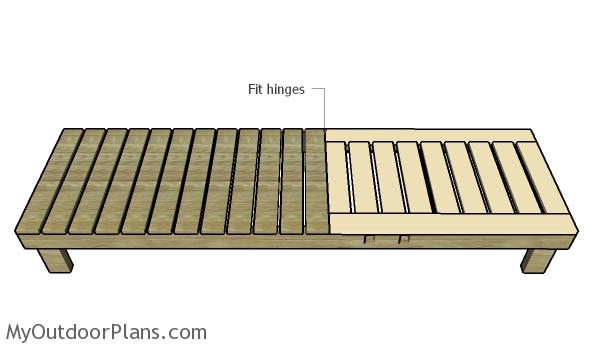
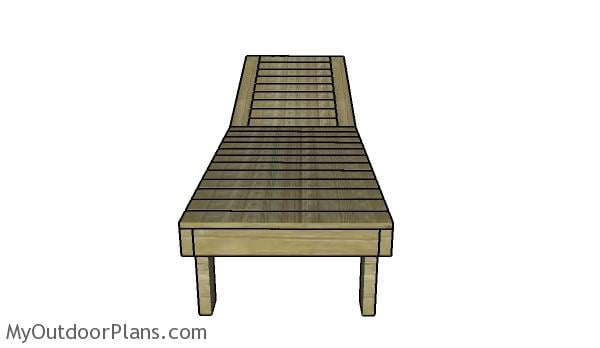
Next, you need to attach the 1×4 slats to the chaise lounge. Drill pilot holes at both ends and secure them into place with 1 1/4″ screws. Place a piece of 1/2″ plywood between the slats to create even gaps.
Backrest
Build the backrest from 1×4 lumber. Cut the components at the right dimensions and drill pocket holes at both ends of the 17″ long slats. Align everything with attention and insert 1 1/4″ screws to lock them together tightly. Add waterproof glue to the joints and make sure the edges are flush.
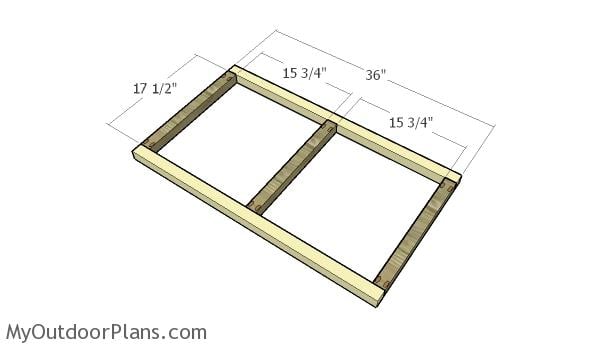
Building the frame of the backrest
Build the frame for the backrest from 2×2 lumber. Drill pocket holes at both ends of the 17 1/2″ components and secure them to the perpendicular components with 2 1/2″ screws. Add glue to the joints and make sure the corners are square.
Assembling the backrest
Fit the frame the backrest, as hown in the diagram. Drill pilot holes through the frame and insert 2″ screws into the backrest.
Attaching the backrest to the frame
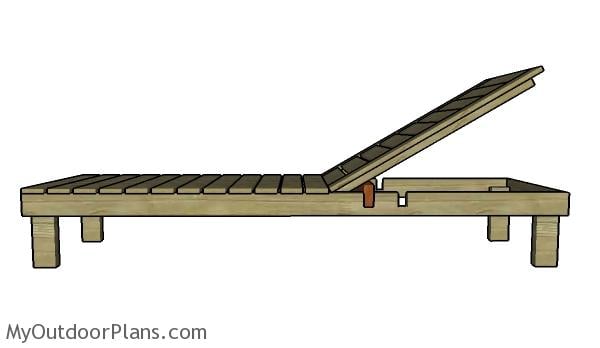
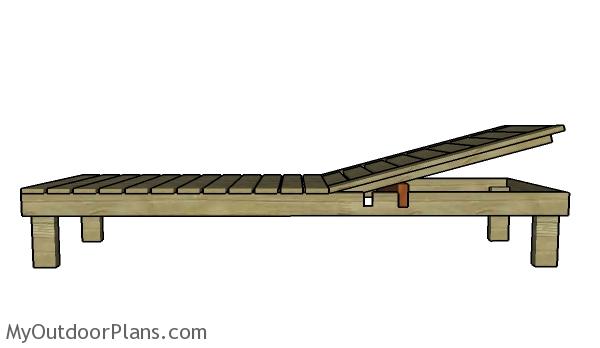
Fit the backrest to the frame of the chaise lounge. Use hinges to secure the backrest to the seat of the lounger. Two hinges will do the job for the backrest.
Support
In order to lilt the backrest, you need to fit a 24″ support to the notches cut out in the rails.
45 degree lean
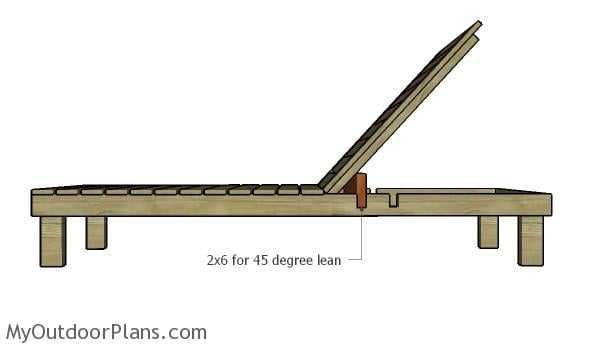
Place a 2×6 support to the first notch, so the lean of the backrest is of 45 degrees.
30 degree lean
For a 30 degree lean, you should fit a piece of 2×4 lumber to the first notch.
15 degree lean
For a 15 degree lean, place a 2×4 support to the second notch. As you can see, it is so easy to adjust the angle of the backrest to suit your needs.
Pool chair plans
One of the last steps of the projects is to take care of the finishing touches. Fill the holes and the dents with wood putty and smooth the surface with 120-220 grit sandpaper. Cover the wooden components with stain and then seal everything with spar varnish.
Chaise Lounge Chair Plans
This is a super simple project anyone should be able to build in a day without much effort. Remember that you need to adjust the size of the components so they suit your particular own needs. The best step of the project is that you this design will match any style of outdoor furniture. Take a look over the rest of the outdoor furniture plans on my blog, for even more building inspiration.
This woodworking project was about chaise lounge plans free. If you want to see more outdoor plans, check out the rest of our step by step projects and follow the instructions to obtain a professional result.
4 comments
did you attach the hinges on the backrest to the slat or the frame? Thank you
The hinges will be hidden. So they will go to the vertical edge of the slat.
The slats are only 1×4, and since the hinge has to carry a lot of weight it will rip right out of the wood. This chair design cannot possibly work!
Where do you find cushions that fit this chair? The cushions I’m seeing that fit in width are all 12” short. And the ones that fit in length are all 2” too wide.