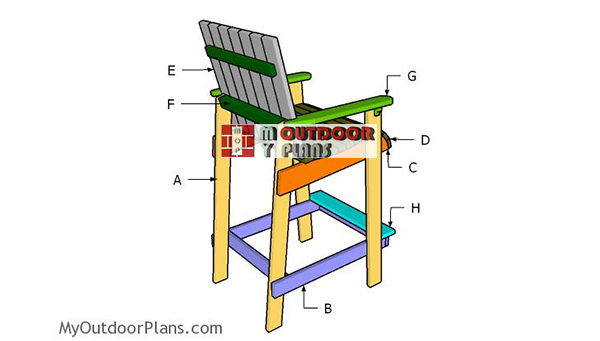
This step by step diy woodworking project is about bar height adirondack chair plans free. I have designed this tall adirondack bar stools, so you can add unique charm to your patio or backyard. This bar stools have a rustic appearance and there are super easy to build. Take a look over these instructions and make adjustments if you want to get a professional result.
Make sure you invest in high quality materials, such as pressure-treated lumber, cedar, pine or redwood. Take accurate measurements and use a professional saw to get the job done. Always align the components at both ends before drilling the pilot holes and inserting the galvanized screws, in order to prevent the wood from splitting. Use waterproof glue to reinforce the joints. See all my Premium Plans HERE.
Projects made from these plans
Bar Height Adirondack Chair Plans
Building-a-bar-height-adirondack-chair
Cut & Shopping Lists
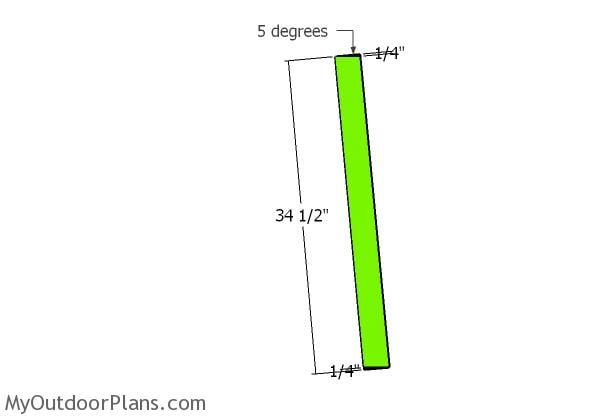
- A – 2 pieces of 1×3 lumber – 34 1/2″ long, 2 pieces – 34 3/4″ long LEGS
- B – 2 pieces of 1×3 lumber – 24 1/2″ long, 1 piece – 19″ long, 1 piece – 17 1/2″ long SUPPORTS
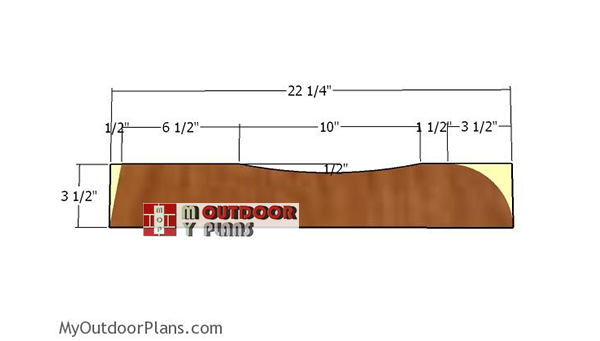
- C – 2 pieces of 1×4 lumber – 22 1/4″ long SEAT
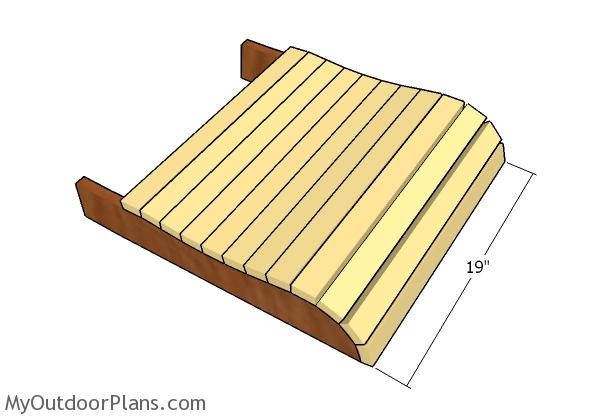
- D – 12 piece of 1×2 lumber – 19″ long SEAT
- E – 7 pieces of 1×3 lumber – 18″ long BACKREST
- F – 1 piece of 2×2 lumber – 16″ long, 1 piece of 1×2 lumber – 17″ long SUPPORTS
- G – 2 pieces of 1×3 lumber – 20 1/4″ long, 1 piece of 1×2 lumber – 1 1/2″ long ARMRESTS
- H – 1 piece of 1×4 lumber – 20 1/2″ long STEP
- 5 pieces of 1×3 lumber – 8′
- 3 pieces of 1×2 lumber – 8′
- 1 piece of 1×4 lumber – 8′
- 1 piece of 2×2 lumber – 4′
- 2 1/2″ screws, 1 1/4″ screws
- wood glue, stain/paint
- wood filler
Tools
![]() Hammer, Tape measure, Framing square, Level
Hammer, Tape measure, Framing square, Level
![]() Miter saw, Drill machinery, Screwdriver, Sander
Miter saw, Drill machinery, Screwdriver, Sander
Time
![]() One day
One day
Related
How to build an adirondack bar stool
Seat-supports
The first step of the project is to build the seat supports from 1×4 lumber. Mark the cut lines on the slats and then get the job done with a circular saw. Use sandpaper to smooth the edges.
Fitting the seat slats
Next, you need to attach the 1×2 slats to the seat supports. You can adjust the size of the seat to suit your needs. Moreover, round the edges of the slats with a router before fitting them to the supports, for extra character. Drill pilot holes at both ends of the slats and insert 1 1/4″ screws to lock them into place tightly. Countersink the head of the screws for a professional result.
Building the front legs
Continue the project by cutting the front legs for the bar height adirondack stools. As you can easily see in the diagram, you just need to make 5 degree cuts to both ends of the 1×3 slats. Smooth the edges with sandpaper.
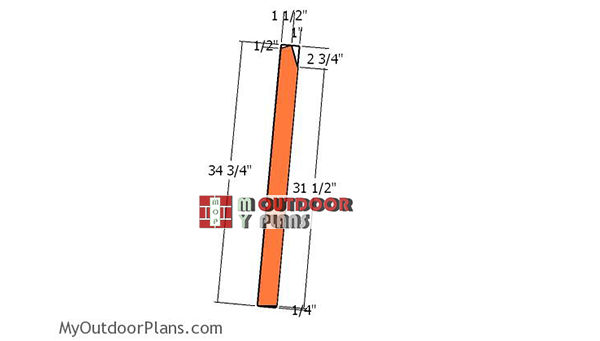
Back-legs
Build the back legs for the adironack bar stools in the same manner described above. However, you need to make some additional cuts to the legs, so you can fit them into place tightly.
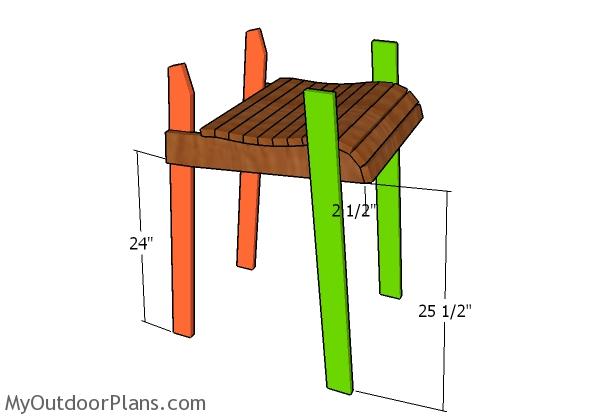
Fitting the legs
Fit the legs to the seat of the adirondack chair, as shown in the diagram. Drill pilot holes and insert 1 1/4″ screws to lock the legs to the seat of the chair. Add glue to the joints and align the edges.
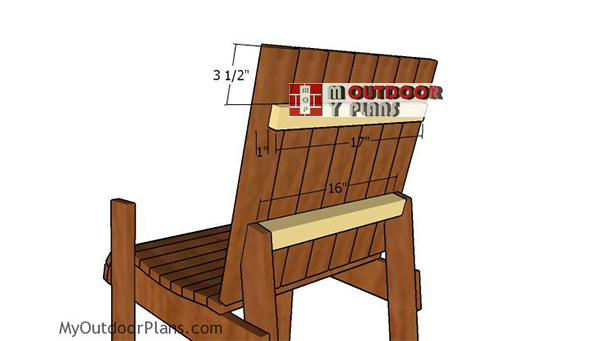
Backrest-supports
Fit the 2×2 support to the back of the bar stool. Moreover, fit the 1×2 slat to the top of the backrest slats, so you can secure them into place tightly. Drill pilot holes and insert 1 1/4″ screws to secure the backrest together tightly.
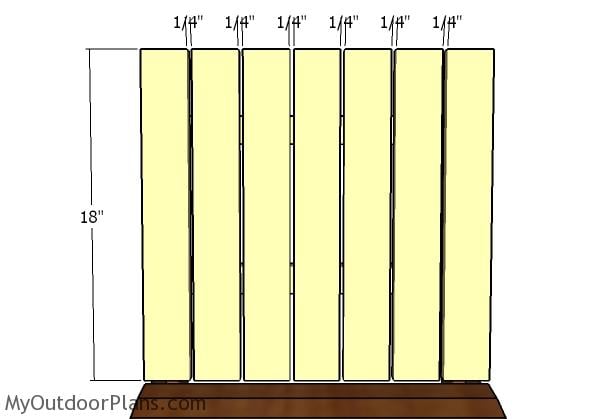
Backrest slats
Fit a piece of 1/4″ plywood between the slats, so you can create even gaps. You can even round the top of the backrests, for an unique design.
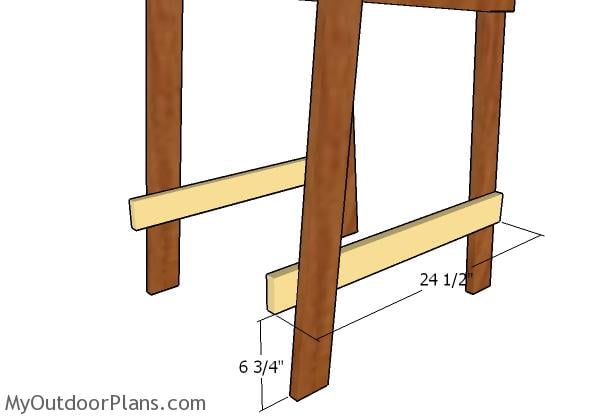
Bottom supports
Fit the 1×3 supports to the base of the legs. Align the slats to the back legs, drill pilot holes and insert 1 1/4″ screws to lock them into place tightly.
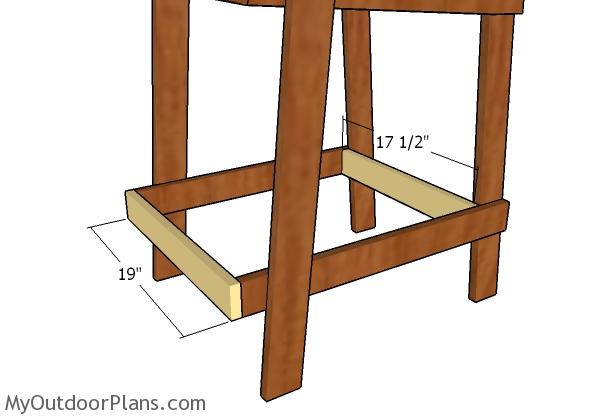
Fitting the bottom braces
Fit the supports to the braces, as shown in the diagram. Align the edges flush, drill pilot holes and insert 1 1/4″ screws to lock them together tightly. Make sure the corners are square.
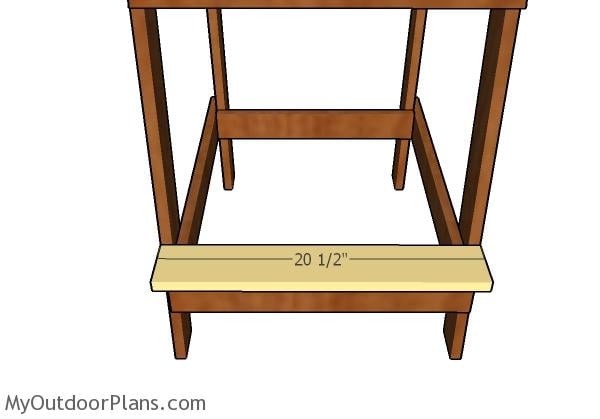
Fitting the step
Fit the 1×4 step to the front of the adirondack bar stool. Align the edges flush, drill pilot holes and insert 1 1/4″ screws to secure it into place tightly.

Building the armrests
Build the armrests from 1×3 lumber. Mark the cut lines on the slats and then get the job done with a circular saw. Round over the edges with a router, for a professional result.
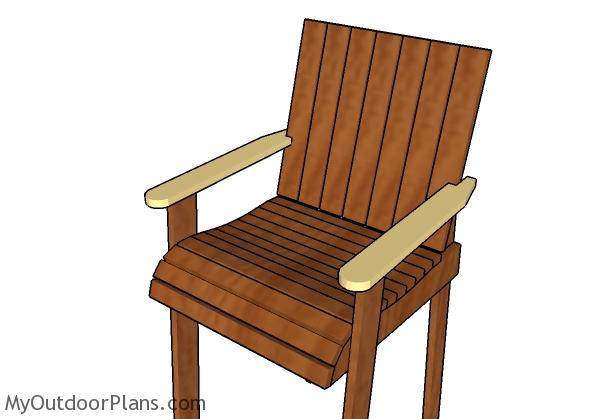
Fitting the armrests
Center the armrests to the bar stools and then secure them into place with 1 1/4″ screws.
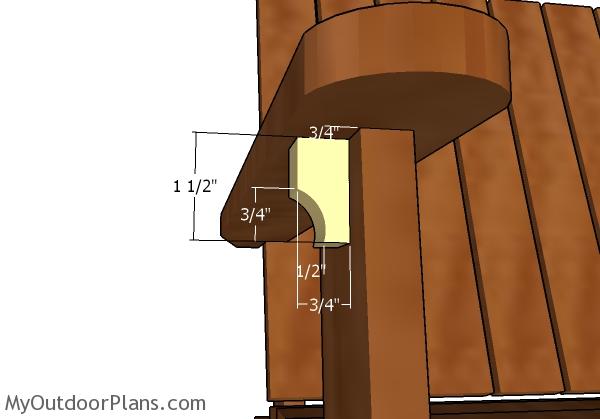
Armrests supports
Fit decorative supports under the armrests, using the instructions shown in the diagram.
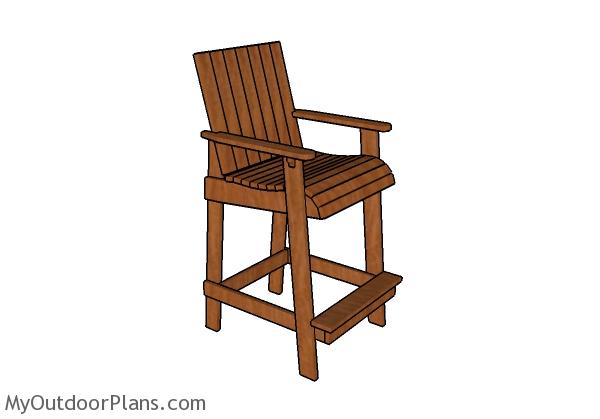
Bar height adirondack chair plans
Last but not least, you need to take care of the finishing touches. Fill the holes with wood putty and then smooth the surface with 120-220 grit sandpaper. Apply a few coats of paint or stain over the components, to protect the wood from the lumber and to enhance the look of the chair.

Tall adirondack chair plans
You can customize the look of the chair so it suits your needs.
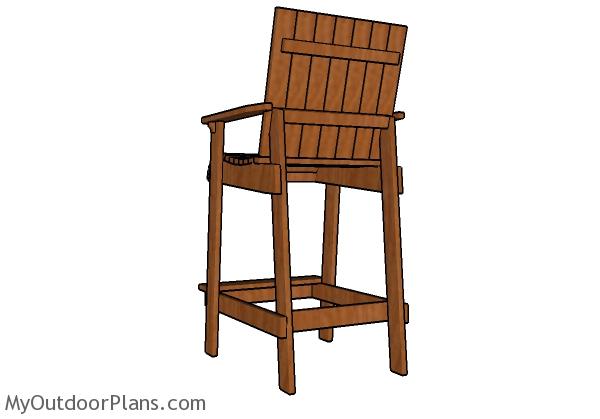
Bar height adirondack chair plans – Back view
Smooth all the edges and use a router to round the edges with a router.
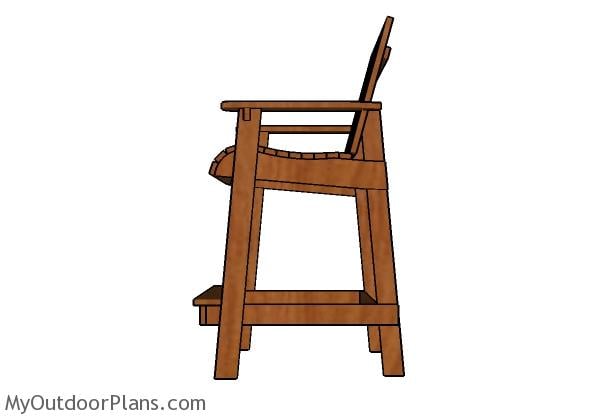
Bar height adirondack chair plans – Side view
This bar height is a nice addition to any patio or home, as it features an unique design, while being very easy to build. I would love to see it, so don’t forget to share a few images!
Top Tip: Don’t forget to take a look over the rest of my outdoor furniture plans, as there are so many designs and ideas you can choose from.
This woodworking project was about bar height bar stool free. If you want to see more outdoor plans, I recommend you to check out the rest of our step by step projects.
13 comments
Taking to give this a try this weekend! This will be my first wood working project.
Glad to hear that. I hope the project comes out really well, so you could build more. Let me know how it comes out.
Want to build these tall chairs
I AM ALWAYS IMPRESSED WITH YOUR PLANS
I can t wait for you emails.They give me a good project to build on a regular basis.
Thank you for the nice words. Looking forward to seeing your projects!
First tall chair! Love the details.Wil make it faster. Thanks
Congrats for the project! Looking forward to seeing a few pics of your projects!
Hi…I am really impressed with this plan, I am brand new to woodworking and I really want to build this chair can you give me more info on doing the back fancier then the box look I like the scalloped look how much extra do I need to buy to cover the back like you did..
Thanks for your help.
On “fitting the legs”, how far apart are the front and back legs at the base? It looks like you’d attach the rear legs first, which sets the angle of the seat, and the front legs after.
Double checking … (measure twice, etc.)
Going to give a shot on these chairs – will be my second project
Good luck. Let me know how it goes… I would love to see them!
I am wondering if you or anyone has made this with using 2×4 for the legs. What changes were required?
Great Plans. Simple but concise. Disappointed that you can’t print them out.