This step by step diy project is about 10 foot picnic picnic table plans plans. I have designed this 10 foot long picnic table so you can enjoy a nice meal in the backyard with the loved ones. This picnic table is large enough to support a few people, so you shouldn’t worry about it. Take a look over the rest of my woodworking plans, if you want to get more building inspiration. Premium Plans available for this project in the Shop.
When buying the lumber, you should select the planks with great care, making sure they are straight and without any visible flaws (cracks, knots, twists, decay). Investing in cedar or other weather resistant lumber is a good idea, as it will pay off on the long run. Use a spirit level to plumb and align the components, before inserting the galvanized screws, otherwise the project won’t have a symmetrical look. If you have all the materials and tools required for the project, you could get the job done in about a day. See all my Premium Plans HERE.
Projects made from these plans
10 foot Picnic Table Plans
Building-a-10-ft-picnic-table
Cut & Shopping Lists
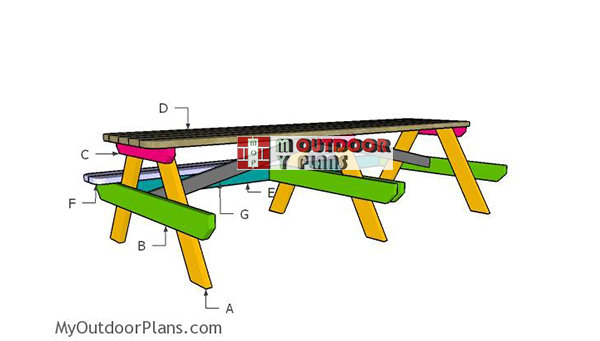
- A – 6 pieces of 2×6 lumber – 36″ long LEGS
- B – 4 pieces of 2×6 lumber – 60″ long SUPPORTS
- C – 3 piece of 2×4 lumber – 28 1/2″ long SUPPORTS
- D – 5 pieces of 2×6 lumber – 120″ long TABLETOP
- E – 2 pieces of 2×6 lumber – 53 3/4″ long, 2 pieces – 50 3/4″ long SEAT STERTCHERS
- F – 4 pieces of 2×6 lumber – 120″ long SEAT
- G – 2 pieces of 2×4 lumber – 55 3/4″ long BRACES
- 3 pieces of 2×4 lumber – 8′
- 11 pieces of 2×6 lumber – 6′
- 9 pieces of 2×6 lumber – 10′
- 3 1/2″ carriage bolts
- 2 1/2″ pocket screws
- 2 1/2″ screws
- wood filler , wood glue, stain/paint
Tools
![]() Hammer, Tape measure, Framing square, Level
Hammer, Tape measure, Framing square, Level
![]() Miter saw, Drill machinery, Screwdriver, Sander
Miter saw, Drill machinery, Screwdriver, Sander
Time
![]() One day
One day
Related
How to build a 10 foot picnic table
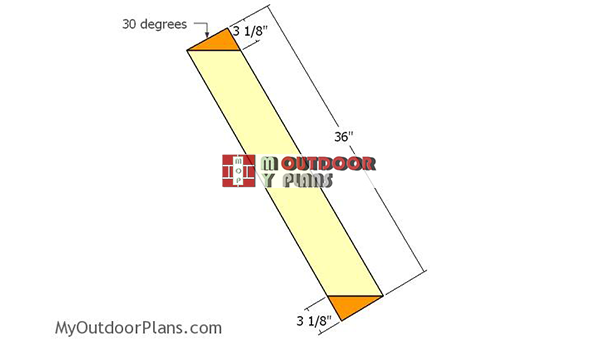
Building-the-legs
The first step of the outdoor project is to build the legs for the 12′ picnic table. As you can easily see in the diagram, you need to make 30 degree cuts to both ends of the 2×6 legs. Smooth the edges with sandpaper.

Tabletop-supports
Next, you need to build the tabletop supports from 2×4 lumber. Make 45 degree cuts to both ends of the supports, following the diagram. Moreover, drill pocket holes into the 2×4 supports, so you can lock it to the tabletop slats.
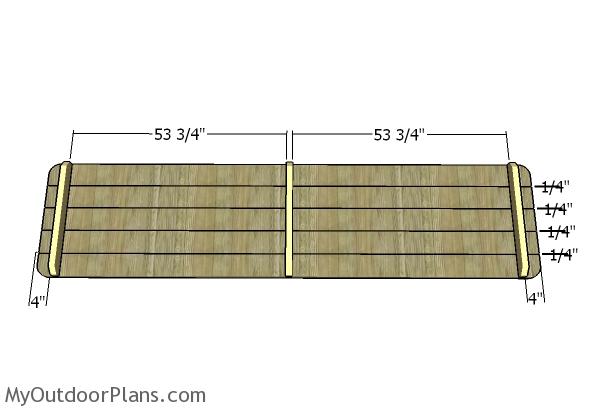
Building the tabletop
Lay the 2×6 tabletop slats (10′ long) on a level surface. Place 1/4″ plywood pieces between the slats so you can create even gaps. Fit the supports to the slats and then place them equally spaced. Insert 2 1/2″ screws to secure the supports into place tightly.
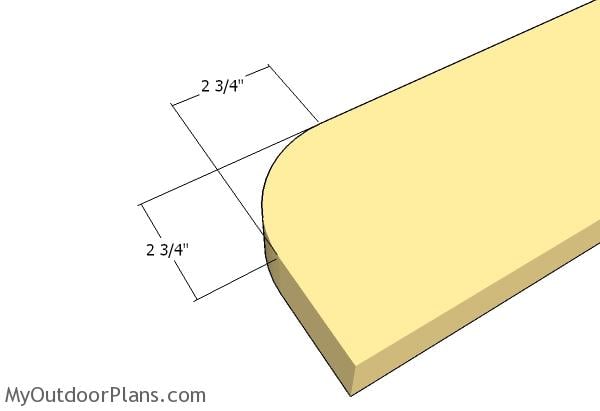
Decorative cuts
Use a jigsaw to make round decorative cuts to the corners of the tabletop.

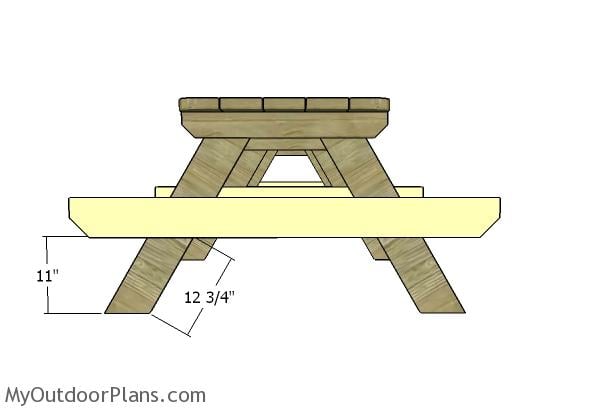
Fitting the legs
Fit the 2×6 legs to the picnic table, as shown in the diagram. Clamp the legs to the supports and then drill pilot holes through both components. Insert 3 1/2″ carriage bolts and tighten the components into place. Use two bolts for each joint for a professional result. Using the carriage bolts will also make disassembling the picnic table easy, if you want to move it to another location.
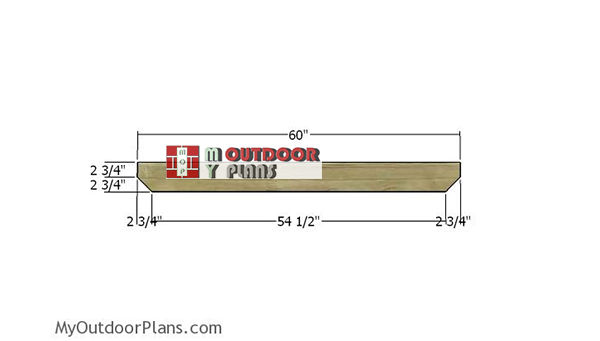
Seat-supports
Build the seat supports from 2×6 lumber. Make 45 degree cuts to both ends of the supports, as shown in the plans. These decorative cuts will add character to the picnic table.
Fitting the seat supports
Align the seat supports to the legs and then clamp them into place tightly. Drill two pilot holes through the braces and through the legs, for each joint. Insert 3 1/2″ carriage bolts to lock the components together tightly. Use a spirit level to plumb the seat supports horizontally.
Seat supports
As you can easily notice in the diagram, you have to install 4 seat supports to the legs of the picnic table.
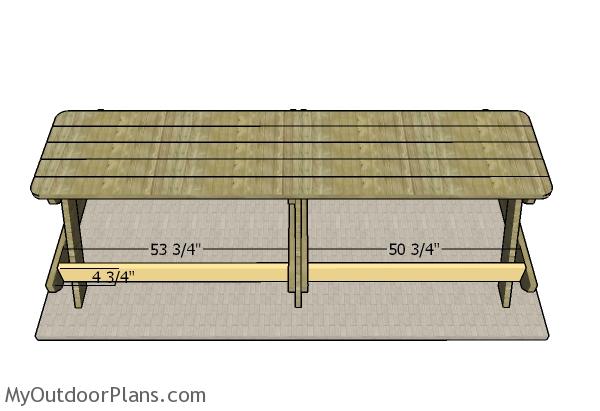
Fitting the seat stretchers
Fit the 2×6 seat stretchers to the picnic table, as shown in the diagram. Drill pocket holes at both ends of the beams and insert 2 1/2″ screws into the supports.
Fitting the seat slats
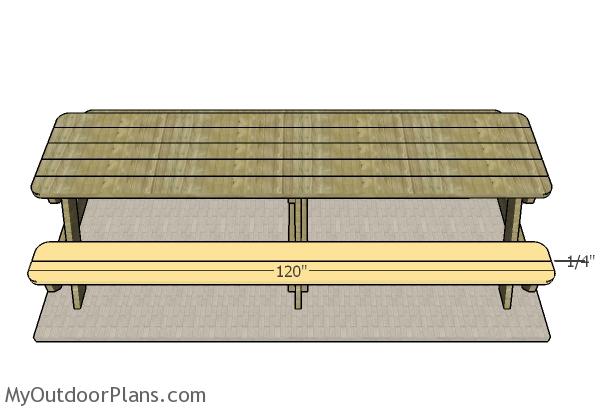
Fit the 2×6 beams to the sides of the picnic table. Leave about 4″ overhangs on both sides of the seat slats. Drill pilot holes and insert 2 1/2″ screws to lock the slats into place tightly.
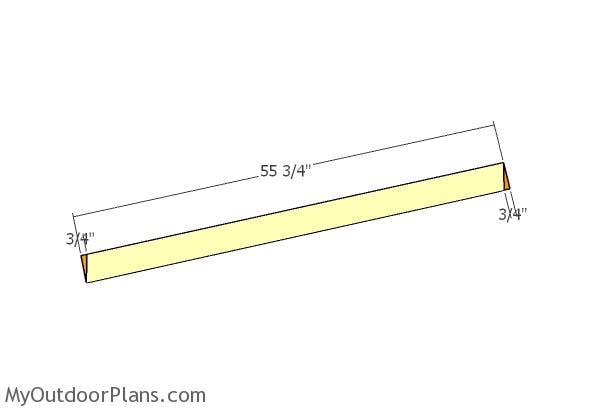
Building the diagonal braces
Build the braces for the table from 2×4 lumber. Make 15.9 degrees cut to both ends of the braces. Smooth the edges with sandpaper.
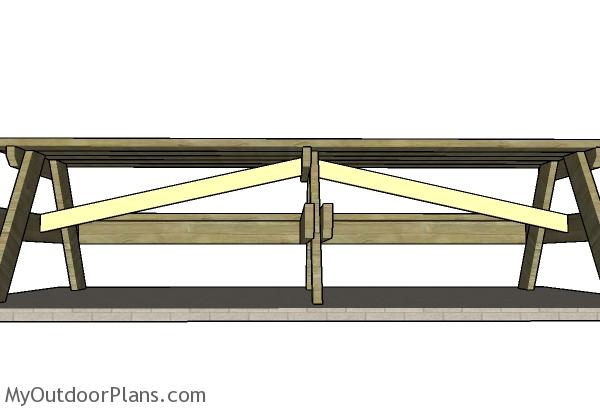
Fitting the braces
Fit the diagonal braces to the picnic table. Center the braces to the supports and drill pocket holes at both ends of the diagonal braces. Insert 2 1/2″ screws to secure the diagonal braces into place tightly.
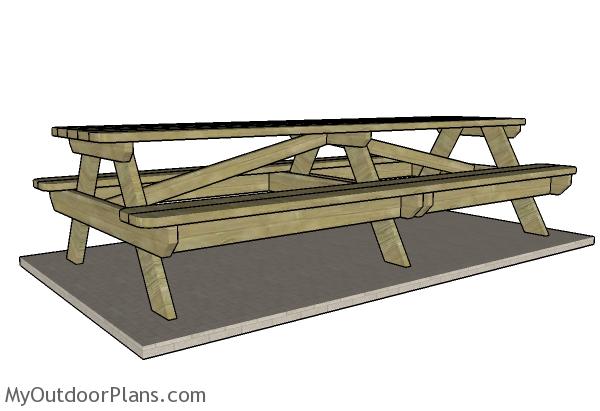
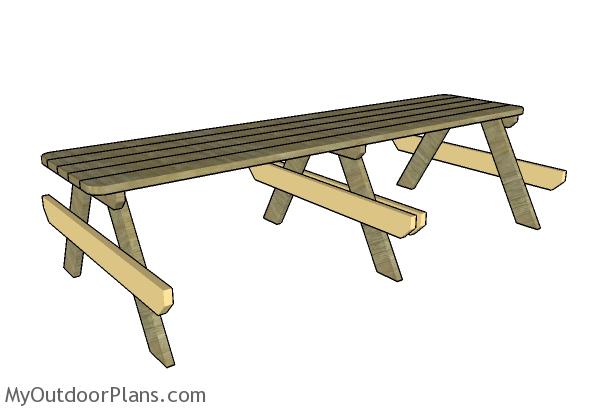
10 foot Picnic Table
Last but not least, you need to take care of the finishing touches. Fill the holes with wood putty and let them harden for a few hours. Smooth the surface with 120-220 grit sandpaper and round the exposed edges with a router. Apply a few coats of paint or stain to protect the lumber from the elements and to enhance the look of the 10 foot picnic table.
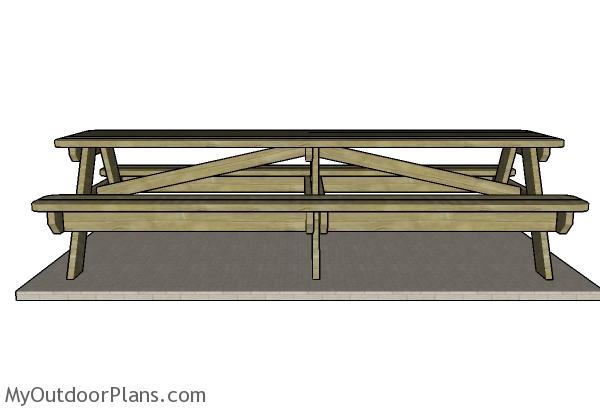
How to build a 10′ picnic table
This picnic table is the ideal project for any garden, as it is easy to build and it the materials don’t cost a fortune. Moreover, if you have a drill, a saw and a sander, you will get the job done in one weekend. As compared to a 6′ or 8′ long picnic table, this 10′ long picnic table is much sturdier, as it features middle legs.
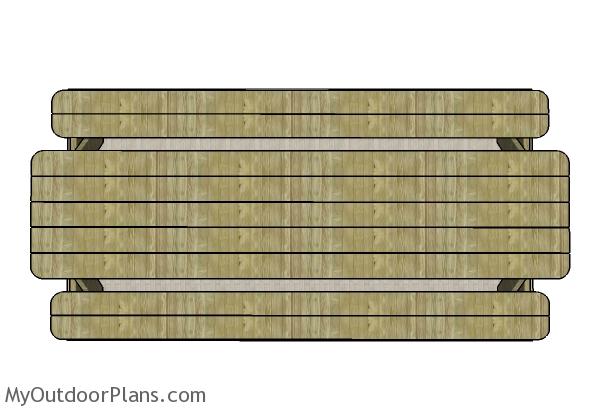
10 foot Picnic Table – Top view
Don’t forget to take a look over the rest of my picnic table plans HERE. If you are new to MyOutdoorPlans.com, I recommend you to check out the rest of my designs, as well, as I have created thousands of free plans for your backyard. Instant building inspiration right here! Premium Plans available for this project in the Shop.
This woodworking project was about 10 foot picnic table plans free. If you want to see more outdoor plans, check out the rest of our step by step projects and follow the instructions to obtain a professional result.
18 comments
Wouldn’t the diagonal braces have to be different lengths (not both 55 3/4″) because the center support legs would make one side shorter?
No, because the center tabletop support is really on center. The gaps between the side legs and the center tabletop supports are equal.
Why not put a table top cross support on both sides of the center legs like you did with the bench seats? Then your center legs would actually be in the center of the length of the table (with a cross support board on each side) and your diagonal supports would then be at equal lengths. My OCD likes things in symmetry, lol.
You’re free to do that, if that’s an issue for you
A friend and I built this table this weekend. We both didn’t have a lot of woodworking experience and decided to use hand tools only, but the end result came out great. One minor suggestion would be to suggest a number of bolts in the materials list. We used 2 per joint which came out to 24 – having that in hand originally would have saved a trip to the hardware store mid-build.
For folks like myself with limited lumber purchasing experience, how about providing some other alternatives to lumber lengths in your materials list? My local hardware store, for instance, only carried 8 foot long boards, but I could have saved on excess by purchasing 10 foot boards.
Could you suggest a good weathering solution for the table legs? I’ve read that certain epoxies can help prevent rot with ground contact situations.
I love the way the table came out, and all in all, it wasn’t that difficult despite never having built anything like this before.
Congrats for the project and thank you for sharing your experience. I haven’t used epoxy for outdoor furniture yet.
Hey, thanks for these plans, I plan to build it soon. Approximately how many 3.5 in carriage bolts do I need thanks the link is not working. Thanks again!
18 pieces of 3 1/2″ and 5 pieces of 5″ carriage bolt. You can find them at any local diy store
If you do 2 bolts for each joint, wouldn’t you need 20 3.5″ bolts for outside legs and top of the middle legs. And then 4 5.0″ bolts for bottom of middle legs?
Also which side should you drill the pocket holes for the 2×4 braces and 2×6 strechers?
That’s correct. That is why you should always buy 1-2 extra bolts. Haha Doesn’t matter where you drill the pocket holes, but personally I prefer to make the holes on the side that’s hidden.
It says 4 -36″ pieces legs… Don’t you need 6? Aren’t there 6 legs? Just verifying, thank you
Yes. 6 pieces. Thanks for letting me know.
Hey, This looks like a great plan. I am confused where the pocket screws are used though.
It’s for the supports that go to to the tabletop slats.
I’m thinking about making this table for our cabin in Georgia. However, I just paid for a wedding so I’m on a budget. Can you tell me about what it would cost to make the table?
Thanks so much!
Jess
The plans come with a materials list so you can add the local costs of the materials.
Do the diagonal braces get in the way of leg space or are they OK? I also noticed that one of the pictures posted by someone that used your plans used two shorter braces on each side. Pros and cons?
Thanks!
I think it’s a matter of preferences, they both work great. You can build the table first and then decide which one suits you best.