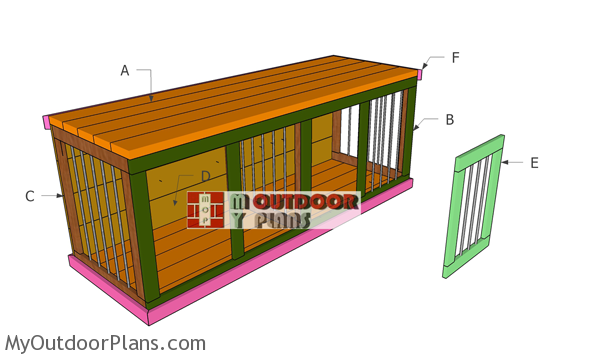
This step by step diy woodworking project is about double dog kennel plans. This design is for large dogs, so you should take that into consideration. Additionally, you should consider building this wooden kennel, if you need a beautiful piece of furniture that can add value to your living room. Furthermore, you can use this kennel as a TV stand or as a small table next to your sofa. The free woodworking plans come with step by step 3D diagrams, instructions, a full cut and shopping list and it is print friendly. As well, the plans are PDF download, so you can take the printed plans with you in the workshop.
There are many shapes and designs that you could choose from, so make sure you make the right adjustments to this project, as to suit your needs. In addition, we recommend you to invest in high quality materials and to use the right tools for the job. Don’t forget to ask a skilled friend to assist you during the project, as two pairs of hands are always better than one. See all my Premium Plans HERE.
Projects made from these plans
Dog Kennel Plans
Building-a-double-dog-house-kennel
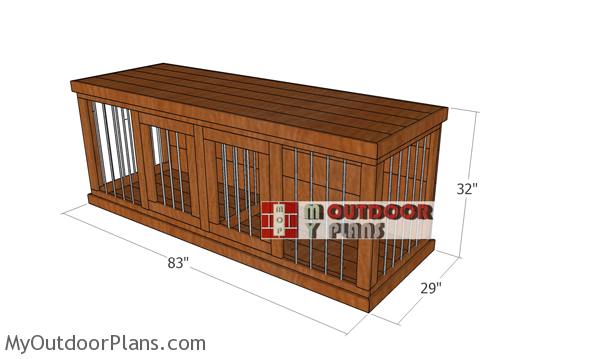
Cut / Shopping Lists
- A – 10 pieces of 2×6 lumber – 81 1/2″ long BASE + TABLETOP
- B – 5 pieces of 1×3 lumber – 24″ long, 2 pieces – 81 1/2″ long FRONT FRAME
- C – 2 pieces of 1×3 lumber – 24″ long, 2 pieces – 26″ long SIDE FRAMEx2
- D – 4 pieces of 1×8 lumber – 81 1/2″ long BACK PANEL
- E – 4 pieces of 1×3 lumber – 17″ long, 4 pieces – 18 3/4″ long DOORx2
- F – 4 pieces of 1×3 lumber – 29″ long, 4 pieces – 83″ long BASE + TOP TRIMS
- 14 pieces of 1×3 lumber – 8 ft
- 4 pieces of 1×8 lumber – 8 ft
- 10 pieces of 2×6 lumber – 8 ft
- 3 pieces of 3/8″ rebar – 20 ft
- 150 pieces of 1 1/4″ pocket hole screws
- 100 pieces of 1 5/8″ screws
- 100 pieces of 2 1/2″ screws
- 150 pieces of 2″ finish nails
- wood glue, stain/paint
- 4 hinges + 2 door handle
Tools
![]() Hammer, Tape measure, Framing square, Level
Hammer, Tape measure, Framing square, Level
![]() Miter saw, Drill machinery, Screwdriver, Sander
Miter saw, Drill machinery, Screwdriver, Sander
Time
![]() One day
One day
Related
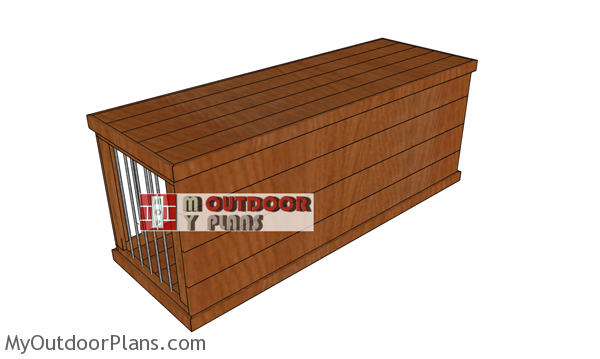
It’s that simple to build a double dog kennel
Step 1: Building the top and base
Tabletops-for-double-kennel
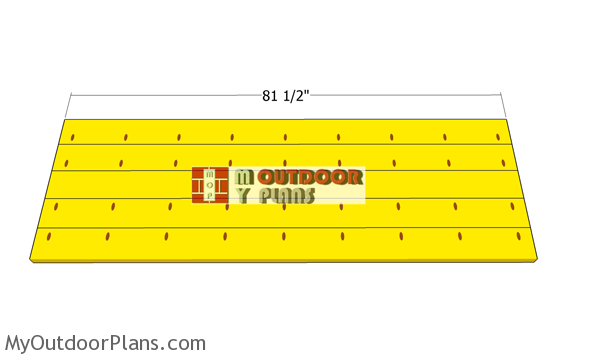
The first step of the project is to assemble the panels for the top and base of the dog kennel. Continue by cutting the components at 81 1/2″ and smooth the edges. Drill pocket holes through the 2×6 boards, as shown in the diagram.
Next, add glue to the joints and lay them on a level surface. Also, you need to clamp the panels together and insert the 2 1/2″ screws to lock them together tightly.
Step 2: Building the frames
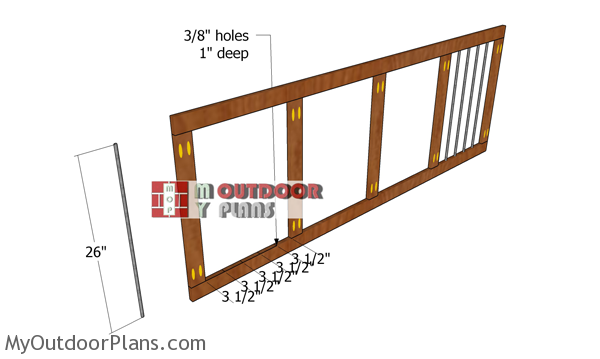
Side-frame-holes
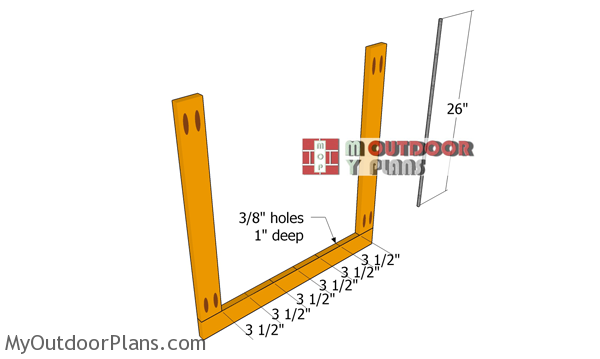
Use 1×3 lumber for the side frames and cut the components as shown in the diagram, and drill pocket holes at both ends of the vertical components. Nonetheless, align the edges flush and make sure the corners are square.
I recommend you to use 3/8″ rebars for the walls. In addition, use a drill bit and make 1″ deep cuts, every 3 1/2″ on center, as shown in the diagram.
Assembling-the-side-frames-for-the-dog-kennel
Next, use 1 1/4″ screws to assemble the frame, after setting the rebars into place. Furthermore, fill the pocket holes with wood plugs. You should notice that you need 3 identical frames, two for the sides and one for the partition.
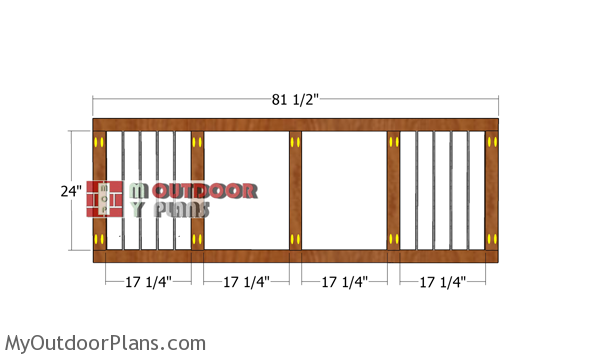
Front-wall-frame-for-dog-kennel
Next, assemble the front frame. As you can see in the diagram, we will also need to use 1×3 lumber for the components and dill 2 pocket holes at both ends of the vertical components.
As well, use 3/8″ rebars and therefore drill the holes with a 3/8″ bit. You have to drill 1″ deep holes every 3 1/2″ on center. Notice the openings for the doors.
Front-wall-frame
Align the edges flush and make sure the corners are square and insert 1 1/4″ screws to assemble the front frame tightly. Also, fill the holes with wood plugs and then cut them flush with a pull saw.
Step 3: Building the top and base
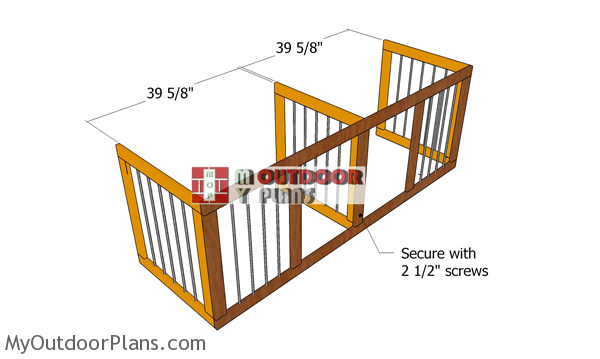
Assembling-the-frame-for-the-double-kennel
After we have all the frames assembled, we need to assemble the box. Therefore, align the edges flush and make sure the corners are square. Continue by drilling pilot holes through the front frame and insert 2 1/2″ screws into the side frames. You should insert the screws every 4″.
Fitting-the-base-for-the-double-kennel
Attach the panel for the base of the double kennel, after you align the edges flush. In addition, add glue to the joints, drill pilot holes and insert 2 1/2″ screws to lock everything together tightly.
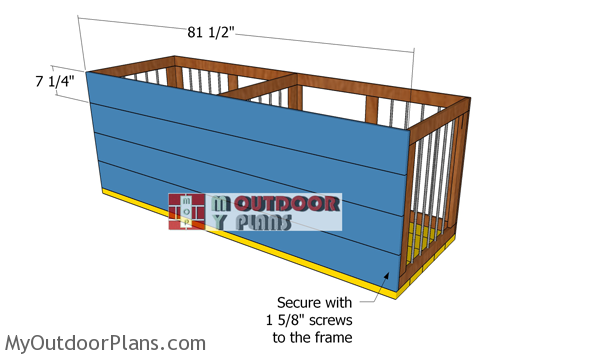
Fitting-the-back-wall-slats
Attach the 1×8 slats to the back of the kennel. On top of that, leave no gaps between the boards and align the edges at both ends. Also, drill pilot holes and insert 1 5/8″ screws to lock them into place tightly and use at least 2 screws for each joint.
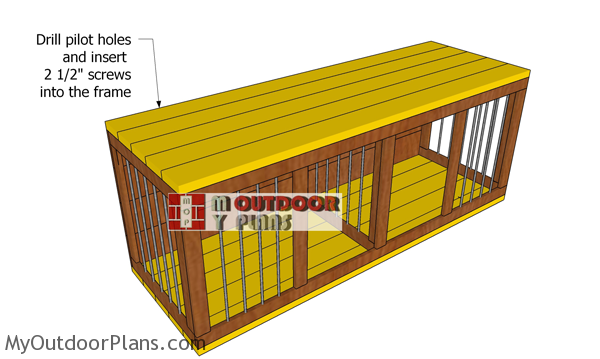
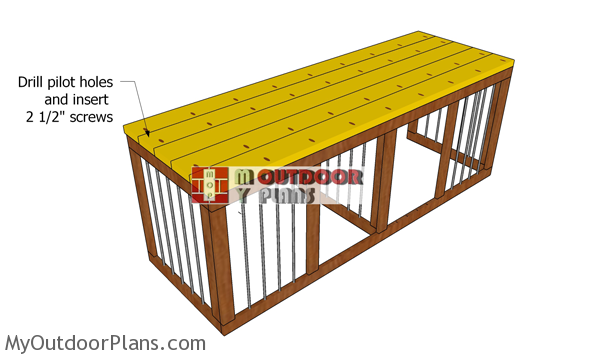
Fitting-the-tabletop
Turn the kennel upside down and then attach the panel to the top of the kennel. Next, align the edges flush, drill pilot holes and insert 2 1/2″ screws to lock them into place tightly.
Step 4: Building the top and base
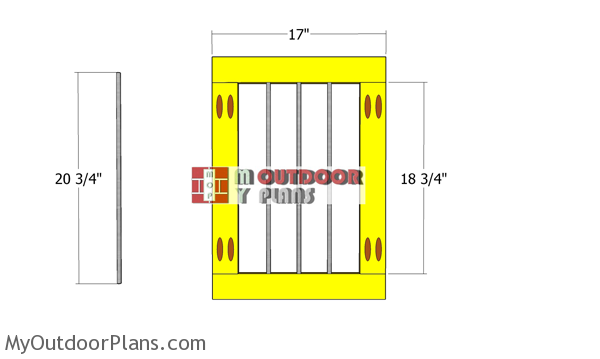
Door-frame-for-kennel
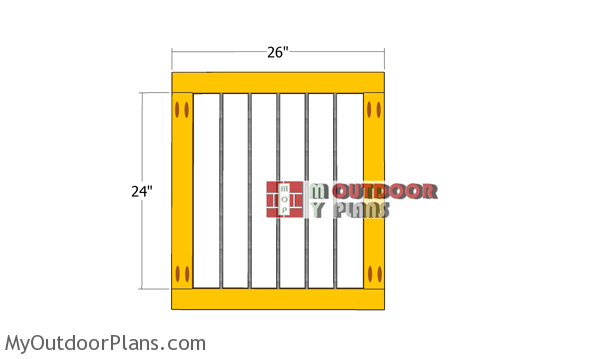
Assemble the doors for the large double dog kennel. Additionally, cut the 1x3s at the dimensions shown in the diagram.
Besides, drill pocket holes at both ends of the vertical components and use 1 1/4″ screws to lock the door frame together tightly. I suggest you to use the 3/8″ rebars for the door.
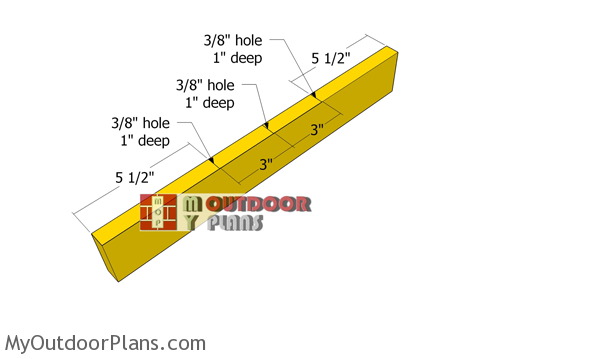
Door-components
Use a 3/8″ drill bit to make the 1″ deep holes for the bottom and top components.
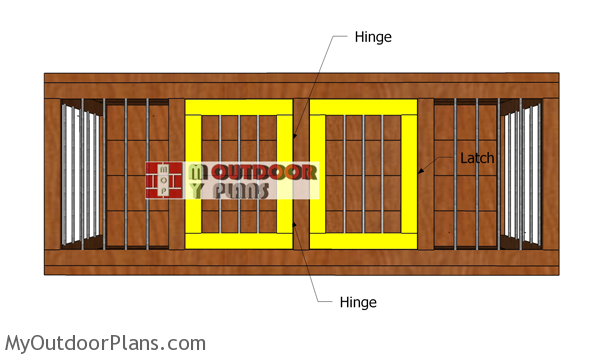
Fitting-the-double-doors-to-the-kennel
Fit the doors to the front openings. Furthermore, center the doors into place, so you have even gaps on all sides. My personal recommendation is that you to use 2 hinges for each door and also install latches.
Step 5: Finishing touches
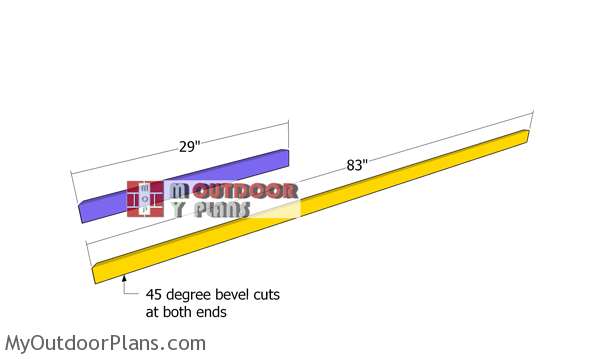
Trims-for-kennel
Use 2×4 lumber for the trims and make 45 degree bevel cuts to both ends.
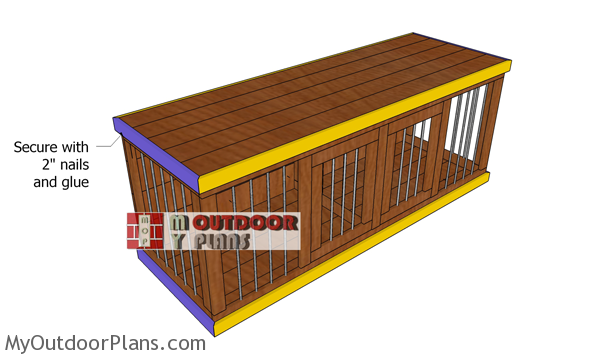
Fitting-the-trims-to-the-wooden-dog-kennel
Attach the trims to the top and bottom of the double kennel and align the edges flush and secure them into place with 2″ nails. On top of that, insert 2″ nails every 8″.
How-to-build-2-dog-kennel-plans
Fill the holes with wood putty and smooth the surface with sandpaper. Moreover, you can apply a few coats of pant / stain to enhance the look of the kennel and to make it match the color scheme of the rest of the furniture in your room.
Back-view-of-2-dog-kennel
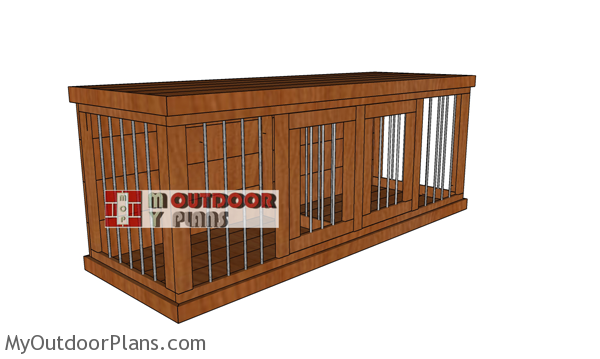
This dog kennel is easy to build and it can host 2 large dogs. Thus, this piece of furniture can make for an awesome TV stand or a coffee table. In addition, you can use a router to round the exposed edges.
Double-dog-kennel-plans
After assembling the dog kennel we recommend you to check if the components are locked together properly. Moreover, insert the galvanized screws properly, making sure they are at the same level with the wooden surface.
Top Tip: Don’t forget to cover the exterior of the kennel with wire and to lock it into place properly. Nevertheless, check all my dog house plans and projects. If you want to get PREMIUM PLANS for this project, in a PDF format, please press GET PDF PLANS button bellow. Thank you for the support.

This woodworking project was about dog kennel plans. If you want to see more outdoor plans, we recommend you to check out the rest of our step by step projects.
EXPLORE MORE IDEAS FOR:
 |
 |
 |
 |