This step by step diy project is about outdoor deck plans. Building an outdoor deck is a great project, as it will create a nice relaxation area for your family and it will most certainly add value to your property. When it comes to building a deck, the possibilities are limited only by your imagination and budget, so make sure you check the alternatives before choosing the plans.
We strongly recommend you to study the local codes before starting the project, as the legal requirements differ extensively. For example, you need to know the depth of the frost line, so to know how deep to dig the holes. In addition, you have to comply with basic rules, such as the distance you should leave between the joists or how to connect the ledger to the house. This requirements are a great starting point for your deck project, so make sure you use them when planning the constructions. See all my Premium Plans HERE.
Projects made from these plans
Cut & Shopping Lists
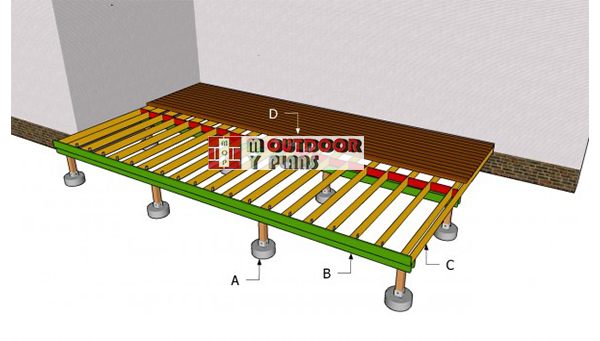
- A – 8 tube forms, 8 pieces of 4×4 lumber, 8 adjustable anchors POSTS
- B – 6 pieces of 2×6 lumber SUPPORT BEAMS
- C – 22 pieces of 2×6 lumber JOSTS
- D – 2×4 or 2×6 decking, 2 1/2” wood screws DECKING
Tools
![]() Hammer, Tape measure, Framing square
Hammer, Tape measure, Framing square
![]() Miter saw, Drill machinery, Screwdriver, Sander
Miter saw, Drill machinery, Screwdriver, Sander
Time
Related
- Part 1: Outdoor Deck Plans
- Part 2: Deck Framing Plans
- Part 3: Deck Stairs Plans
- Part 4: Deck Railing Plans
- Part 5: Deck Stair Railing Plans
Building an outdoor deck
Building-an-outdoor-deck
Building a deck attached to your house is complex project, as you need to pay attention to many aspects. First of all, you need to secure the ledger to the house tightly, as it has to bear a lot of weight. In addition, the girder boards should support the joists.
Top Tip: You should always adjust the size of the deck to your needs, but you can use the techniques described in this project. Always consult a professional before starting the project on your own.
Outdoor Deck Plans
Laying-out-the-deck-posts
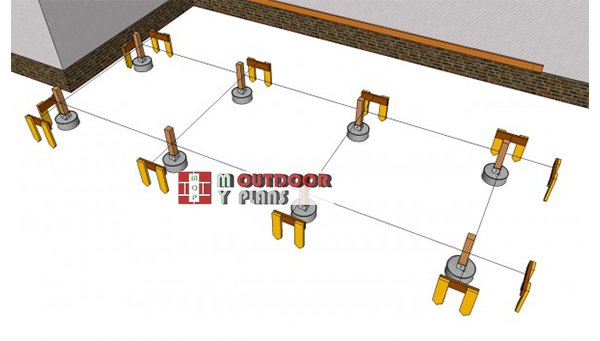
The first step of the project is to lay out the deck in a professional manner. Therefore, we strongly recommend you to use batter boards in string, in order to determine the location of the posts properly. Check if the corners are right-angled using a large L-square or by applying the well-know 3-4-5 rule to every corner.
Top Tip: Check if the diagonals are equal and adjust the batter boards and string, if necessary.
Securing the posts with braces
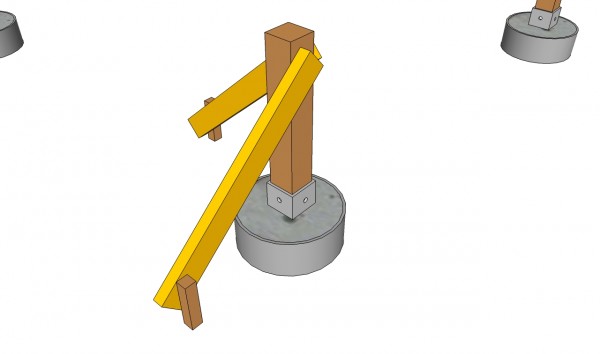
After laying out the outdoor deck, you should dig 2-3′ deep holes (according to the local building codes) and fit tubes forms. Compact a 2” layer of gravel on the bottom of the holes and fit the posts, if you want to set them into concrete.
Otherwise, fit a metal anchor in concrete and install the posts after the compound dries out. Plumb the posts with a spirit level and secure them temporarily with braces till fitting the decking boards.
Installing the ledger
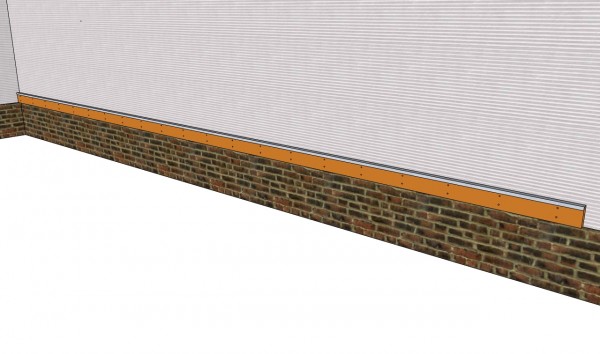
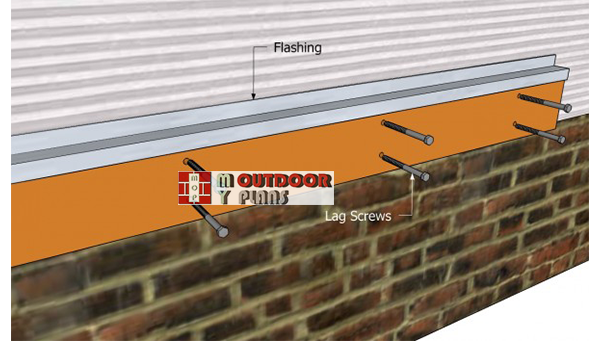
Next, you need to secure the ledger to the house. You could either attach it to masonry or to wood framing. The ledgers should bear a lot of weight, so make sure you should fasten them tightly.
Top Tip: The ledger transfers the weight to the foundation, so make sure you set it into place properly. Fit a metal flashing over the ledger, to protect it from water damage. Cut a level line where the top edge of the flashing will fit.
Attaching-the-ledger
In order to attach the ledger to masonry, drill pilot holes trough the beams and mark the locations to the wall. Next, drill holes for lag shields that are 1/4″ deeper that the length of the shields. Insert lag screws and washers.
Oppositely, if you attach the ledger to wood framing, make sure you do it the level of the floor frame. Use long lag screws and washers, as they have to pass 2” into the framing member.
Securing the girder to the posts
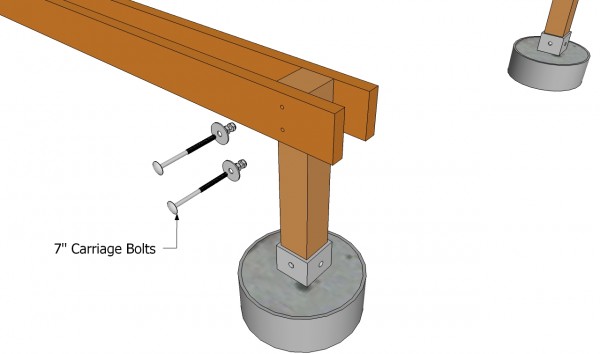
Afterwards, you should install the support beams to the posts, as in the plans. Therefore, clamp the 2×6 boards to 4×4 posts on both sides. Next, drill pilot holes trough all the components and insert 7″ carriage bolts. Place a level on the girder to check if is perfectly horizontal.
Top Tip: You could let the posts to run long, if you want to support railing or built-in benches. A proper planning should take all these aspects into account.
Outdoor deck framing
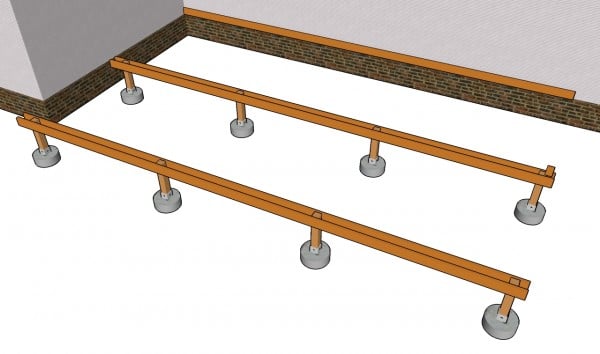
After fitting the ledger to the house, either to the concrete foundation or to the wood framing, and installing the girders, you can continue the project by installing the joists. Nevertheless, you should make sure the supports can bear the weight, if you want to get the job done as a professional.
Top Tip: Set another row of posts to the middle of the deck, if your deck is very wide, or if you want to provide extra-support to the construction.
This project was about outdoor deck plans. If you want to see more outdoor plans, we recommend you to check out the rest of the projects. Don’t forget to share our projects with your friends, by using the social media widgets.
<< Previous | Next >>
