This step by step diy woodworking project is about elevated deer stand roof plans. This project features instructions for building a gable roof for the elevated deer stand. You should also check the first part of this project to learn how to build the frame for the deer blind. Make sure you take a look over the rest of plans to see alternatives and more projects for your garden.
When buying the lumber, you should select the planks with great care, making sure they are straight and without any visible flaws (cracks, knots, twists, decay). Investing in cedar or other weather resistant lumber is a good idea, as it will pay off on the long run. Use a spirit level to plumb and align the components, before inserting the galvanized screws, otherwise the project won’t have a symmetrical look. If you have all the materials and tools required for the project, you could get the job done in about a day. See all my Premium Plans HERE.
Projects made from these plans
Elevated Deer Stand Roof Plans

Building-an-elevated-deer-stand
Cut & Shopping Lists
- K – 2 pieces of 3/4″ plywood – 42 1/4″x82″ long ROOF
- L – 60 sq ft of tar paper, 60 sq ft of asphalt shingles ROOFING
- M – 2 pieces of 3/4″ plywood – 14″x65″ long, 2 pieces – 15″x62″ long BLINDS
- N – 1 piece of 3/4″ plywood – 24″x34″ long, 2 pieces of 1×4 lumber – 25 1/2″ long, 2 pieces – 24″ long DOOR
- 2 pieces of 1×4 lumber – 8′
- 8 pieces of 3/4″ plywood – 4’x8′
- 1 1/4″ screws
- 1 5/8″ screws
- 2 1/2″ screws
- filler, stain
- glue
- 60 sq ft of tar paper
- 60 sq ft of asphalt shingles
- 10 small hinges
- 1 latch
Tools
![]() Hammer, Tape measure, Framing square, Level
Hammer, Tape measure, Framing square, Level
![]() Miter saw, Drill machinery, Screwdriver, Sander
Miter saw, Drill machinery, Screwdriver, Sander
Time
![]() One week
One week
How to build the roof an elevated deer stand
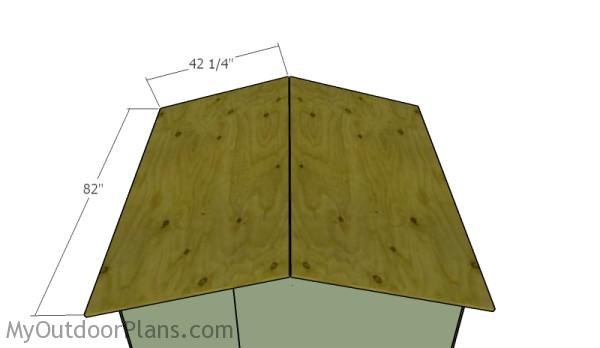
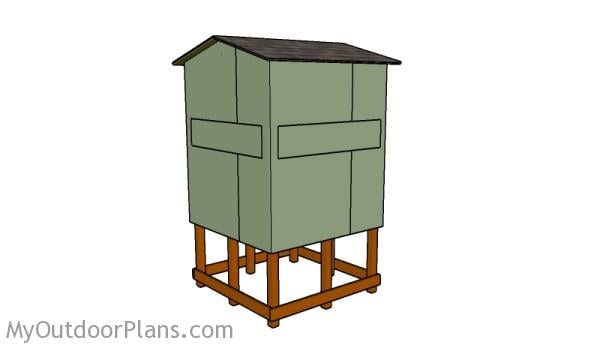
Attaching the roof sheets
Build the roof of the deer stand from 3/4″ plywood. Cut the sheets at the right dimensions and center them to the rafters. Use 1 5/8″ screws to secure the sheets into place, every 8″.
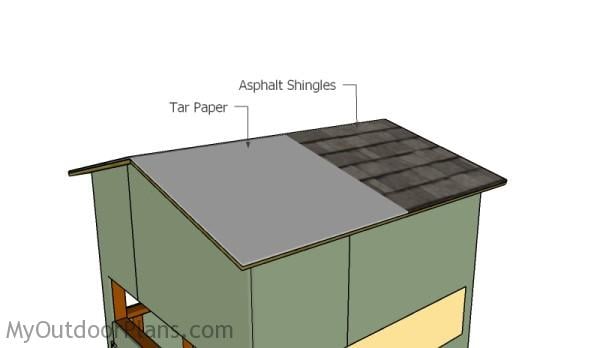
Laying the roofing
Cover the roof with tar paper. Use staples to secure the tar paper into place. Next, you should install asphalt shingles to the roof, starting from the bottom up to the top. Install a ridge cap to waterproof everything in a professional manner.
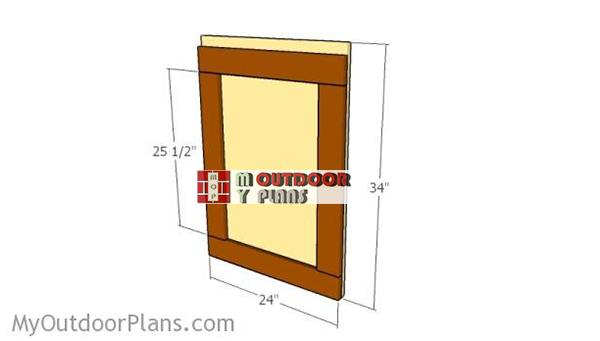
Building-the-door-for-deer-stand
Build the door from 1×4 lumber and 3/4″ plywood. Cut the plywood panel at 24″x34″ or you can use the piece that has been cut out when building the back wall. Attach 1×4 trims to the panel, as shown in the diagram. Use 1 5/8″ to lock the trims to the panel.
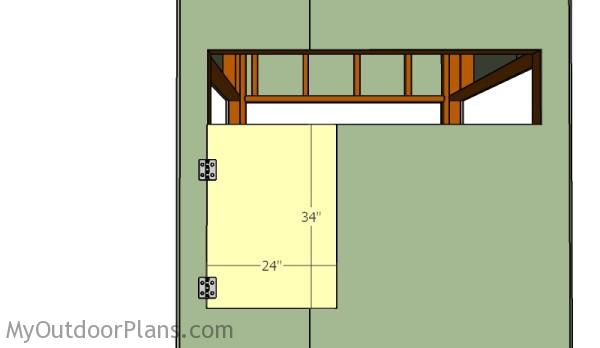
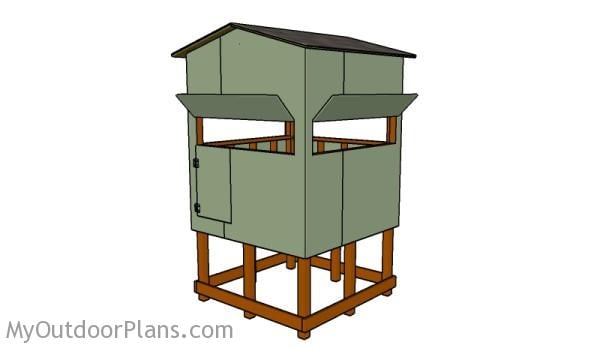
Fitting the door
Fit the door to the opening and lock it to the wall with hinges. Install a latch to keep it tightly closed.

Side blinds
Cut the window blinds from 3/4″ plywood. Fit the panels into place and secure them to the top edge with hinges.
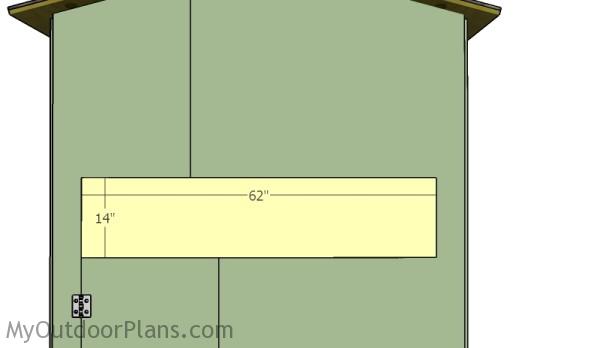
Front blind
Cut the window blinds for the front and back faces of the elevated deer blind. Use hinges to lock the sheets to the top of the edge of the opening.
Elevated deer stand plans
Now that you have assembled everything with attention, we recommend you to cover the exterior components with a few coats of paint.
Elevated Deer Blind Plans
This deer blind has a basic design and can be built by any person with common woodworking skills. You can adjust the dimensions of the deer box, while using the same techniques described in the plans.
Top Tip: Make sure you check out part 1 of this project, to learn more about how to build the frame of the elevated deer box.
This woodworking project was about elevated deer stand roof plans. If you want to see more outdoor plans, check out the rest of our step by step projects and follow the instructions to obtain a professional result.

EXPLORE MORE IDEAS FOR:
 |
 |
 |
 |
5 comments
These are really detailed directions, but can the wood, screws, nails, etc be ordered directly from you with the wood being labeled A, B, Cedric, etc? Sort of like when you buy a playhouse or something from Walmart?
Thanks.
That should say A, B, C, not Cedric.
I mention in the instructions where to use each screw.
Great plans. I modified the base and put it on blocks for stability. I also shortened them a bit.
Weekend project that actually took three weekends to complete.
Lots of deer and hog at the feeder, as well as a few mutant dinosaur raccoons.
Great plans that allowed me and a friend to sight out, have a cold one and wait for the animals.
Now if I can only keep the cows away from the feeder it will be gold.
This is a great plan. I went to print it as I like to hold paper in my hands and much easier when I go to build it. Would you mind sending the plans to my email? I would greatly appreciate it and btw…Great job!!