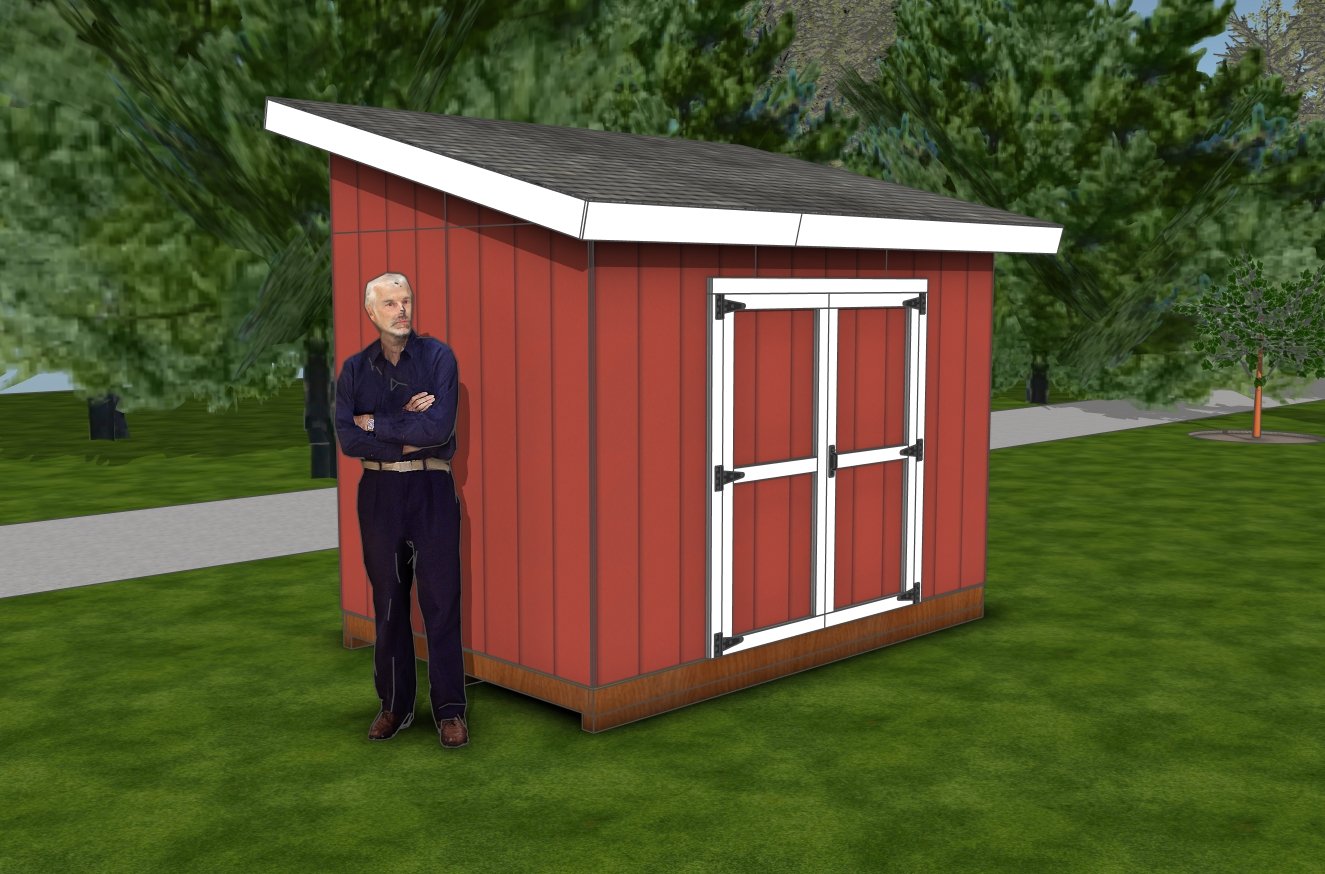
If you’re short on space but big on function, this 8×12 lean-to shed might be just what your backyard needs. It’s compact, clean-looking, and surprisingly roomy on the inside—perfect for stashing garden tools, a lawn mower, bikes, or even setting up a little weekend workshop. With a sloped roof, wide double doors, and durable T1-11 siding, this shed isn’t just about storage—it’s a solid, good-looking build that’ll stand up to the elements and turn heads while doing it.
I designed this shed to be beginner-friendly, but still tough enough to handle snow, wind, and anything else Mother Nature can dish out. Whether you’re building your first structure or just looking for a reliable storage solution, these plans will walk you through every step. So grab your tools, clear a spot in the yard, and let’s get to work—this lean-to shed is ready to earn its place on your property.
When buying the lumber, you should select the planks with great care, making sure they are straight and without any visible flaws (cracks, knots, twists, decay). Investing in cedar or other weather resistant lumber is a good idea, as it will pay off on the long run. Use a spirit level to plumb and align the components, before inserting the galvanized screws, otherwise the project won’t have a symmetrical look. If you have all the materials and tools required for the project, you could get the job done in about a day.
Projects made from these plans
Pin it for later!
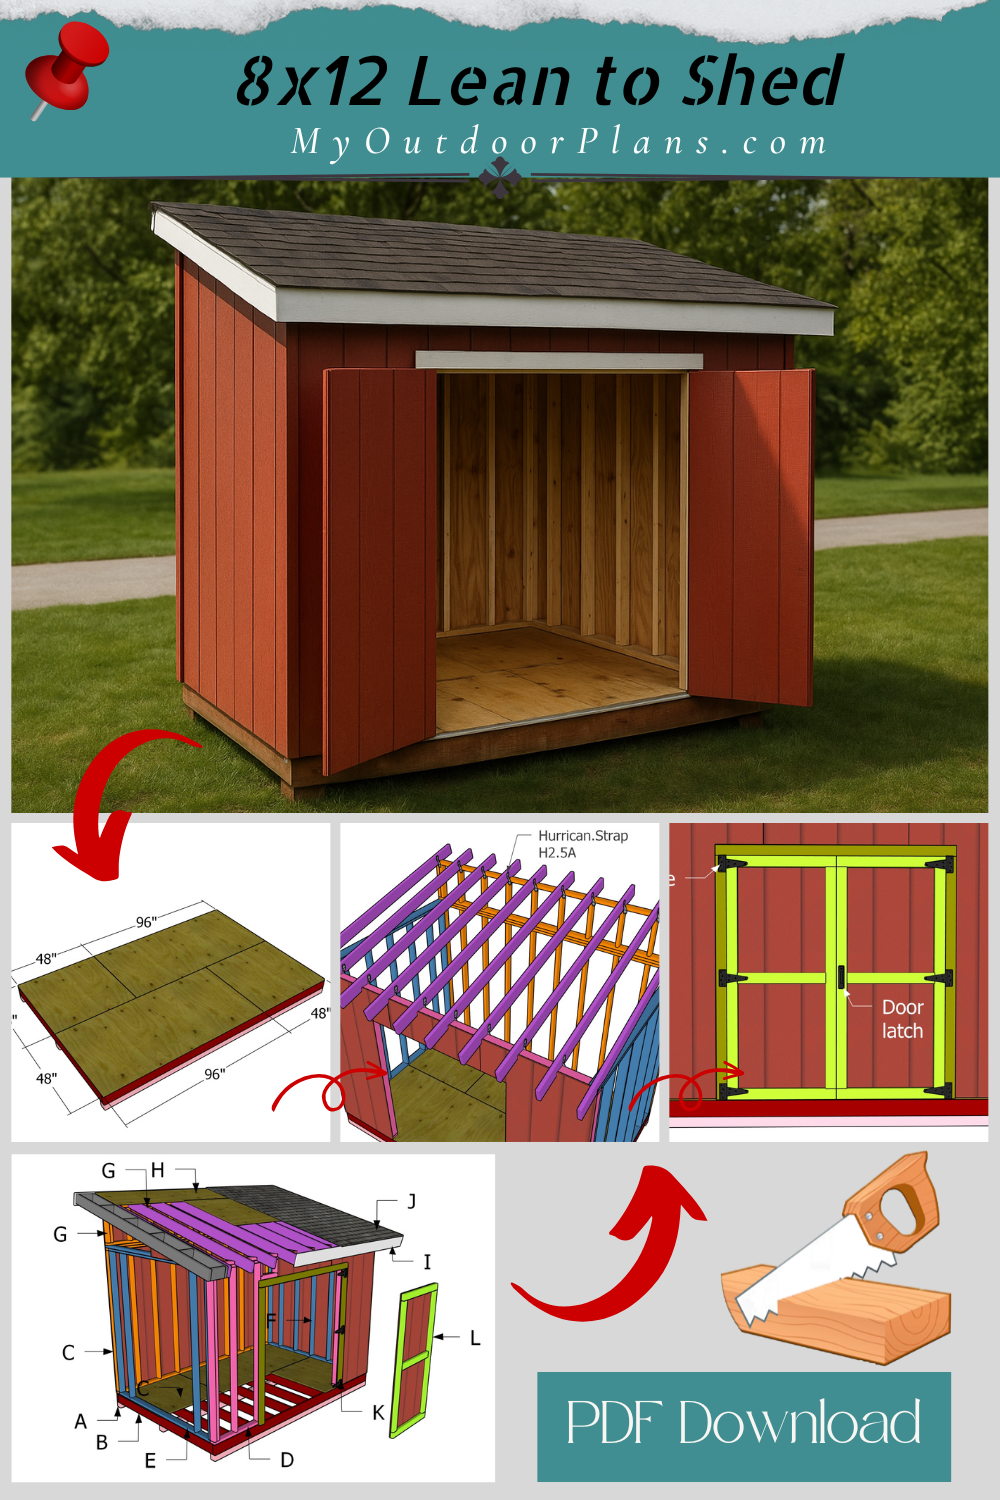
8×12 Lean to Shed – DIY Plans
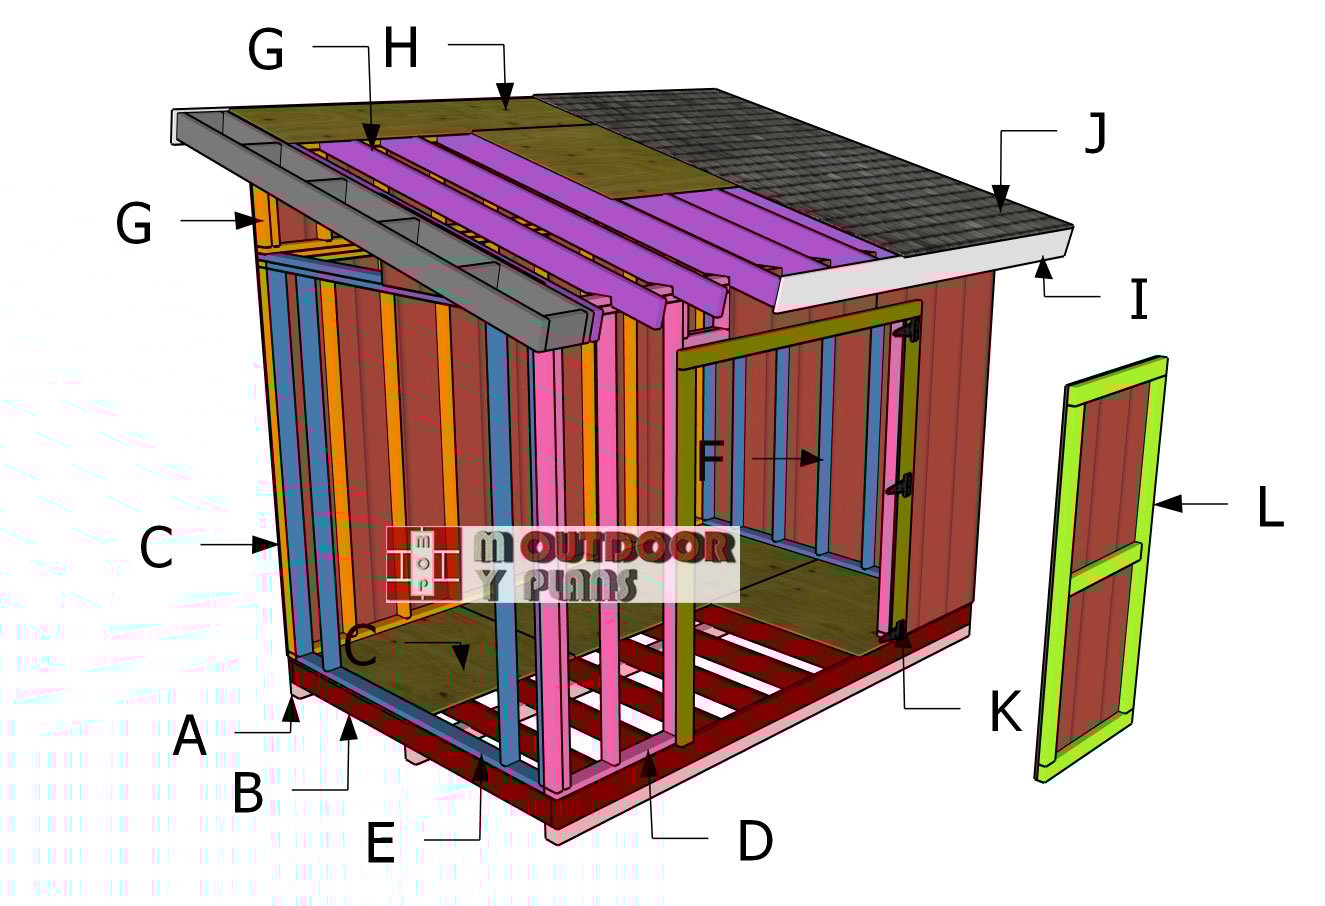
Building-a-8×12-lean-to-shed
Cut and Shopping Lists
Tools
![]() Hammer, Tape measure, Framing square, Level
Hammer, Tape measure, Framing square, Level
![]() Miter saw, Drill machinery, Screwdriver, Sander
Miter saw, Drill machinery, Screwdriver, Sander
![]() Safety Gloves, Safety Glasses
Safety Gloves, Safety Glasses
Time
![]() One week
One week
Related
It’s that easy to build a lean to shed!
Step 1: Building the shed floor

Building-the-floor-frame
Let’s kick things off with the floor frame—this is the foundation of your shed, so it’s gotta be rock solid. Start by cutting your 2x6s to length for the joists, then lay them out on a flat, level surface. Grab your drill and drive 3 1/2″ screws through the rim joists into the ends of each floor joist. Pre-drilling your holes helps keep the wood from splitting and makes everything go together cleaner.
Make sure to space your joists 16 inches on center—that spacing gives your floor the strength it needs. And don’t forget this handy trick: measure corner to corner across the frame. If both diagonals are the same, you’re square! If not, shift things a little until they match. Getting it square now will save you from a lot of frustration later on.
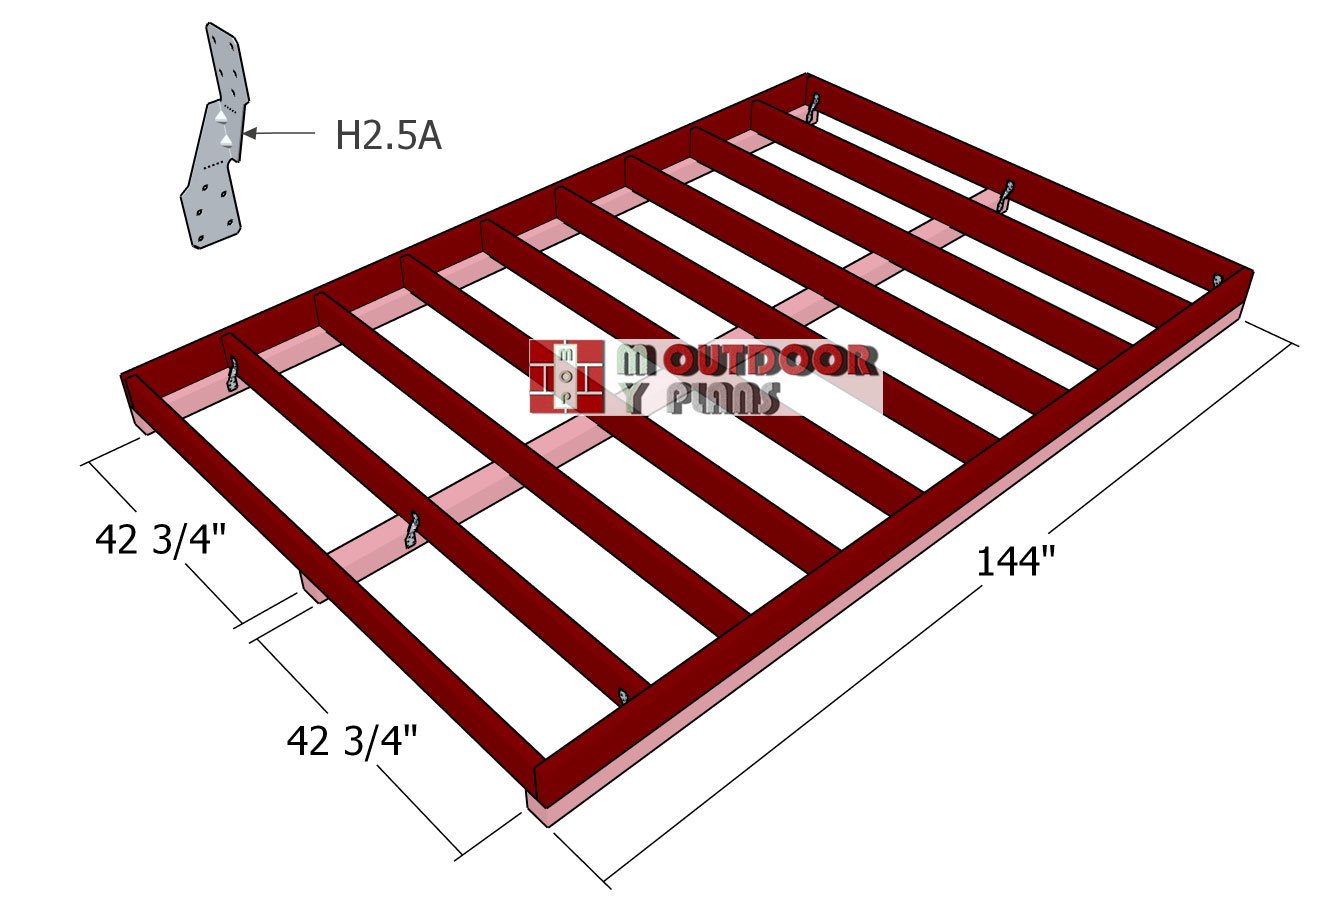
Installing-the-skids
Now that the floor frame’s done, let’s get it sitting on something sturdy—time to install the 4×4 skids. These babies are what keep your shed off the ground and help it stay put for the long haul. Slide the skids into position under the frame, making sure they line up just right with your layout.
To lock them in place, use rafter ties and 1 1/2″ structural screws—two ties per skid, one near each end. This setup keeps everything tight and secure, even when the weather gets wild. Take your time getting these aligned and fastened correctly. A solid foundation now means less maintenance (and no shifting) later!
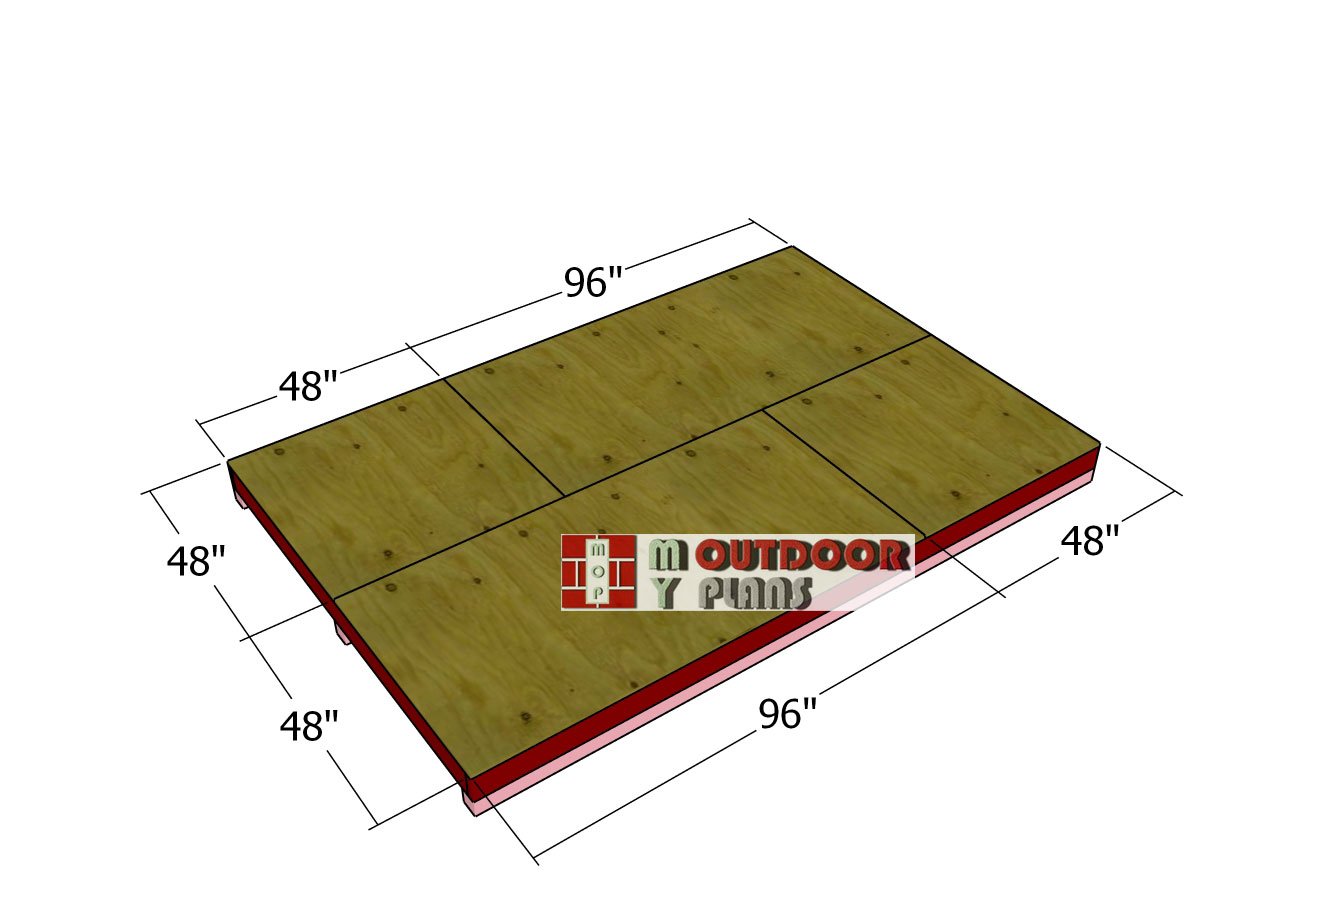
Fitting-the-floor-sheets
Alright, let’s get that floor decked out! Grab your 3/4″ plywood sheets and start laying them down on the floor frame. You want those edges nice and flush with the outside of the frame—no overhangs or gaps. Once everything’s lined up, go ahead and drive in 1 5/8″ screws, about every 8 inches along the joists.
This step ties the whole floor frame together and gives you a strong, smooth surface to build on. Take your time here and make it solid—because a sturdy floor means a sturdy shed.
Step 2: Building the shed wall frame
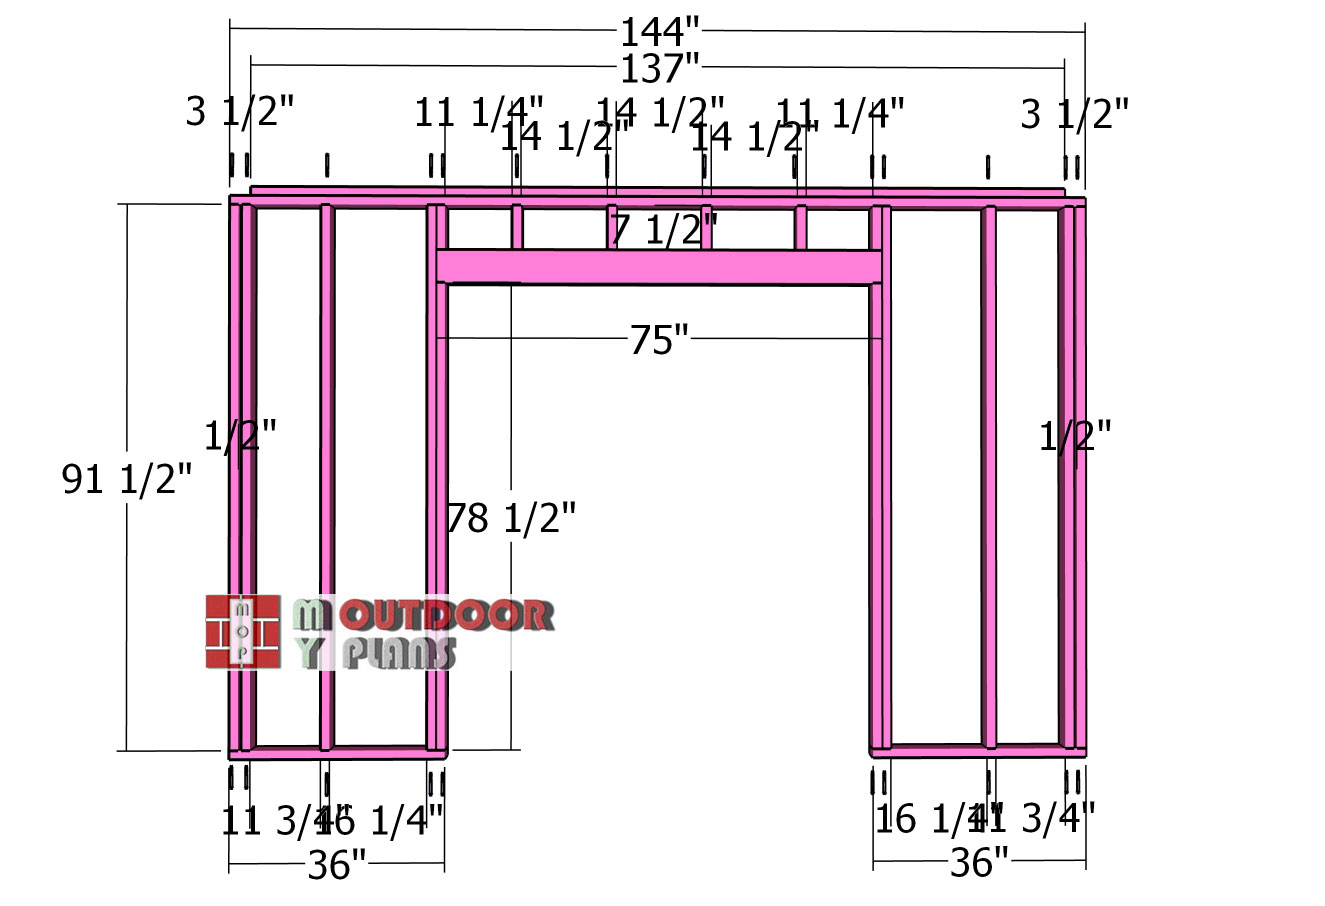
Front-wall-frame
Alright, let’s jump into building the wall frames—starting with the front wall. For this part, you’ll use 2x4s for your top and bottom plates and vertical studs, and 2x6s for the double header to give it that extra strength where it counts. Go ahead and drill pilot holes through the plates, then secure your studs using 3 1/2″ screws.
That’ll keep everything snug and square. You’ll notice a 1/2″ gap between the double studs—just cut and slide in some 1/2″ plywood spacers to keep those gaps even. Once the frame is built, drop your double header into place at the top and toenail it in using 12d nails. That header’s going to carry the load above your opening, so it’s worth doing it right.

Back-wall-frame
Now let’s knock out the opposite wall of your lean-to shed. Start by cutting your 2×4 studs and laying them out, spaced 16 inches on center—this keeps your structure strong and ready for anything. Just like before, drill pilot holes through the top and bottom plates, then attach the studs with 3 1/2″ screws to lock everything down tight.
You’ll have those 1/2″ gaps between the double studs again, so drop in some 1/2″ plywood spacers to keep it all nice and even. Once the wall frame is built, go ahead and add a double top plate. That’s going to tie the walls together and help spread the load evenly across the frame. With this wall done, you’re one step closer to a shed that’s built to last.

Side-wall-frame
Next up, let’s get those side walls built. Grab your 2x4s for the studs and plates, and lay everything out flat on a nice, level surface so you can keep things accurate. Drill pilot holes through the top and bottom plates, then drive in 3 1/2″ screws to secure each stud.
That gives you a strong, tight connection that’ll hold up over time. Keep your spacing consistent, and double-check for square as you go. Once both side walls are framed, you’ll be ready to start raising this shed into shape!
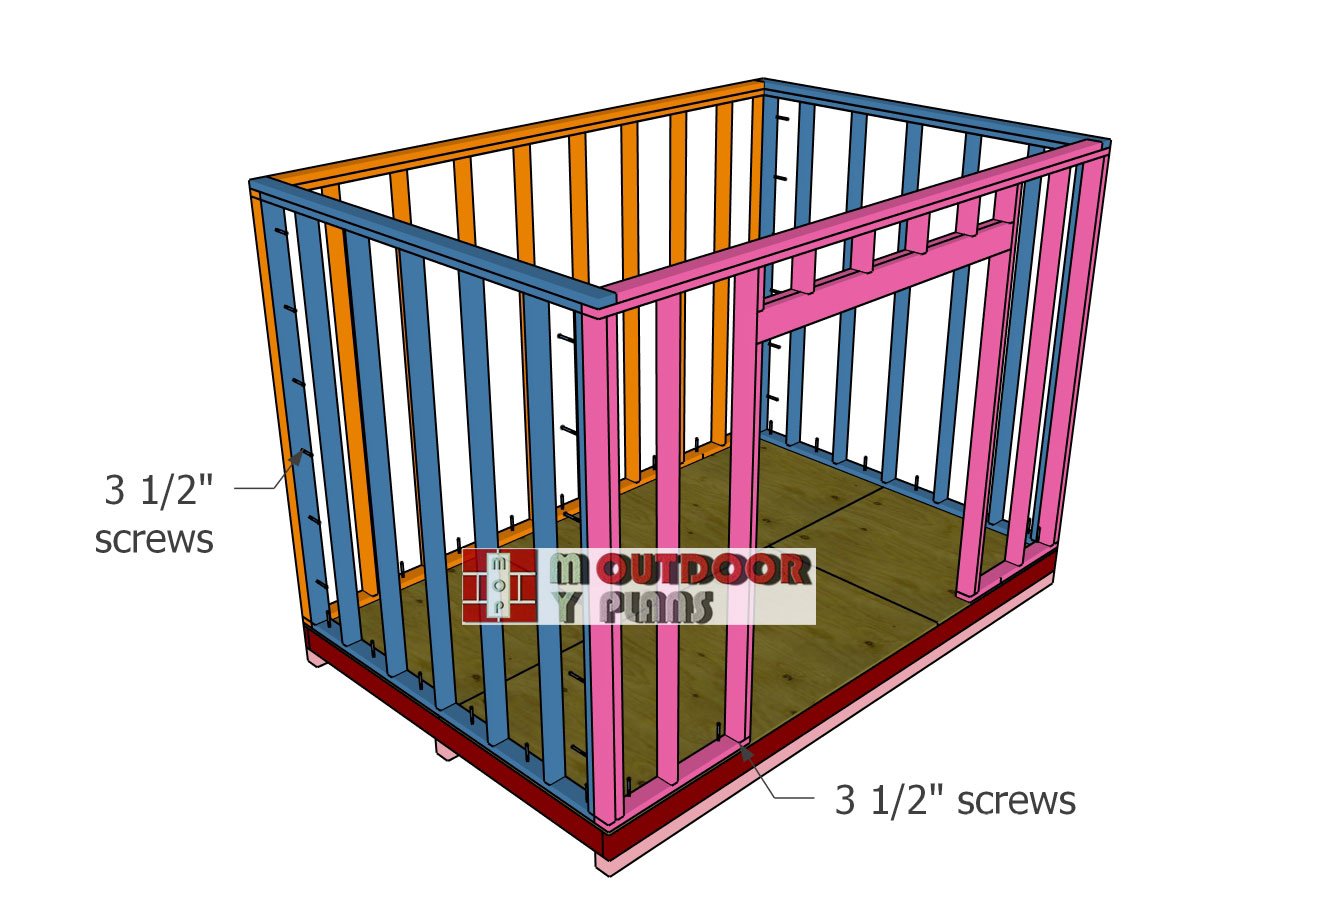
Assembling-the-shed-frame
Alright, time to stand those wall frames up! Start with the front and back walls—lay them down on the floor and align the edges so they’re flush with the base. Drill pilot holes through the bottom plates and drive in 3 1/2″ screws every 8 inches to lock them down tight. Next, bring in the side wall frames. Set them in place so the edges line up perfectly with the floor and the adjoining walls.
Take a few minutes here to double-check everything is square and sitting right—this is one of those times where a little patience pays off big. Once it’s all lined up, drill pilot holes through the plates and secure the side walls with 3 1/2″ screws, tying them into both the floor and the front/back walls. When it’s all screwed together, you’ve got a sturdy, rock-solid frame that’s built to last.
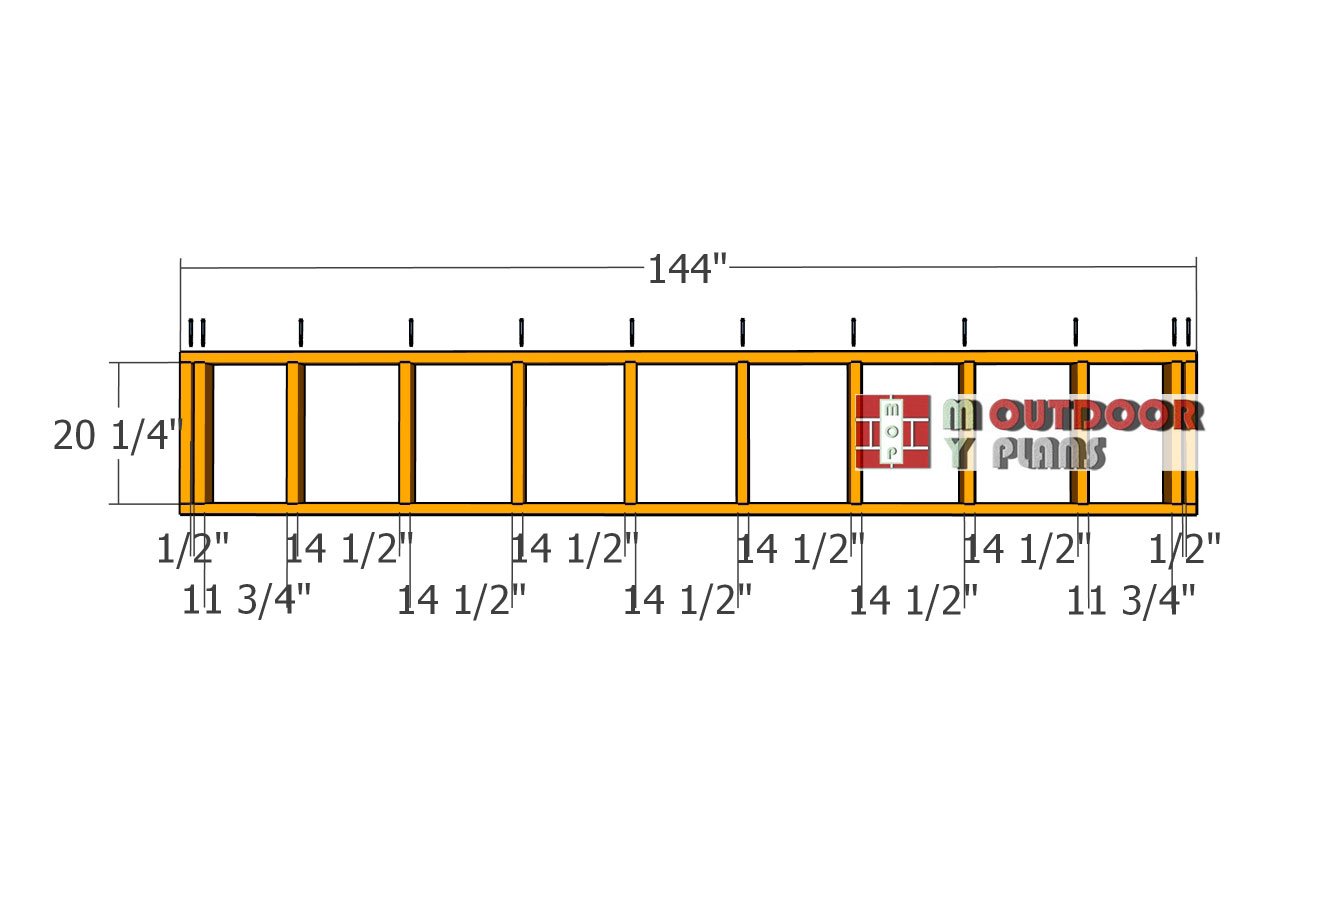
Top-wall-frame
Now let’s knock out the top wall frame for your lean-to shed. Use 2×4 lumber and cut all your pieces according to the diagram. Lay everything out on a flat surface and assemble the frame using 3 1/2″ screws—two screws per joint to keep it solid. Make sure your studs are spaced 16 inches on center for consistent support.
This top wall ties everything together and gives the shed its full height and slope for the roof. Built right, it’ll handle snow loads and strong winds without a problem. Take your time here—it’s the kind of step that sets the tone for a tough, long-lasting shed. This wall frame is for a 3:12 roof pitch.
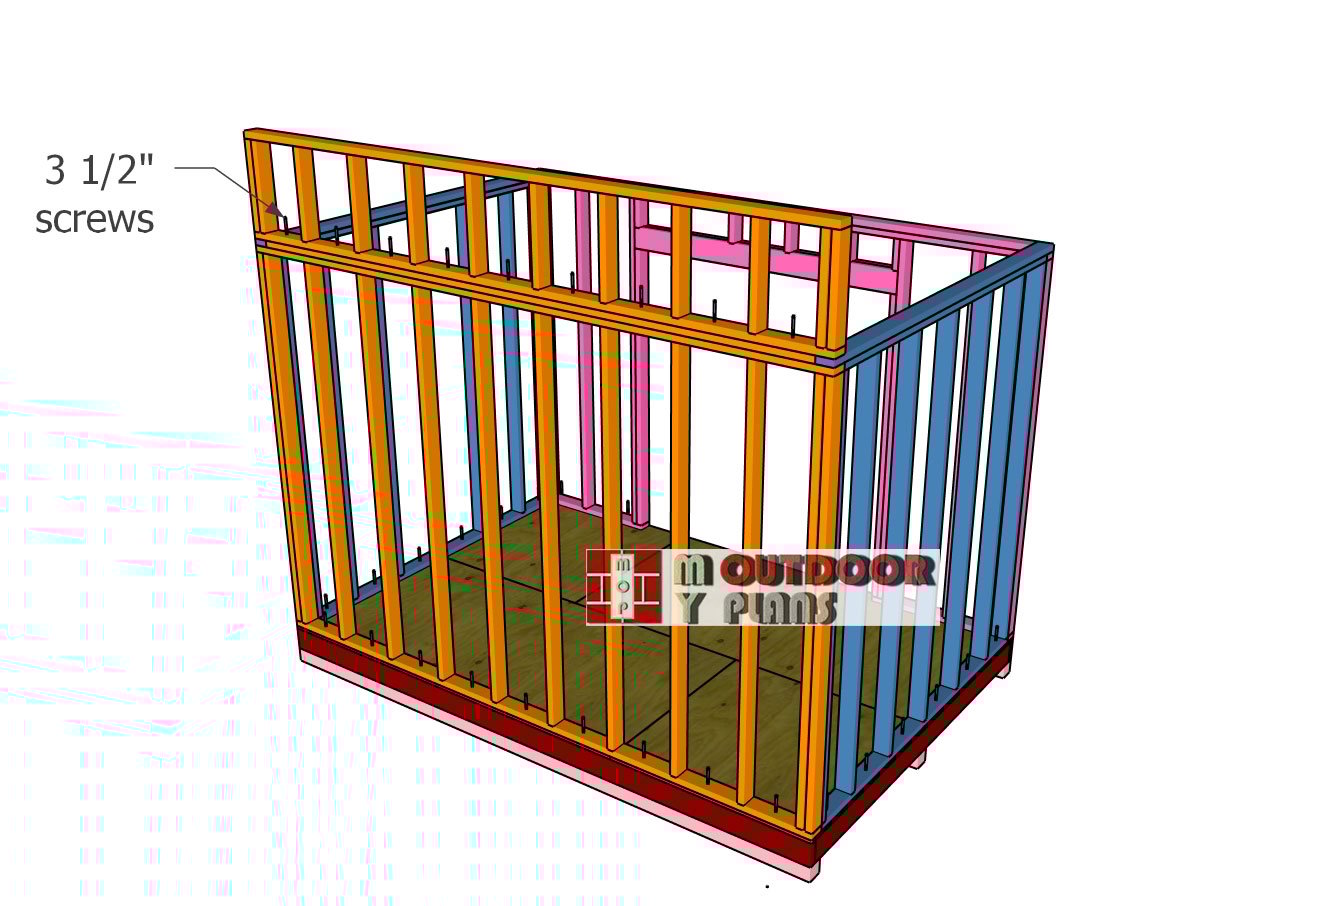
Fitting-the-top-wall-frame
Alright, time to get that top wall frame in place. Lift it up and set it on the back wall of the shed, making sure the edges are flush and everything is plumb. Once it’s lined up, drive 3 1/2″ screws every 8 inches to lock it down tight. Now if you want your roof to slope the other direction—front to back instead of back to front—you can totally flip the script and mount that top wall frame to the front instead. Either way works, just depends on how you want the water to shed and the look you’re going for.
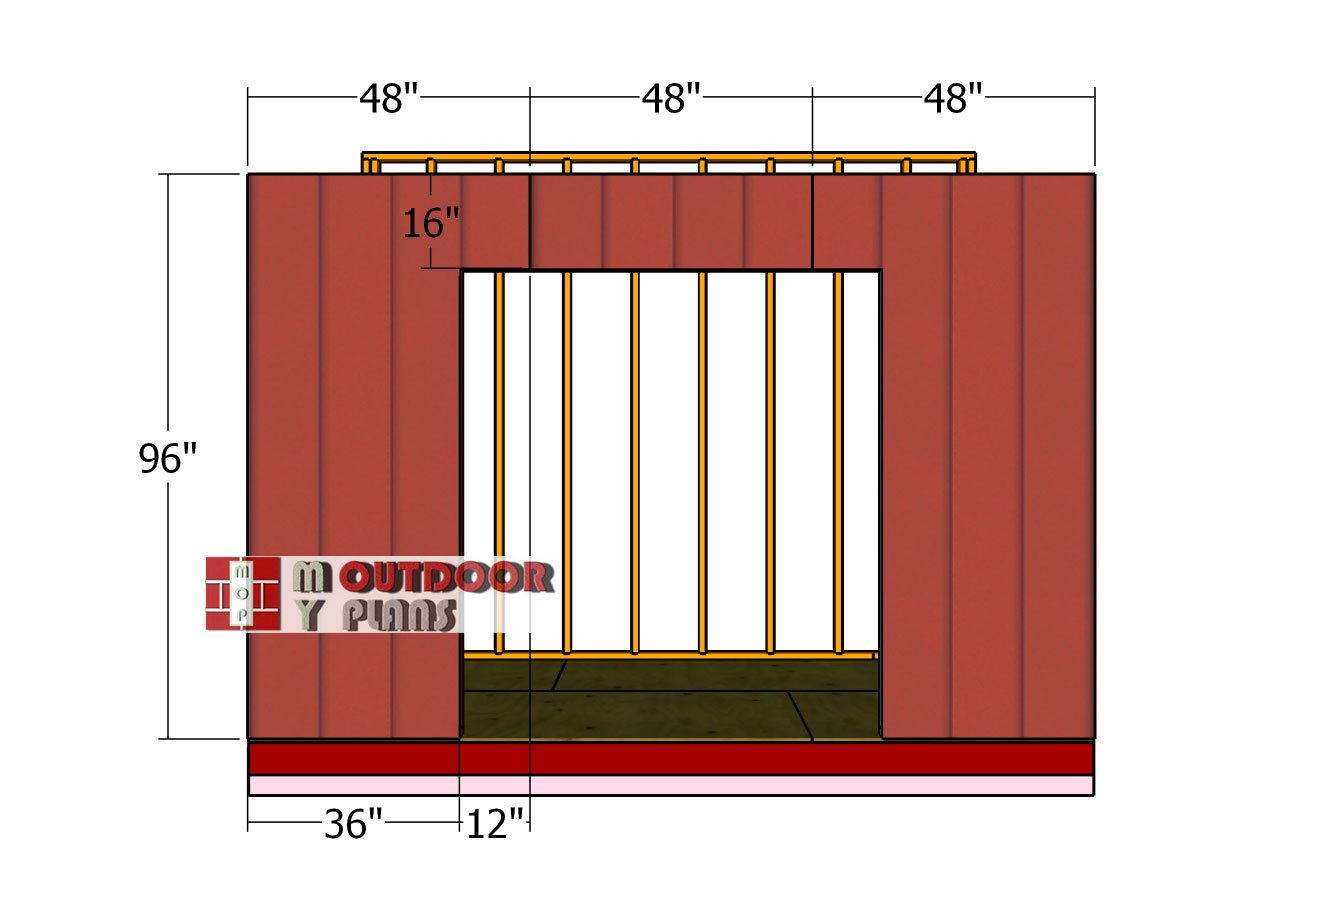
Front-wall-siding-sheets
Now let’s get the front wall sided up with T1-11 panels—and this part takes a little patience and precision. Start by measuring and cutting your sheets to size, making sure you account for the double 6-foot door opening. Line up the panels so the grooves flow nicely from one to the next for a clean, seamless look. Mark out the door opening directly on the siding, then grab your circular saw or jigsaw and carefully cut out that section—take your time to keep the edges nice and straight.
Once you’ve got your T1-11 panels cut and the door openings marked out, go ahead and line the sheets up with the edges of the wall frame. You want everything flush and square for that clean, professional look. Secure the panels using 1 5/8″ galvanized screws or 8d nails, spacing them about every 8 inches along the studs and plates.
Make sure the siding is sitting nice and flush around the door opening—that’s what’s going to give you a polished finish and help the doors blend right in. This step not only strengthens the front wall but also sets you up for doors that look like they were built right into the shed from the start.
Lean to Shed Plans – Small Storage Shed
How to build a 8×12 garden shed
Building this 8×12 lean-to shed is a straightforward project that most DIYers can knock out over a couple of weekends. If you’ve got some basic tools, a level work surface, and a little determination, you’re in great shape. The framing is simple, the roof is easy to assemble with standard cuts, and the overall design avoids anything too complex—making it ideal for both beginners and seasoned builders alike.
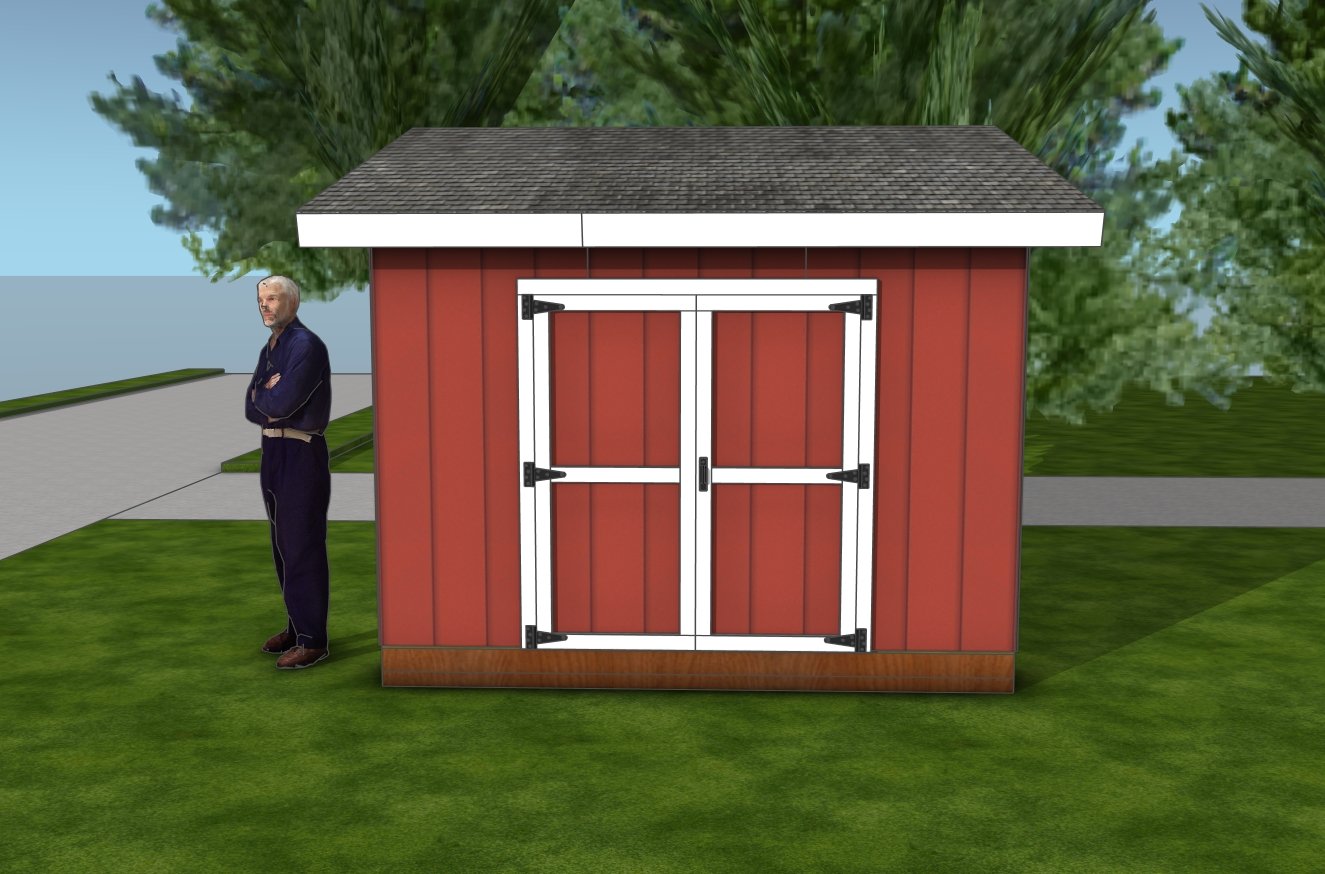
8×12 – Lean to shed plans
As for cost, you can expect to spend anywhere from $1,200 to $2,000, depending on lumber prices in your area, the type of roofing and siding you choose, and whether you already have materials like screws, paint, or felt on hand. It’s a solid investment for a shed that’s custom-built, durable, and tailored to your needs. And let’s be honest—there’s just something satisfying about standing back and saying, “Yep, I built that.”
The main structure of the shed is coming together. In Part 2, I will show you how to build the roof and install the front doors, completing the shed with a functional and weather-resistant design. Stay tuned for the next steps!
If you want to get Premium Plans, just press the GET PDF PLANS bellow. If you want to get the free version, please read the blog FAQs.

This woodworking project was about 8×12 lean to shed plans. If you want to see more outdoor plans, check out the rest of our step by step projects and follow the instructions to obtain a professional result.
