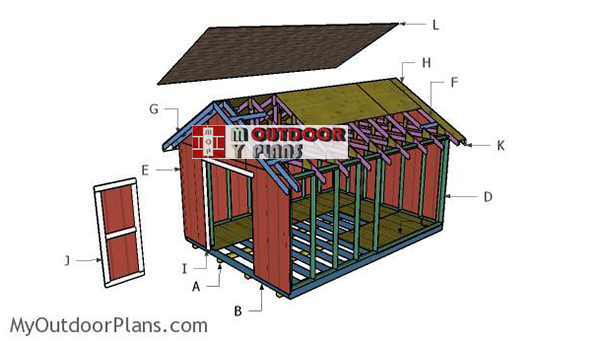
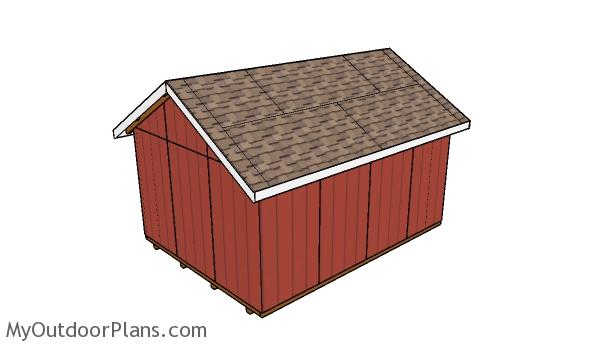
This step by step diy project is about 12×16 shed roof plans. This is PART 3 of the 12×16 storage shed, where I show you how to build the double front doors. Make sure you check out the first and second part of the project, so you learn how to build the frame of the shed, as well as the roof. You can easily adjust the size and the design of the doors, to suit your needs. Take a look over the rest of my woodworking plans, if you want to get more building inspiration. See all my Premium Plans HERE.
When buying the lumber, you should select the planks with great care, making sure they are straight and without any visible flaws (cracks, knots, twists, decay). Investing in cedar or other weather resistant lumber is a good idea, as it will pay off on the long run. Use a spirit level to plumb and align the components, before inserting the galvanized screws, otherwise the project won’t have a symmetrical look. If you have all the materials and tools required for the project, you could get the job done in about a day.
Projects made from these plans
12×16 Shed Double Door Plans
Building-a-12×16-shed
[tabs tab1=”Materials” tab2=”Tools” tab3=”Time” tab4=”Related Plans”] [tab id=1]
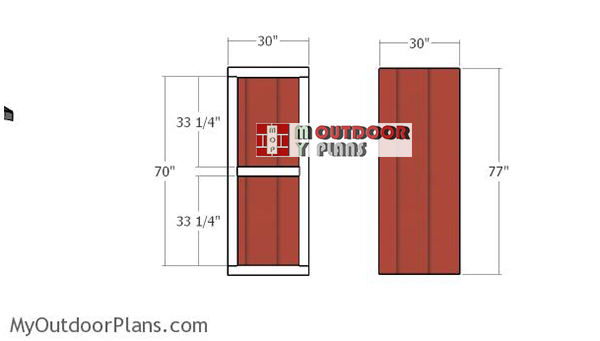
- I – 2 pieces of 1×4 lumber – 79 1/2″ long, 1 piece – 67″ long, 1 piece of 2×2 lumber – 60″ long JAMBS
- J – 2 pieces of 1×4 lumber – 70″long, 2 pieces – 30″ long, 1 piece – 23″ long, 1 piece of T1-11 – 30″x77″ 2xDOOR
- 8 pieces of 1×4 lumber – 8′
- 1 piece of 2×2 lumber – 6′
- door hinges and latch
- 8d nails, 2 1/2″ screws, 3 1/2″ screws, 1 5/8″ nails
- wood filler , wood glue, stain/paint
- shed accessories
[/tab] [tab id=2]
![]() Hammer, Tape measure, Framing square, Level
Hammer, Tape measure, Framing square, Level
![]() Miter saw, Drill machinery, Screwdriver, Sander
Miter saw, Drill machinery, Screwdriver, Sander
[/tab] [tab id=3]
![]() One day
One day
[/tab][tab id=4]
- PART 1: 12×16 Shed Plans
- PART 2: 12×16 Shed Roof Plans
- PART 3: 12×16 Shed door and Trims Plans
[/tab][/tabs]
Building double shed doors
Fitting the door stop
The first step of the project is to build the door stop for the 12×16 shed. Cut the door stop from 2×2 lumber and secure it to the top header with 2 1/2″ screws. Drill pilot holes through the lumber before inserting the screws, to prevent the wood from splitting.

Fitting-the-door-jambs
Fit 1×4 trims around the door opening. Cut the components at the right dimensions and secure the jambs into place with 1 5/8″ brad nails. Align the edges flush.
Building-the-shed-doors
Continue the project by assembling the double shed doors. Cut the frame of the 1×4 lumber at the right dimensions and lock them into place with 1 1/4″ nails and construction glue. Align the edges flush and make sure the corners are square.
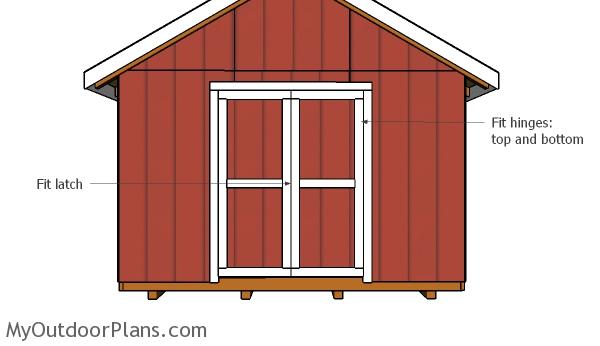
Fitting the doors
Fit the double shed doors to the opening and lock them to the jambs with hinges. In addition, install a latch to keep the doors shut.
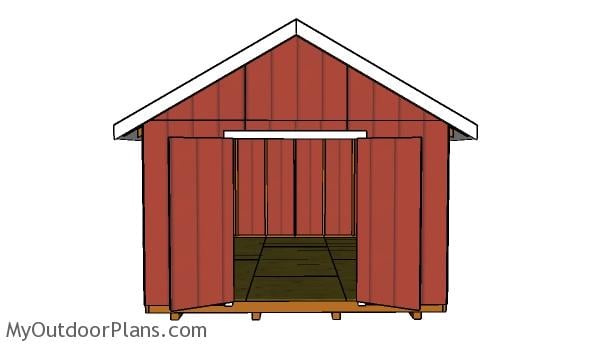
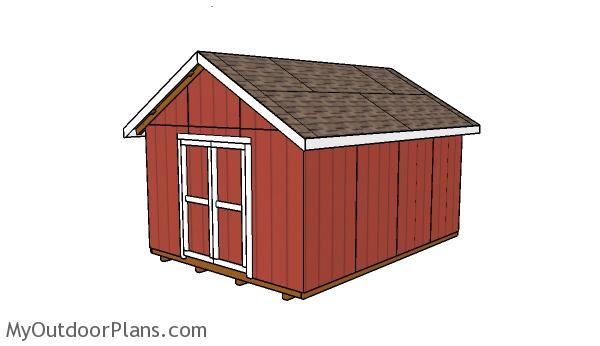
Front double doors
This 12×16 storage shed has a nice design and the wide front doors make it easy to have access. In addition, you can easily adjust the design of the shed and fit another door to the side wall.
Make sure you consider fitting decorative 1×4 trims to the corners of the shed and to the all sides, in order to enhance the look of the project. Moreover, fit the soffit and a vent to the shed. Apply a few coats of paint to enhance the look of the shed and to protect the surface from decay and water damage.
12×16 Shed Plans
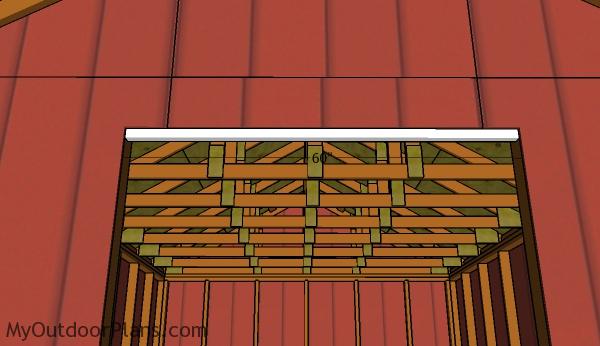
Make sure you check out the rest of the project, so you learn how to frame the 12×16 garden shed and how to build the gable roof. In addition, I have lots of other shed projects on the site so I recommend you to browse through all alternatives before starting the building project.
This woodworking project was about 12×16 double shed door plans free. If you want to see more outdoor plans, check out the rest of our step by step projects and follow the instructions to obtain a professional result.

4 comments
I built this shed based on your plans with a few exceptions. I did not cut a birds mouth on the trusses and let them sit on the top plate. I did use 6 inch lag bolts from Home Depot – Here is alink to some 4.5″ ones, but I used 6″: https://www.google.com/search?biw=1309&bih=670&tbm=shop&ei=P-EcXKuWKK2w_QaVzL2wBQ&q=home+depot+fastenmaster+bolts&oq=home+depot+fastenmaster+bolts&gs_l=psy-ab.3…51317.56674.0.57827.21.21.0.0.0.0.228.2037.15j5j1.21.0….0…1c.1.64.psy-ab..1.2.147…0j0i13k1.0.bdg4puvf2D4#spd=16164497424226348095 . This allowed me to adjust the trusses easier on the plate of needed. I also did not use T-111 as there were many negative comments on the T-111 sold today. I will install vinyl siding in the spring. I found your measurements to be accurate although I was off by 1/4 inch on the 16′ foot wall as the 16′ 2x6s for the floor were a bit long and I did not cut those which threw off my sheathing by a tiny bit. I used Advantech plywood on the floor as it was quite raining during construction (caution Advantech is not a full 4×8′). If I were to build another I would allow the plywood to go all the way to the overhangs for additional support of those and less chance of an uneven spot under your shingles. It would require either more cutting or modifying the truss locations so the full sheet lands on a truss. Thank you so much for you help.
Rick
Thank you for taking the time to share your experience. It is very useful. I would love to see your shed and feature it on the blog. You can send a few pics here: http://myoutdoorplans.com/contact/
How do I get these plans to my email so I can print them out?
You press the big FAQ-PRINT button on the blog. Here: https://myoutdoorplans.com/faq/