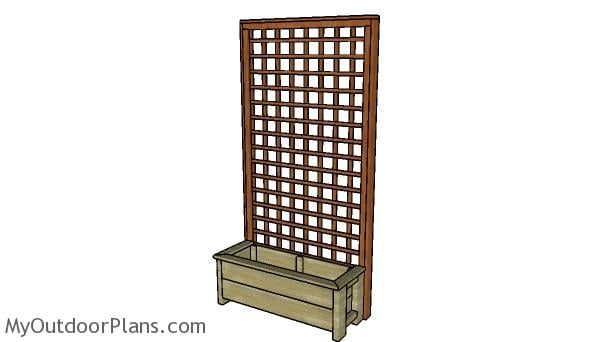
This step by step diy project is about planter box with trellis plans. I have designed this basic planter box with trellis so you can create a nice environment for your climbing plants. You can make adjustments to the plans so they suit your needs. Make sure you invest in weather resistant lumber, if the planter box will be exposed to the weather elements. Take a look over the rest of our woodworking plans, if you want to get more building inspiration.
When buying the lumber, you should select the planks with great care, making sure they are straight and without any visible flaws (cracks, knots, twists, decay). Investing in cedar or other weather resistant lumber is a good idea, as it will pay off on the long run. Use a spirit level to plumb and align the components, before inserting the galvanized screws, otherwise the project won’t have a symmetrical look. If you have all the materials and tools required for the project, you could get the job done in about a day. See all my Premium Plans HERE.
Projects made from these plans
Free Planter Box with Trellis Plans
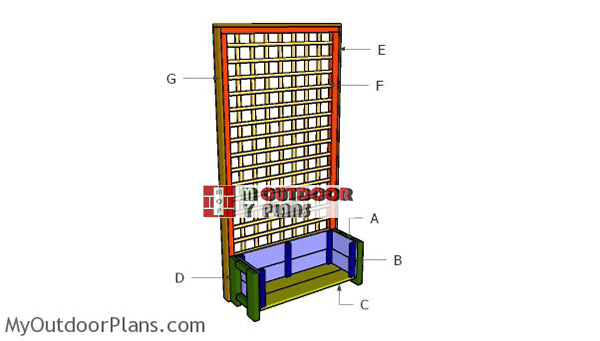
Building-a-planter-box
Cut & Shopping Lists
- A – 4 pieces of 1×6 lumber – 33″ long, 4 pieces – 11 1/4″ long BOX
- B – 2 pieces of 1×6 lumber – 31 1/2″ long BOTTOM
- C – 6 pieces of 1×2 lumber – 10 1/4″ long SUPPORTS
- D – 4 pieces of 2×4 lumber – 13″ long, 4 pieces of 2×2 lumber – 5 3/4″ long LEGS
- E – 2 pieces of 1×2 lumber – 70 1/2″ long, 1 piece – 36″ long 2xFRAME
- F – 16 pieces of 1×1 lumber – 36″ long, 7 pieces – 58 1/4″ long TRELLIS
- G – 2 pieces of 1×3 lumber – 72″ long, 1 piece – 37 1/2″ long, 1 piece – 36 1/2″ long, 2 pieces – 13 3/4″ long, 2 pieces of 1×2 lumber – 12 1/4″ long TRIMS
- 3 pieces of 1×6 lumber – 8′
- 6 piece of 1×2 lumber – 8′
- 1 piece of 2×4 lumber – 6′
- 1 piece of 2×2 lumber – 4′
- 15 pieces of 1×1 lumber – 6
- 3 pieces of 1×3 lumber – 8′
- 1 1/4″ screws
- 1 5/8″ screws
- 2 1/2″ screws
- 3 1/2″ screws
- 2″ brad nails
- wood glue, stain/paint
- wood filler
- landscape fabric
Tools
![]() Hammer, Tape measure, Framing square, Level
Hammer, Tape measure, Framing square, Level
![]() Miter saw, Drill machinery, Screwdriver, Sander
Miter saw, Drill machinery, Screwdriver, Sander
Time
Related
How to build a planter box with trellis
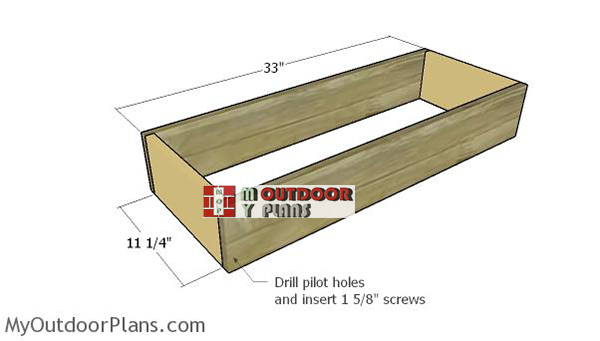
Assembling-the-box-for-the-planters
The first step of the project is to build the boxes for the planter with trellis. Cut the 1×6 slats at the right dimensions and then lock them together tightly, as shown in the diagram. Make sure you align the edges with attention and check if the corners are square.
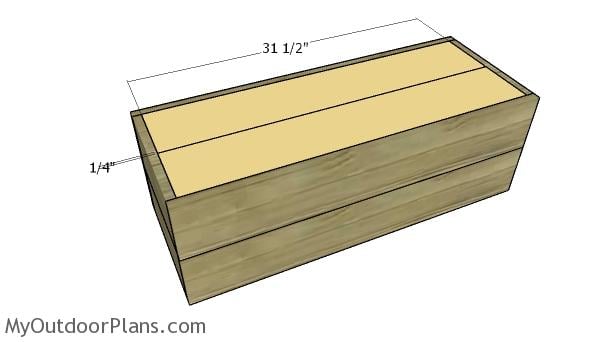
Attaching the bottom slats
Use 1×6 lumber for the bottom of the planter box. Cut the components at the right dimensions and then fit them to the box. Drill pilot holes through the box and insert 1 15/8″ screws into the bottom slats.
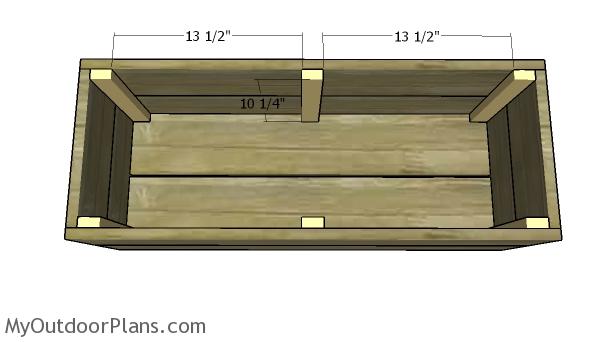
Fitting the supports to the planter box
Continue the outdoor project by attaching the 1×2 supports to the interior of the box. Use 1 1/4″ screws to secure the boxes together tightly. Make sure there are no gaps between the slats, so you get a professional result.
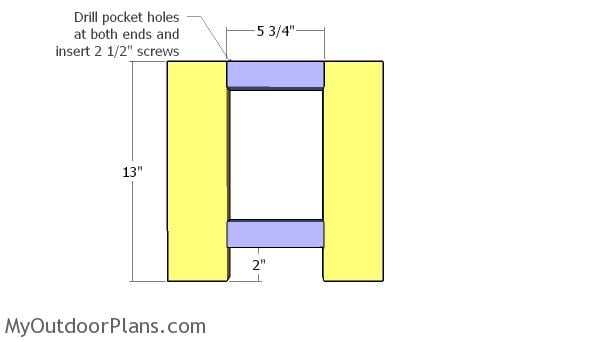
Assembling the legs
Use 2×4 lumber for the legs and 2×2 lumber for the side trims. Drill pocket holes at both ends of the trims and then insert 2 1/2″ screws into the legs. Make sure the edges are flush and add glue to the joints.
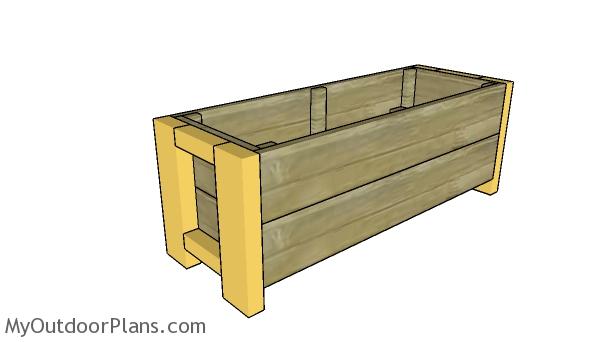
Fitting the legs to the planter box
Add the legs to the sides of the planter boxes. Align the edges with attention and add glue to the joints. Add glue to the joints, drill pilot holes and insert 2 1/2″ screws to lock everything together tightly.
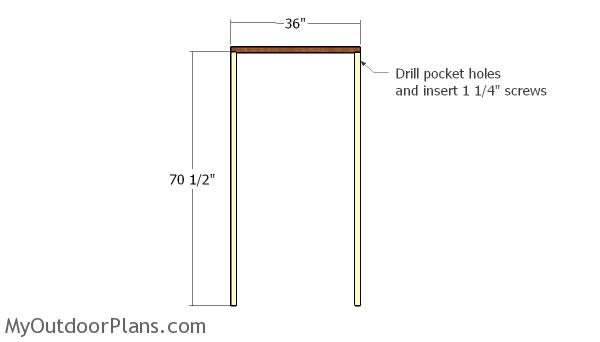
Trellis frame
The next step of the project is to build the back trellis. Therefore, you need to start by assembling the U-shaped frames. Cut the components for the frame from 1×2 lumber. Drill pocket holes at both ends of the vertical components and insert 1 1/4″ screws to assemble everything together tightly. Make sure the corners are square.
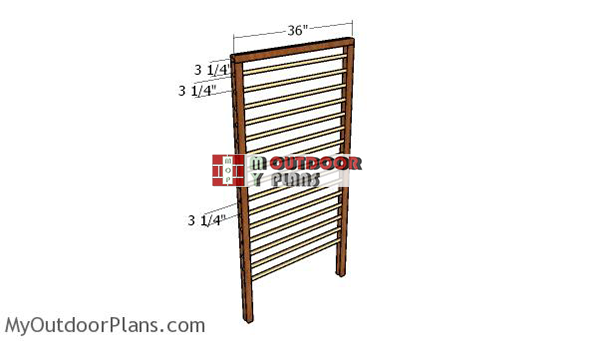
Building-the-wood-trellis
The next step of the project is to assemble the trellis. As you can see in the diagram, you need to sandwich 1×1 strips between the two frames. Use a brad nailer to secure everything together tightly. Add glue to enhance the bond of the components. You can adjust the distance between the strips, to suit your needs.
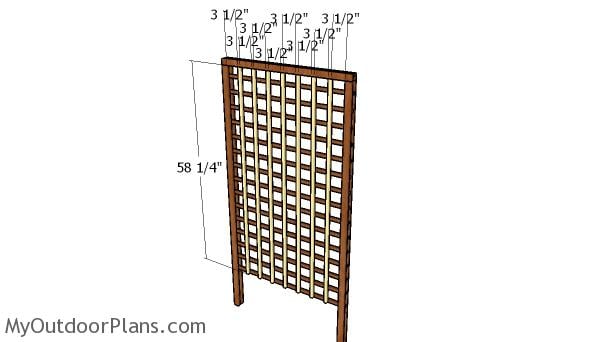
Building the trellis
Attach the perpendicular strips to the back of the trellis, as shown in the diagram. Use 1 1/4″ brad nails to secure them into place. Use a 3 1/2″ spacer between the trellis so you can create even gaps.
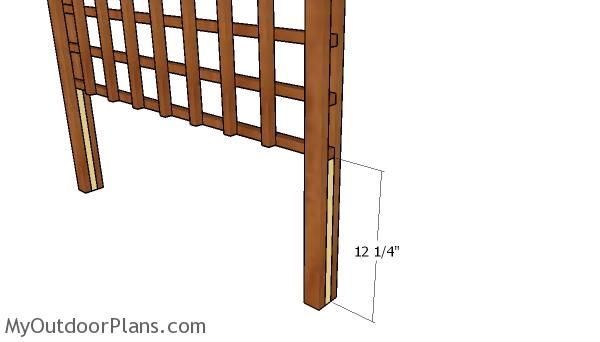
Fitting the trellis blocking
Fit the 1×2 blockings to the bottom of the trellis. Add glue to the joints and align the edges with attention.
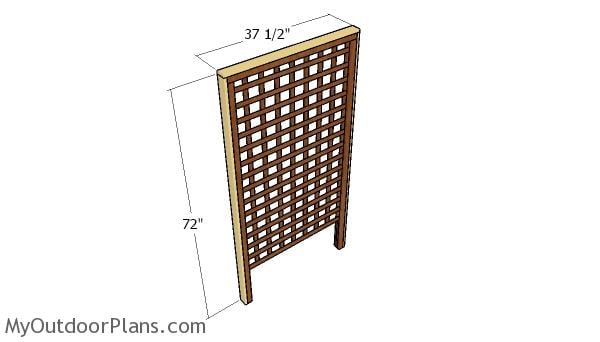
Fitting the trellis trims
Fit the 1×3 trims to the exterior of the trellis. Align the edges with attention and use 2″ nails to secure them into place.
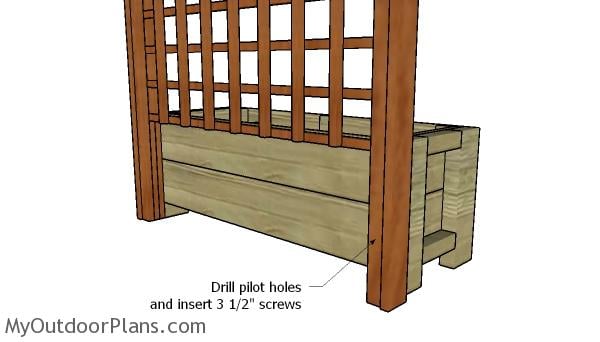
Attaching the trellis to the back of the planter box
Fit the trellis to the back of the planter box and make sure the edges are flush. Plumb everything with attention, drill pilot holes and then insert 3 1/2″ screws to secure the trellis to the planter box.
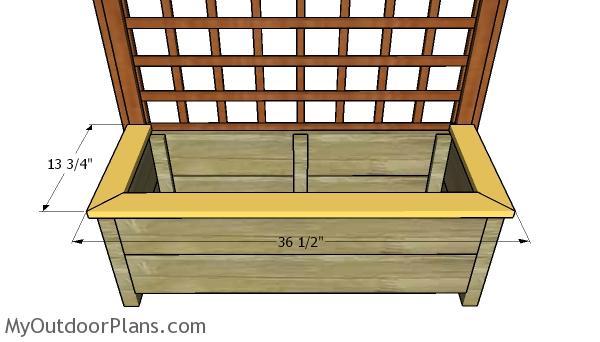
Top trims
Last but not least, you could attach 1×3 trims to the top of the planter box. Use a miter saw to make the 45 degree cuts where the trims join together and then install them into place with 2″ nails.

Planter box with trellis plans – Back view
Last but not least, you need to take care of the finishing touches. Therefore, make sure you fill the holes and the dents with wood putty. Smooth the surface with 120-220 grit sandpaper and then apply a few coats of paint or stain. The best way to do that is before attaching the trellis to the planter box, so you have access to all areas.
Planter box with trellis plans
You should take a look over the rest of my planter plans HERE. Moreover, you need to browse through all my free woodworking plans HERE (I have more than 1000 free plans).
This woodworking project was about planter box with trellis plans free. If you want to see more outdoor plans, check out the rest of our step by step projects and follow the instructions to obtain a professional result. Feel free to SHARE this project with your friends, using the social media widgets!

2 comments
I have been sent to your website by Google. Very good site with loads of information. However, you need to have a look at the address above, as some of your coding is being shown, for example [/tab] [/tabs]
I do not mean to be the barer of bad news, but if you are not informed you will never find out.
AndyB
I am aware of the issue. It happens, it’s due to updating WordPress themes and plugins.