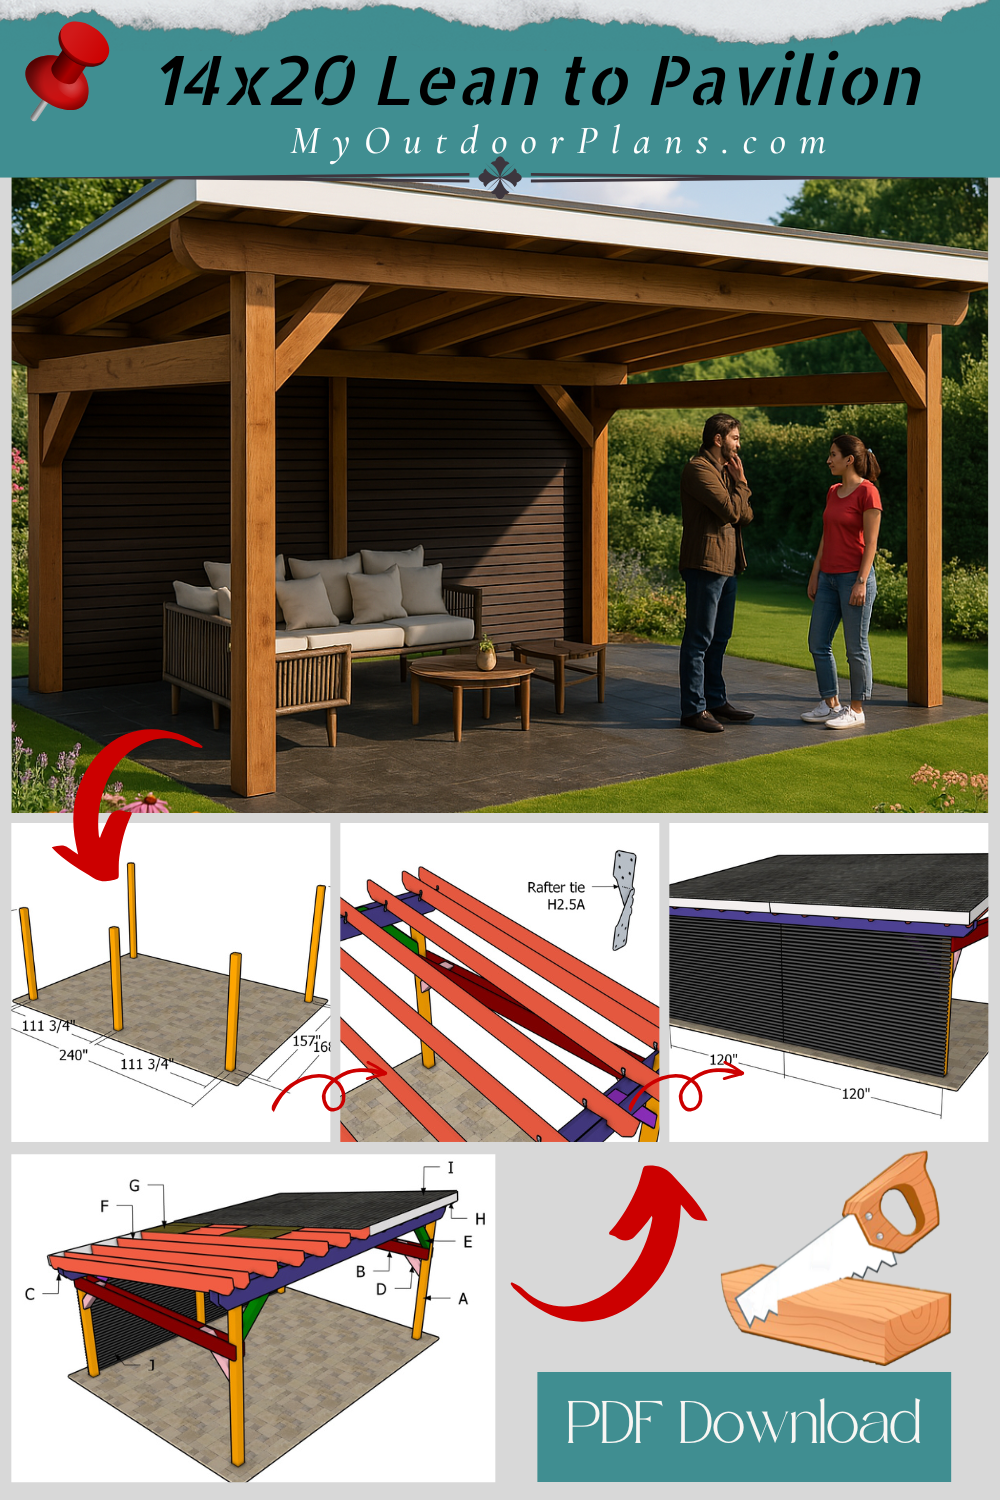
The 14×20 modern lean-to pavilion is the ultimate outdoor structure for adding style, function, and shelter to your backyard. With its clean lines, open layout, and contemporary lean-to roof design, this pavilion blends beautifully with any home while providing a comfortable, shaded space for relaxing, dining, or entertaining. Whether you’re hosting weekend cookouts or creating a peaceful retreat, this build brings structure and elegance to your outdoor living area.
Built on a sturdy frame of 6×6 posts and reinforced with 2×10 rafters, this pavilion is designed to stand strong against the elements. The sloped roof not only adds visual appeal but also promotes efficient water drainage, keeping the space dry and usable year-round. In this tutorial, I’ll walk you through every step of the process—from digging the post holes to installing the final trim—so you can confidently build a pavilion that looks great and lasts for years to come.
When buying the lumber, you should select the planks with great care, making sure they are straight and without any visible flaws (cracks, knots, twists, decay). Investing in cedar or other weather resistant lumber is a good idea, as it will pay off on the long run. Use a spirit level to plumb and align the components, before inserting the galvanized screws, otherwise the project won’t have a symmetrical look. If you have all the materials and tools required for the project, you could get the job done in about a day.
Projects made from these plans
Pin it for later!
Building a Modern 14×20 Lean to Carport
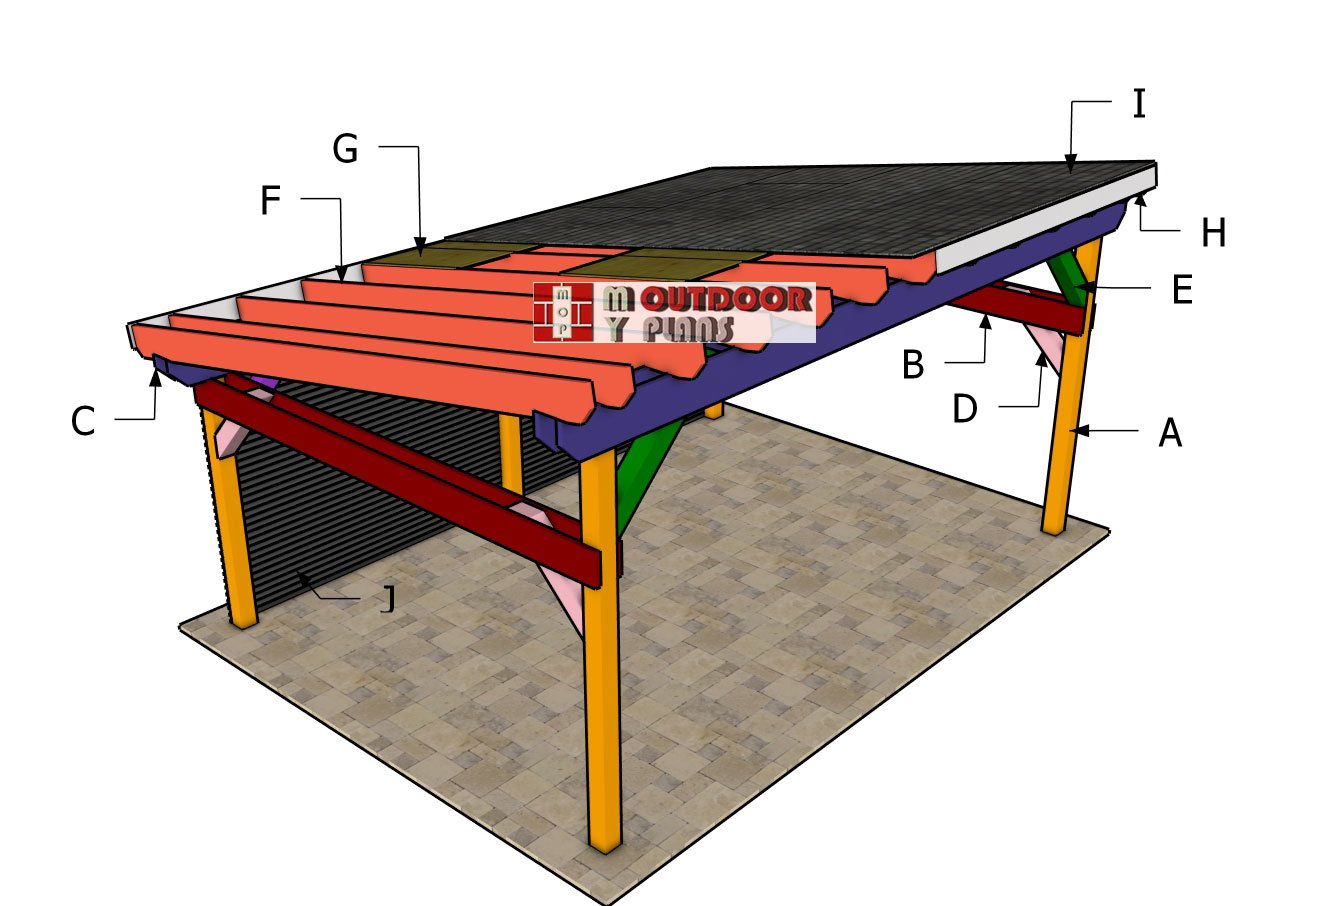
Building-a-14×20-lean-to-pavilion
Cut & Shopping Lists
Tools
![]() Hammer, Tape measure, Framing square, Level
Hammer, Tape measure, Framing square, Level
![]() Miter saw, Drill machinery, Screwdriver, Sander
Miter saw, Drill machinery, Screwdriver, Sander
![]() Post hole digger, Concrete mixer
Post hole digger, Concrete mixer
![]() Safety Gloves, Safety Glasses
Safety Gloves, Safety Glasses
Time
Related
- 16×24 run in shed plans
- 18×20 lean pavilion plans
- PART 1: 14×20 lean to pavilion plans
- PART 2: 14×20 lean to pavilion roof plans
It’s that easy to build a lean to pavilion!
STEP 1: Fitting the posts
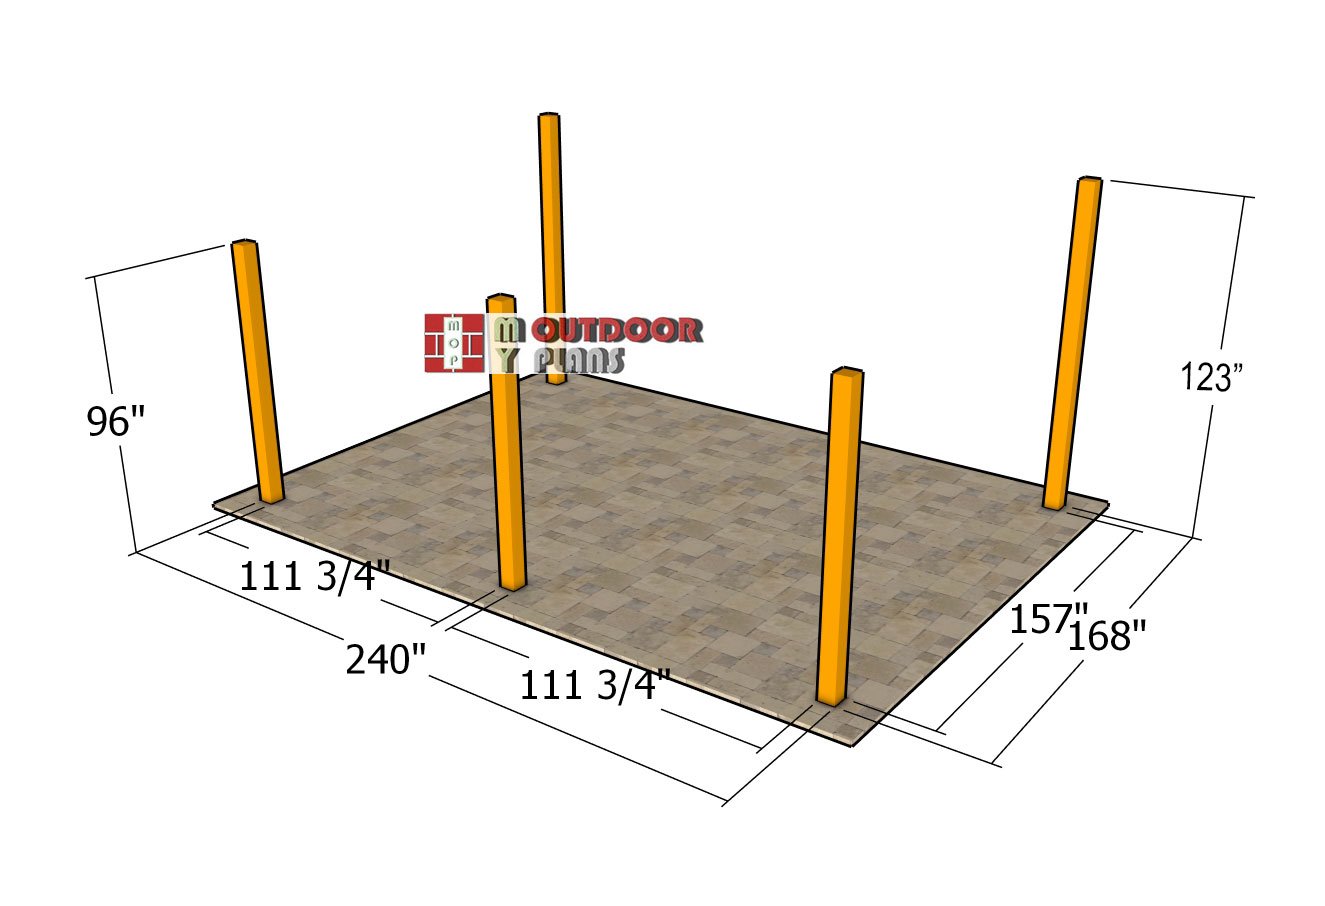
Layout—14×20-lean-to-pavilion
This layout diagram provides the exact distances between each post, giving you a full overview of the spacing as you position the posts and base plate for the pavilion. This detailed plan ensures precision, helping you build a strong and perfectly aligned frame. With this clear visual guide, you can be confident that every measurement and position is spot-on for a sturdy and polished final structure.
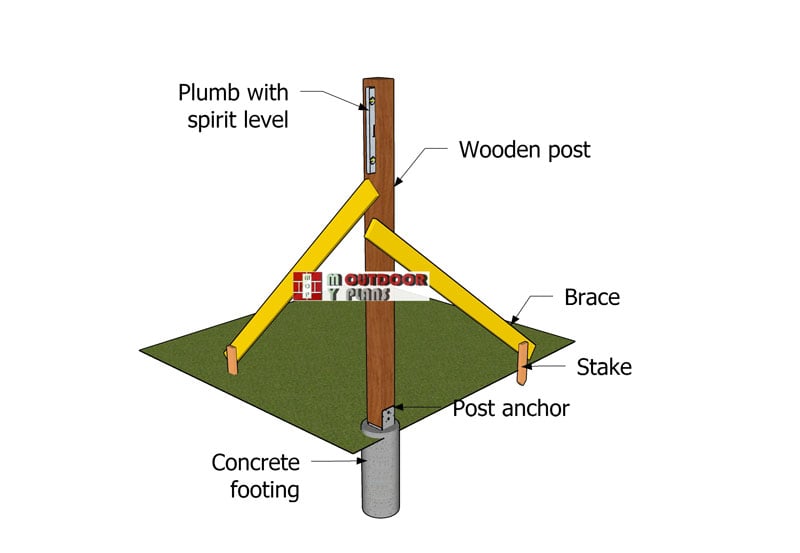
Setting-the-posts
Once your post locations are marked, dig holes that are 3 feet deep and about 14 inches wide. Drop a concrete tube form into each hole and fill them up with concrete. While the mix is still wet, set your post anchors in place—take your time here to make sure they’re perfectly aligned. Getting this part right will save you headaches down the road.
After the concrete has fully cured, it’s time to install the posts. Set each post into its anchor, checking with a level to make sure it’s perfectly plumb. Use 2×4 braces to hold them steady while you work. Then, drive in lag screws through the anchors to lock the posts in for good. This gives you a solid, square foundation—ready to support the rest of the build.
STEP 2: Attaching the beams
Top-beams
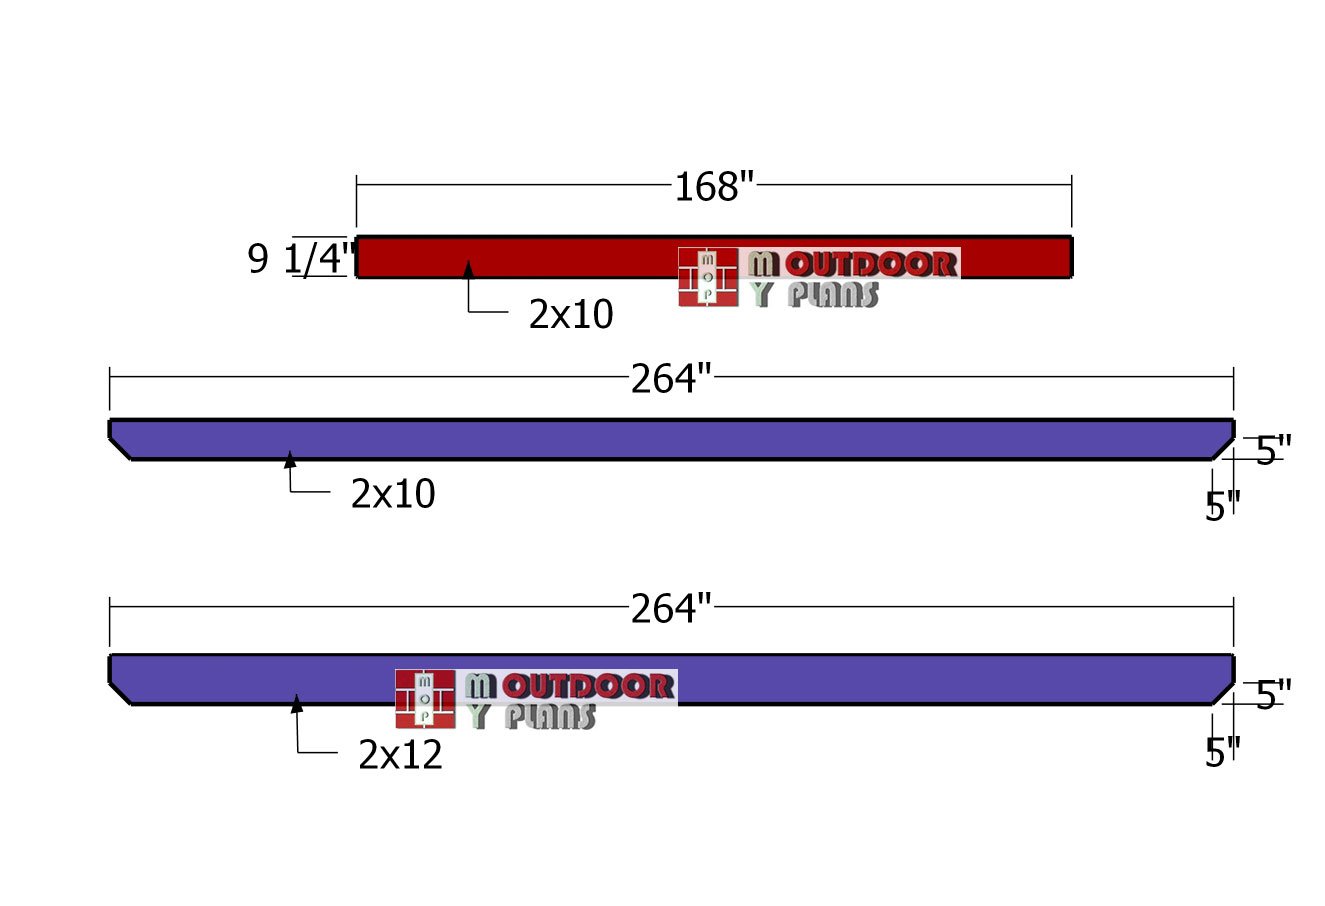
Use 2×10 lumber for the side and back support beams to provide solid structural integrity for your pavilion. For the front support beams, go with **2×12 lumber** to give extra visual weight and added strength where it matters most. Begin by marking your cut lines on each board based on the measurements in your plans, and use a circular saw to make precise, clean cuts.
For a touch of added style, consider making decorative cuts on both ends of the front and back support beams. This small design detail adds a polished, custom feel to your build and instantly enhances the overall look of the pavilion—proof that even the simplest accents can make a big difference.
Sitting-the-side-support-beams
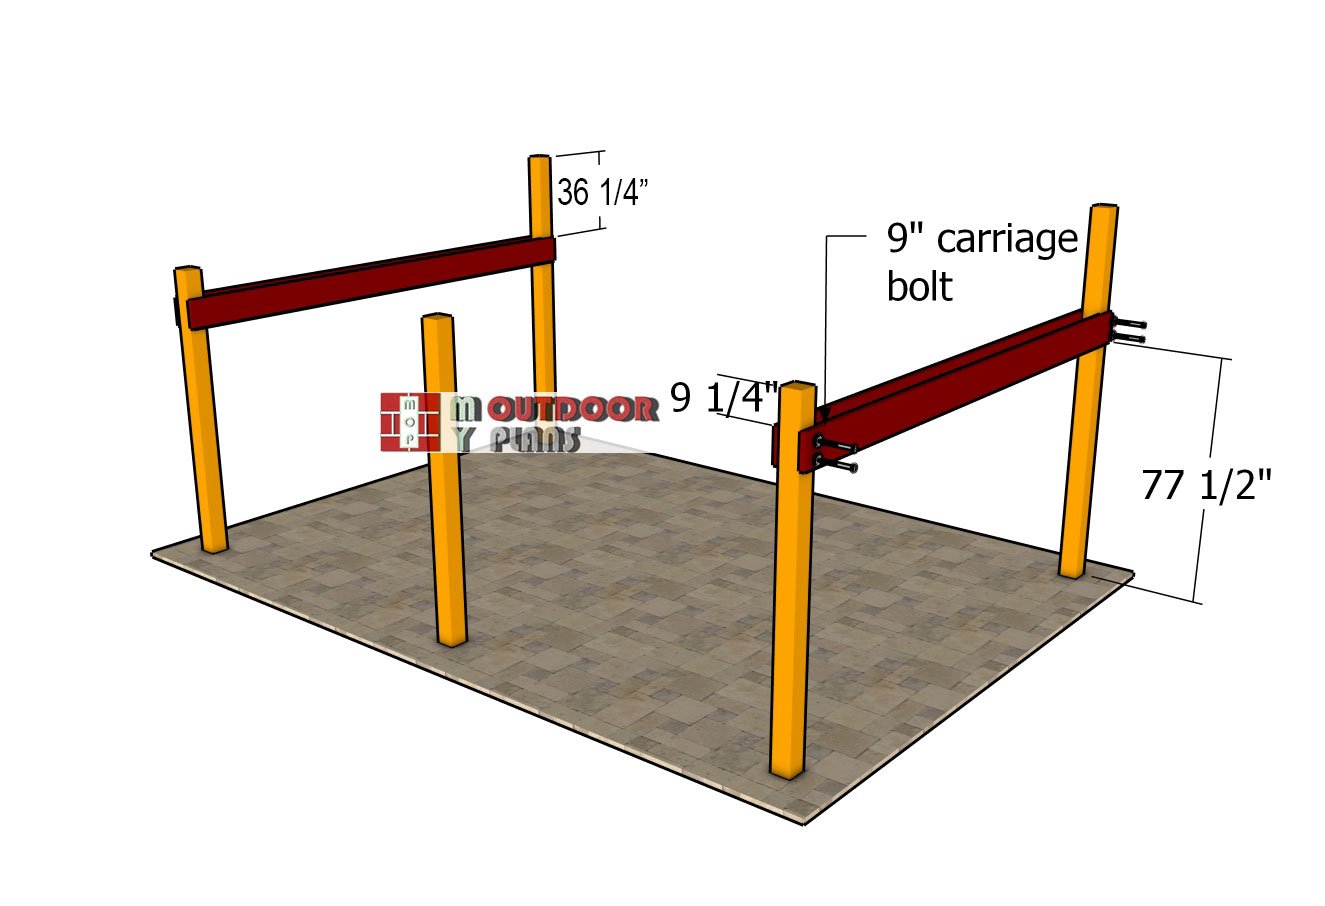
Use 2×10 lumber for the side top beams to match the strength and profile of the rafters. Position each beam so there’s exactly 9 1/4″ from the top of the front posts to the top edge of the beam—this keeps everything consistent and properly aligned. Use a spirit level to double-check that the beam is sitting perfectly straight, then clamp it in place temporarily to hold it steady while you work.
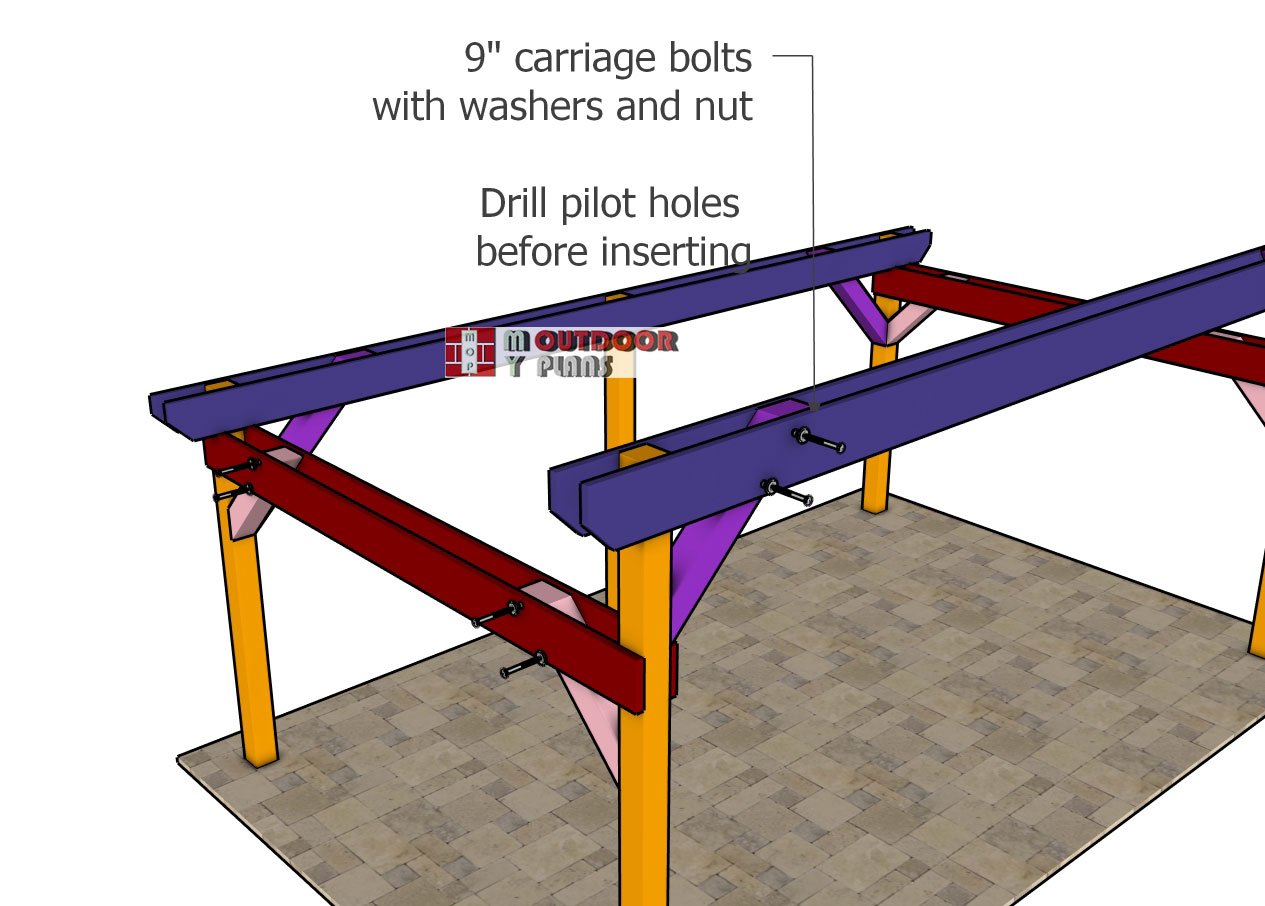
Once aligned, drill pilot holes through both the beam and the post to prevent splitting. Insert 9″ carriage bolts through the holes, add washers and nuts, and tighten them down securely. For a strong, long-lasting joint, use two bolts per connection. This step locks the frame together and sets the stage for a sturdy, reliable roof structure.
Fitting-the-top-beams
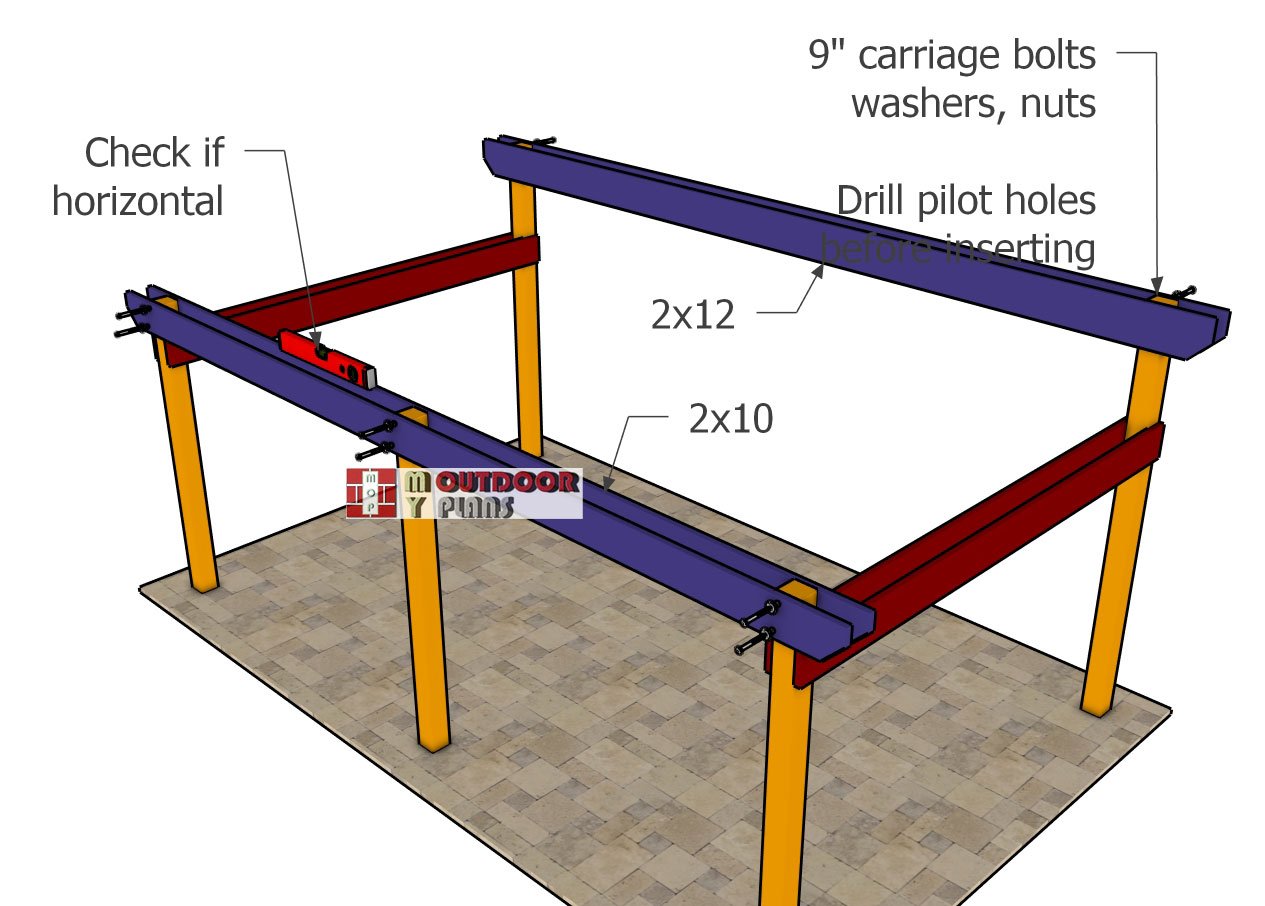
Attach the beams to the front and back of the pavilion, ensuring they overhang the posts by 12″ on both sides. When properly aligned, the beams should sit perfectly horizontal. Drill pilot holes through both the beams and the posts, then secure them with 9″ carriage bolts. Use at least two bolts per joint for stability, but be sure to consult your local building codes to ensure the solution meets your specific requirements.
STEP 3: Adding the braces
Braces
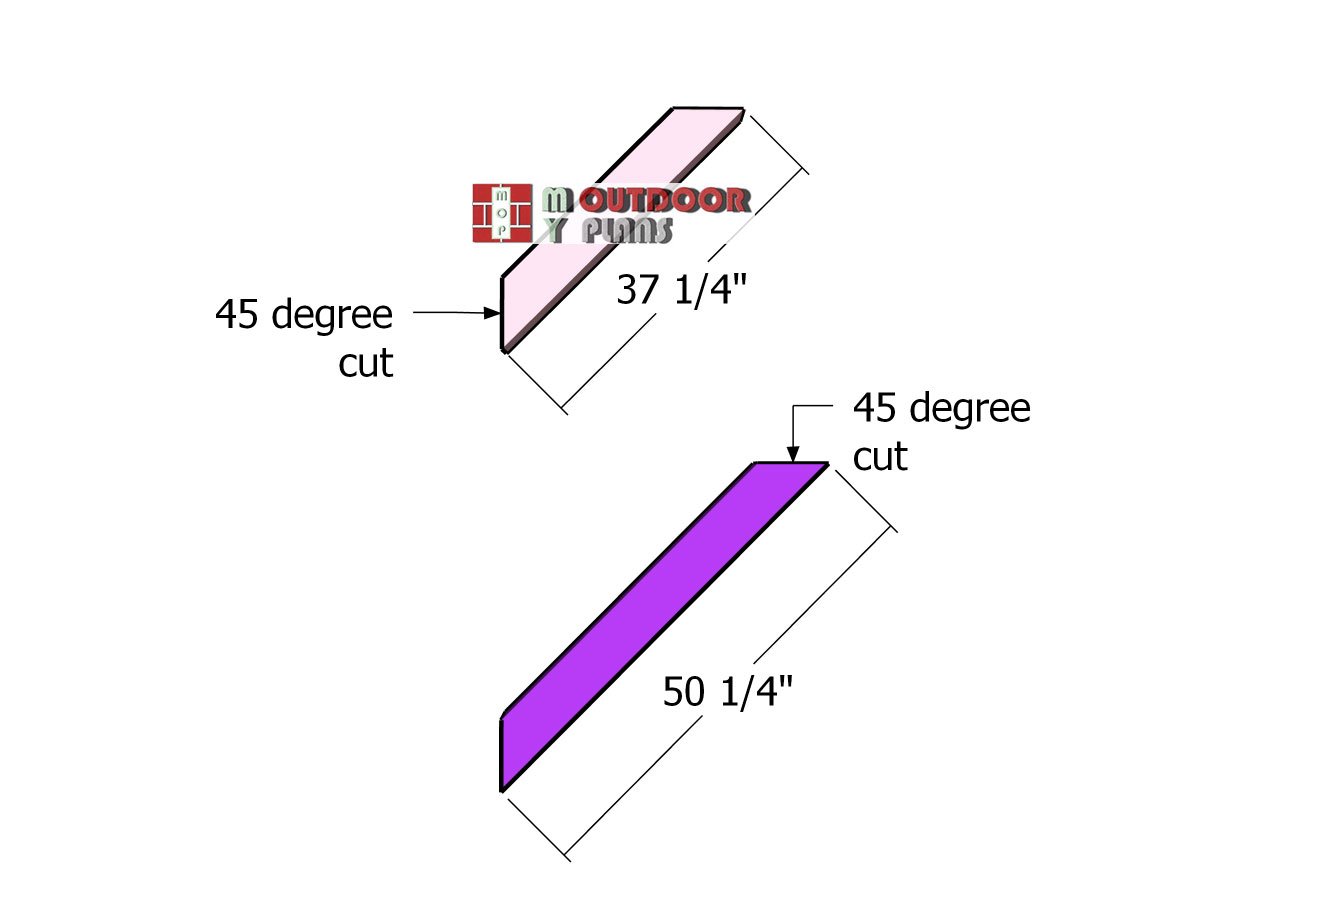
Next up, it’s time to cut the diagonal braces. Make 45-degree cuts at both ends of each piece so they tuck in nicely between the posts and beams—this gives you a tight, clean fit that looks sharp and adds serious support. These braces aren’t just for show—they’ll stiffen up the whole structure and keep it rock solid for the long haul.
Braces—detail-2
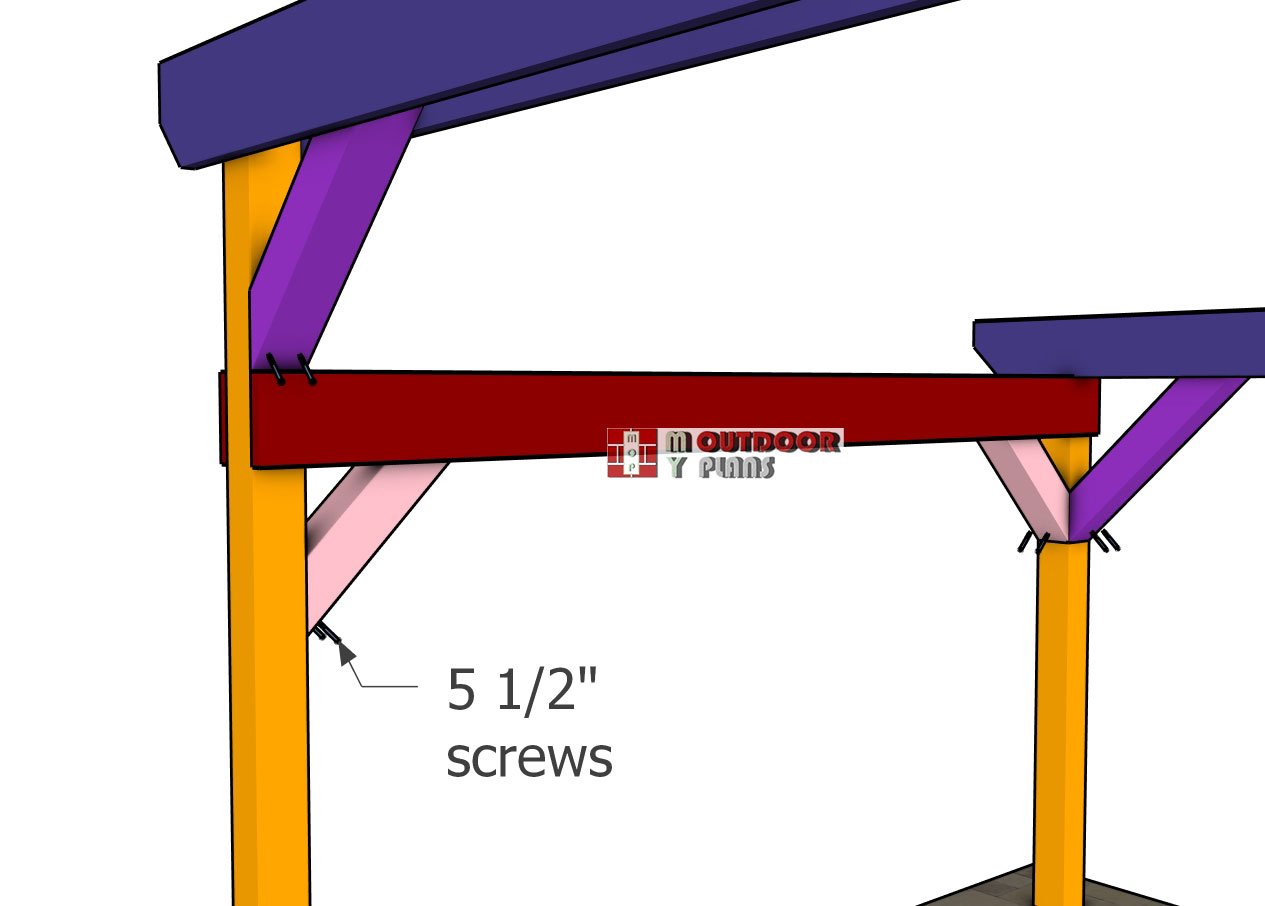
Attach the diagonal braces to the pavilion, making sure each post stays perfectly plumb as you go. Take your time aligning the braces so they fit snugly into place. Once everything looks good, drill pilot holes at each connection point to prevent splitting, then drive in 5 1/2″ screws. As shown in the plans, use two screws per joint to lock everything down tight. For that clean, finished look, don’t forget to countersink the screw heads—they’ll sit flush with the wood and give your build that polished, pro-level touch.
Braces—detail-1
Position the top ends of the braces snugly between the front and back beams, making sure everything fits tight and lines up clean. Drill pilot holes through the beams and into the tops of the braces, just like it’s shown in the diagram. Once everything’s aligned, slide in 9″ carriage bolts through each connection. Add washers and nuts, then tighten everything down firmly to lock the joints in place. This step ties the structure together and adds serious rigidity to the frame.
Finishing touches
14×20 lean to pavilion
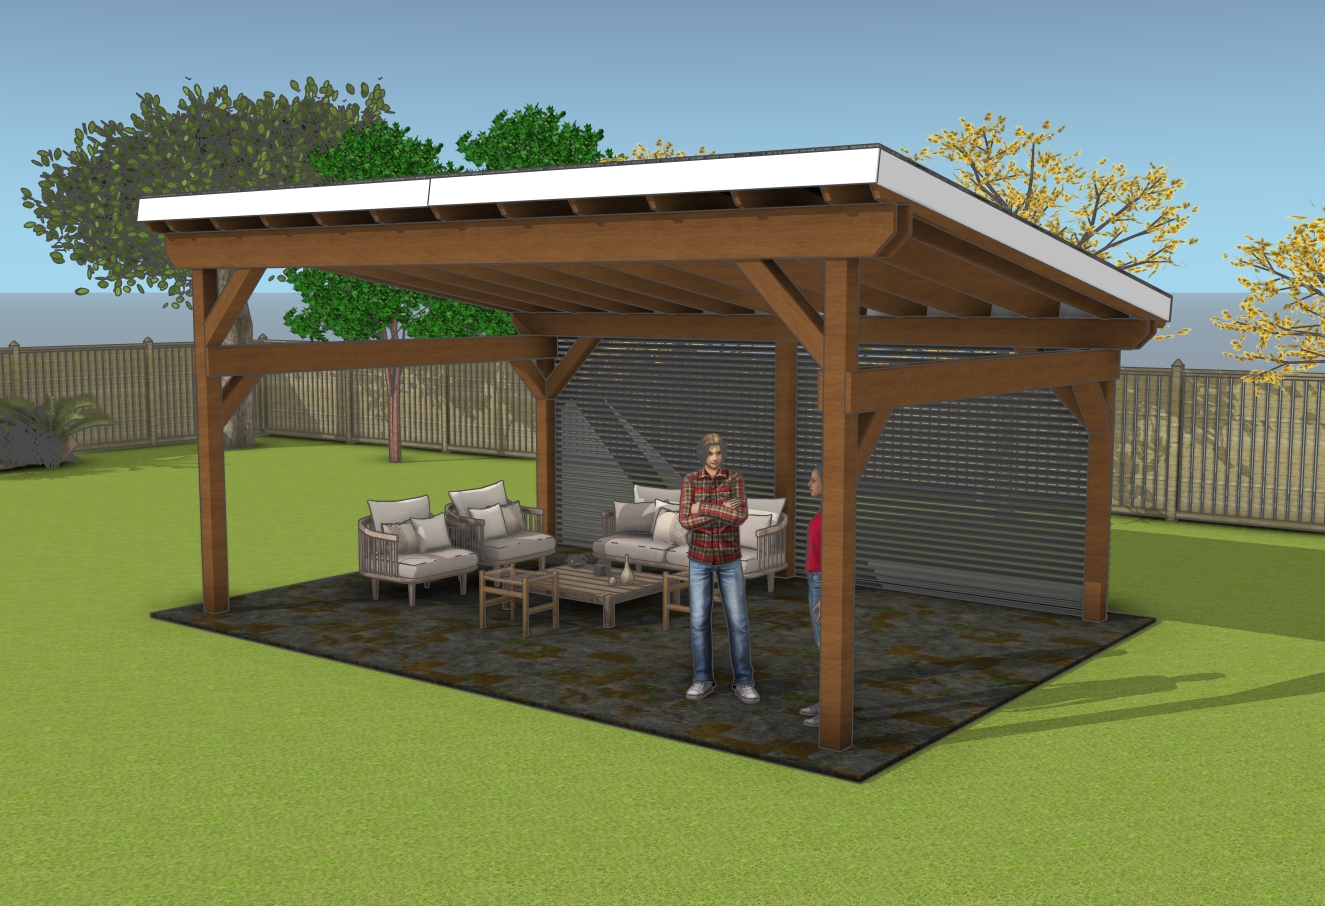
With the final pieces in place, your 14×20 modern lean-to pavilion is now a fully finished outdoor structure, ready to bring comfort and style to your backyard. From the solid post foundation to the sleek roofline and finishing trim details, every step has built toward a pavilion that’s not only functional but beautifully crafted. This space is perfect for hosting gatherings, enjoying quiet evenings, or simply creating a shaded retreat to escape the summer sun.
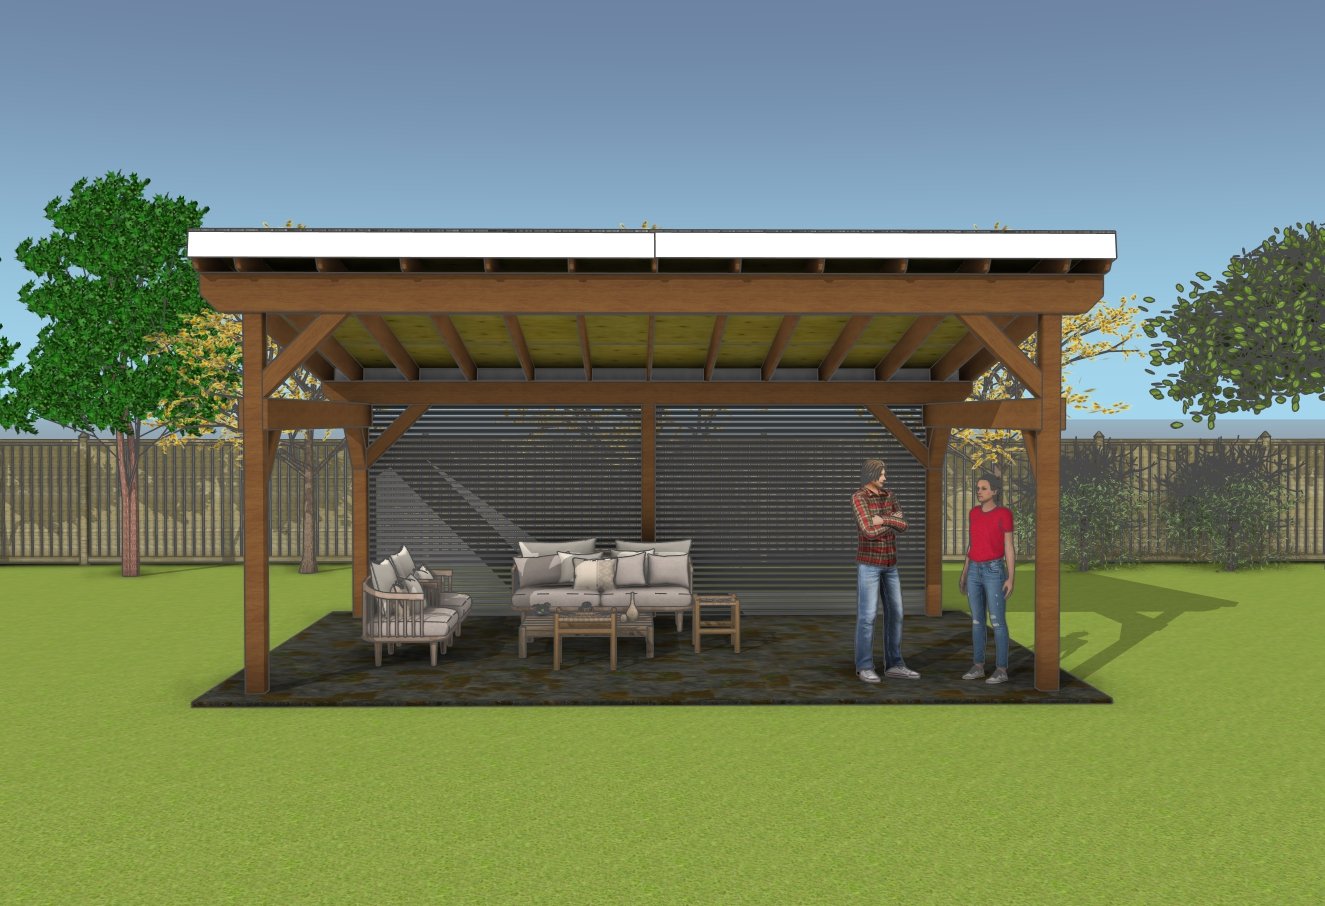
14×20 garden pavilion – front view
Now that the structure is complete, it’s time to make it your own. Think about how you want to use the space—whether it’s a cozy lounge with outdoor sofas, a dining area with a large table, or a full-featured outdoor kitchen. Add string lights, hanging plants, or even privacy panels to enhance the vibe and make the pavilion an inviting space that works for your lifestyle. Every small detail adds personality and transforms the pavilion from a simple shelter into a true outdoor living room.
Most importantly, take a step back and enjoy what you’ve built. A project like this is no small feat, and now you’ve created something that adds value to your home and daily life. Whether it’s the craftsmanship you’re proud of or the memories you’ll create under this roof, your pavilion is more than just wood and screws—it’s a space you’ve brought to life.
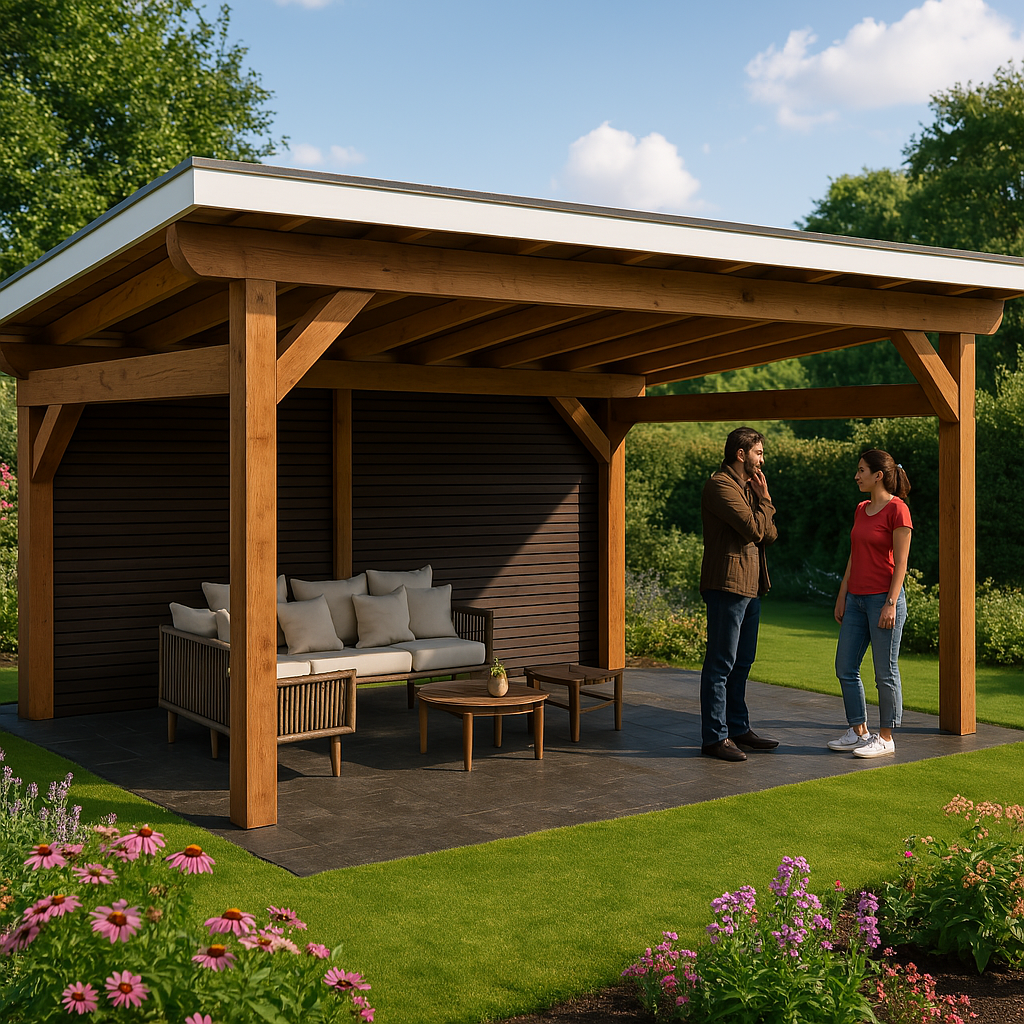
large lean to pavilion
Check out PART 2 of the project, so you learn how to continue the outdoor gazebo project.
Top Tip: If you want to get PREMIUM PLANS for this project, in a PDF format, please press GET PDF PLANS button bellow. If you want the free version of the plans, please read the blog FAQs. Thank you for your support.
This woodworking project was about 14×20 lean pavilion plans. If you want to see more outdoor plans, we recommend you to check out the rest of our step by step projects.


