Welcome to Part 2 of the 14×20 Lean-To Pavilion build! In this stage of the project, we’re taking your structure one big step closer to completion by focusing on the roof and key finishing features. We’ll install the roof decking, lay down the underlayment, and add the final roofing material to make sure your pavilion is solid, weatherproof, and built to last.
Beyond just the roof, we’ll also look at how to boost the overall function and visual appeal of your pavilion—whether that means adding privacy slats, trim details, or other creative upgrades. By the end of this phase, you’ll be well on your way to creating a fully finished outdoor retreat that’s both practical and beautiful. Let’s get to it!
When buying the lumber, you should select the planks with great care, making sure they are straight and without any visible flaws (cracks, knots, twists, decay). Investing in cedar or other weather resistant lumber is a good idea, as it will pay off on the long run. Use a spirit level to plumb and align the components, before inserting the galvanized screws, otherwise the project won’t have a symmetrical look. If you have all the materials and tools required for the project, you could get the job done in about a day.
Projects made from these plans
14×20 Lean to Pavilion Plans – PART 2
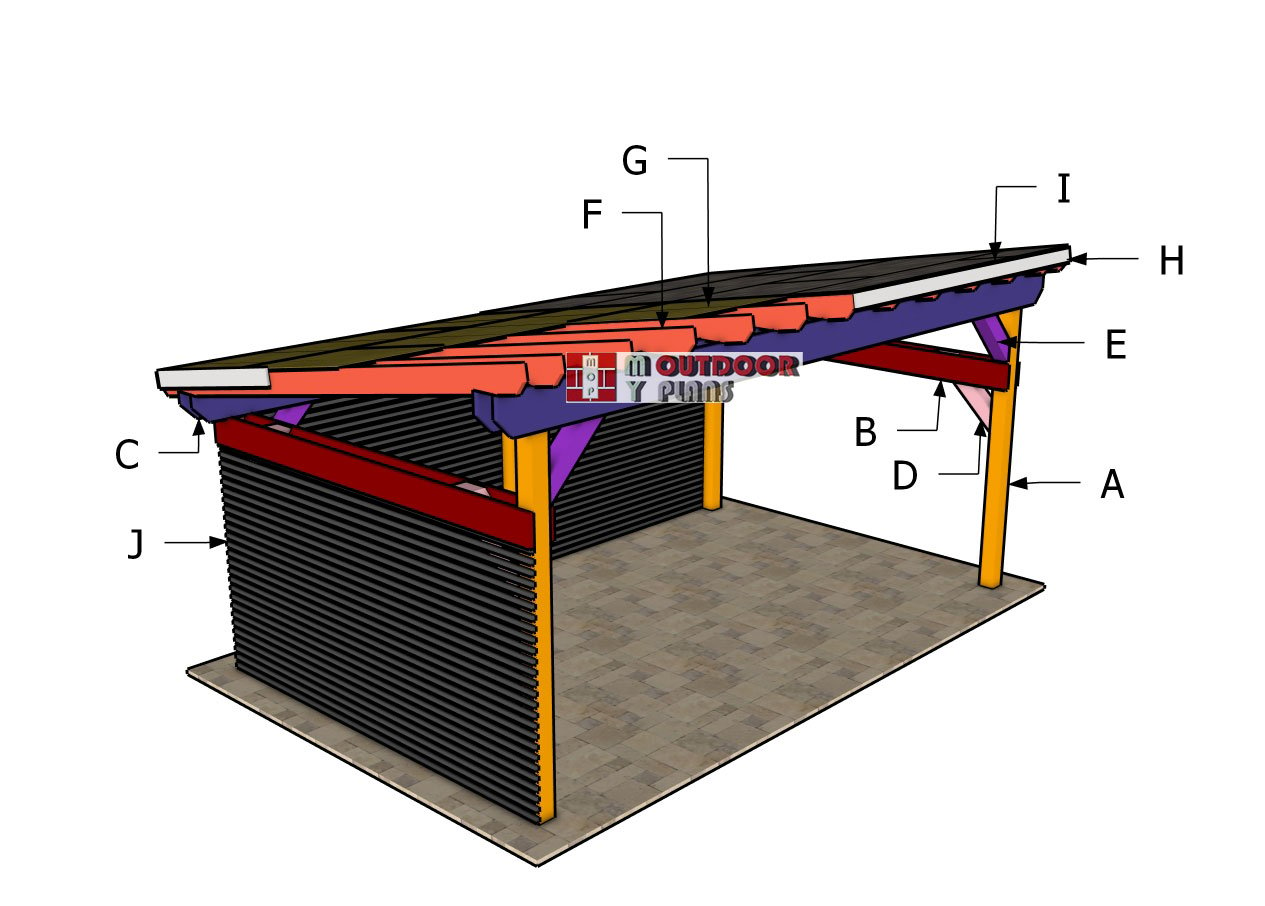
Building-a-12×20-lean-to-pavilion
Cut & Shopping Lists
Tools
![]() Hammer, Tape measure, Framing square, Level
Hammer, Tape measure, Framing square, Level
![]() Miter saw, Drill machinery, Screwdriver, Sander
Miter saw, Drill machinery, Screwdriver, Sander
![]() Post hole digger, Concrete mixer
Post hole digger, Concrete mixer
![]() Safety Gloves, Safety Glasses
Safety Gloves, Safety Glasses
Time
Related
- 18×20 Pavilion Plans
- PART 1: 14×20 Lean to pavilion
- PART 2: 14×20 Lean to pavilion
STEP 4: Building the roof
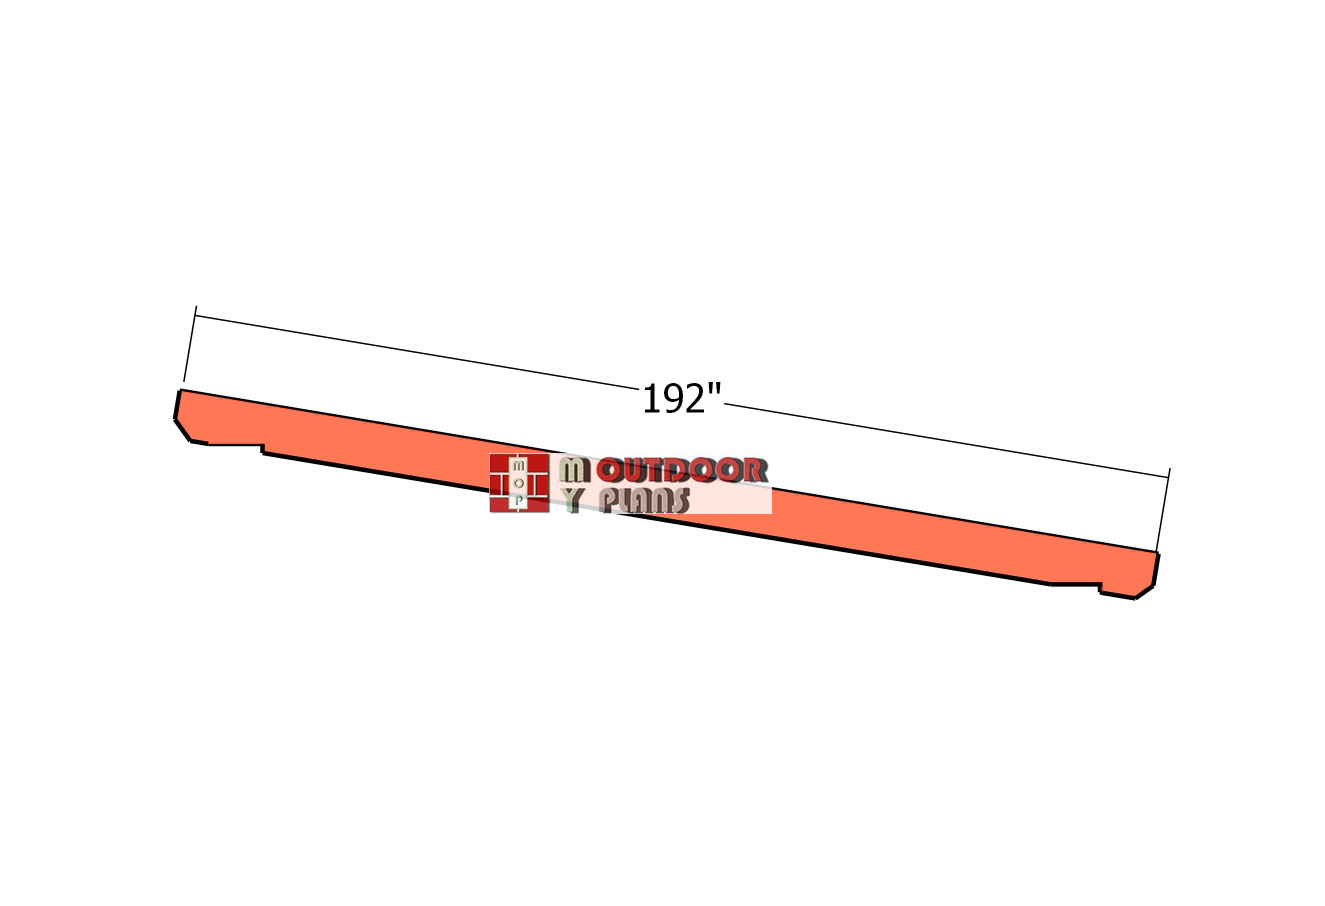
Rafters
Use 2×10 lumber for the rafters to ensure strength and stability. Mark the cut lines on each board according to the measurements in your plans, and use a circular saw to make precise cuts. For an added touch of style, create decorative cuts on both ends of the rafters, giving your pavilion a polished and professional appearance.
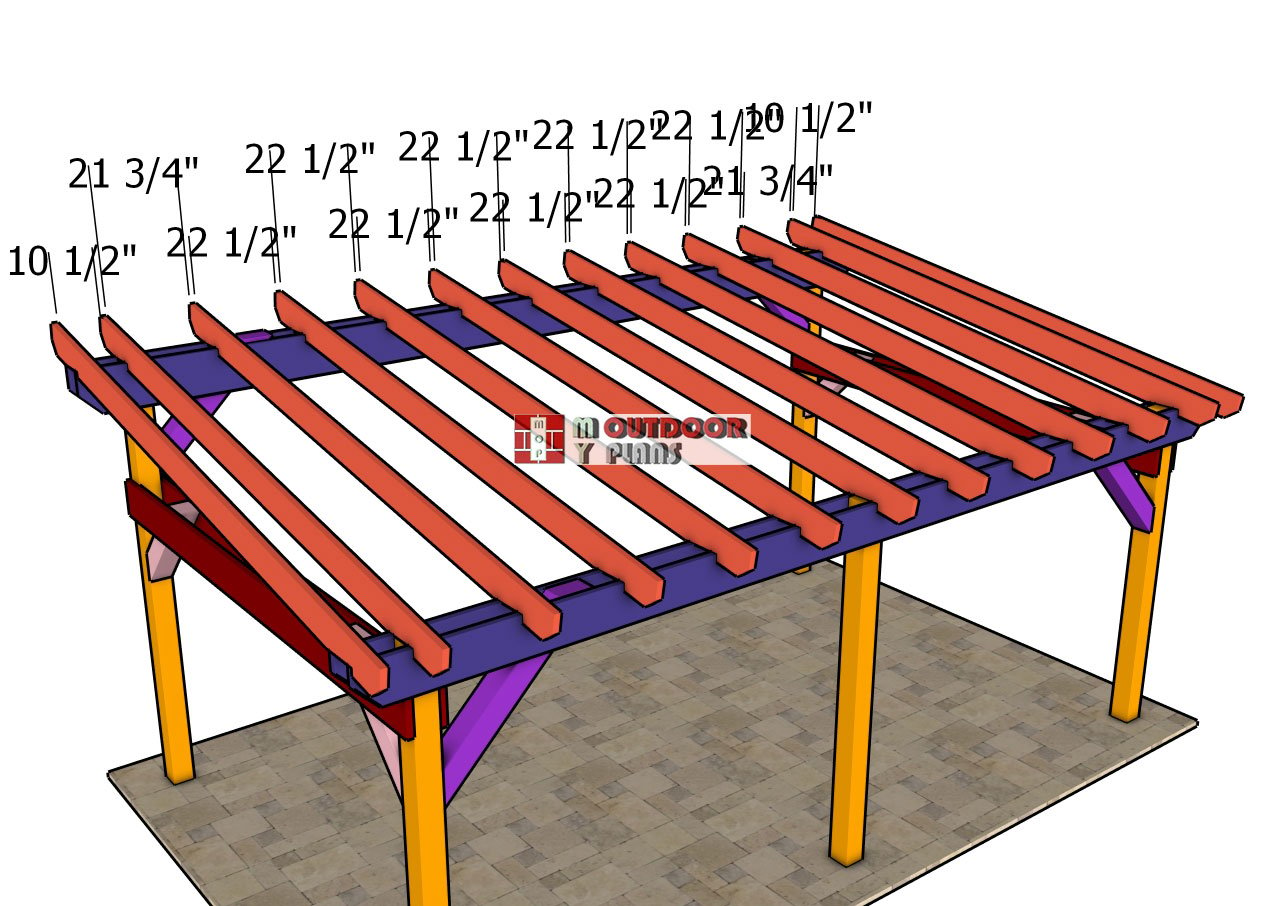
Fitting-the-rafters
Secure the rafters to the top of the structure, spacing them evenly at 24 inches on center, just like shown in the diagram. Take your time aligning each rafter to keep that spacing consistent and the roofline perfectly level—this not only helps with structural strength but gives your pavilion a clean, professional look. Once the rafters are in place, fasten them to the beams using rafter ties for added support.
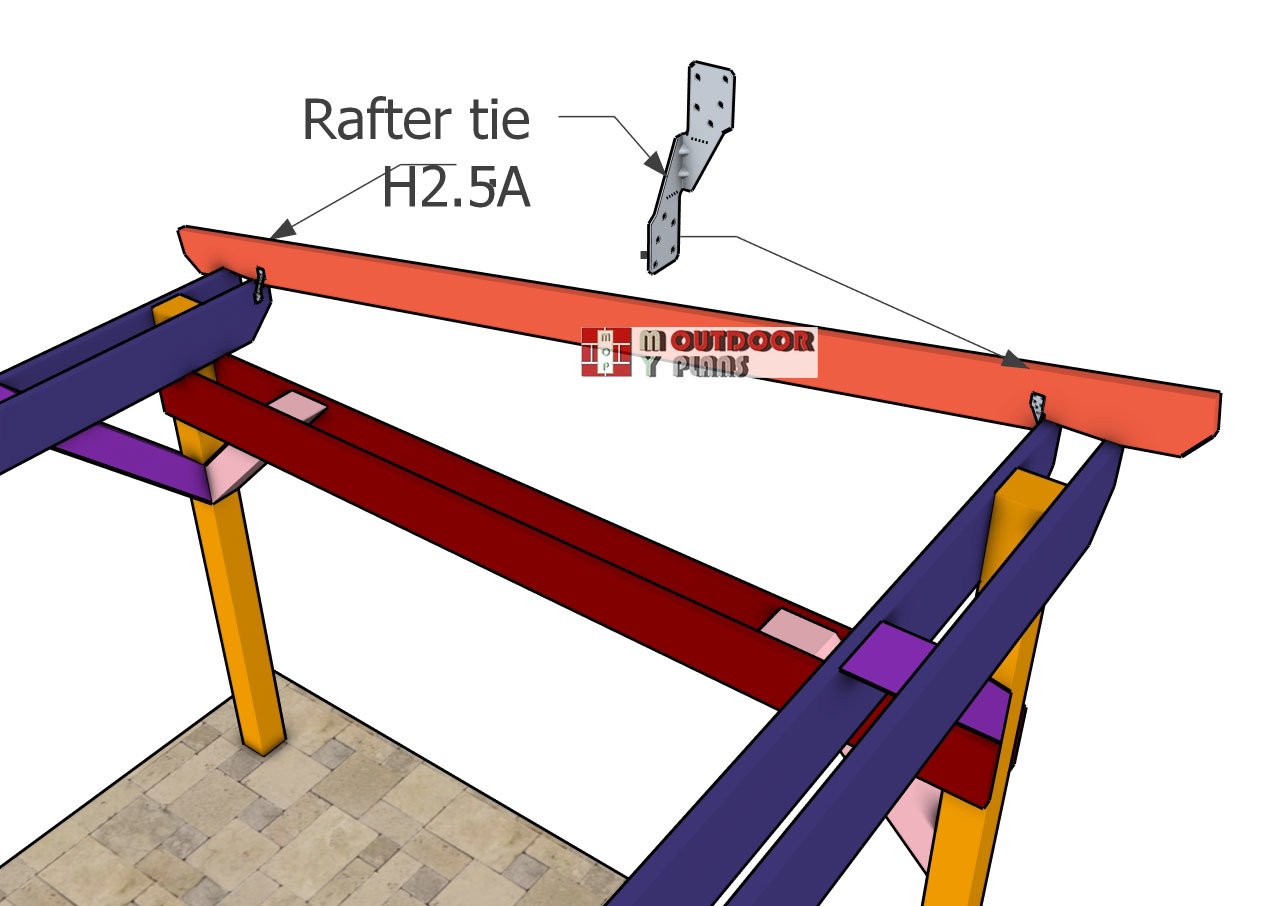
Fitting-the-rafter-ties
Attach each tie with 1 1/2″ structural nails or screws at both ends of the rafter to lock it down securely. For maximum strength, install rafter ties on both sides of each rafter joint. That means you’ll need four ties per rafter—two on each end. This step makes a big difference in overall stability, especially in areas prone to wind or heavy loads.
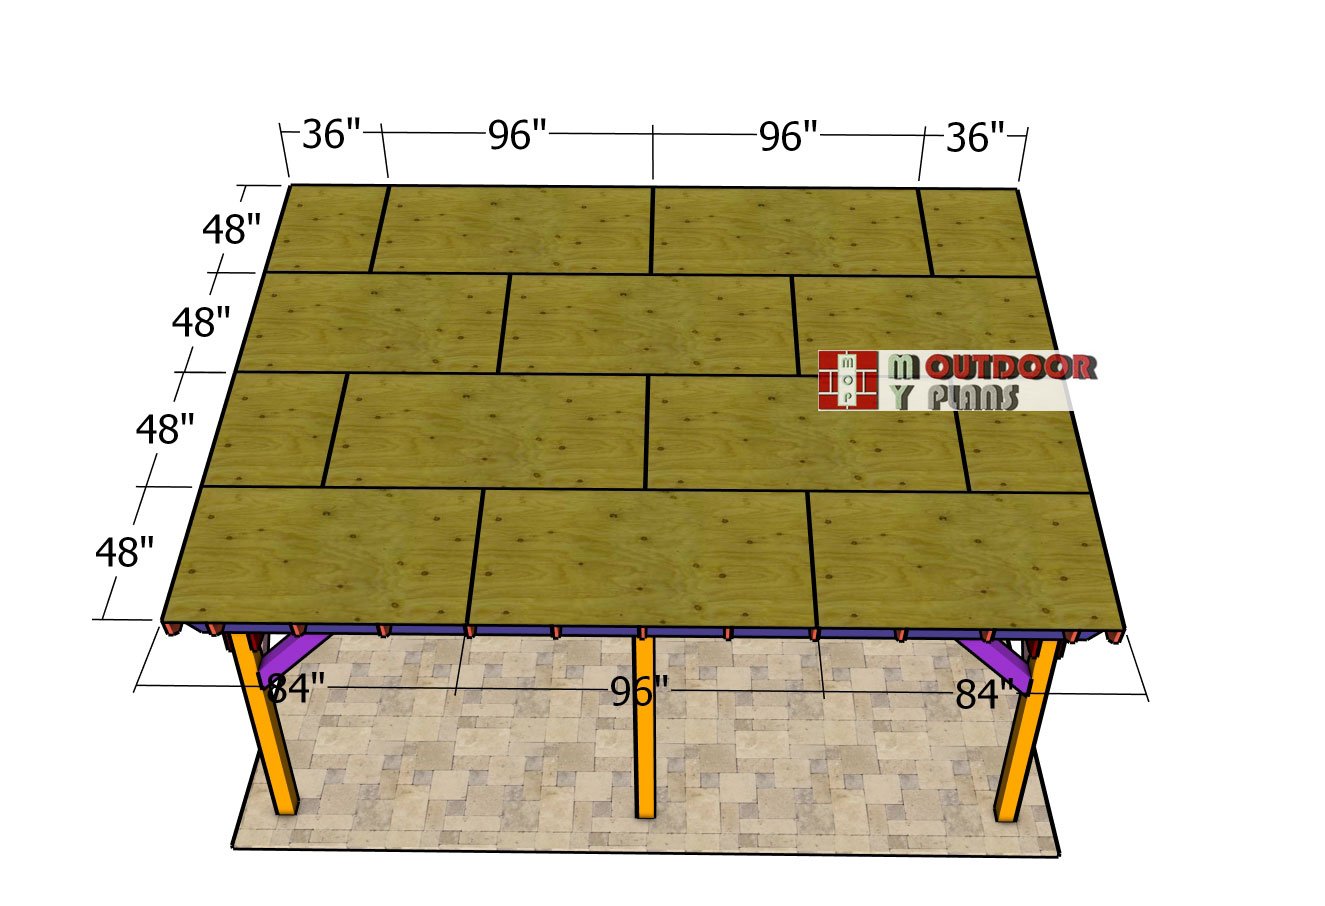
Roof-sheets
Install the 3/4″ plywood sheets over the rafters to create a solid, long-lasting roof deck. Start by carefully positioning each sheet so the edges line up cleanly with the rafters and each other. Leave a small gap—about 1/8″—between sheets to allow for natural expansion and contraction, which helps prevent warping or buckling as temperatures change.
Once the sheets are in place, secure them using 2 1/2″ exterior-grade screws. Drive the screws every 8 to 10 inches along each rafter to lock everything down tight. This step ensures the plywood is firmly attached and provides a strong, stable base for your roofing material. With the roof deck complete, you’ll have a sturdy foundation that’s built to handle weather and wear for years to come.
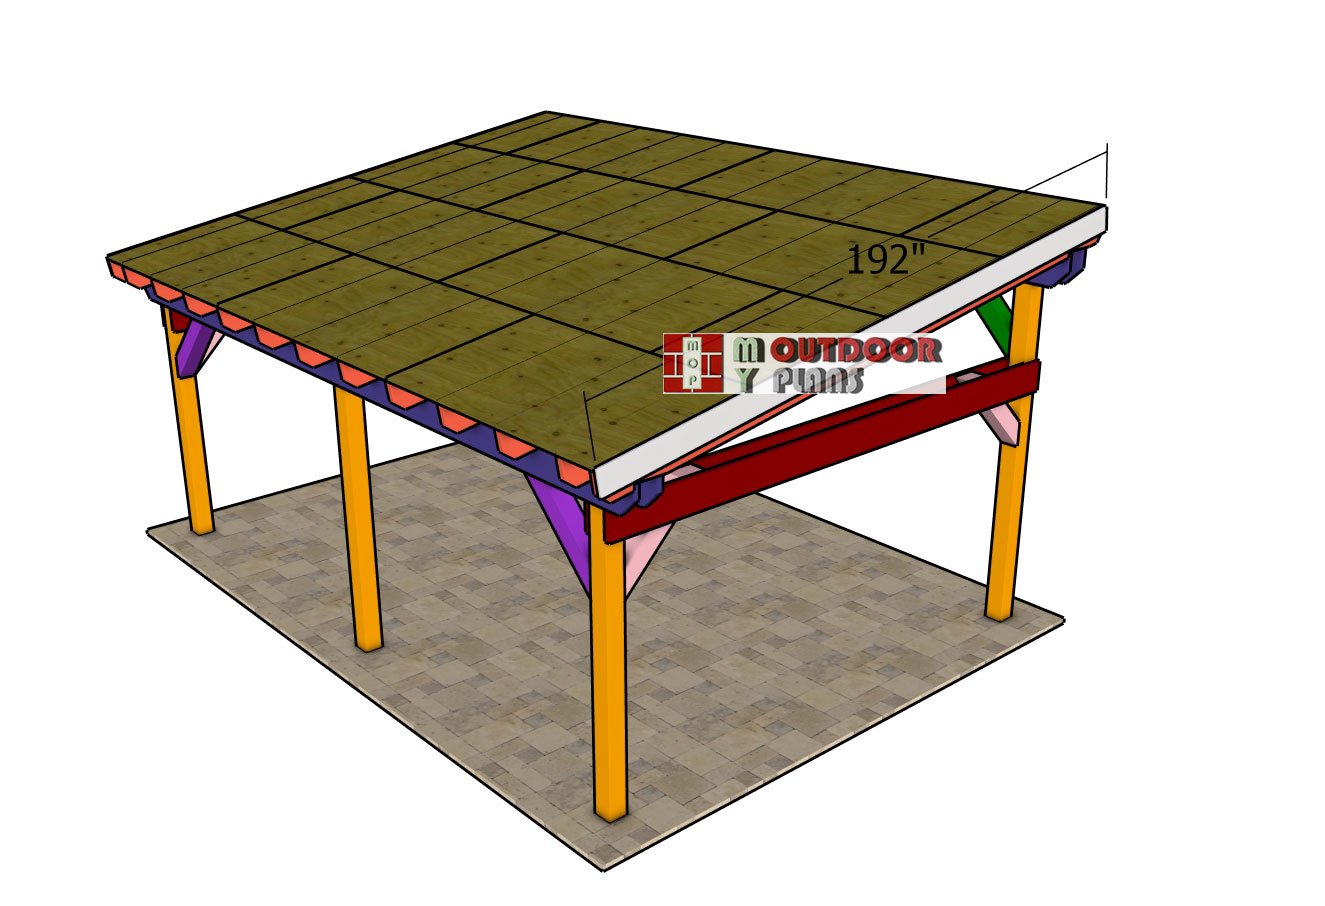
Side-trims—14×20-pavilion-plans
Attach 1×8 trim boards along the sides of your garden pavilion, making sure the edges are flush with the plywood roof decking for a clean, finished look. Line them up carefully and secure each board using 2″ nails, driving the nails into the ends of the rafters for a strong hold. These trim boards not only elevate the appearance of the pavilion but also help protect the roof decking from moisture and wear, giving your structure a longer life and a more refined edge.
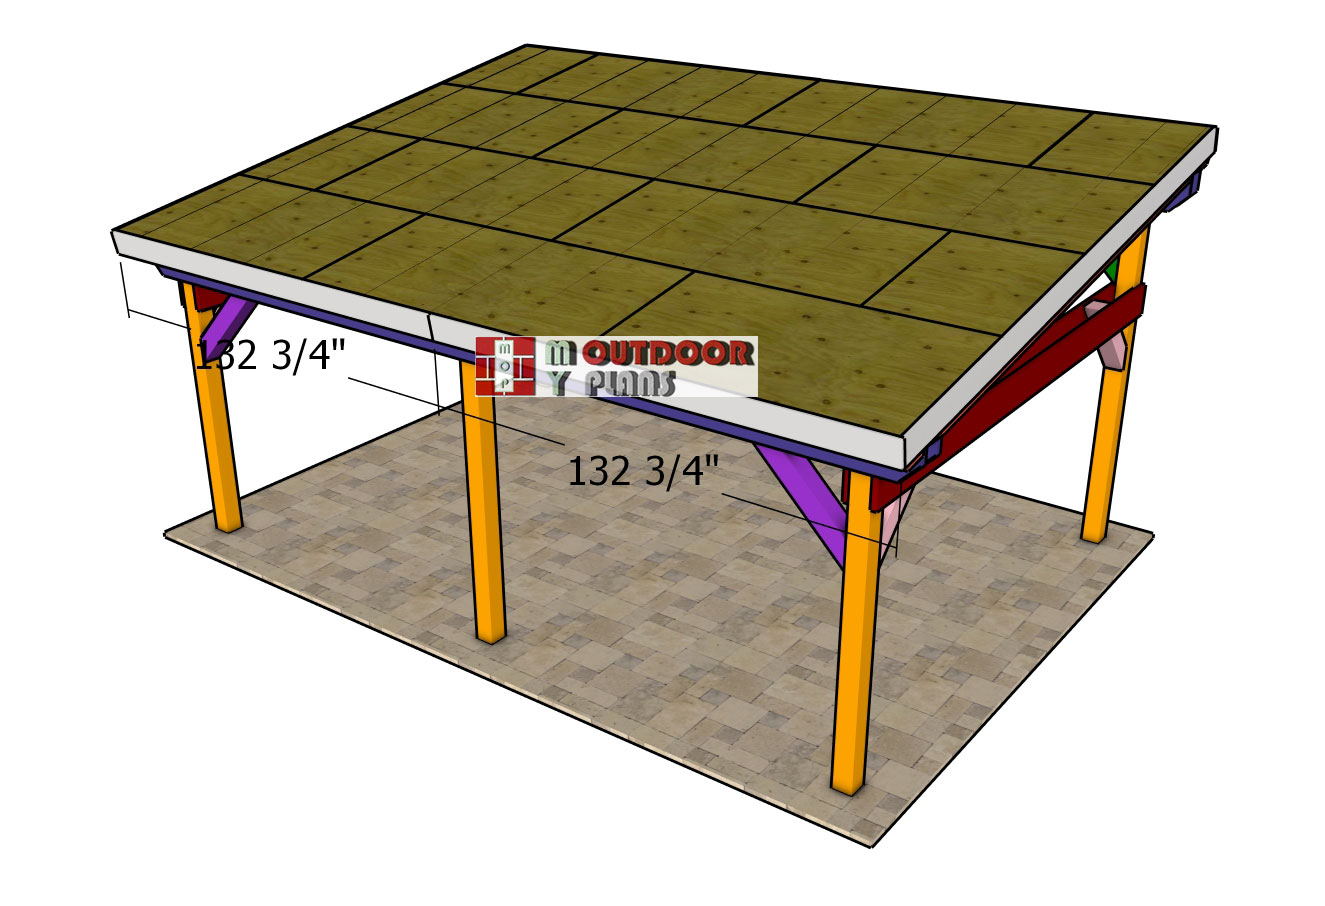
Front-and-back-roof-trims
Next, install the trim boards on the front and back of the pavilion. Just like before, align the edges perfectly so they sit flush with the side trims and roof decking. Use 2″ nails to fasten them securely, spacing the nails evenly for a neat appearance. Make sure the joints are tight and free of gaps for that crisp, professional finish that brings the whole build together.
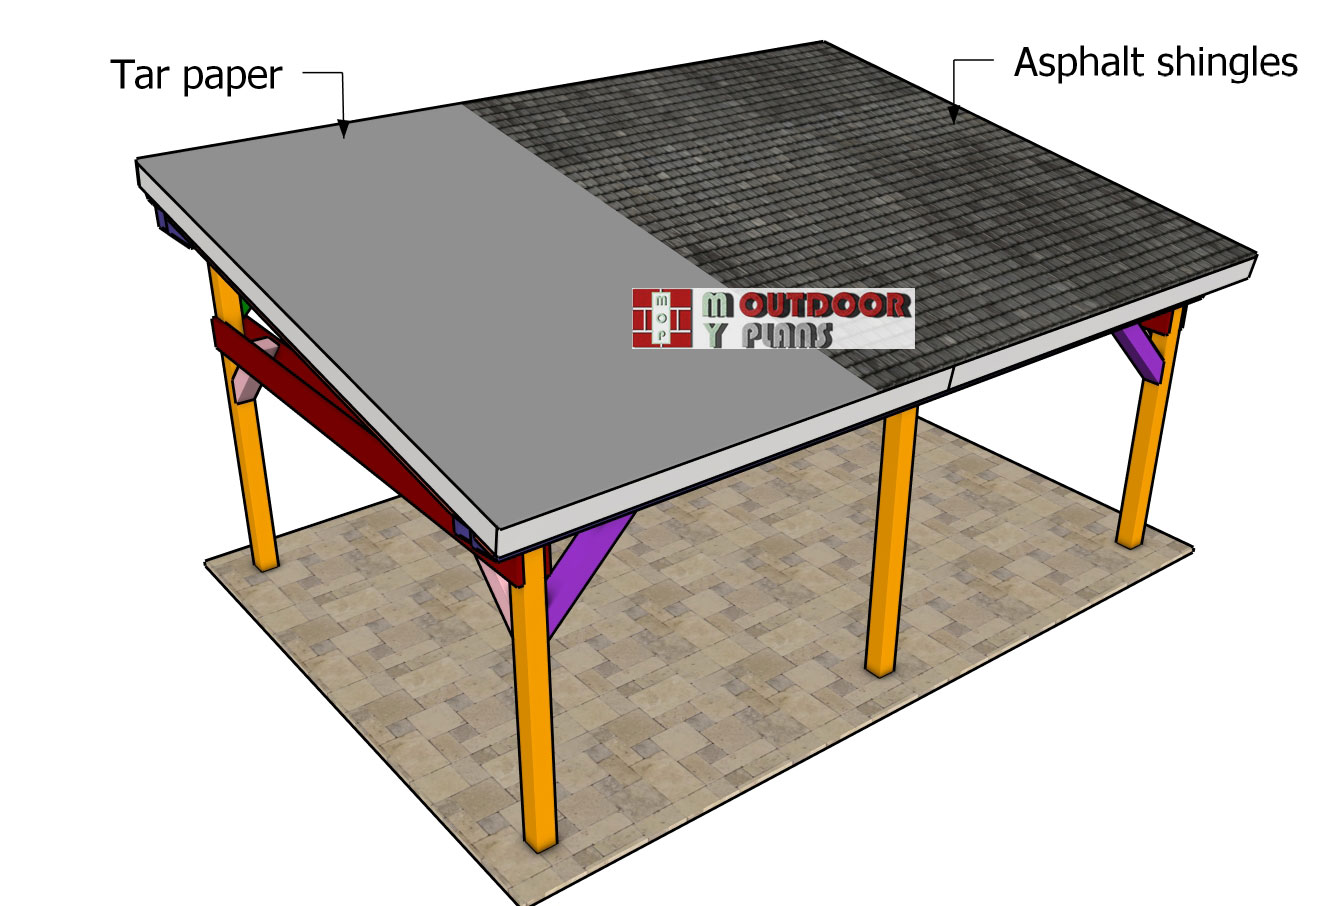
Fitting-the-roofing—large-lean-to-pavilion
With the plywood decking installed, it’s time to prep the roof for asphalt shingles and fully seal it against the elements. Start by installing drip edges along the perimeter of the roof. Begin with the eaves, then move to the rakes, making sure the metal flashing overlaps at the corners. Secure the drip edge using roofing nails spaced every 8 to 12 inches. This simple step helps channel water off the roof and keeps the edges of your plywood protected from rot and moisture damage. Next, roll out a layer of synthetic roofing felt or a self-adhering membrane across the entire roof deck. Overlap each row by at least 2 inches to ensure a watertight seal.
Follow the manufacturer’s recommendations for fastener spacing and installation—roofing nails are typically used for synthetic underlayment. Once the underlayment is in place, begin installing your asphalt shingles. Start at the bottom edge with a starter strip, either pre-made or cut from full shingles. This helps block water from slipping beneath the first row. Lay the first full row of shingles above the starter, secure them with nails just above the tab cutouts, and stagger each new row for proper overlap and a clean, professional look. When you’re done, you’ll have a tough, weather-resistant roof that’s built to stand the test of time.
STEP 5: Privacy screens
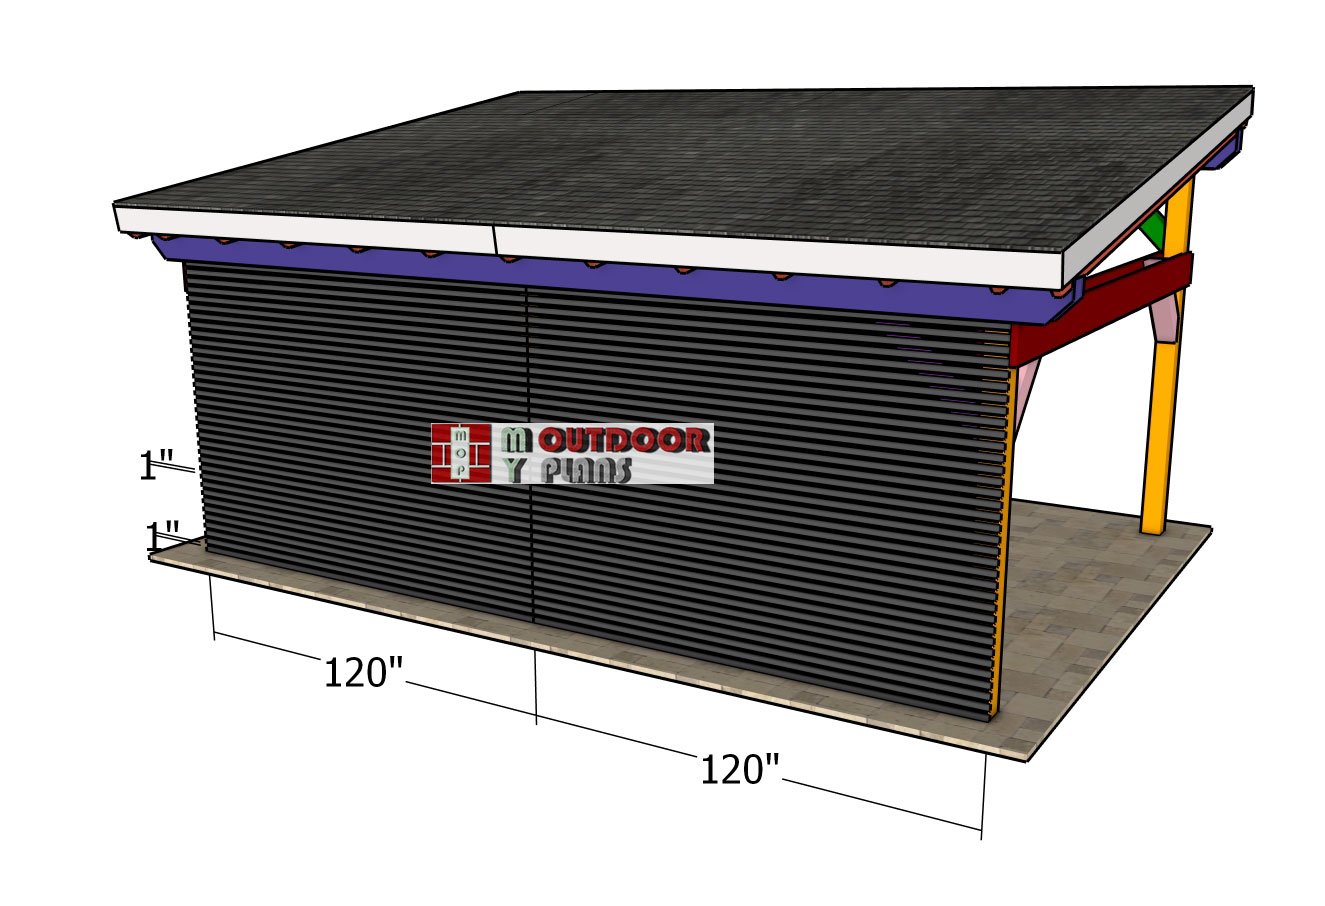
Fitting-the-back-slats
If you’d like to add some privacy or extra shade to your pavilion, a great option is to install 1×2 slats along the back wall. Use a 1″ spacer to keep the gaps between each slat consistent and visually balanced. Start at the bottom and work your way up, drilling pilot holes at both ends of each slat to prevent splitting. Then secure them to the pavilion posts using 1 5/8″ screws. It’s a simple upgrade, but it makes a big impact—offering more seclusion while giving the structure a stylish, modern vibe.
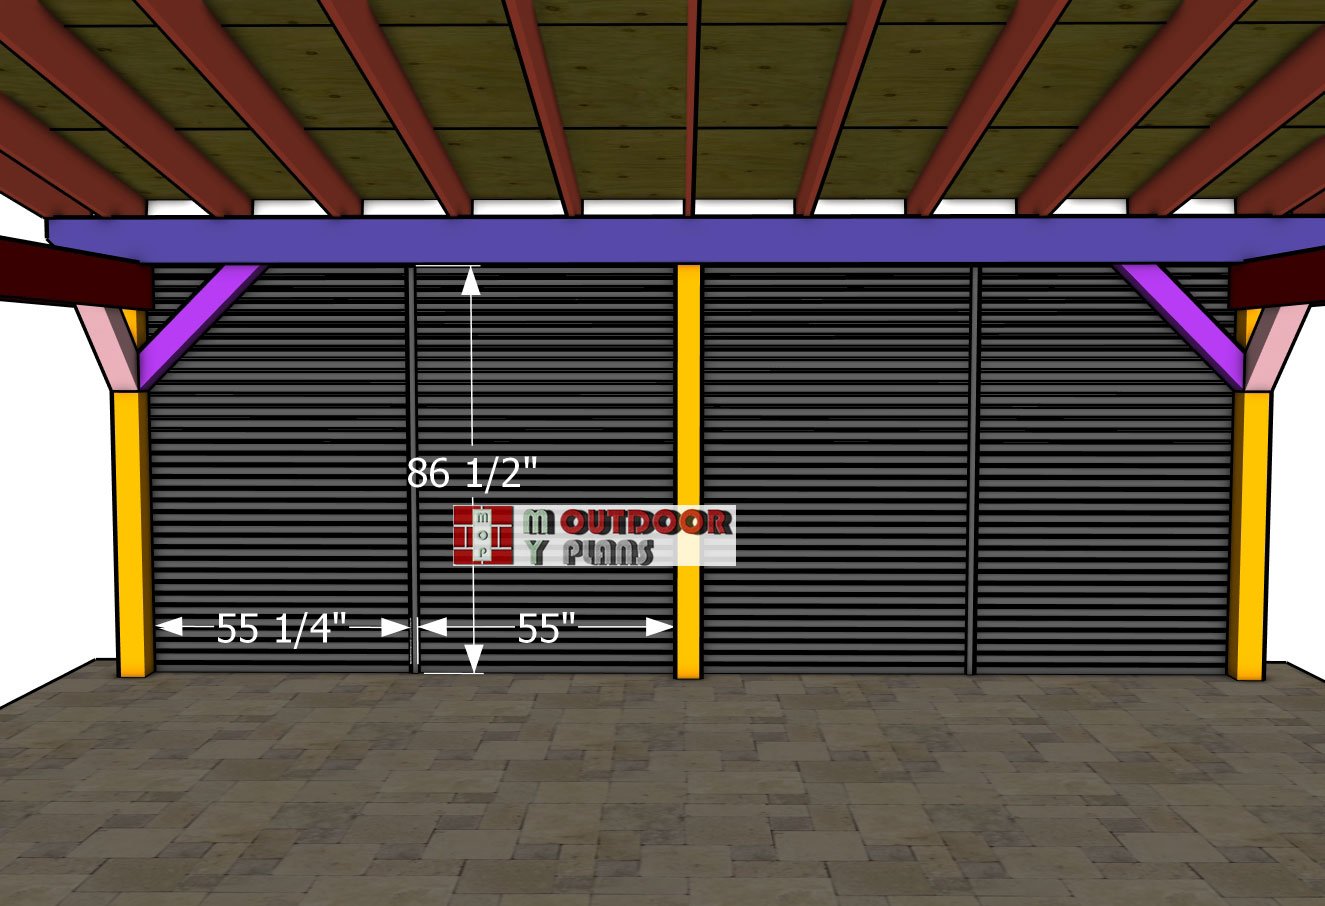
Middle-supports—back-panel
Make sure each slat is aligned flush with the frame for a clean, professional finish. Once all the slats are in place, add a vertical or horizontal middle support behind them for extra strength. This keeps everything secure and helps prevent bowing over time. Attach the support using 1 1/4″ screws, anchoring it firmly to the slats. Not only does this detail boost the structural integrity, but it also brings a nice finished touch to the overall design of your pavilion.
Finishing touches
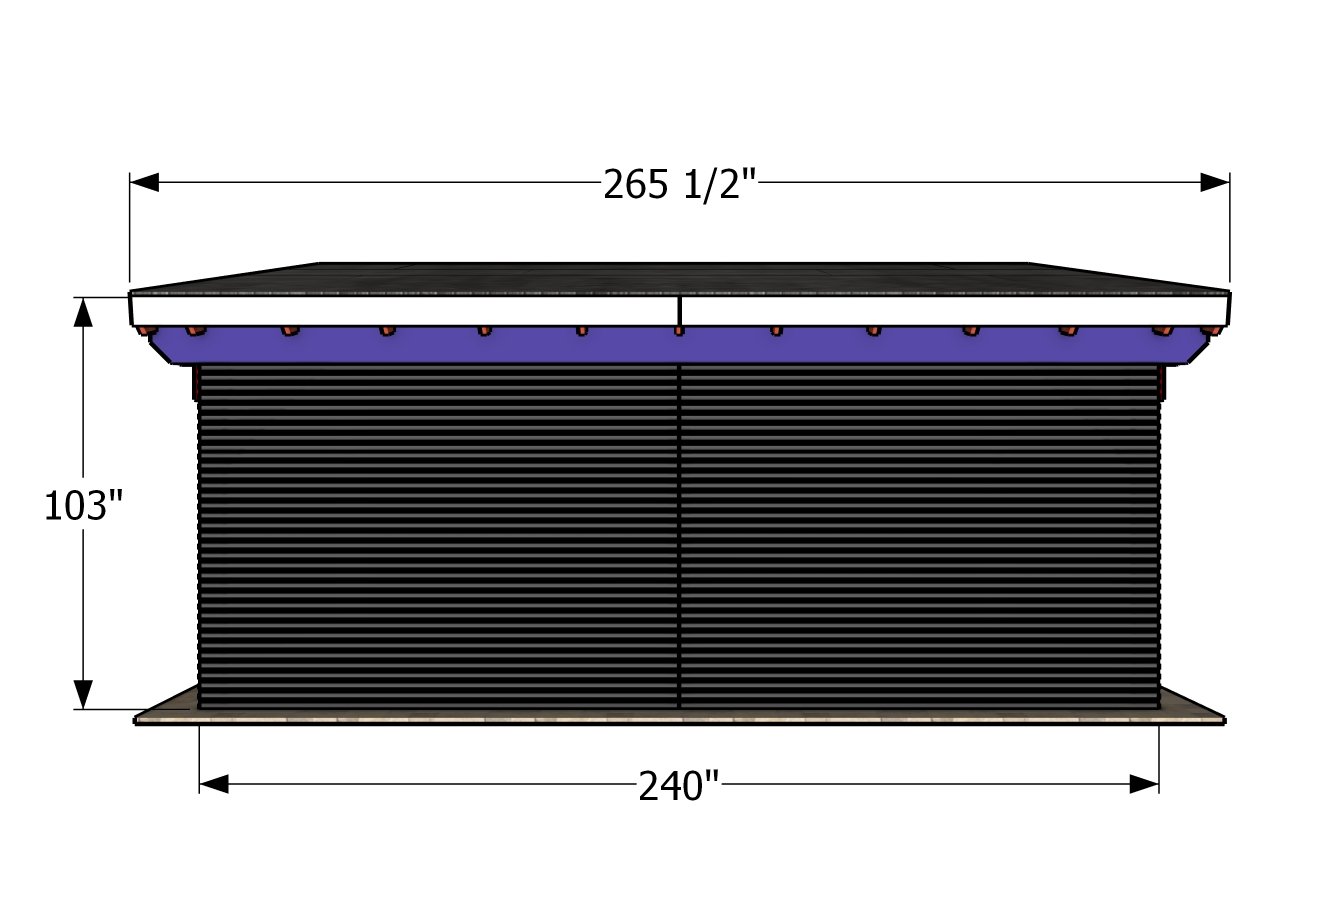
14×20 lean to pavilion plans – back dimensions
Now that your 14×20 modern lean-to pavilion is complete, it’s time to bring the space to life. This versatile structure can be used in so many ways—set it up as an outdoor lounge with weather-resistant sofas and a coffee table for cozy evenings, or turn it into a dining space perfect for family meals and weekend BBQs. Want to entertain into the night? Add some warm string lights, lanterns, or even install an outdoor ceiling fan for comfort and ambiance. If you’re into gardening, place potted plants around the perimeter or hang planters from the beams to blend the structure seamlessly into your landscape.
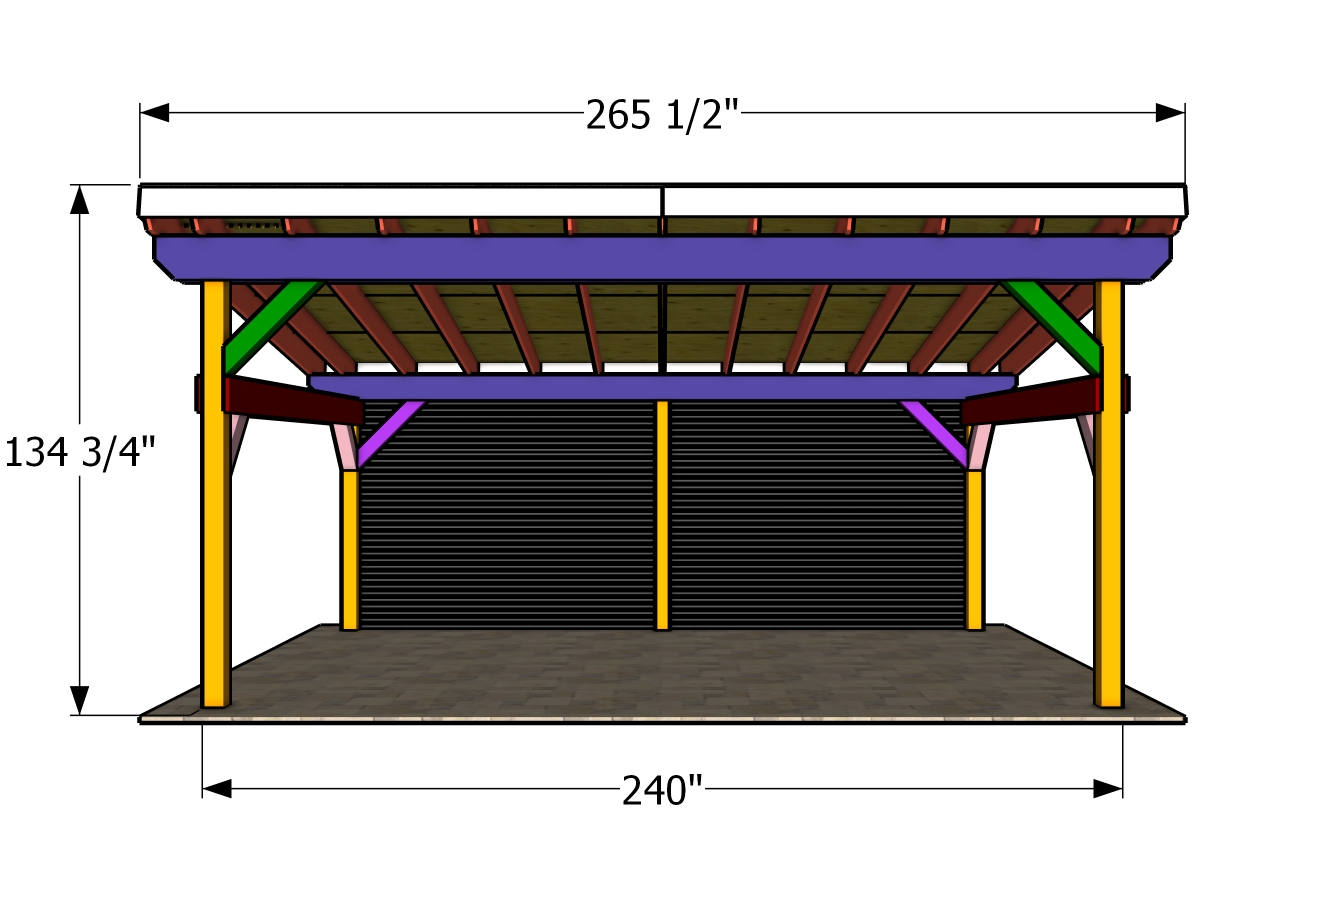
14×20 lean to pavilion plans – front dimensions
To take things even further, consider customizing the space to reflect your personality and lifestyle. Install a privacy wall with 1×2 slats or lattice panels, or create a built-in bar or prep station for outdoor cooking. You could even wire the pavilion for outdoor speakers or add a TV for game days and movie nights under the stars. With just a few thoughtful touches, this pavilion becomes more than a shelter—it becomes a destination right in your backyard. Let your creativity guide you, and don’t be afraid to turn this structure into something truly unique.
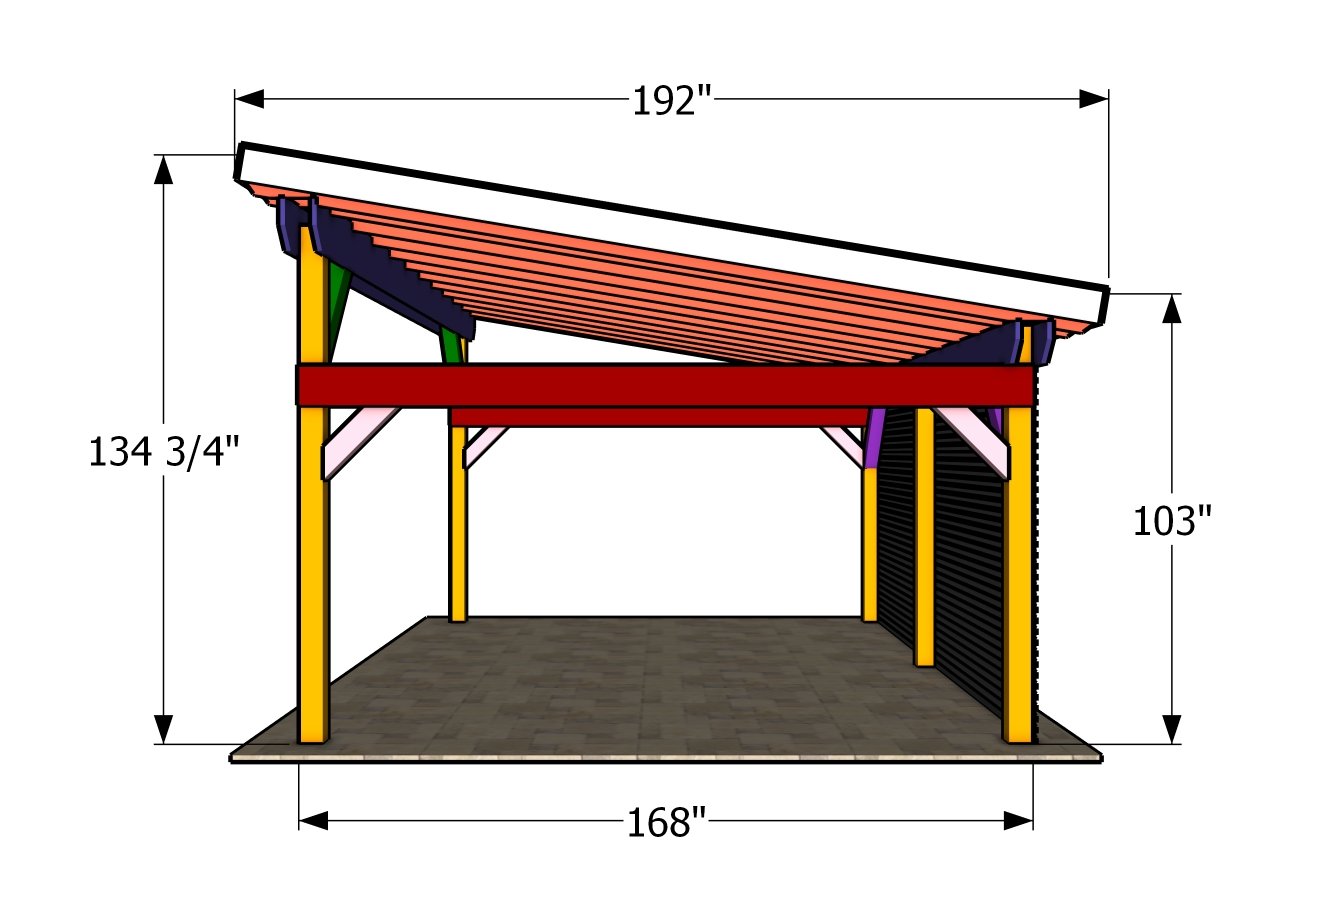
14×20 lean to pavilion plans – side dimensions
Check out PART 1 of the project, so you learn how to build the base for the carport.
This woodworking project was about 14×20 modern lean to pavilion roof plans. If you want to see more outdoor plans, we recommend you to check out the rest of our step by step projects.

