This step by step diy project is about 10×10 pergola plans. This pergola has a 10×10 base and a 12×12 roof. If you are looking for a pergola with a 10×10 roof, you should check out my other plans about building a 8×8 pergola. This is a simple design, as I wanted to be accessible to every DIY hobbyist in a very budget friendly manner. Take a look over the rest of my woodworking plans, if you want to get more building inspiration.
When buying the lumber, you should select the planks with great care, making sure they are straight and without any visible flaws (cracks, knots, twists, decay). Investing in cedar or other weather resistant lumber is a good idea, as it will pay off on the long run. Use a spirit level to plumb and align the components, before inserting the galvanized screws, otherwise the project won’t have a symmetrical look. If you have all the materials and tools required for the project, you could get the job done in about a day. See all my Premium Plans HERE.
Projects made from these plans
10×10 Pergola Plans
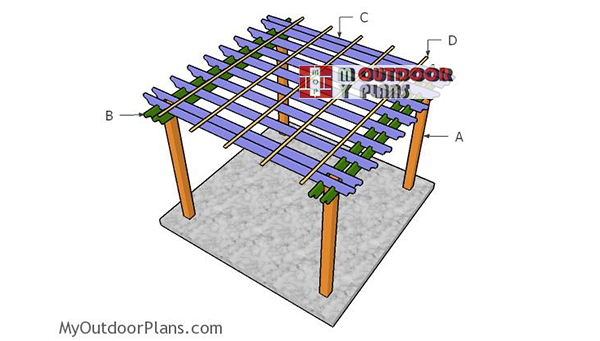
Building-a-10×10-pergola
Cut & Shopping Lists
- A – 4 pieces of 6×6 lumber – 96″ long POSTS
- B – 4 piece of 2×8 lumber – 12′ long SUPPORT BEAMS
- C – 10 pieces of 2×6 lumber – 12′” long SHADE ELEMENTS
- D – 5 pieces of 1×2 lumber – 12′” long SLATS
- 4 pieces of 6×6 lumber – 8′
- 4 pieces of 2×8 lumber – 12′
- 10 pieces of 2×6 lumber – 12′
- 5 pieces of 1×2 lumber – 12′
- 1 5/8″ screws
- 6×6 post anchor 4 pieces
- post to beam connector 8 pieces
- tube form
- rafter ties
- 8 pieces of 9″ carriage bolt
- wood filler , wood glue, stain/paint
Tools
![]() Hammer, Tape measure, Framing square, Level
Hammer, Tape measure, Framing square, Level
![]() Miter saw, Drill machinery, Screwdriver, Sander
Miter saw, Drill machinery, Screwdriver, Sander
![]() Safety Gloves, Safety Glasses
Safety Gloves, Safety Glasses
Time
Related
How to build a 10×10 pergola
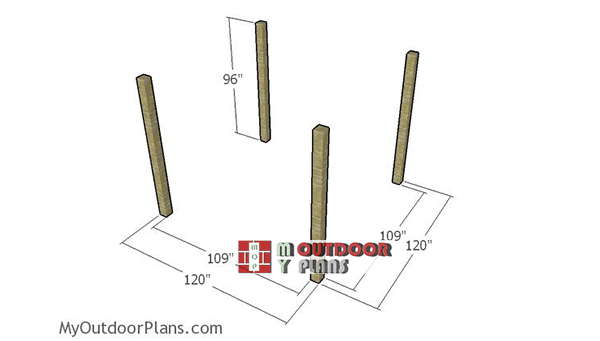
Laying-out-the-posts
The first step of the project is to layout the posts for the pergola. This pergola will have a 12×12 roof, while the base square is 10×10. Use batter boards and string to lay out the location for the posts. Apply the 3-4-5 rule to the corners are then make adjustments if necessary.
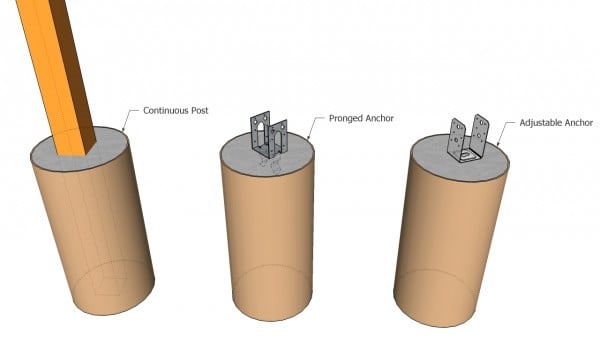
Anchoring the posts of the anchor
There are a few ways to secure the 6×6 posts into place. You can set the posts in concrete or you can use adjustable anchors and pour footings. Dig the holes 3′ deep (or under the front line) and about 12-13′ in diameter. Compact a layer of gravel to the bottom of the holes and then fit the tube forms. Fit the posts, align them and plumb them with a spirit level. Fill the forms with concrete, while the posts are locked into place with temporarily braces. If you use anchors, you need to align and set them into concrete. Fit the posts after the concrete dries, using lag screw.
Smart tip: Read the local building codes, so you dig the holes at the appropriate depth.
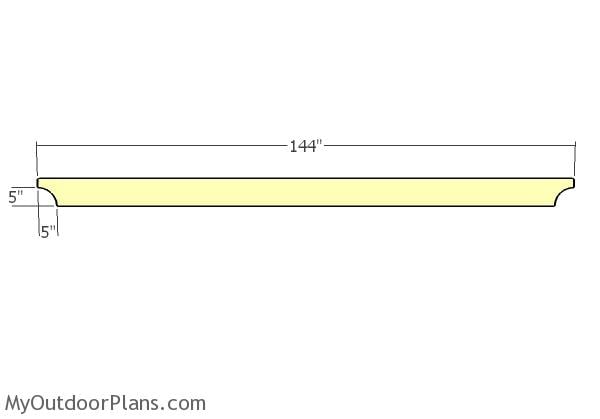
Building the support beam
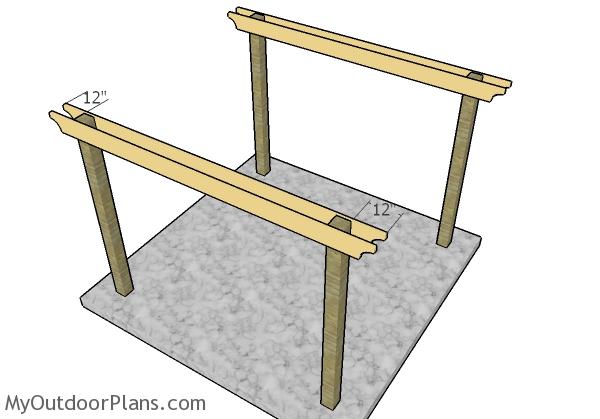
Build the support beams for the pergola from 2×8 lumber. As you can easily see in the free pergola plans, you should make decorative cuts to both ends of the beams. You can use a large round object so you can trace the curves line. Use a jigsaw to make the cut and then smooth the edges with sandpaper.
Fitting the support beams
Fit the support beams to the top of the posts. Align the edges with attention and then clamp them into place tightly. Drill pilot holes through the beams and through the posts and insert 9″ carriage bolts, so you can lock them together tightly. Use a spirit level to make sure the beams are horizontal
Building-the-shade-elements
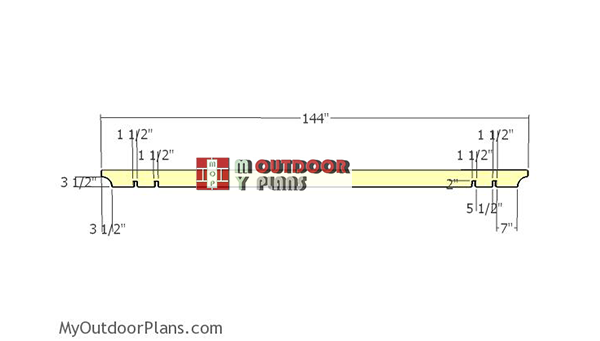
Build the shade elements from 2×6 lumber. Make the decorative cuts to both ends of the beams and then smooth the edges with attention. Mark the cut area for the notches and then use a circular saw to make many parallel cuts. Remove the excess with a chisel and smooth the edges with sandpaper.
Fitting-the-shade-elements
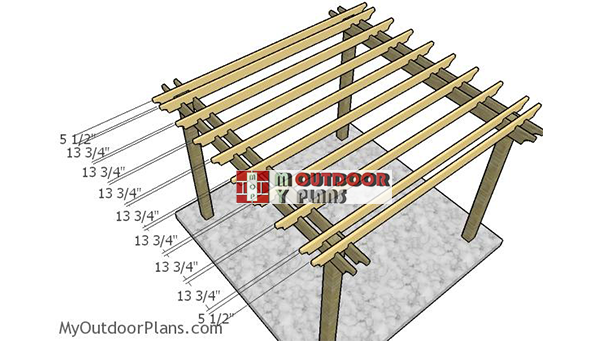
Fit the shade elements to the top of the pergola. Place the shade elements equally spaced and then use rafter ties or screws to lock them into place tightly.
Fitting the top slats
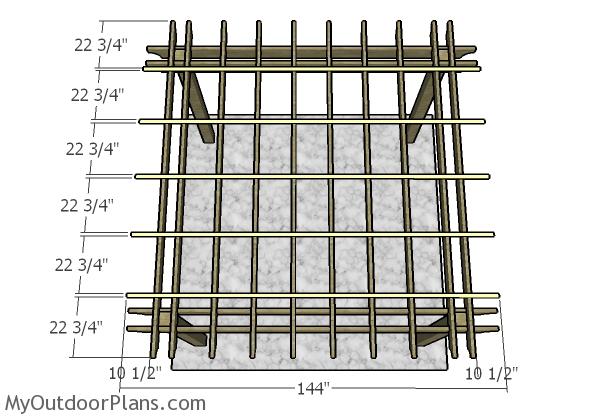
Fit the 1×2 slats to the roof of the pergola, so you can add more character to the pergola and so you can keep the rafters equally spaced. Center the slats to the top of the pergola and then place them equally spaced. Drill pilot holes and insert
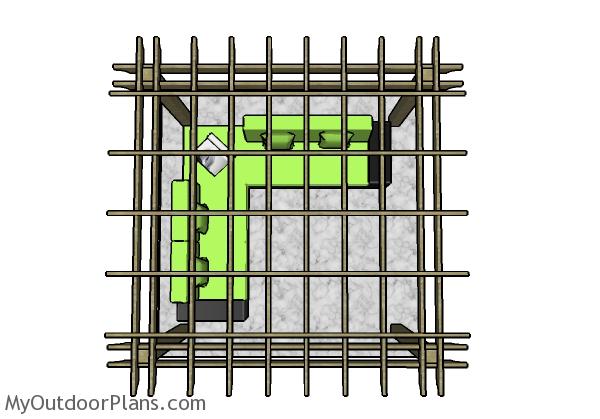
10×10 Pergola Plans – Top view
Last but not least, you need to take care of the finishing touches. Therefore, fill the holes with wood putty and then smooth the surface with 120-220 grit sandpaper. You can also fit braces, if you live in a windy area. Apply a few coats of paint or stain over the components, to enhance the look of the pergola and to protect the components from decay.
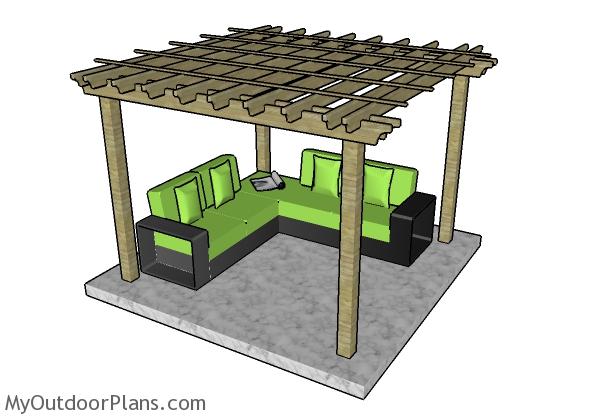
10×10 Pergola Plans
This pergola is large enough so you can set a small table and a few chairs, or a nice outdoor sofa. You can even cover the pergola for more shade during the hot summer days.
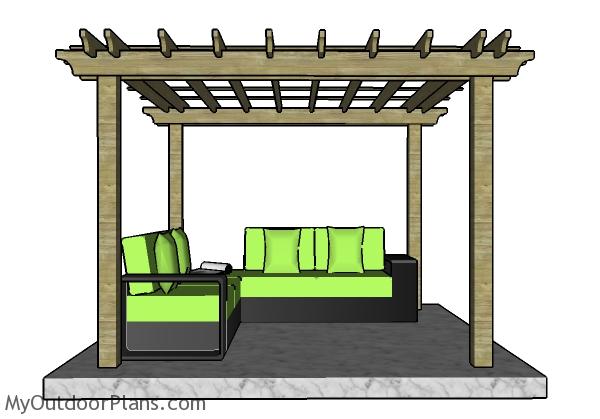
10×10 Pergola Plans Free
If you want to add charm and unique appeal to your garden, I recommend you to check out these plans. This 10×10 pergola can be built by any person with basic woodworking skills and it is also very budget friendly. You can make a lot of adjustments to the design so it suits your tastes and needs. Check out the rest of my pergola plans, as I have many designed and sizes you can choose from.
If you want to get PREMIUM PLANS for this project (different design with re-engineered structure), in a PDF format, please press GET PDF PLANS button bellow. Thank you for the support.
This woodworking project was about 10×10 pergola plans free. If you want to see more outdoor plans, check out the rest of our step by step projects and follow the instructions to obtain a professional result.


10 comments
I am planning to build the 10×10 pergola. I have a question about the hardware used to mount the support beams. The post is 6×6 and the support beams (2) are 2×8. To me that adds to 10″ the directions say to use 7″ carriage bolts. How do the carriage bolts fit?
Thank you for the feedback. You actually need 9″ bolts. 6×6 lumber is 5 1/2″ x 5 1/2″ and 2x8s are 1 1/2″ x 7 1/4″
What is 3-4-5 rule as in your writing above?
Measure 3 ft on one side, 4 ft on the other side. The line between the 2 points should measure 5 ft.
Great plans. Very easy and wonderful looking results. Thanks! I found most lumber yards near me only carry 6×6 rough cut, which means it’s actually 6” x 6”, so if you get rough cut, make sure you get the right post anchors and 10” carriage bolts.
Like your plan but wish to shed roof this style with metal roof. To avoid shedding water toward the house,the roof would slant away from house and cover an existing patio in yard.( Note) If one wishes to concrete the posts in you will need 10′ 6×6 posts if sinking 2′ deep.
i’m having difficulty finding 6×6 post in my area (outside USA) and 9′ carriage screws (7 is available) can u give me the material list for the use of 4×4 posts. much appreciated
Hello, in you plan list you say to get Post to Beam Connector 8 pieces. But you didn’t say where to add them to. If you could please let me know that would be great. Thank you.
As the instructions say, post to support beams. It’s optional and more for a decorative look. The carriage bolts do the heavy work.
Do you have any plans for a screened pergola for a backyard finished with pavers. I want to keep flies and mosquitoes out but I still want that wow factor from the design. Also I will have to remove 4 posts to attach the post to the earth for wind stability what do you suggest? In terms of size I am thinking maybe 10×6 along a back fence.