This step by step diy woodworking project is about hope chest plans. If you want a really stylish way to store your kids toys, or any other small items, this chest project might come handy to you. Use 3/4″ plywood, 1x2s and 1x3s to build this modern chest. The wood chest also features two trays for storing small items. Make sure you take a look over the rest of plans to see alternatives and more projects for your garden.
Work with attention and don’t forget that a good planning will save you from many issues and it will keep the costs withing the total budget. Invest in high quality materials, such as pine, redwood or cedar. Drill pocket holes before inserting the galvanized screws, to prevent the wood from splitting. Add waterproof glue to the joints, in order to enhance the rigidity of the structure. See all my Premium Plans HERE.
Projects made from these plans
It’s that simple to build a hope chest!
Hope Chest Plans
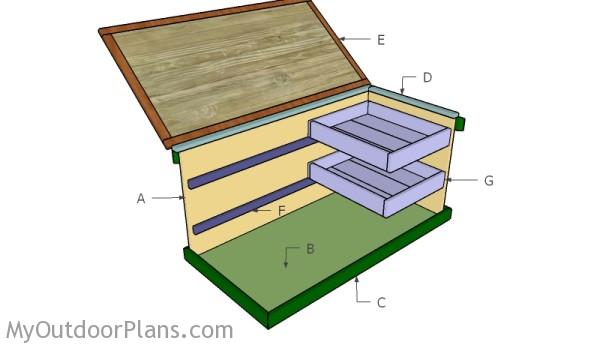
Building a hope chest
Cut & Shopping Lists
- A – 2 pieces of 3/4″ plywood – 22″x22″ long, 2 pieces – 22″x48″ long FRAME
- B – 1 piece of 3/4″ plywood – 23 1/2″x48″ long BOTTOM
- C – 4 pieces of 1×3 – 25″ long, 4 pieces – 49 1/2″ long TRIMS
- D – 2 pieces of 1×2 lumber – 22″ long, 2 pieces – 49 1/2″ long TRIMS
- E – 2 pieces of 1×2 lumber – 51″ long, 1 piece – 23 1/2″ long, 1 piece of 3/4″ plywood – 23 1/2″x48″ long LID
- F – 4 pieces of 1×2 lumber – 46 1/2″ long CLEATS
- G – 2 pieces of 1×4 lumber – 18″ long, 2 pieces – 20 1/4″ long, 3 pieces of 1×6 lumber – 20 1/4″ long 2xTRAY
- 6 pieces of 1×2 lumber – 8′
- 6 pieces of 1×3 lumber – 8′
- 2 pieces of 1×6 lumber – 8′
- 2 pieces of 3/4″ plywood – 4’x8′
- 100 pieces of 2 1/2″ screws
- 100 pieces of 1 1/4″ screws
- 2″ brad nails, 1 1/4″ brad nails
- safety hinge, piano hinge
- wood glue, stain/paint
- wood filler
Tools
![]() Hammer, Tape measure, Framing square, Level
Hammer, Tape measure, Framing square, Level
![]() Miter saw, Drill machinery, Screwdriver, Sander
Miter saw, Drill machinery, Screwdriver, Sander
![]() Post hole digger, Concrete mixer
Post hole digger, Concrete mixer
Time
Related
Build a wooden hope chest
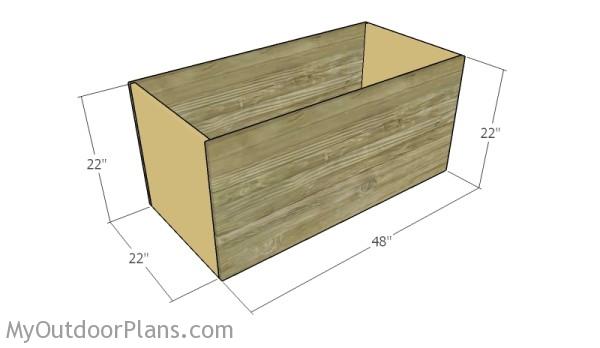
Assembling the frame of the chest
The first step of the project is to assemble the box. Therefore, cut the components from 3/4″ plywood and drill pilot holes along the sides of the frond and back panels. Attach the side components, align the edges and make sure the corners are square. Insert 1 1/4″ screws to lock the box together.
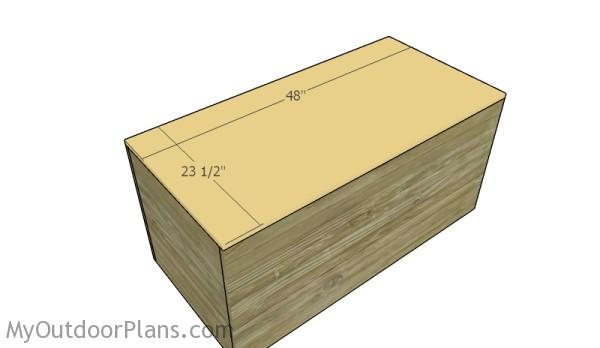
Fitting the bottom
Next, attach the bottom to the box. Drill pilot holes through the bottom and insert 1 1/4″ screws into the box. Align the edges with attention and leave no gaps between the components.
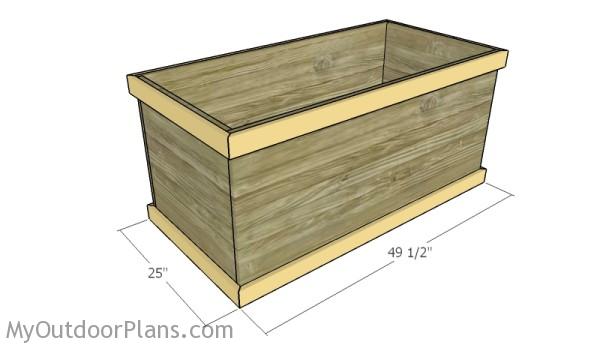
Attaching the trims
In order to enhance the look of the hope chest, you need to attach 1×3 trims to the bottom and to the top of the box. Cut both ends of the trims at 45 degrees and lock the to the box with glue and 1 3/4″ finishing nails.
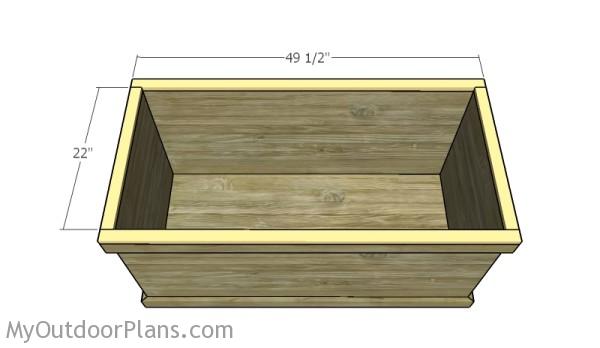
Fitting the top trims
Attach 1×2 trims to the top of the box, as shown in the diagram. Leave no gaps between the components and lock the trims into place with 1 1/4″ brad nails.

Fitting the cleats
Fit 1×2 cleats to the interior of the chest. The cleats will support the trays. Use 1 1/4″ nails to lock the cleats to the frame.
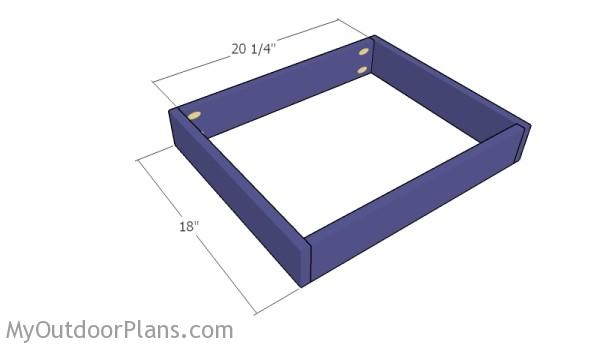
Tray frame
Build the frame for the trays from 1×4 slats. Drill pilot holes at both ends of the 20 1/2″ long slats and insert 1 1/4″ screws into the perpendicular components. Align the edges and make sure the corners are square.
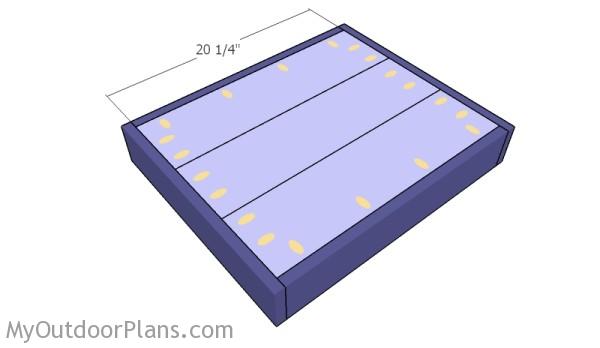
Attaching the bottom tray
Build the bottom from the trays from 1×6 slats. Drill pocket holes at both ends and lock them to the frame using 1 1/4″ screws.
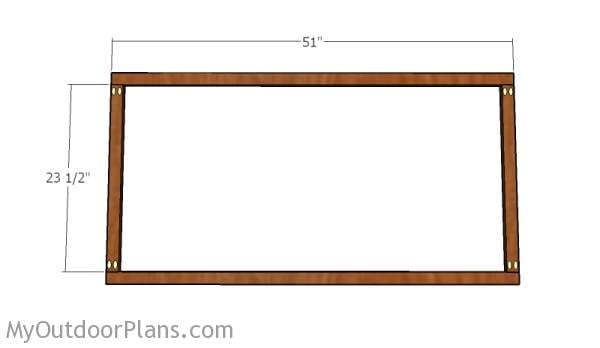
Building the frame of the lid
Build the frame for the lid from 1×2 slats. Drill pocket holes at both ends of the 23 1/2″ long slats and insert 1 1/4″ screws into the perpendicular components. Make sure the corners are square and align the edges with attention.
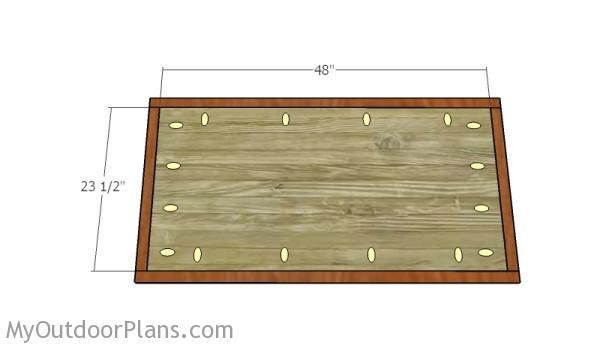
Assembling the lid
Build the lid from 3/4″ plywood. Drill pocket holes along the edges and insert 1 1 /4″ screws into the frame.
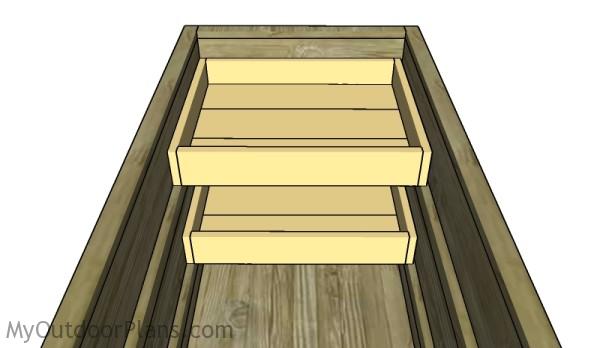
Fitting the trays
Fit the trays to the cleats. As you can see in the image, you can move the trays easily and have access to the items placed below, or you can remove them completely.
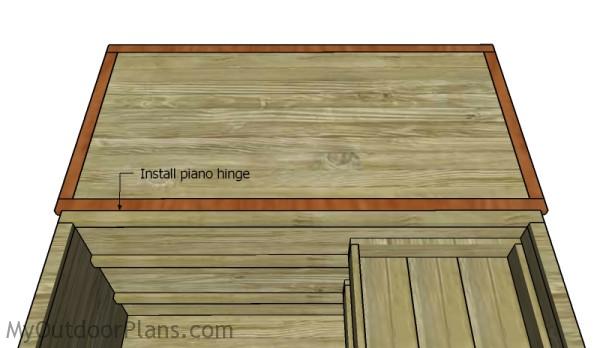
Attaching the lid
Attach the lid to the top of the hope chest and lock it into place with a piano hinge.
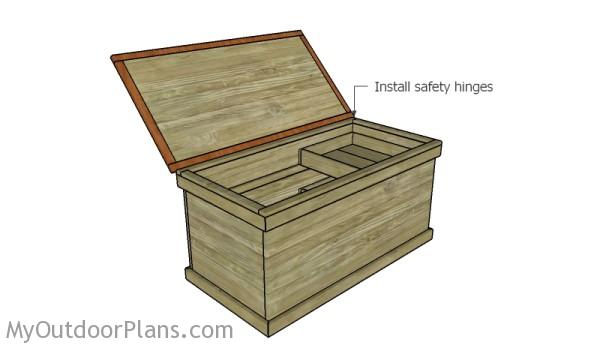
Fitting the lid
In addition, fit safety hinges to prevent possible accidents.
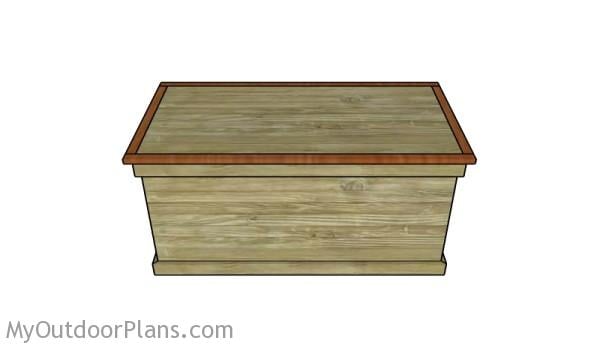
Free hope chest plans
Fill the holes with wood putty and let them dry out for a few hours. Smooth the surface with 100-200 grit sandpaper and remove the residues with a damp cloth.
Top Tip: Apply a few coats of paint or stain to the components, to enhance the look of the project. This hope chest is the ideal project if you are looking to create more storage space for kids toys or for other items you don’t use that regularly. This chest has a modern design so it can match the style of any room. Just make sure you choose the appropriate color to match the rest of the furniture in the house.
This woodworking project was about hope chest plans. If you want to see more outdoor plans, check out the rest of our step by step projects and follow the instructions to obtain a professional result.


2 comments
I like this plan
Thank you. I would love to see your projects.