This step by step diy project is about wall mounted bottle opener with cap catcher plans. I have designed this simple to make wall mounted bottle opener with cap catcher so you can build it in less than one hour. However, I believe in the force of unique design so I made sure the project has a distinctive look. You can use it for beer bottles or Coca Cola. You only need basic tools and skills to build this project, but you will also save a significant amount of money. Take a look over the rest of my woodworking plans, if you want to get more building inspiration.
When buying the lumber, you should select the planks with great care, making sure they are straight and without any visible flaws (cracks, knots, twists, decay). Investing in cedar or other weather resistant lumber is a good idea, as it will pay off on the long run. Use a spirit level to plumb and align the components, before inserting the galvanized screws, otherwise the project won’t have a symmetrical look. If you have all the materials and tools required for the project, you could get the job done in about a day.
Projects made from these plans
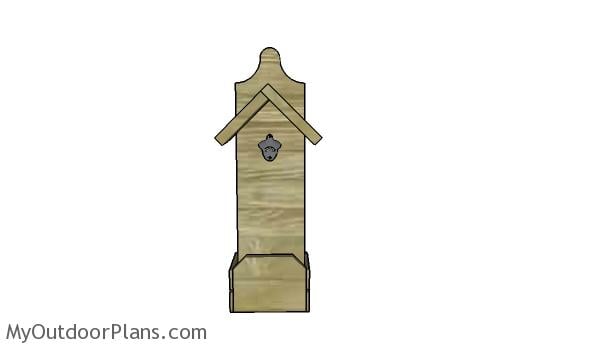
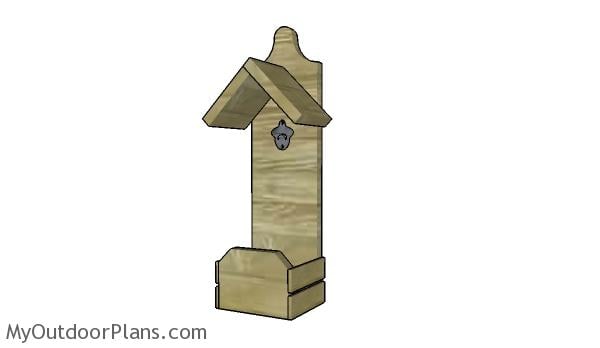
Building a wall mounted bottle opener
Building a wall mounted bottle opener
Cut & Shopping
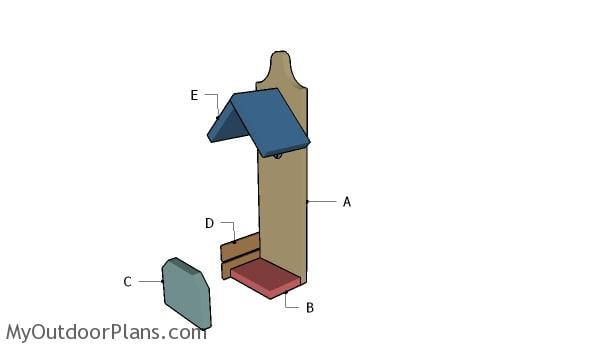
- A – 1 piece of 1×6 lumber – 20″ long BACK
- B – 1 piece of 1×6 lumber – 3 1/2″ long BOTTOM
- C – 1 piece of 1×6 lumber – 4 1/4″ long END
- D – 4 pieces of 1×2 lumber – 5″ long SIDES
- E – 2 pieces of 1×6 lumber – 4 1/2″ long ROOF
- 1 piece of 1×6 lumber – 6′
- 1 piece of of 1×2 lumber (1/4″ thick) – 4′
- bottle opener
- 1 1/2″ brad nails
- wood filler, wood glue, stain/paint
Tools
![]() Hammer, Tape measure, Framing square, Level
Hammer, Tape measure, Framing square, Level
![]() Miter saw, Drill machinery, Screwdriver, Sander
Miter saw, Drill machinery, Screwdriver, Sander
Time
![]() One day
One day
Related
DIY Wall Mounted Bottle Opener with Cap Catcher Plans
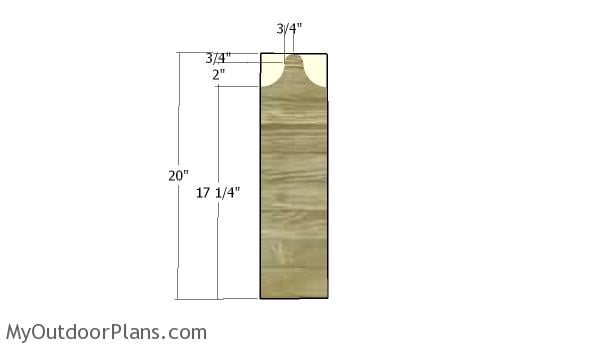
Building the back support
The first step of the project is to build the back of the wall mounted bottle opener. Mark the cut lines on the 1×6 slat and get the job done with a jig saw. Make sure the blade goes outside the marked lies, as you can remove the excess with sandpaper. The easiest way to get a professional result is to use a spindle sander.
If you plan on installing the diy bottle opener outside, I recommend you to invest in weather-resistant lumber, such as cedar, redwood or oak. These materials are more expensive but a lot more durable.
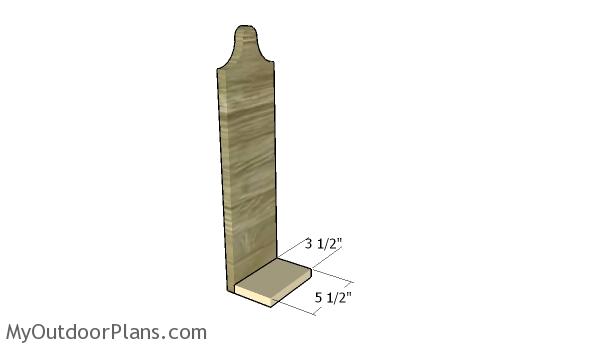
Fitting the bottom
Cut a piece of 1×6 lumber and attach it to the back using waterproof glue and 1 1/2″ brad nails. Make sure the edges are flush and check if the corner is right angled before inserting the brad nails.
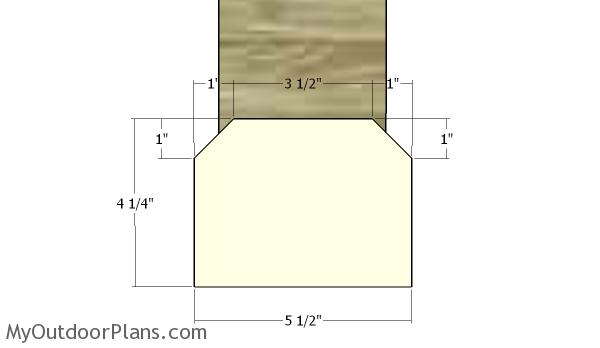
Fitting the end to the tray
Next, you need to assemble the tray for the caps. Make some decorative cuts to the end component and attach it to the bottom slat with 1 1/2″ brad nails and wood glue. Check if the corner is square and if the edges are perfectly aligned.
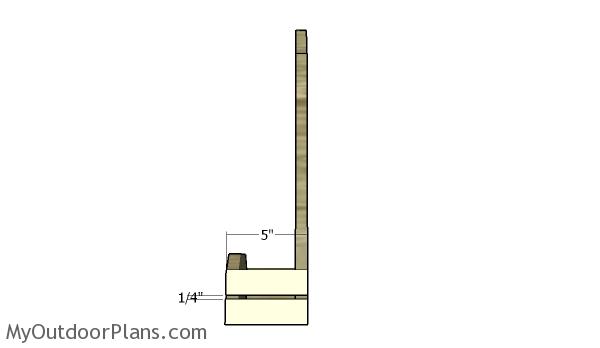
Fitting the side slats
Continue the project by attaching 1×2 strips to the sides of the tray catcher. Align the edges and secure the slats into place with 3/4″ brad nails and glue.
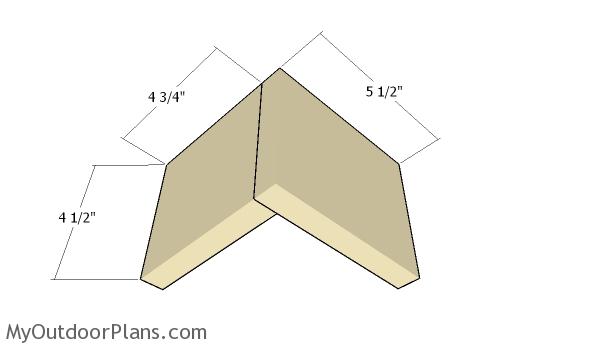
Assembling the roof
Assemble the roof for the bottle opener using 1×6 slats. Cut the components at the right dimensions and lock them together tightly with glue and 1 1/2″ brad nails.
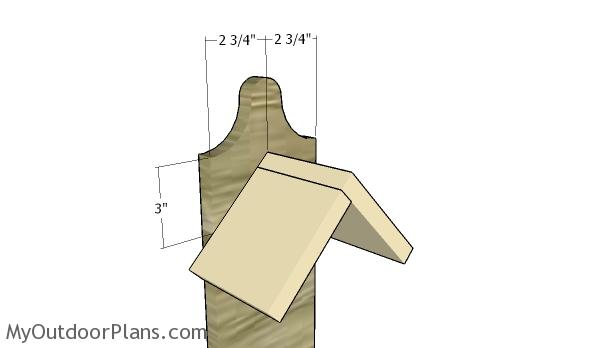
Fitting the roof
Center the roof to the back of the opener. Add glue to the joints and insert 1 1/2″ brad nails though the back, so you lock it into place tightly.
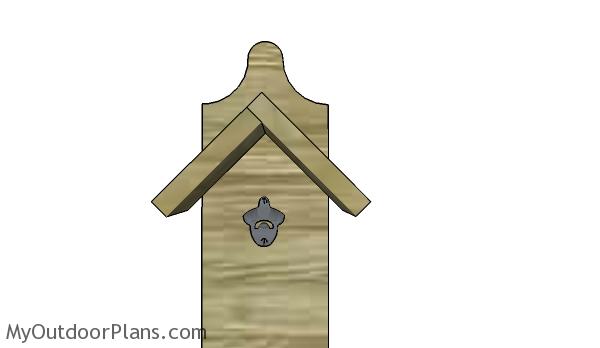
Fitting the bottle opener
Fit the metal bottle opener to the back slat. Center it into place and adjust its location so it suits your needs. Make sure you pre-drill holes before inserting the screws to prevent the wood from splitting.
DIY Bottle Opener with Cap Catcher Plans
Las but not least, you need to take care of the finishing touches. Therefore, I recommend you to fill the dents and the holes with wood putty and to leave it harden for a couple of hours. Next, remove the metal bottle opener and smooth the surface with 120-220 grit sandpaper. Apply a few coats of stain over the components to enhance the natural look of the wood and to protect the lumber from decay. Seal the finish with a few coats of lacquer.
How to build a beer bottle opener with a cap catcher
This wall mounted bottle opener has a rustic design and can be install both indoor but also outdoor. If you like beer or you want to make an unique gift to a loved one, make sure you give this project a shot. If you build this, I would love to see your project.
This woodworking project was about wall mounted beer bottle plans free. If you want to see more outdoor plans, check out the rest of our step by step projects and follow the instructions to obtain a professional result.