This step by step diy woodworking project is about a 10×16 lean to gazebo plans. This article features detailed instructions for building a rectangular gazebo with a lean to roof. You can attach the gazebo to an existing building. Check out PART 2 of the project to learn how to build the railings. Take a look over the rest of our woodworking plans, if you want to get more building inspiration.
When buying the lumber, you should select the planks with great care, making sure they are straight and without any visible flaws (cracks, knots, twists, decay). Investing in cedar or other weather resistant lumber is a good idea, as it will pay off on the long run. Use a spirit level to plumb and align the components, before inserting the galvanized screws, otherwise the project won’t have a symmetrical look. If you have all the materials and tools required for the project, you could get the job done in about a day. See all my Premium Plans HERE.
Projects made from these plans
It’s that simple to build a lean to gazebo!
Lean To Gazebo Plans
Building-a-lean-to-gazebo
Cut & Shopping Lists
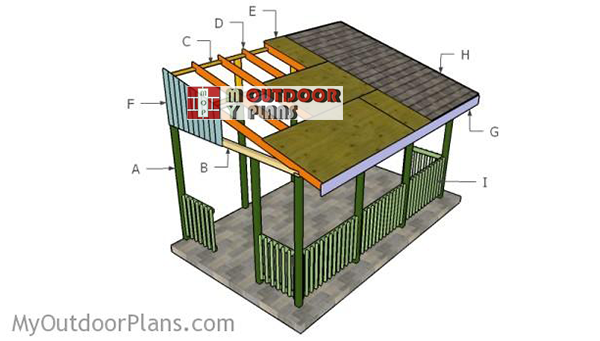
- A – 12 pieces of 4×4 lumber – 96″ long POSTS
- B – 2 pieces of 4×4 lumber – 192″ long, 2 pieces – 120″ long TOP RAILS
- C – 2 pieces of 2×4 lumber – 192″ long, 4 pieces – 29 1/4″ long WALL
- D – 9 pieces of 2×6 lumber – 144″ long RAFTERS
- E – 3 pieces of 3/4″ plywood – 48″x96″ long, 2 pieces – 48″x48″ long, 2 pieces – 46″x96″ long ROOF
- F – pieces of 1×6 lumber – 96″ long END PANELS
- G – 2 pieces of 1×8 lumber – 144 1/2″ long, 1 piece – 195 1/2″ long TRIMS
- H – 200 sq ft of tar paper, 200 sq ft of asphalt shingles ROOFING
- 12 pieces of 4×4 lumber – 8′
- 2 pieces of 4×4 lumber – 16′
- 3 pieces of 4×4 lumber – 12′
- 9 pieces of 2×6 lumber – 12′
- 2 pieces of 2×4 lumber – 16′
- 25 pieces of 1×6 lumber – 8′
- 2 pieces of 1×8 lumber – 14′
- 1 piece of 1×8 lumber – 20′
- 6 pieces of 3/4″ plywood – 4’x8′
- concrete form tube
- 12 post anchors
- 20 pieces of 5″ screws
- 500 pieces of 1 5/8″ screws
- 50 pieces of 3 1/2″ screws
- wood glue, stain/paint
- 18 pieces of rafter ties
- structural screws for connectors
- strong tie T
Tools
![]() Hammer, Tape measure, Framing square, Level
Hammer, Tape measure, Framing square, Level
![]() Miter saw, Drill machinery, Screwdriver, Sander
Miter saw, Drill machinery, Screwdriver, Sander
Time
![]() One day
One day
Related
- PART 1: Lean to gazebo plans
- PART 2: How to build gazebo railings
How to build a lean to gazebo
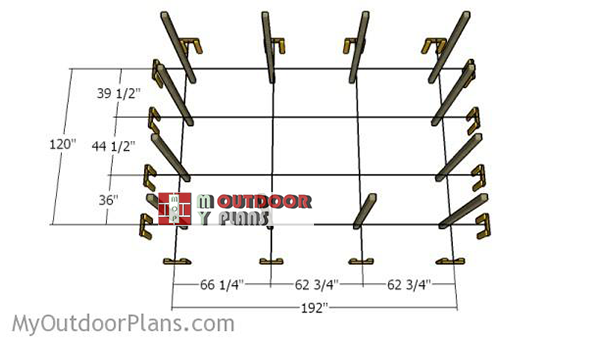
Laying-out-the-gazebo-posts
The first step of the project is to layout the posts for the pavilion. Use batter boards and string to lay out everything in a professional manner. Apply the 3-4-5 rule to every corner, to make sure they are right-angled. In addition, measure the diagonals and make adjustments until they are perfectly equal.

Anchoring the posts of the anchor
There are several ways to lock the posts into place. Therefore, you could dig 2-3′ holes in the ground and set the posts into concrete, or you could use post anchors. Use tube forms so that the footing will be really strong.
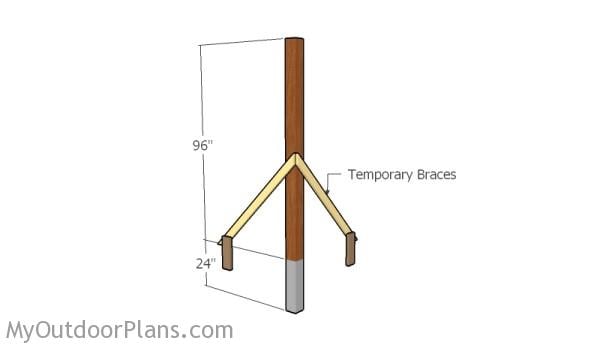
Fitting the posts
If you want to set the posts in concrete, then you need to use temporarily braces. Plumb the posts with a spirit level. Read the local building codes for finding the right depth of the footings. It is essential to set the footing at the right depth to avoid them being heaved by the Winter freeze/thaw cycle.
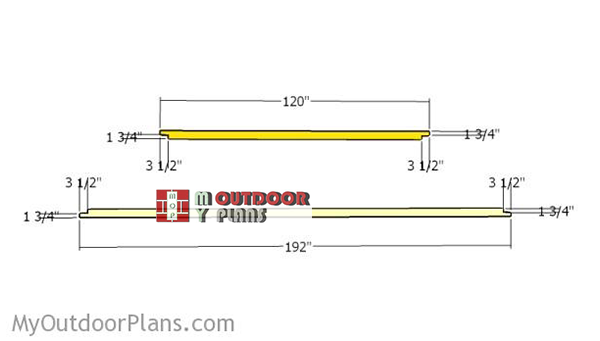
Building-the-top-rails
Build the top rails for the lean to gazebo from 4×4 lumber. As you can easily notice in the plans, you need to make notches to both ends of the beams. Make parallel cuts to the beams and remove the excess material with a chisel. Smooth the edges with sandpaper.
Fitting the top rails
Fit the top rails to the posts and lock them into place with 5″ screws. Make sure the corners are square and plumb the posts with a spirit level before inserting the screws.
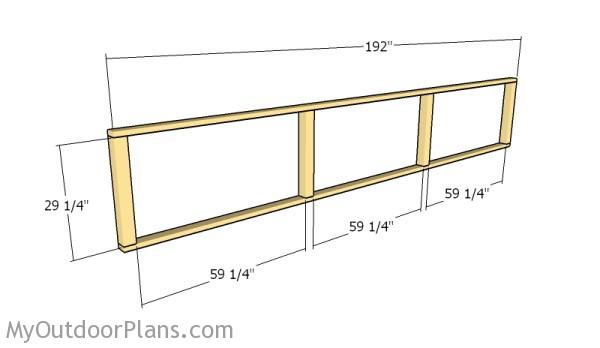
Building the top back wall
Assemble the top frame for the back wall from 2×4 lumber and 4×4 lumber. Drill pilot holes through the plates and insert 2 1/2″ screws into the studs. Make sure the corners are square and align the edges with attention.
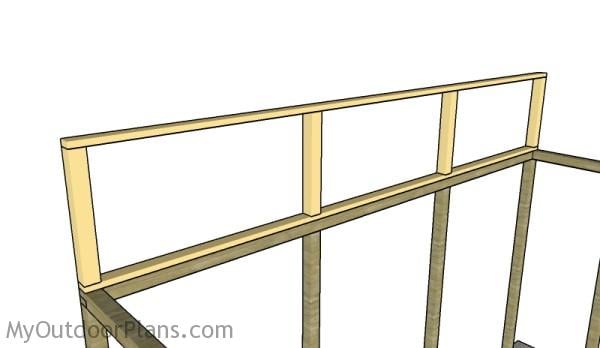
Fitting the top back wall
Fit the wall frame to back of the gazebo. Align the edges with attention, drill pilot holes through the bottom plate and insert 2 1/2″ screws into the 4×4 beam. Make sure the corners are square before inserting the screws.
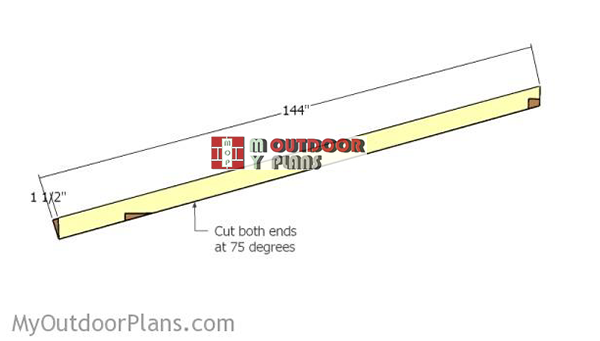
Building-the-rafters
Build the rafters from 2×6 lumber. Cut both ends of the rafters at 75 degrees. Smooth the edges with sandpaper for a professional result.
Top notch
Mark the cut lines to the to of the beams and cut the notch with a circular saw. Smooth the edges with sandpaper for a professional result.

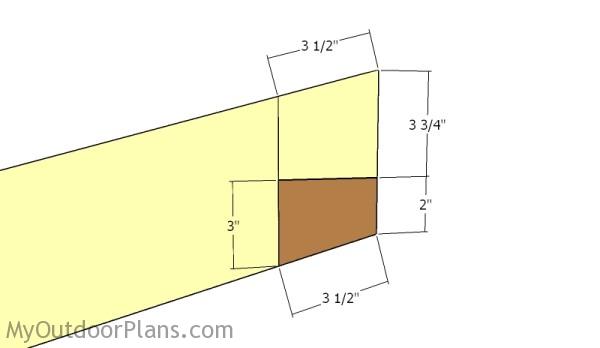
Bottom notch
Make notches to the bottom of the rafters, using the information from the diagram. Mark the cut lines on the rafters and get the job done with a saw.
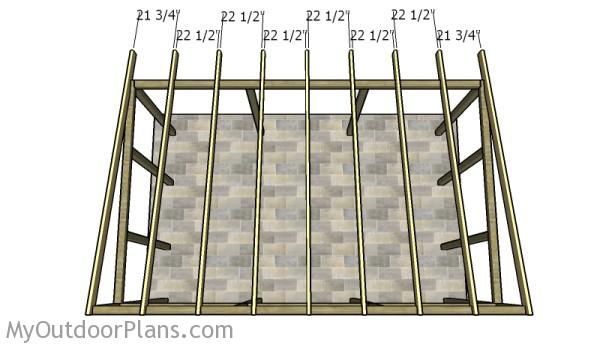
Fitting the rafters to the roof
Fit the rafters to the top of the gazebo. Place the rafters equally spaced, every 24″ on center. Use rafter ties to secure them to the top plates.
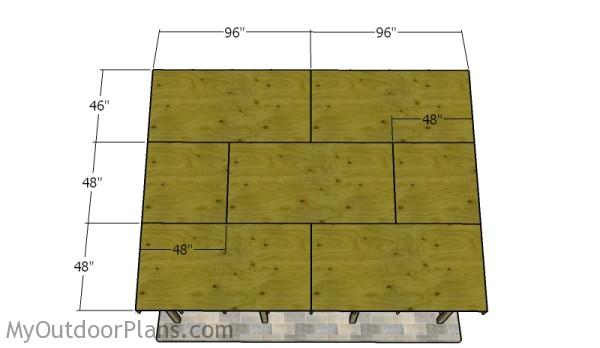
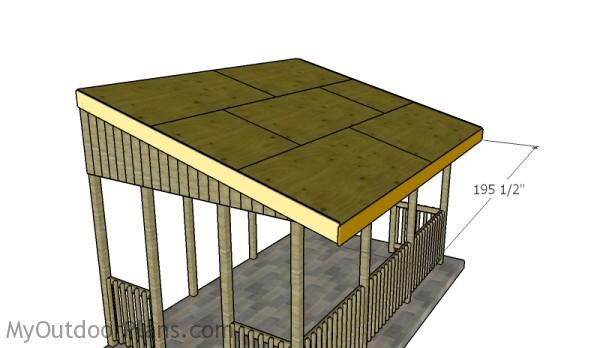
Fitting the roofing sheets
Use 3/4″ plywood sheets for the roofing. Lay the sheets to the rafters following the pattern shown in the plans. Use 1 5/8″ screws to lock the sheets to the rafters. Leave no gaps between the sheets for a professional result.
Fitting slats to the gable ends
Fit the 1×6 slats to the sides of the lean to gazebo. Cut the top of the slats at 75 degrees and smooth the edges with sandpaper. Fit the slats to the frame and secure them into place with 2″ brad nails.
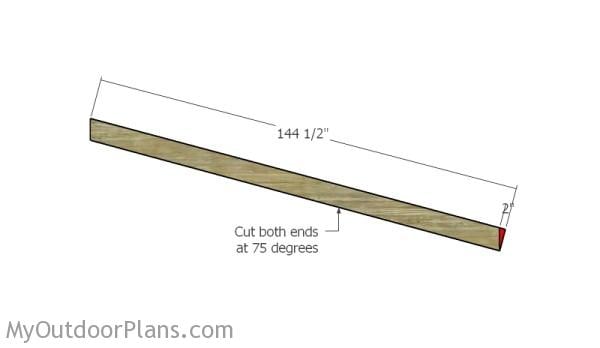
Building the side trims
Build the side trims for the roof from 1×8 lumber. Cut both ends of the trims at 75 degrees.
Fitting the roof trims
Fit the trims to the sides of the roof. Use 2″ brad nails to lock the trims into place, every 8″. Afterwards, attach the 1×8 trim to the end of the rafters. Align the edges with attention and lock the trim into place with 2″ brad nails.
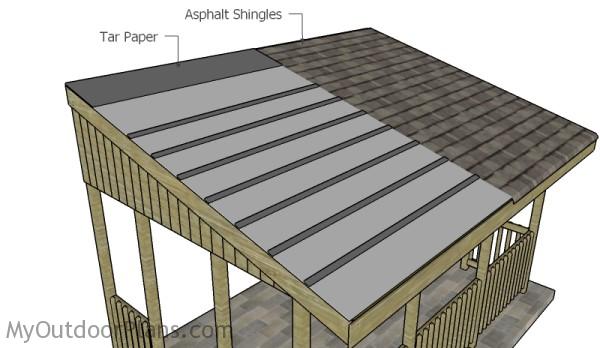
Fitting the roofing
Cover the roof of the shed with roofing felt, making sure the strips overlap at least 2″. Secure the tar paper to the plywood sheets with roofing staples. In addition, cut a 12″ piece for the top ridge. Fit the side drip edges over the roofing felt, while the bottom drip edges should be fit under.
Start the first course of shingles with a full tab, the second with 2 1/2 tabs, the third with 2 tabs, the forth with 1 1/2 tabs, the fifth with 1 tab, the sixth with half tab and the seventh with a 3 tabs.
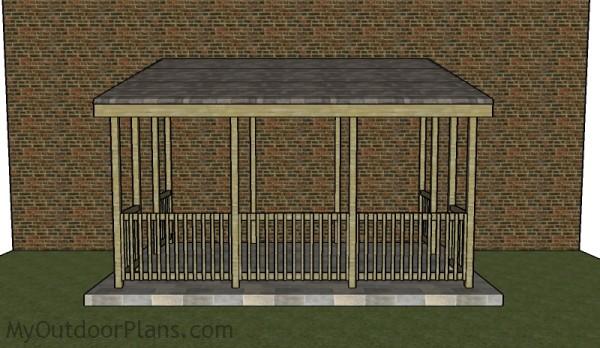
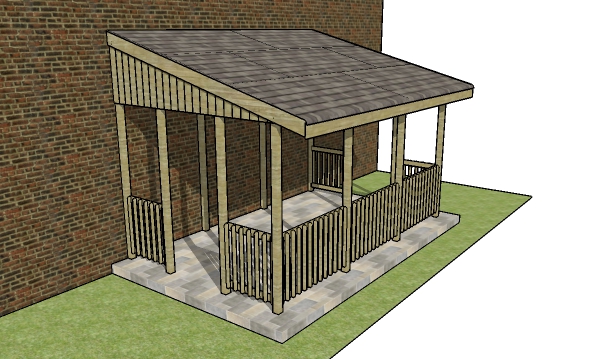
How to build a lean to gazebo gazebo
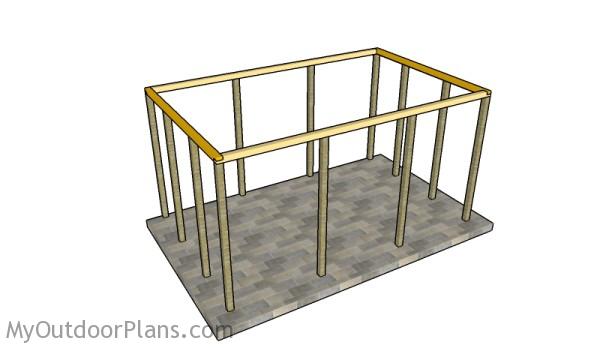
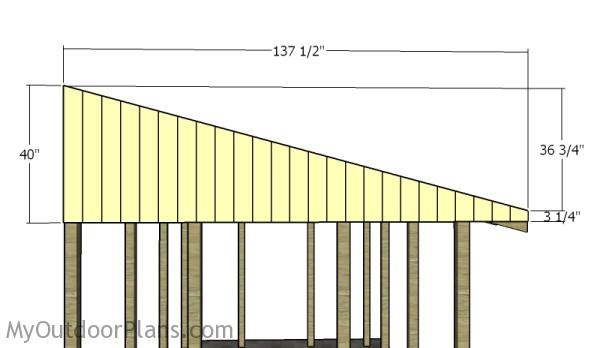
This 10×16 gazebo can be attached to an existing building or to a wall. The rectangular gazebo has a nice design that can match the style of any backyard.

Lean to gazebo plans
How to build a lean to gazebo
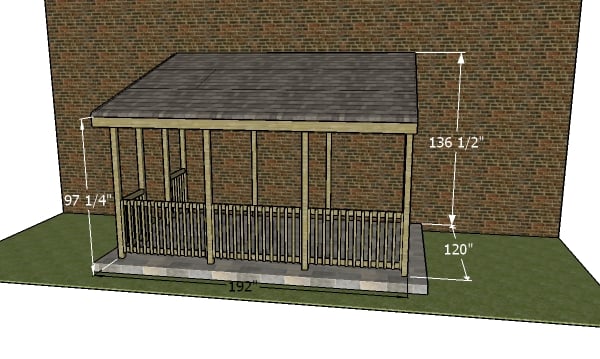
Lean to gazebo plans – overall dimensions
Fill the holes with wood putty and let them dry out for a few hours. Smooth the surface with 100-220 grit sandpaper and remove the residues with a damp cloth.
Top Tip: Apply a few coats of paint or stain to the components, to enhance the look of the project. Check out PART 2 of the project so you learn how to build the railings for the gazebo.
This woodworking project was about 10×16 attached gazebo plans free. If you want to see more outdoor plans, check out the rest of our step by step projects and follow the instructions to obtain a professional result.

EXPLORE MORE IDEAS FOR:
 |
 |
 |
 |
1 comment
Hi there……hopefully this is the correct place to ask this question. Any chance you have plans for this lean to gazebo in a 10 X 20?
Thanks for your time;
Jeff