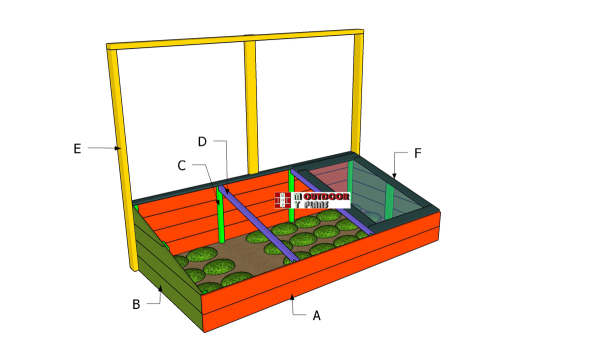
This step by step diy woodworking project is about 4×8 cold frame plans. This small greenhouse features 3 lids that you can open and close according to the outside temperature. Building this cold frame will definitely extend the gardening season and allow you to have fresh vegetables from more month. I have designed this mini-greenhouse so you can building it in one weekend with common tools.
There are many plans and designs to choose from, so make sure you take a close look over the rest of the cold frame plans featured on our website. Plan everything with attention and adjust the size and the shape of the cold frame to suit your needs. Plumb the legs and make sure the corners are right-angled before inserting the galvanized screws into place. Drill pilot or pocket holes to prevent the wood from splitting. See all my Premium Plans HERE.
Projects made from these plans
How to build a cold frame
Building-a-cold-frame
Cut & Shopping Lists
Tools
![]() Hammer, Tape measure, Framing square, Level
Hammer, Tape measure, Framing square, Level
![]() Miter saw, Drill machinery, Screwdriver, Sander
Miter saw, Drill machinery, Screwdriver, Sander
Time
Related
Building a cold frame
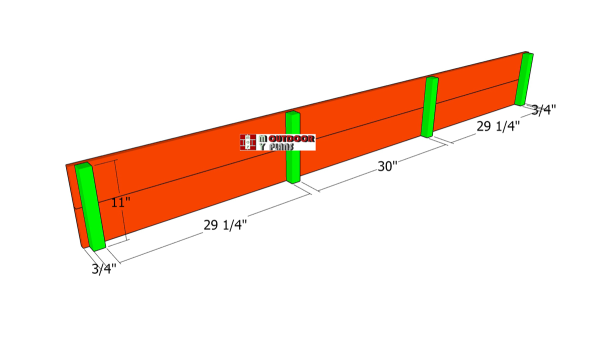
Front-panel
The first step of the project is to assemble the front panel for the cold frame. Use 2×2 lumber for the supports and 1×6 lumber for the slats. Align everything and insert 1 5/8″ screws through the slats into the supports. Drill pilot holes before inserting the screws, to prevent the wood from splitting.
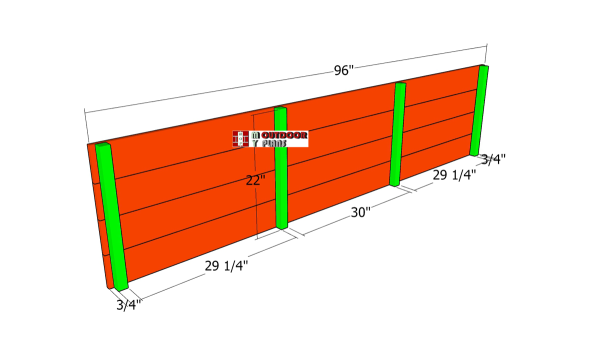
Back-wall-panel
Next, attach the back wall for the cold frame. As you can see in the diagram, the back wall needs to be taller, so you can create the slope for the lids. Leave no gaps between the slats and align them flush at both ends. Use 1 5/8″ screws to lock the boards to the 2×2 supports.
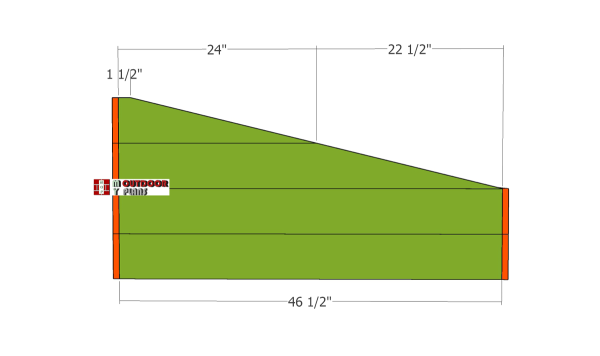
Side-panel-slats
Attach the 1×6 boards to the sides of the cold frame. As you can notice in the diagram, you need to make the angled cuts with a circular saw. Use 1 5/8″ screws to lock the boards to the posts. Drill pilot holes to prevent the wood from splitting.
Middle-side-support
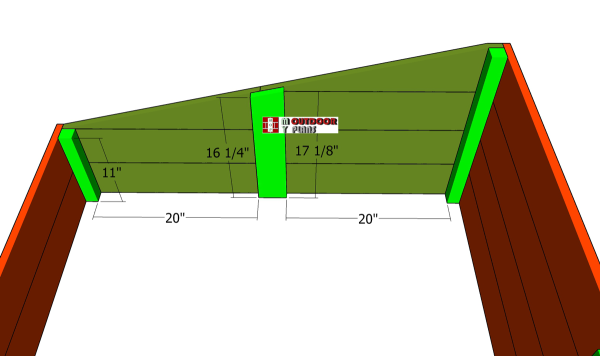
Attach a 1×4 board to the interior of the frame. These boards will lock the side slats together. Insert 1 1/4″ screws to attach the support to the side slats.
Fitting-the-lid-supports
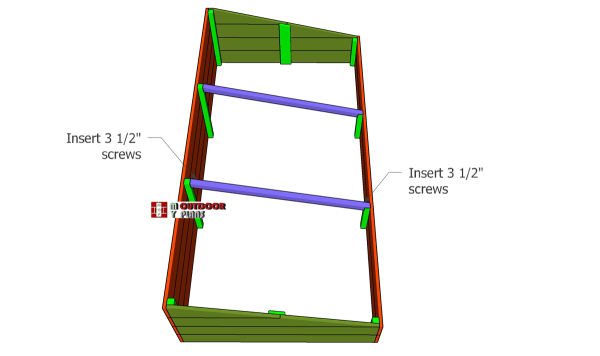
Next, we need to attach the supports for the lid into place. Align them at both ends and drill pilot holes before inserting the 3 1/2″ screws. (a detailed diagram with the supports is available in the premium plans, so you can cut it properly)
Building the lids
Assembling-the-lid-frame
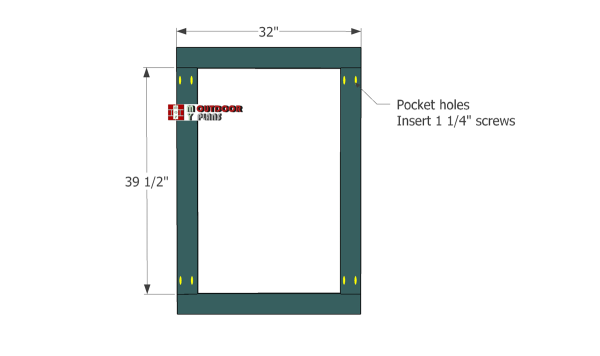
Use 1×4 boards for the lid frames. As you can see in the image, you have to drill two pocket holes at each end of the vertical boards. Lay all the boards on a level surface and align the edges flush, making sure the corners are square. Insert 1 1/4″ screws to assemble the frames properly.
Lid-back-supports
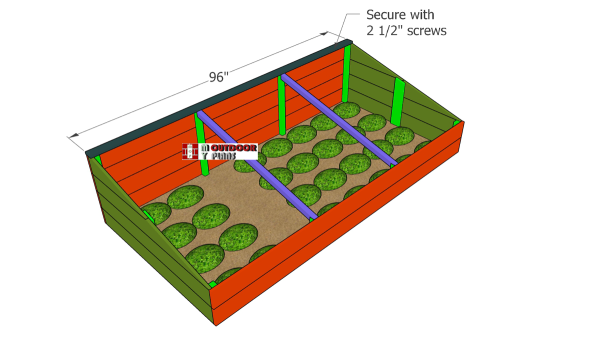
Fit the 1×3 support to the top back of the cold frame. We need this slat so we can secure the lids into place. In this manner, you can open and close them easily.
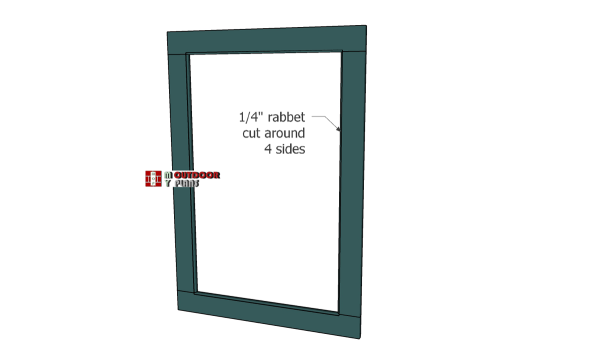
Rabbet-cuts-for-lids
Use a router to make 1/4″ rabbets to the lid frames, along the four interior edges.
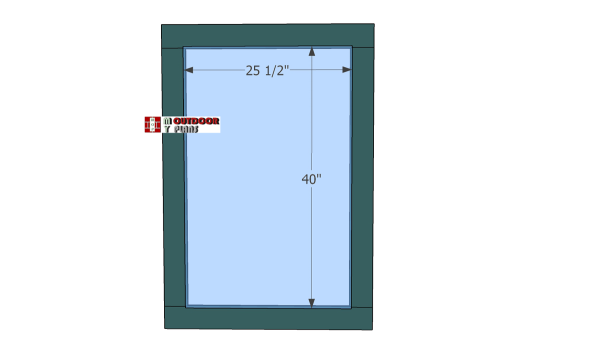
Fitting-the-glass-panel
Fit the 1/4″ plexiglass panels to the lid frames. Use adhesive and silicone to seal the joints and make sure the water will not get through the lid inside the cold frame.
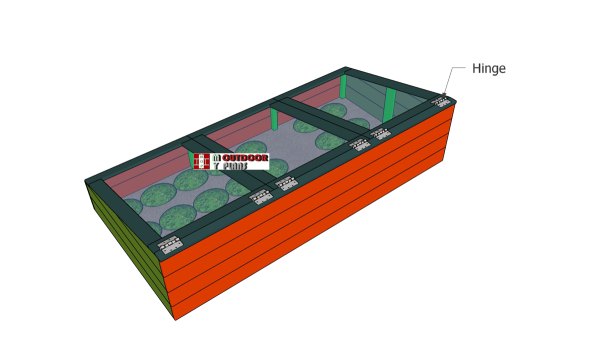
Fitting-the-lids
Fit the 3 lids to the cold frame. Use hinges and screws to lock the lids into place. Use 2 hinges for each lid.
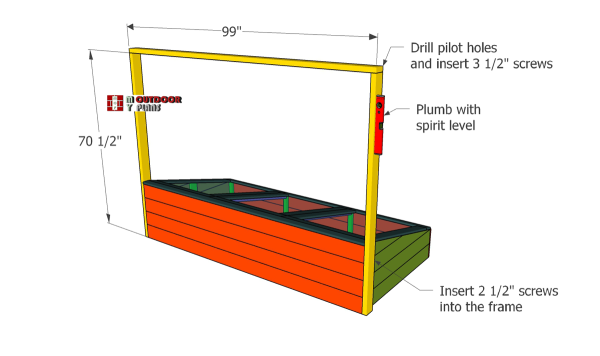
Trellis-frame
Last but not least, we need to frame the trellis that will also hold the lids open when necessary. Use 2×4 lumber for the frame and cut the components as shown in the diagram. Plumb the supports and lock them into place with 2 1/2″ screws. Attach the top component into place with 3 1/2″ screws, after drilling the pilot holes.

Back-vertical-post
Attach the extra 2×4 to the back of the structure to reinforce its rigidity. Drill pilot holes and insert 2 1/2″ screws to lock it into place tightly.
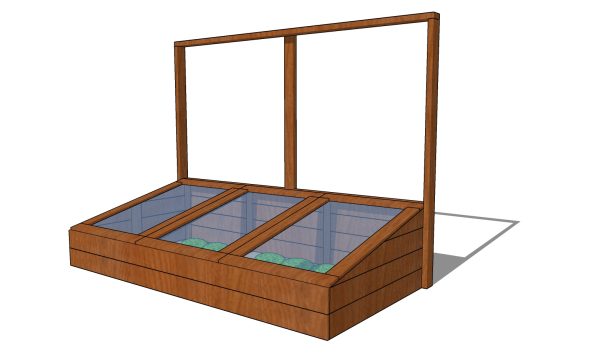
Cold frame
It would be a good idea to staple landscape fabric inside the cold frame, so the lumber is protected from the elements.

Build a cold frame
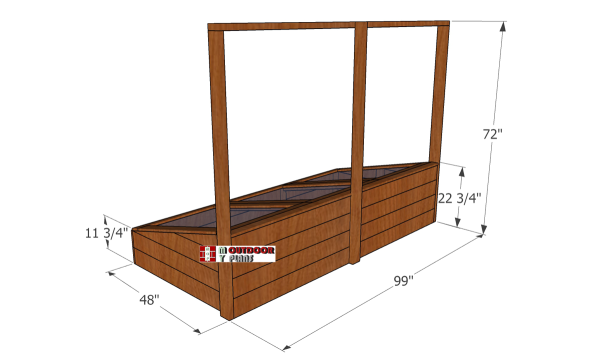
Cold-frame—overall-dimensions
One of the last steps of the woodworking project is to take care of the finishing touches. Therefore, fill the pilot holes with wood putty and smooth the surface with 120-grit sandpaper.
Top Tip: If you want to enhance the look of the woodworking project and to protect the table from decay, we recommend you to cover the components with paint or stain. Place the cold frame in a proper location and move it whenever necessary.
This woodworking project was about how to build a cold frame. If you want to see more outdoor plans, we recommend you to check out the rest of our step by step projects. LIKE us on Facebook and Google + to be the first that gets out latest projects.

