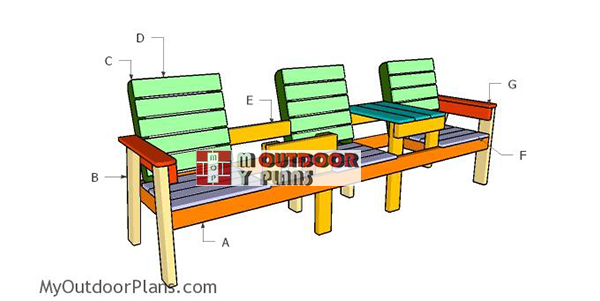
This step by step woodworking project is about triple chair bench with table plans. This article features detailed instructions for building a sturdy triple chair with table for your backyard. The best part of this project is that you can build the wooden bench with table in less than a weekend. I have designed the plans to keep the expenditures under control and to involve the least amount of work possible. It is an ideal project for a deck or a backyard patio.
When buying the lumber, you should select the planks with great care, making sure they are straight and without any visible flaws (cracks, knots, twists, decay). Investing in cedar or other weather resistant lumber is a good idea, as it will pay off on the long run. Use a spirit level to plumb and align the components, before inserting the galvanized screws, otherwise the bench won’t have a symmetrical look. If you have all the materials and tools required for the project, you could get the job done in about a day. See all my Premium Plans HERE.
Projects made from these plans
It’s that simple to build your own chair with table bench!
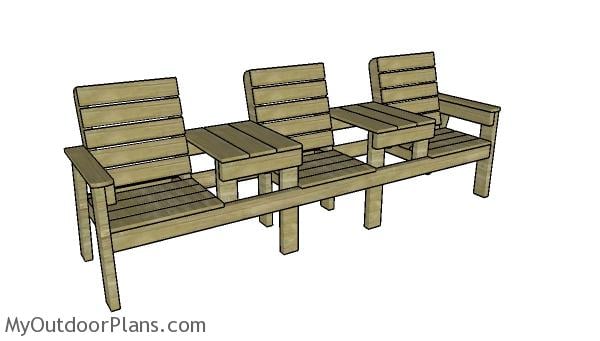
Triple Chair Bench with Table Plans
Building-a-three-chair-bench
Cut & Shopping Lists
- A – 2 pieces of 2×4 lumber – 94″ long, 6 pieces – 18″ long FRAME
- B – 2 pieces of 2×4 lumber – 23″ long, 2 pieces – 24 3/4″ long LEGS
- C – 6 pieces of 2×4 lumber – 23″ long BACKREST SUPPORTS
- D – 15 pieces of 1×4 lumber – 19″ long BACKRESTS
- E – 2 pieces of 2×4 lumber – 13″ long, 2 pieces – 23″ long, 2 pieces – 12″ long, 4 pieces – 17″ long MIDDLE FRAME
- F – 8 pieces of 1×4 lumber – 20 1/2″ long, 4 pieces – 19″ long SEAT
- G – 2 pieces of 2×4 lumber – 21 3/4″ long, 2 pieces of 1×4 lumber – 21 3/4″ long ARMRESTS
- H – 6 pieces of 1×6 lumber – 21 3/4″ long TABLE
- 8 pieces of 2×4 lumber – 8′
- 7 pieces of 1×4 lumber – 8′
- 2 pieces of 1×6 lumber – 8′
- 100 pieces of 1 1/4″ screws
- 100 pieces of 2 1/2″ screws
- glue, stain
Tools
![]() Hammer, Tape measure, Framing square, Level
Hammer, Tape measure, Framing square, Level
![]() Miter saw, Drill machinery, Screwdriver, Sander
Miter saw, Drill machinery, Screwdriver, Sander
Time
![]() One day
One day
How to build a triple chair with table
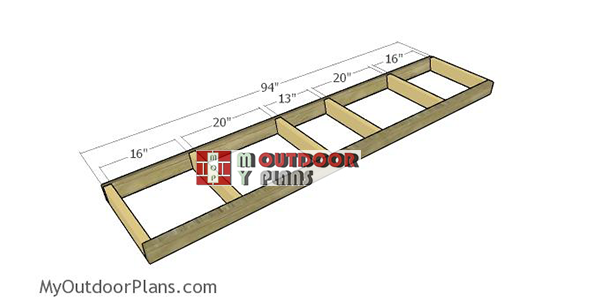
Building-the-seat-frame
The first step of the project is to build the seat frame for the double chair bench. Use 2×4 lumber for the components, making sure you cut them at the right dimensions. Cut one end of the short components at 75 degrees (make 15 degree cuts). Drill pocket holes at both ends of the short components and secure them to the long components using 2 1/2″ screws. Add glue to the joints and make sure the corners are square. Leave no gaps between the components.
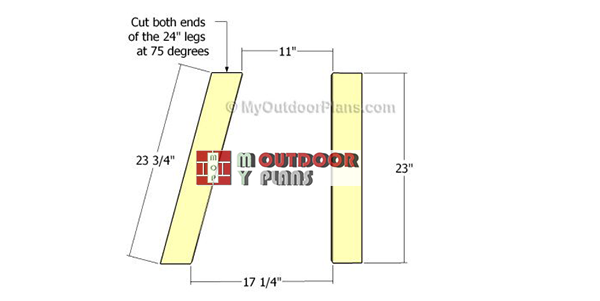
Building-the-legs—large-bench
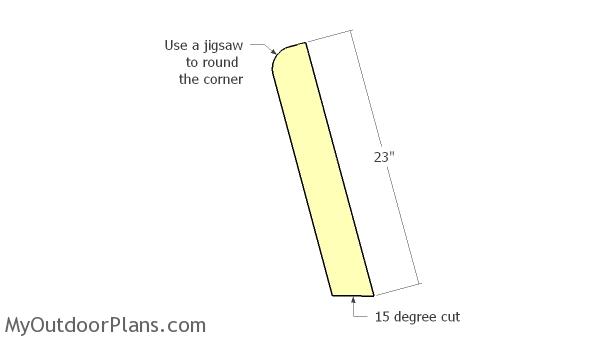
Next, you need to build the legs for the double chair bench with table. Cut both ends of the back leg at 75 degrees (15 degree cuts). Smooth the edges with sandpaper.
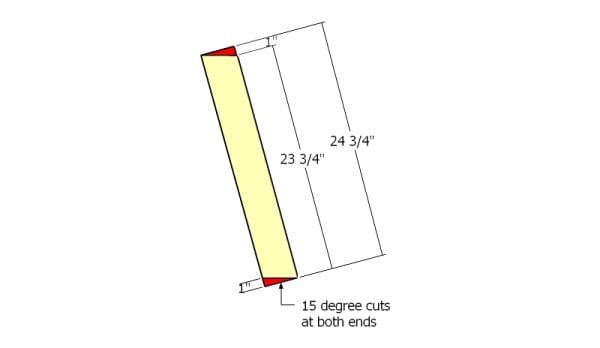
Back Legs
You can see in the diagram more information about cutting the back legs. As I have already said, cut both ends at 75 degree, which means you need to make 15 degree cuts. Use the information from the diagram to build the back legs properly. The easiest way to get accurate angle cuts is to use a miter saw. Smooth the cut edges with sandpaper.
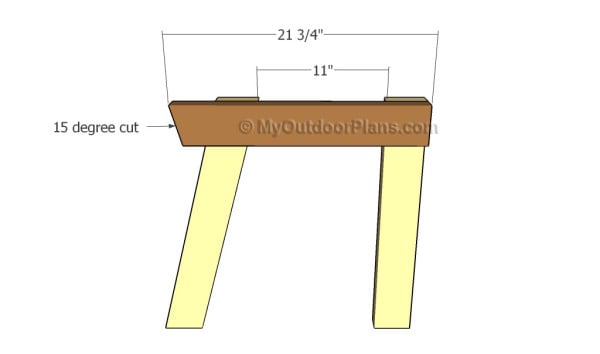
Attaching the armrest support
Continue the project by attaching the top support to the side legs. Cut one end of the 2×4 support at 75 degrees. Attach the support to the top of the legs, making sure the edges are perfectly aligned. Drill pilot holes and secure the support to the legs using 2 1/2″ screws. Pre-drilling prevents the wood from splitting.
Use a carpentry square to make sure the corners are 90 degrees. In addition, you an set the legs against a straight line, so you make sure they are aligned properly, before attaching the horizontal supports.

Fitting the side legs to the frame
After assembling the sides of the bench, you need to attach it to the seat frame, as shown in the diagram. Make sure the corners are square. Plumb the sides with a spirit level and check if the seat is perfectly horizontal. Insert 2 1/2″ screws through the frame into the legs.
Backrests
Build the backrest supports out of 2×4 lumber. Round the top corner of the supports using a jigsaw. Smooth the edges with sandpaper and remove the residues with a damp cloth.
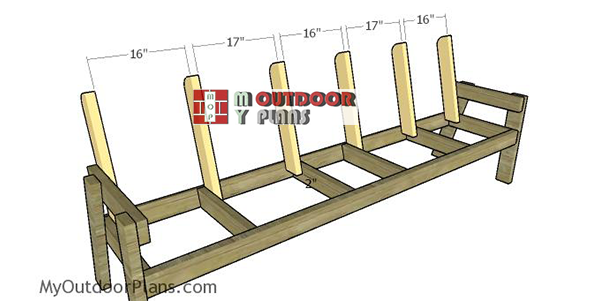
Fitting-the-backrest-supports
Attach the supports to the seat frame, as shown in the diagram. Drill pilot holes through the supports and insert 2 1/2″ screws into the seat frame. Leave no gaps between the components.
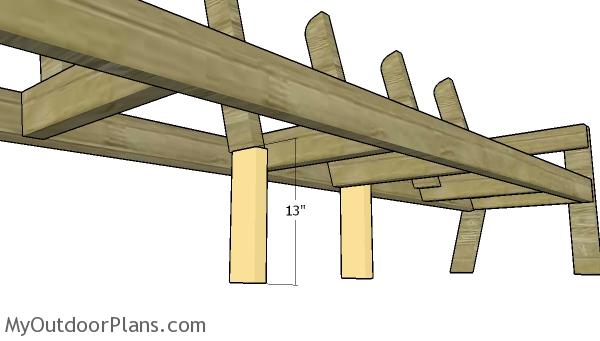
Back middle legs
Fit 2×4 legs to the middle of the bench. Drill pilot holes and insert 2 1/2″ screws to lock them into place tightly. Make sure the corners are square and leave no gaps between the components.
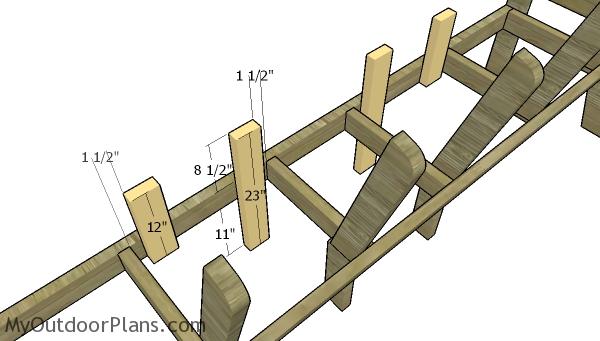
Table and front legs
Fit the 2×4 legs to the front of the bench, as shown in the diagram.
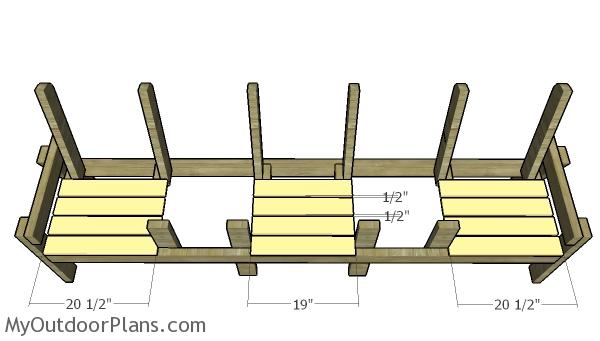
Seat slats
Build the seat slats out of 1×4 lumber. Cut the components at the right dimensions and secure them to the frame using 1 1/4″ screws. Place the seat slats equally-spaced, if you want to get a professional result. Place a piece of 1/2″ plywood between the slats to get consistent gaps.
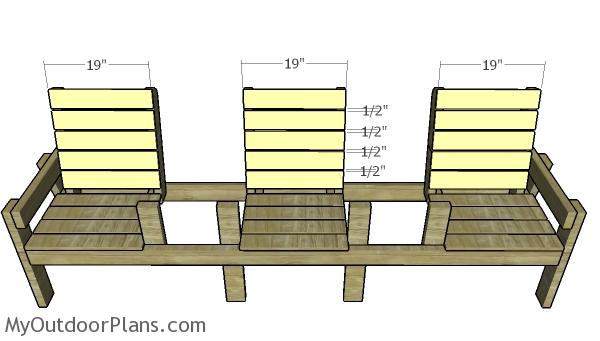
Backrest slats
Next, attach the 1×4 slats to the backrests of the chairs. Place the slats equally-spaced and lock them to the supports using 1 1/4″ screws. Smooth the edges with sandpaper. Align the edges before inserting the screws.
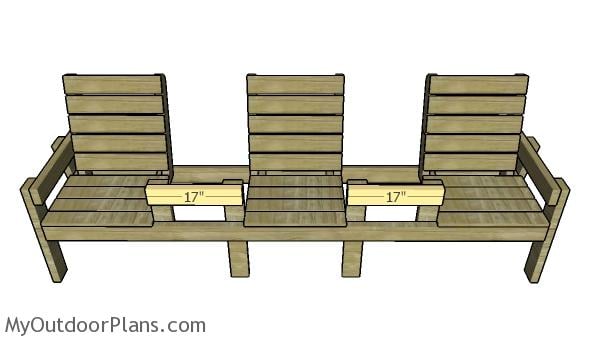
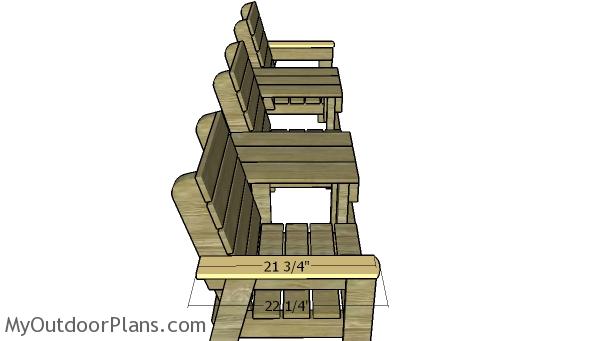
Front table supports
Next, you need to attach the 2×4 supports for the tabletop to the front of the bench. Align the edges with attention, drill pilot holes and insert 2 1/2″ screws.
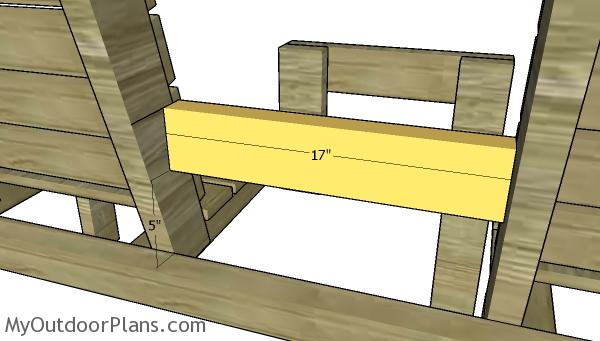
Fitting the back table supports
Attach the 2×4 supports to the back of the bench. Drill pocket holes at both ends of the supports and insert 2 1/2″ screws.
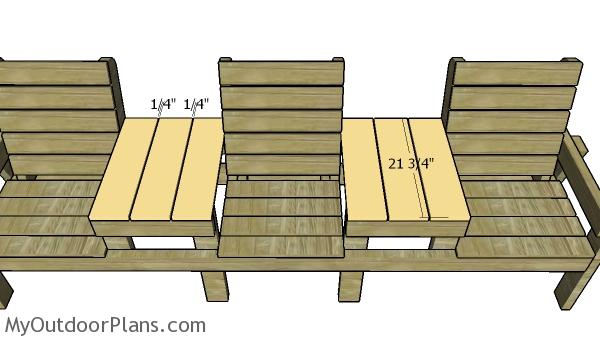
Tabletop slats
Attach the 1×6 slats to the table frames. Align the edges with attention and fit a piece of 1/4″ plywood between the slats so you can create even gaps.
Fitting the armrests
Build the armrests out of 1×4 lumber. Round one end of the components and smooth the edges with 120 grit sandpaper. Use 1 1/4″ screws to secure the armrests into place. Fill the holes with wood putty.
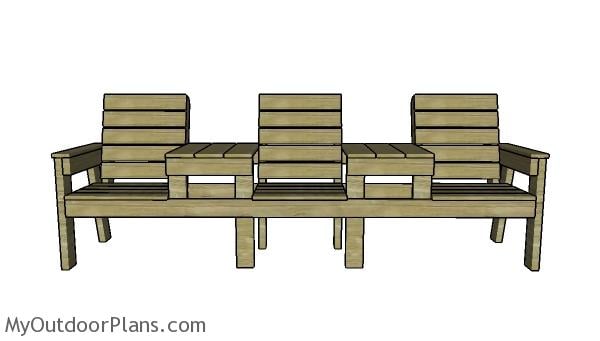
Three chair bench with table plans
If you are looking for outdoor furniture plans or you are just trying to learn how to build an outdoor bench, this the perfect starting point to your woodworking journey. This triple bench project is the right choice if like to relax on the front porch, or reading a good book next to the loved ones.
If you liked this patio furniture plan, then you would also love the corresponding chair. In this manner, you can create a relaxation area where you can hang out with your friends and family. These would also be perfect around a fire pit or under a pergola.
Triple chair bench with table plans
One of the last steps of the woodworking project is to take care of the finishing touches. Therefore, fill the pilot holes with wood putty and smooth the surface with 120-grit sandpaper.

Triple chair bench plans
Top Tip: If you want to enhance the look of the project and to protect the wooden bench from decay, we recommend you to cover the components with paint or stain.
This woodworking project was about triple chair bench with table plans. If you want to see more outdoor plans, we recommend you to check out the rest of our step by step projects. LIKE us on Facebook and Google + to be the first that gets out latest projects and to hep us keep adding free woodworking plans for you.
2 comments
Step G states: 25 pieces of 2×4 lumber – 21 3/4″ long
This does not seem right. Can you please verify?
It was a typing mistake. You only need 2 armrests supports.