This step by step diy woodworking project is about hexagonal planter plans. If you want to build a wooden planter with an unique design for your garden, we recommend you to pay attention to the instructions described in the image. There many designs to choose from when building a planter, so make sure you take a look over the rest of the projects that fall in this category.
It is highly recommendable to invest in high quality and weather resistant materials, as the components will be exposed to sunlight and water. Work with attention and always select the materials before cutting them to the right size (choose straight lumber that is in a good condition). Lock the components together by adding waterproof glue to the joints, as well as by inserting galvanized screws. See all my Premium Plans HERE.
Projects made from these plans
Cut & Shopping Lists
- A – 16 pieces of 2×2 lumber – 18 1/4″ long COMPONENTS
- B – 16 pieces of 2×2 lumber – 20″ long COMPONENTS
- C – 16 pieces of 2×2 lumber – 21 3/4” long COMPONENTS
- D – 1 pieces of 3/4″ plywood – 40″ x 40″ BOTTOM
Tools
![]() Hammer, Tape measure, Framing square, Level
Hammer, Tape measure, Framing square, Level
![]() Miter saw, Drill machinery, Screwdriver, Sander
Miter saw, Drill machinery, Screwdriver, Sander
Time
Related
Hexagonal Planter Plans
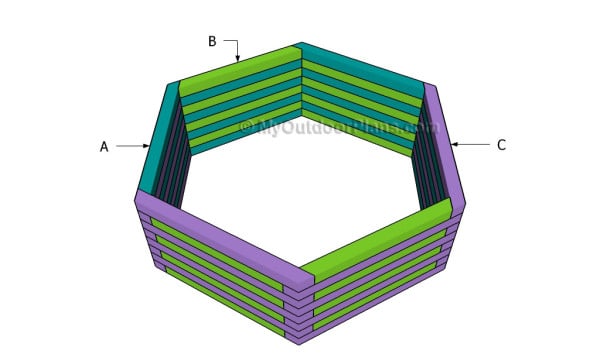
Building a hexagonal planter
Top Tip: Building a hexagonal project is a straight-forward project if the right plans and tools are used. Therefore, we recommend you to invest in high-quality materials and to ask a skilled friend to give you a hand.
Building a hexagonal planter
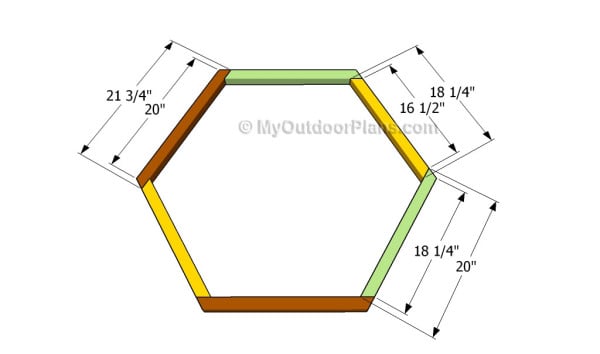
Building the first layer
The first step of the project is to build the components for the first layer. Therefore, we recommend you to build the components out of 2×2 lumber by using the information showed in the plans.
Use a good miter saw to build the components at the right angled, otherwise they won’t fit together properly. Add waterproof glue and insert 2 1/2″ screws to lock them together properly.
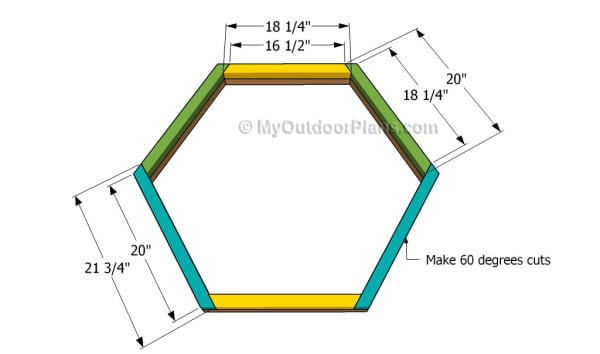
Building the second layer
The second layer is basically the same as the previous one, with the exception that it should be rotated 60 degrees. In this manner you will create a beautiful pattern that will add value to the hexagonal planter.
Locking the layers together is not a difficult process, but it requires your attention. Therefore, we recommend you to drill pilot holes through the components and insert the 2 1/2″ screws into the previous layer.
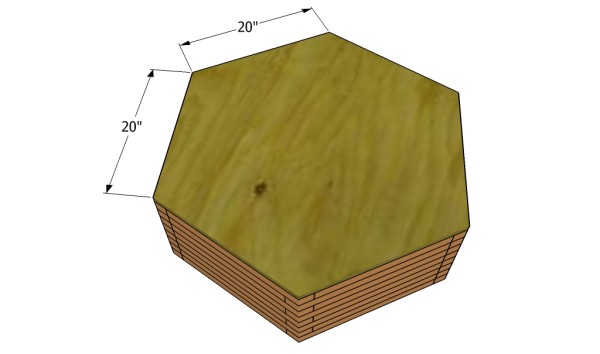
Attaching the bottom of the planter
One of the last steps required to get the job done is to attach the bottom to the planter. As you can notice in plans we recommend you to cut a hexagonal piece of 3/4″ plywood and to attach it to the planter with screws.
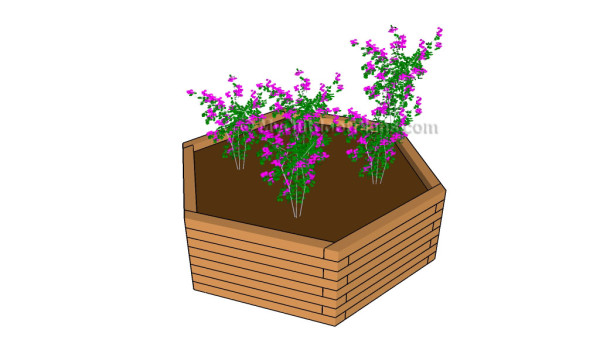
Hexagonal planter plans
After installing the bottom to the planter, we recommend you to take care of the finishing details. Therefore, you should make sure all the components are locked together easily.
Top Tip: Don’t forget to take a look over the rest of the projects, if you want to learn more about how to build projects for your garden. There are lots of projects that you could choose from so pay attention to the our plans.
This woodworking project was about hexagonal planter plans. If you want to see more outdoor plans, we recommend you to check out the rest of our step by step projects.

3 comments
Why do you show three different sizes of timber to make the hexagonal planter: 2×2, 1×3 and 1×2. Surely using different sizes for the same hexagonal planter will not work?
Sorry, they are all 2x2s.
How do you come up with the different lenghts of your wood if you want to build a 5 1/2 foot side to side