This step by step diy woodworking project is about a 10×10 free pavilion plans. If you want to build a small shelter in your backyard to create shade for a table and a few chairs, you should take a look over this design. The frame of the pavilion is made from 4×4 lumber, so you can keep the costs down and so you can get the job done by yourself. Take a look over the rest of our woodworking plans, if you want to get more building inspiration.
When buying the lumber, you should select the planks with great care, making sure they are straight and without any visible flaws (cracks, knots, twists, decay). Investing in cedar or other weather resistant lumber is a good idea, as it will pay off on the long run. Use a spirit level to plumb and align the components, before inserting the galvanized screws, otherwise the project won’t have a symmetrical look. If you have all the materials and tools required for the project, you could get the job done in about a day. See all my Premium Plans HERE.
Projects made from these plans
10×10 Pavilion Plans
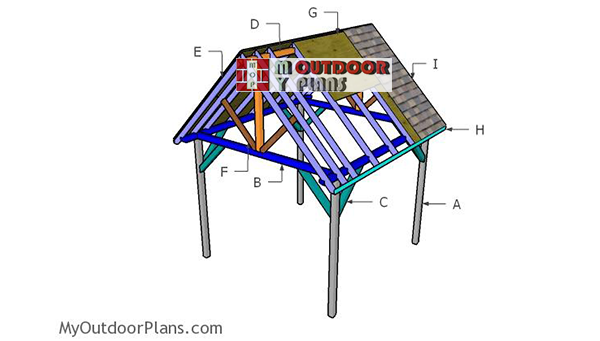
Building-a-10×10-pavilion
Cut & Shopping Lists
- A – 4 pieces of 4×4 lumber – 96″ long POSTS
- B – 2 pieces of 4×4 lumber – 120″ long, 2 pieces – 144″ long TOP PLATES
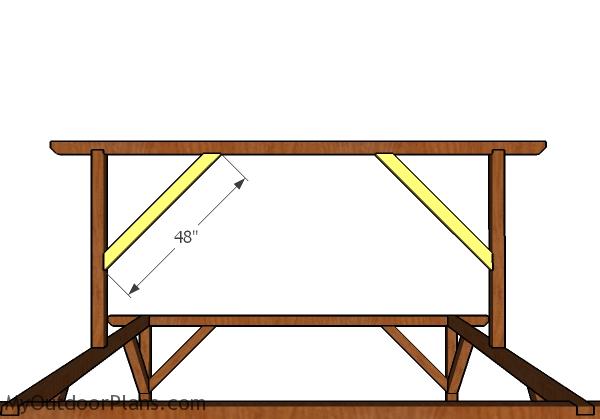
- C – 2 pieces of 4×4 lumber – 48″ long, 8 pieces – 36″ long BRACES
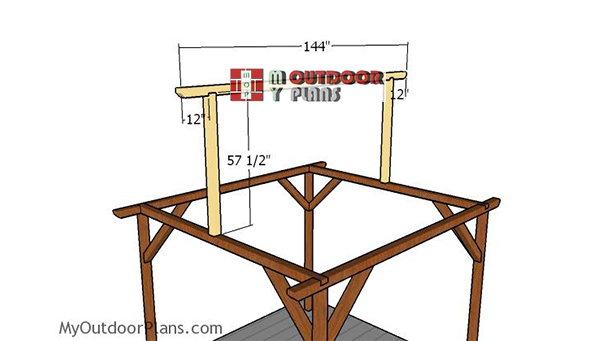
- D – 2 pieces of 4×4 lumber – 57 1/2″ long, 1 piece – 144″ long TOP RIDGE
- 5 pieces of 4×4 lumber – 8′
- 3 pieces of 4×4 lumber – 14′
- 2 pieces of 4×4 lumber – 10′
- 4 pieces of 4×4 lumber – 6′
- concrete form tube
- post anchors
- 3 1/2″ screws
- wood glue, stain/paint
- structural screws for connectors
- strong tie T
Tools
![]() Hammer, Tape measure, Framing square, Level
Hammer, Tape measure, Framing square, Level
![]() Miter saw, Drill machinery, Screwdriver, Sander
Miter saw, Drill machinery, Screwdriver, Sander
Time
Related
- PART 1: 10×10 Pavilion Plans
- PART 2: 10x10 Pavilion Roof Plans
How to build a 10×10 pavilion plans
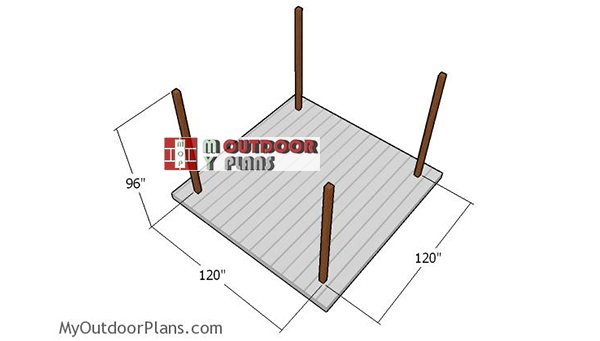
Fitting-the-pavilion-posts
The first step of the project is to choose the location for the pavilion and to layout the posts. Make sure you read the local building codes, so you comply with the legal regulations. Remove the layer of vegetation and then level the surface evenly.
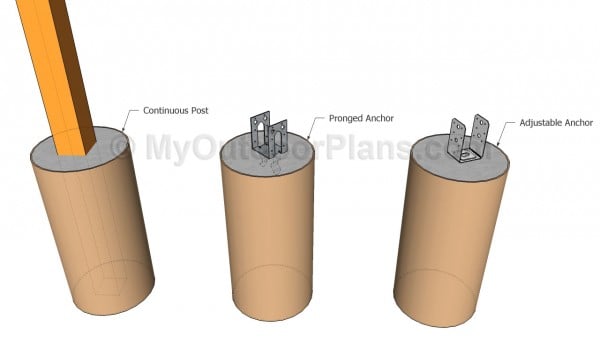
Anchoring the posts of the anchor
There are several ways to lock the posts into place. Therefore, you could dig 2-3′ holes in the ground and set the posts into concrete, or you could use post anchors. Use tube forms so that the footing will be really strong.
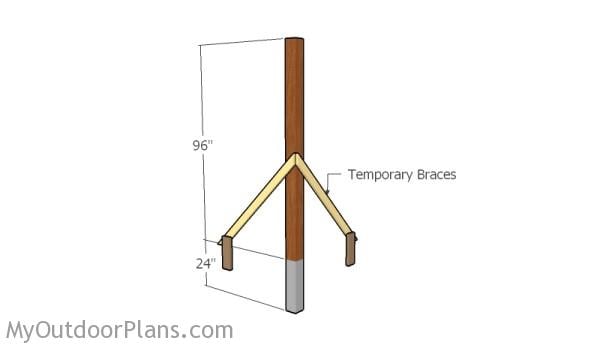
Fitting the posts
If you want to set the posts in concrete, then you need to use temporarily braces. Plumb the posts with a spirit level. Read the local building codes for finding the right depth of the footings. It is essential to set the footing at the right depth to avoid them being heaved by the Winter freeze/thaw cycle.
If you go for footings, you have to dig holes with a 14″ diameter. After digging the holes set the concrete forms and then fill them with concrete. Fit the anchors and align them with attention. After the concrete dries, fit the 6×6 posts and plumb them.
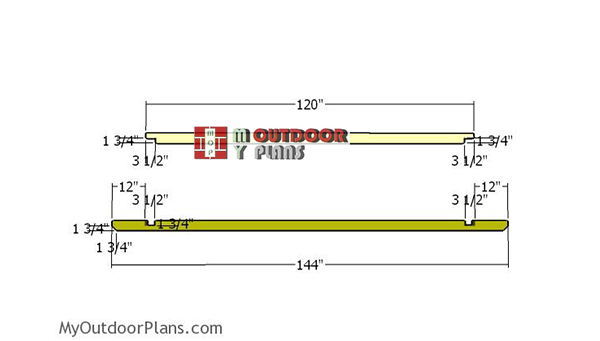
Top-rails
Build the top rails from 4×4 lumber. As you can easily notice in the diagram, you need to make notches to the beams, so you can lock them together in a professional manner. Use a circular saw to make 1 3/4″ deep parallel cuts to the beams and then remove the excess with a chisel. Smooth the edges with sandpaper.
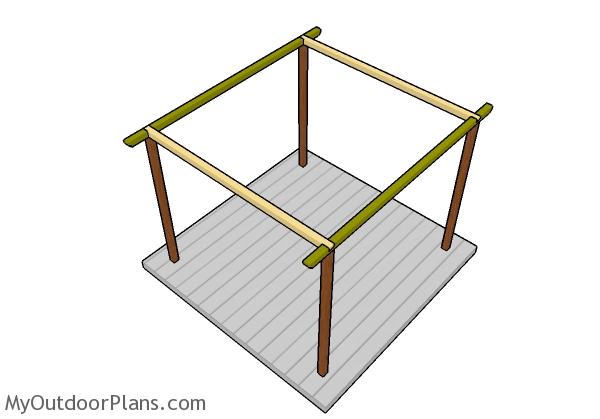
Fitting the top rails
Fit the beams to the top of the posts. Align the edges with attention. First set the side beams (the green ones). Align them with attention, drill pilot holes and insert 3 1/2″ screws. Afterwards, fit the other plates into place, drill pilot holes and insert 3 1/2″ screws. Make sure the corners are square and align the edges flush.
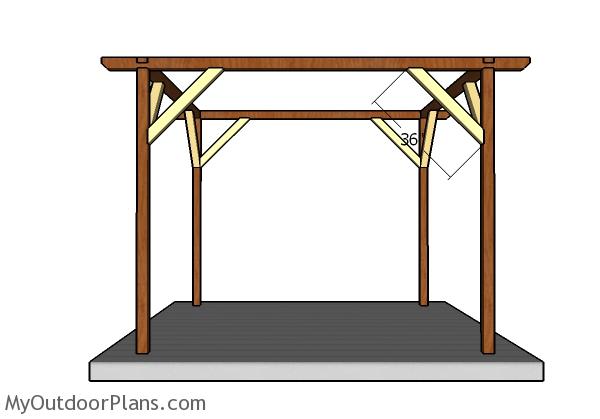
Frame braces
Use 4×4 lumber for the braces. Make 45 degree cuts to both ends of the braces and then secure them into place with 3 1/2″ screws. Make sure the corners are square, for a professional result.
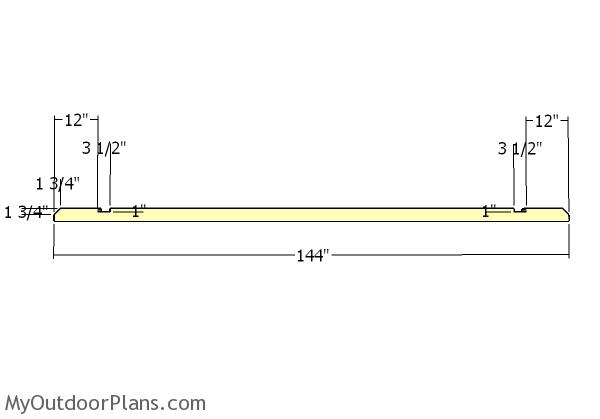
Top ridge
Build the top ridge from 4×4 lumber. As you can notice in the diagram, you need to make 1″ deep notches to the beam. Use a circular saw to make parallel cuts and then remove the excess with a chisel. Smooth the edges with sandpaper, for a professional result.
Fitting-the-top-ridge
Cut the top ridge supports from 4×4 lumber. Center the supports to the front and back rails and use a spirit level to plumb them vertically. Use screws or metal connectors to lock the supports into place tightly. Fit the top ridge to the supports. Use screws or metal connectors to lock the top ridge into place tightly.
Fitting the top ridge braces
Use 4×4 lumber for the top ridge braces. Make 45 degree cuts to both ends of the braces and then secure them into place with 3 1/2″ screws. Make sure the corners are square and then use a spirit level to check if the top ridge is horizontal.
10×10 Pavilion Plans – Side View
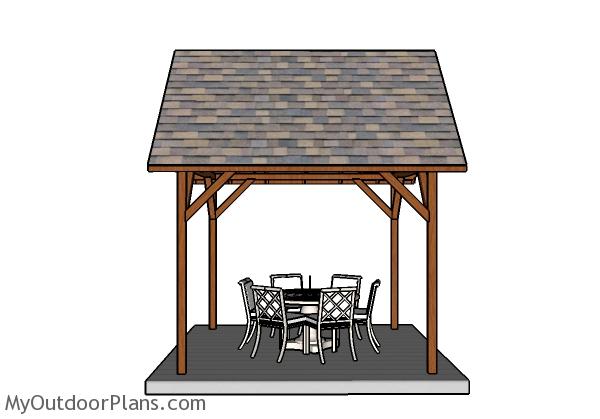
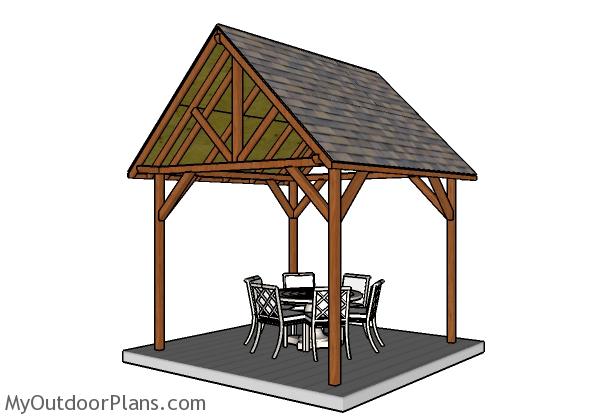
This small square pavilion has a neat appearance and it can be built in one weekend, without much effort. The braces will add plenty of strength to the frame, so if you live in windy area, you won’t have to worry about it being damaged. The roof has a 45 degree slope, so it will drain the water and the snow.
10×10 Pavilion Plans
You need to take a look over PART 2 of the project, where I show you how to frame the roof for this 10×10 pavilion.
If you want to get PREMIUM PLANS for this project (different design with re-engineered structure), in a PDF format, please press GET PDF PLANS button bellow. Thank you for the support.
This woodworking project was about 10×10 outdoor pavilion plans free. If you want to see more outdoor plans, check out the rest of our step by step projects and follow the instructions to obtain a professional result.


4 comments
i need some plans on how to bulid a 20×28 pavillion and how much material i would need
I am working on plans for a 20×30 pavilion right now. It will be live on the blog in a few days. I hope this helps.
This is a nice plan for a 10 x 10 pavilion. I have a question. Would the pavilion still be structurally sound if the pitch of the roof was lowered to a 6 in 12 inch rise ? I would also like to cover in either steel or polycarbonate .
The best thing to do is to read the local codes. If you live in an area with heavy snow, it might not work. You can go for steel sheets with no problems.