This step by step diy woodworking project is about patio side table plans. I have designed this patio side table so you can enjoy a relaxing afternoon in your garden, while sipping a lemonade or reading a good book. This small table features a smart and modern design and costs under 20 $ to make. Great combo, right? There are many other designs and plans to choose from when building projects for your backyard, so make sure you take a close look over the related plans that are featured on our site.
There are many plans and designs to choose from, so make sure you take a close look over the rest of the table plans featured on our website. Plan everything with attention and adjust the size and the shape of the table to suit your needs. Plumb the legs and make sure the corners are right-angled before inserting the galvanized screws into place. Drill pilot or pocket holes to prevent the wood from splitting. See all my Premium Plans HERE.
Projects made from these plans
Building an outdoor side table
Building a patio side table
Cut & Shopping Lists
- A – 4 pieces of 1×6 lumber – 20″ long LEGS
- B – 2 pieces of 1×4 lumber – 12 5/8″ long, 1 piece – 15″ long BRACES
- C – 2 pieces of 1×4 lumber – 24″ long, 2 pieces – 16 1/2″ long TRIMS
- D – 3 pieces of 1×6 lumber – 22 1/2″ long TABLETOP
- 2 pieces of 1×4 lumber – 8′
- 2 pieces of 1×6 lumber – 8′
- 1 1/4″ pocket screws, 1 1/4″ screws
- glue, paint
Tools
![]() Hammer, Tape measure, Framing square, Level
Hammer, Tape measure, Framing square, Level
![]() Miter saw, Drill machinery, Screwdriver, Sander
Miter saw, Drill machinery, Screwdriver, Sander
![]() Safety Gloves, Safety Glasses
Safety Gloves, Safety Glasses
Time
![]() One day
One day
Related
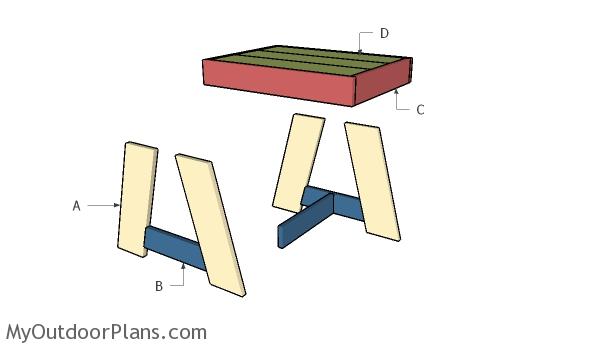
Patio Side Table Plans
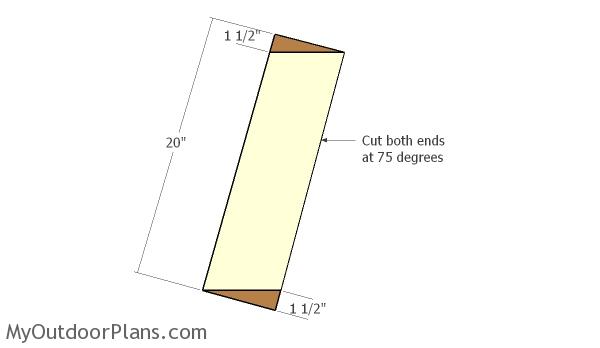
Building the legs
The first step of the project is to build the legs for the patio side table. Cut both ends of the 1×6 legs at 75 degrees and smooth the edges with 120-grit sandpaper.
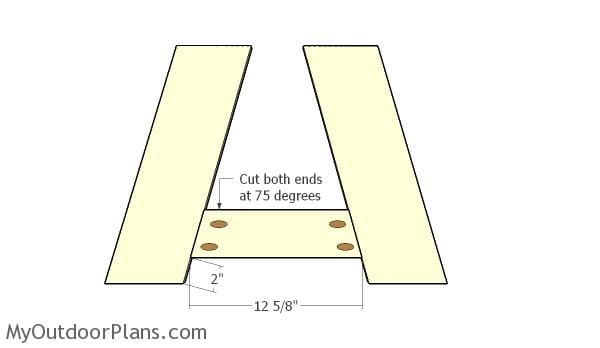
Assembling the sides
Next, build the supports for the sides from 1×4 lumber. Cut both ends of the supports and secure it to the legs using 1 1/4″ screws. Align the edges with attention and add glue to the joints, for a professional result.
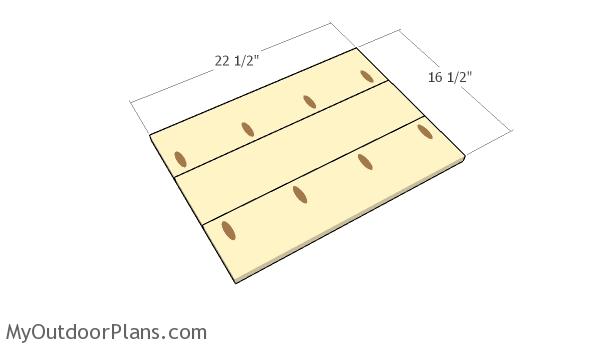
Building the top of the side table
Continue the project by assembling the top for the side table. Cut the 1×6 slats at 22 1/2″ and drill pocket holes, as shown in the diagram. Add glue to the joints and align the edges with attention. Next, smooth the edges with sandpaper for a professional result.
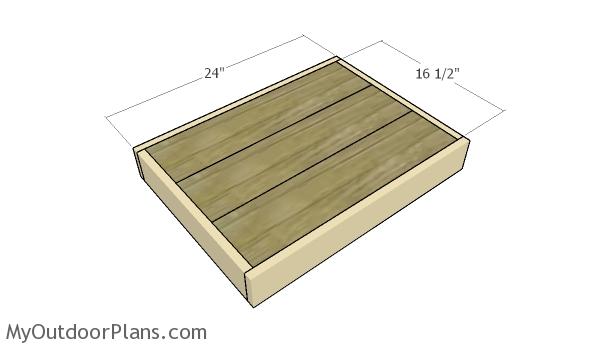
Assembling the tabletop
Attach 1×4 trims to the tabletop, as shown in the plans. Leave no gaps between the trims and make sure the edges are flush one with another. Add glue to the joints and lock everything together tightly with 2″ brad nails.
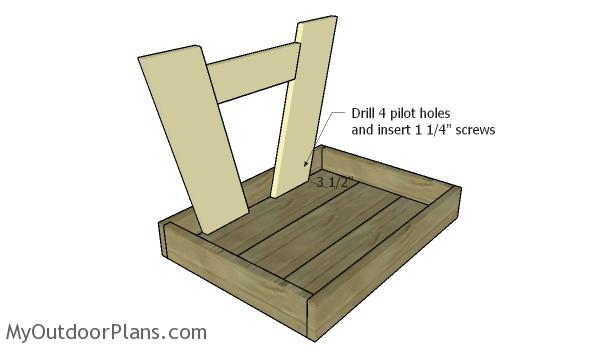
Fitting the side legs
Fit the sides to the tabletop, making sure you center everything with attention. Use a few claps to lock the legs to the frame temporarily. Next, drill pilot holes through the legs and insert 1 1/4″ screws into the frame.
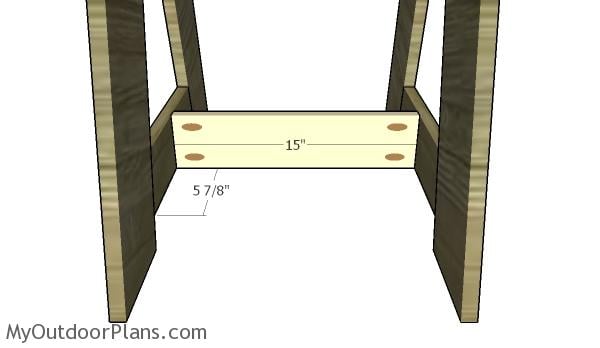
Fitting the stretcher
After attaching the opposite legs to the patio side table, I recommend you to install the stretcher. Drill pocket holes at both ends of the stretcher and then insert 1 1/4″ screws to lock it into place tightly. Fill the holes with wood plugs and then smooth everything with 120-220 grit sandpaper.
Outdoor Side Table Plans
Fill the rest of the holes or dents with wood putty. After it dries out, smooth everything with 120-220 grit sandpaper and apply the primer. Last but not least apply the coats of paint to enhance the look of the project and to protect it from decay.
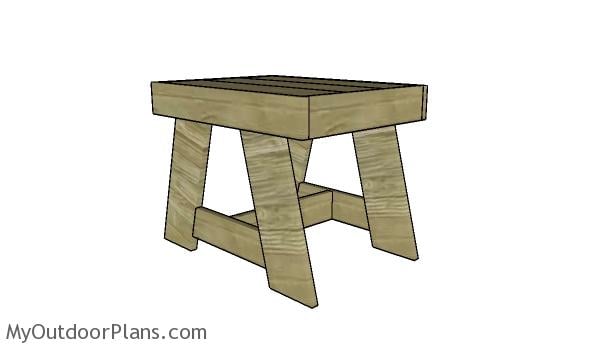
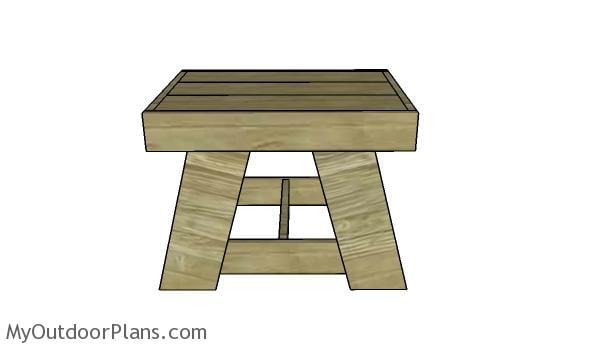
Patio Side Table Plans
This is a great one day project that will add character to your patio. If you want, you can create a bottom shelf so you can store even more items or you can drill a holes through the top and use the project as an umbrella stand. So many ideas and possibilities!
This woodworking project was about patio side table plans. If you want to see more outdoor plans, I recommend you to check out the rest of my step by step projects. LIKE me on Facebook and Google + to be the first that gets my latest projects.
EXPLORE MORE IDEAS FOR:
 |
 |
 |
 |