This step by step diy woodworking project is about log sawhorse plans. The project features instructions for building a sturdy sawbuck for cutting logs. You need 1x4s and 2x4s to get the job done. This is an under 25 $ project that only takes a few hours to build. Make sure you take a look over the rest of plans to see alternatives and more projects for your garden.
When buying the lumber, you should select the planks with great care, making sure they are straight and without any visible flaws (cracks, knots, twists, decay). Investing in cedar or other weather resistant lumber is a good idea, as it will pay off on the long run. Use a spirit level to plumb and align the components, before inserting the galvanized screws, otherwise the project won’t have a symmetrical look. If you have all the materials and tools required for the project, you could get the job done in about a day. See all my Premium Plans HERE.
Projects made from these plans
It’s that simple to build a log sawhorse!
Log sawhorse plans

Building a heavy duty sawbuck
Cut & Shopping Lists
- A – 6 pieces of 2×4 lumber – 41 1/4″ long LEGS
- B – 4 piece of 1×4 lumber – 46 1/2″ long BRACES
- C – 2 pieces of 1×4 lumber – 49″ long DIAGONAL BRACES
- D – 5 ft of heavy duty string STRING
- 3 pieces of 2×4 lumber – 8′
- 4 pieces of 1×4 lumber – 8′
- 6 pieces of 4″ carriage bolts
- 40 pieces of 1 5/8″ screws
Tools
![]() Hammer, Tape measure, Framing square, Level
Hammer, Tape measure, Framing square, Level
![]() Miter saw, Drill machinery, Screwdriver, Sander
Miter saw, Drill machinery, Screwdriver, Sander
Time
![]() One day
One day
How to build a heavy-duty sawbuck
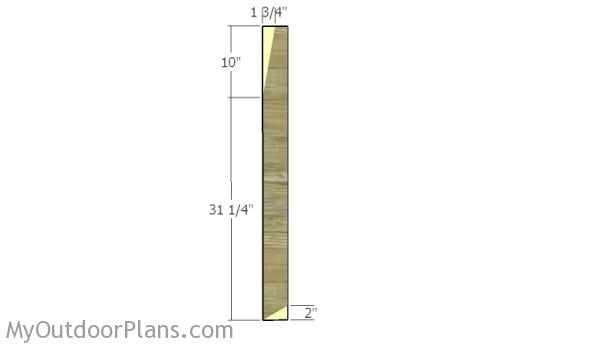
Building the legs
The first step of the project is to build the legs for the log sawhorse. As you can easily notice in the diagram, you need to make a few cuts to the 2×4 beams. Make sure you cut the bottom of the legs at 60 degrees, by using a miter saw. Smooth the cut edges with sandpaper and remove the excess with a damp cloth.
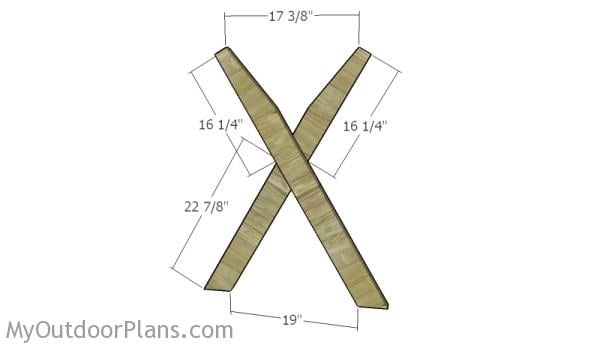
Assembling the X-shaped supports
Next, you need to assemble the X-shaped supports for the sawbuck. Align the components with attention, using the information from the diagram. If you want to build a folding sawbuck, you should drill a single hole through the supports and fit a 4″ carriage bolt. Make sure you fit a washer between the legs, otherwise they won’t fold easily.
If you want to build a permanent sawbuck, you should install several carriage bolts or drive in multiple 2 1/2″ screws.
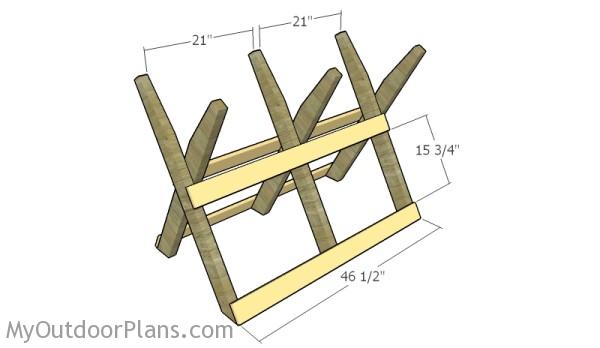
Fitting the side supports
Next, you need to fit 1×4 slats to the sides of the supports, in order to create a rigid structure. Drill pilot holes and insert 1 5/8″ screws to lock the braces to the legs in a professional manner.
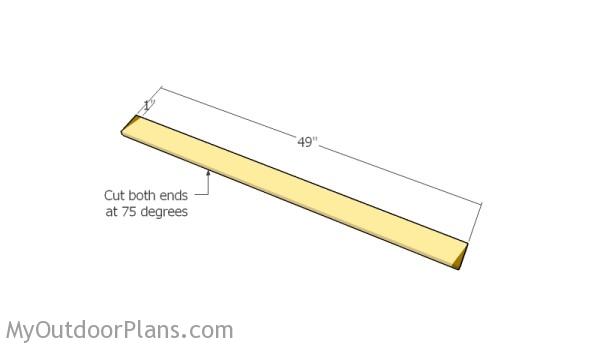
Building the diagonal braces
Build the diagonal braces for the sawbuck from 1×4 lumber. Cut both ends of the braces at 75 degrees, using a saw.
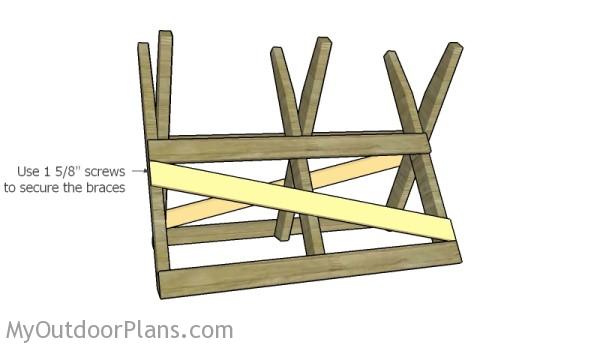
Fitting the diagonal braces
Fit the diagonal braces to the sides of the sawbuck, making sure the supports are perfectly plumb. Drill pilot holes through the braces and insert 1 5/8″ screws into the legs. It is essential to install the braces on different direction on the sides of the sawbuck, as to provide extra-rigidity to the frame.
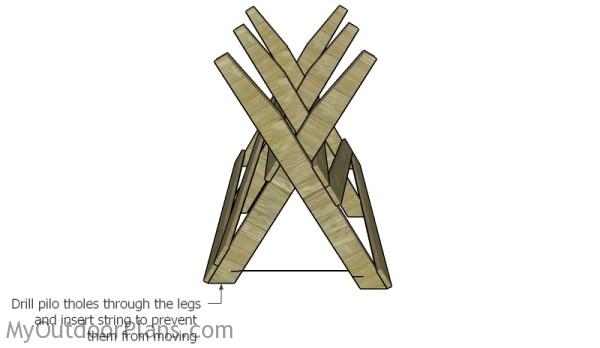
Installing the string
When cutting logs on the sawhorse, you need to make sure the bottom legs won’t move from position. Therefore, drill pilot holes through the bottom of the legs and use string to create tension between the legs.

Log sawhorse plans
Last but not least, you should take care of the finishing touches, as to be able to continue the process with the rest of the steps. Therefore, we recommend you to check if all the components are installed properly into place.
Top Tip: Check out the rest of the workshop projects for more inspiration for your backyard.
This woodworking project was about log sawhorse plans. If you want to see more outdoor plans, check out the rest of our step by step projects and follow the instructions to obtain a professional result.
EXPLORE MORE IDEAS FOR:
 |
 |
 |
 |
1 comment
Most sawhorses have different widths between the vertical posts, rather than both widths being 21″. This gives versatility in the length of logs being cut.
Suppose you need to cut an 18″ log or board. 18 is less than 21, so it cannot be cut; it would just fall down.
That’s why most saw horses don’t have both widths being 21″. Instead they are 16″ and 27″.
Then you can cut that 18″ log.