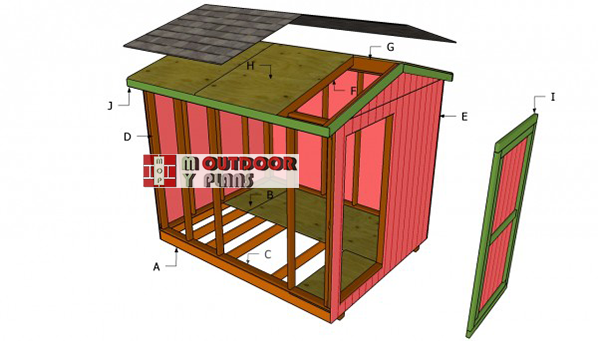
This step by step woodworking project is about building a shed roof. After building the frame of the shed, you need to make it waterproof by installing the rafters and the roofing sheets. There are many shapes and plans you could choose from, but in these plans we show you how to build a gable roof with a 15º. If you follow the detailed instructions, you can build the simple roof in just a few days, with the help of a friend.
Before getting the job started, we strongly recommend you to check the local building codes, as there are cases in which these plans might not fit the legal requirements. In addition, if a building permit is required, you need to consult a specialized engineer to plan everything according to the codes. After getting done this preliminary aspect, you need to buy quality materials, such as pressure treated lumber and 3/4” plywood.
Projects made from these plans
Cut & Shopping Lists
- F – 12 pieces of 2×4 lumber – 120” – cut at 15º at both ends 57 1/4” RAFTERS
- G – 1 pieces of 2×6 lumber – 120” long, 2 pieces of 2×4 lumber – 10” long TOP RIDGE
- H – 5 sheets of 4×8′ 3/4” tongue and groove plywood ROOFING SHEETS
- I – 2 piecs of 1×4 lumber – 82”, 2 pieces – 46 1/4”, 2 pieces – 39 1/4”, 2 pieces – 75” DOOR
- J – 4 pieces of 2×4 lumber – 58” – both ends cut at 15º, 2 pieces of 1×4 lumber – 124 1/4” TRIMS
- 110 sq ft of roofing felt, 110 sq ft of asphalt shingles ROOFING
Tools
![]() Hammer, Tape measure, Framing square
Hammer, Tape measure, Framing square
![]() Miter saw, Drill machinery, Screwdriver, Sander
Miter saw, Drill machinery, Screwdriver, Sander
![]() Safety Gloves, Safety Glasses
Safety Gloves, Safety Glasses
Time
![]() One weekend
One weekend
Related
- Part 1: Utility Shed Plans
- Part 2: Building a Shed Roof
Building a shed roof
8×10-shed-plans
After building the frame of the utility shed, you need to continue the outdoor project by fitting the rafters and installing the asphalt shingles. There are many ways you can get the job done, but in this article we show you the easiest method.
Top Tip: Building trusses and fitting them to the frame would take longer and be more costly, as compared to installing a ridge board and regular rafters.
How to build a simple roof for a shed
Shed-rafters-plans
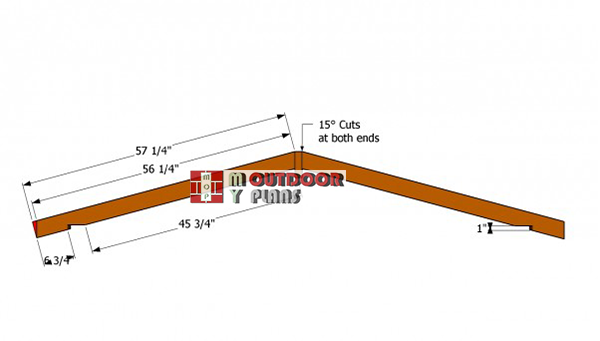
The first step of the project is to build the rafters out of 2×4 lumber. As you can easily notice in the image, you should cut both ends of the rafters at 15º. In this manner, you will be able to attach the rafters directly to the top ridge, without having to assemble any roof truss.
Top Tip: Cut the notches in the rafters with a carpentry square, using our free plans. Use a good circular saw to make the cuts.
Installing-the-rafters
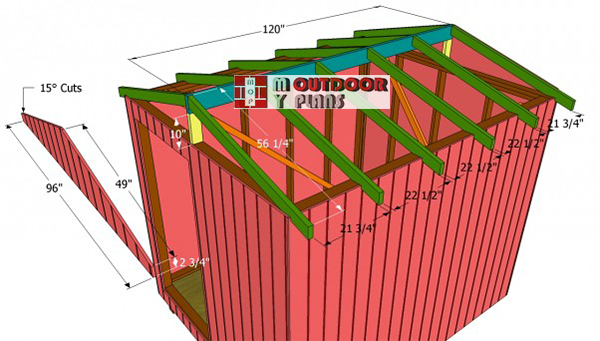
After cutting all the rafters, you need to install them into place. Nevertheless, you need to fit first the ridge board on top of the wooden supports. Use a spirit level to plumb the supports and to make sure the ridge board is horizontal, before driving in the 3” wood screws.
Place the rafters on both sides of the ridge board, align them at both ends, drill pilot holes and insert the screws. In addition attach the front and back gable ends (5/8” siding).
Installing the roofing sheets
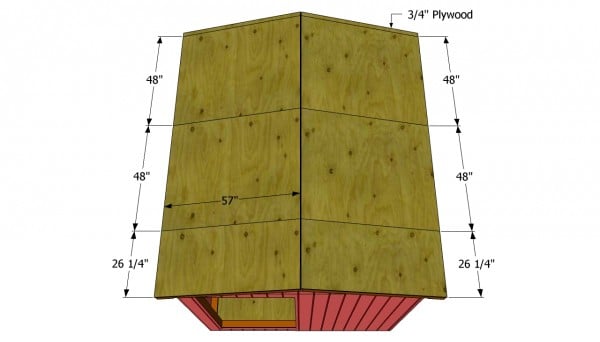
Next, you need to fit the roofing sheets. In order to build a durable roof for your shed, we recommend you to use 3/4” plywood sheets, as they are rigid and come at a decent price. Connect the tongue and groove plywood sheets together, using the pattern you can see in the plans.
Make sure the roof overhangs about 1 1/2” on front and back of the utility shed, as you also have to fit trims to the front and back faces of the shed.
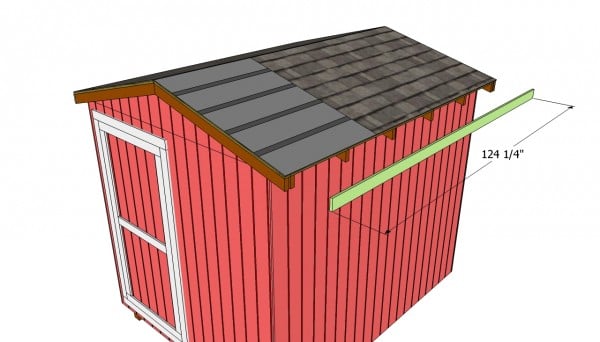
Installing the shingles
The next step of the project is to cover the whole surface of the roof with roofing felt. In order to get the job done properly, we recommend you to overlap the strips at least 2”. In addition, fit a 12” strip over the top ridge.
Top Tip: Install the shingles starting with the left- bottom of the roof, after fitting the starting course. See more about fitting the shingles here. Use roofing tacks to secure the shingles into place.
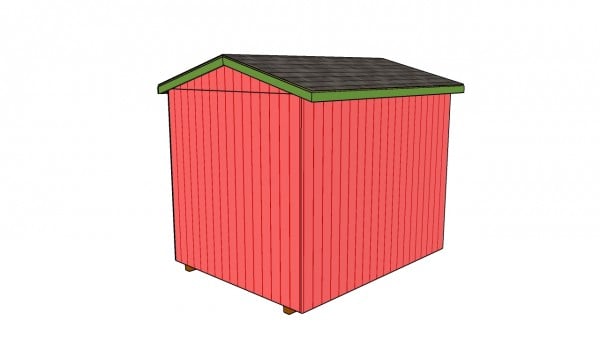
Building the roof of a 8×10 shed
Fitting the trims to the ends of the rafters will not only enhance the look of the utility shed, but it will also add value to your construction. It is essential to align all the components at both ends, before driving in the finishing nails trough the trims into the rafters.
Ideally, the asphalt shingles have to overhang about 1-2” over the trims, otherwise the water might damage the wood over the long-term.
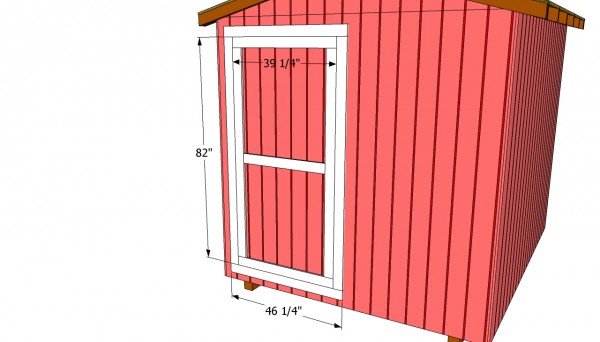
Attaching the door
Building a front door for the small shed is just a straight forward project, as you just need to use the piece of siding cut out when installing the front face of the shed. Next, attach 1×3 trims to the door and around the opening, as you can see in the image. Use two hinges to secure the door into place.
Top Tip: Before driving 1 1/4” nails trough the trims into the siding, we recommend you to check if the corners are right angled.
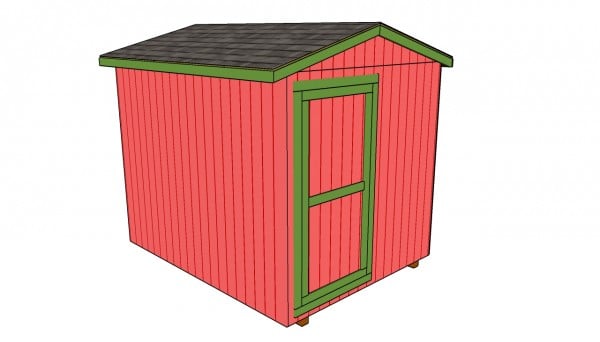
Utility shed roof plans
Last but not least, you need to take care of the finishing touches. In order to get the job done as a professional, check the joints between the components and make sure all screws are inserted properly.
Top Tip: Fill the holes with putty, let it dry out and sand the wooden surfaces with 120-grit sandpaper, before applying several coats of paint to the exterior siding and trims.
This woodworking project was about building a shed roof. If you want to see more outdoor plans, check out the rest of our step by step projects and follow the instructions to obtain a professional result.


2 comments
Please mail me the complete plans to build a 8 X 10 Utility Shed. Thank you
Please read the FAQs and download or print the plans by yourself: http://myoutdoorplans.com/faq/