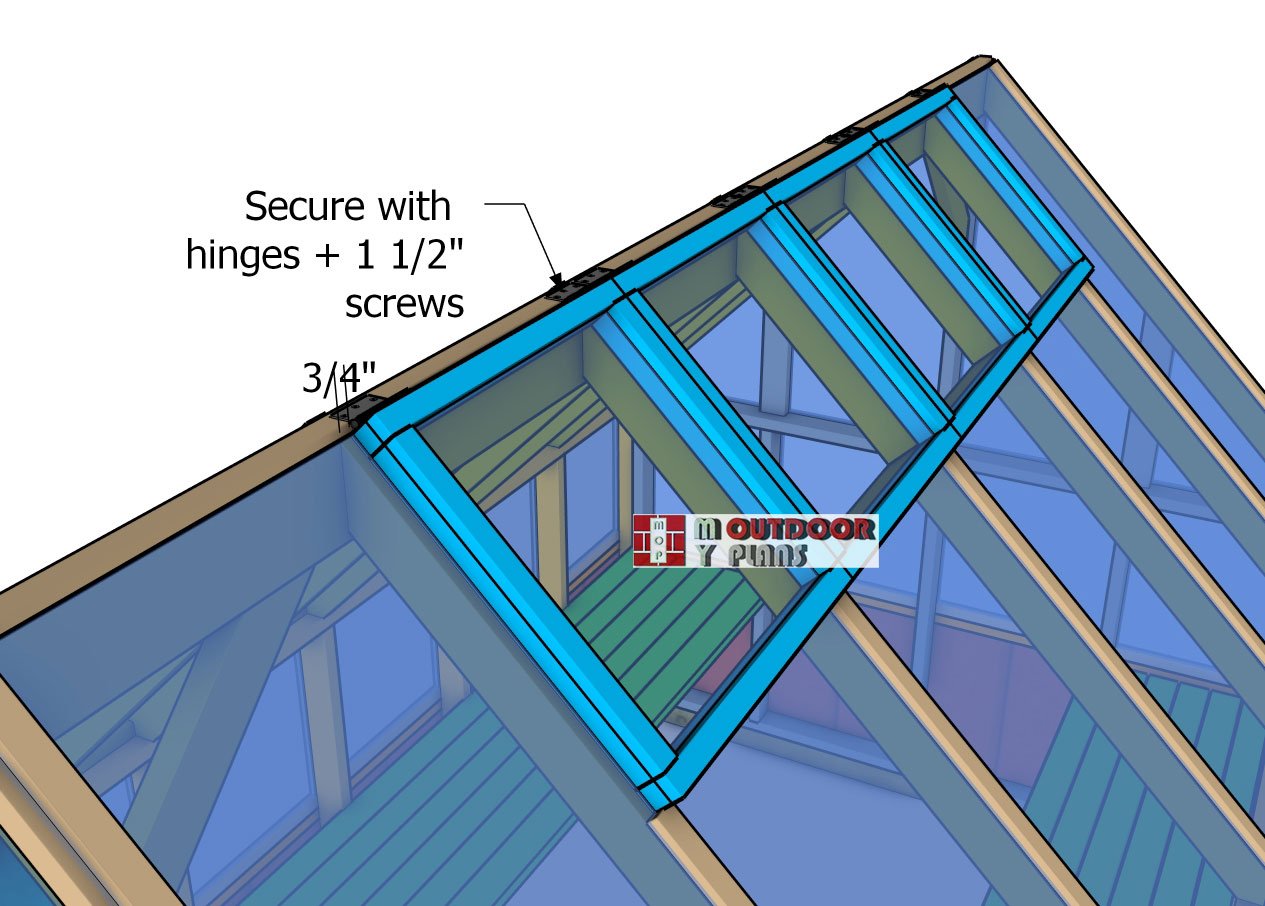
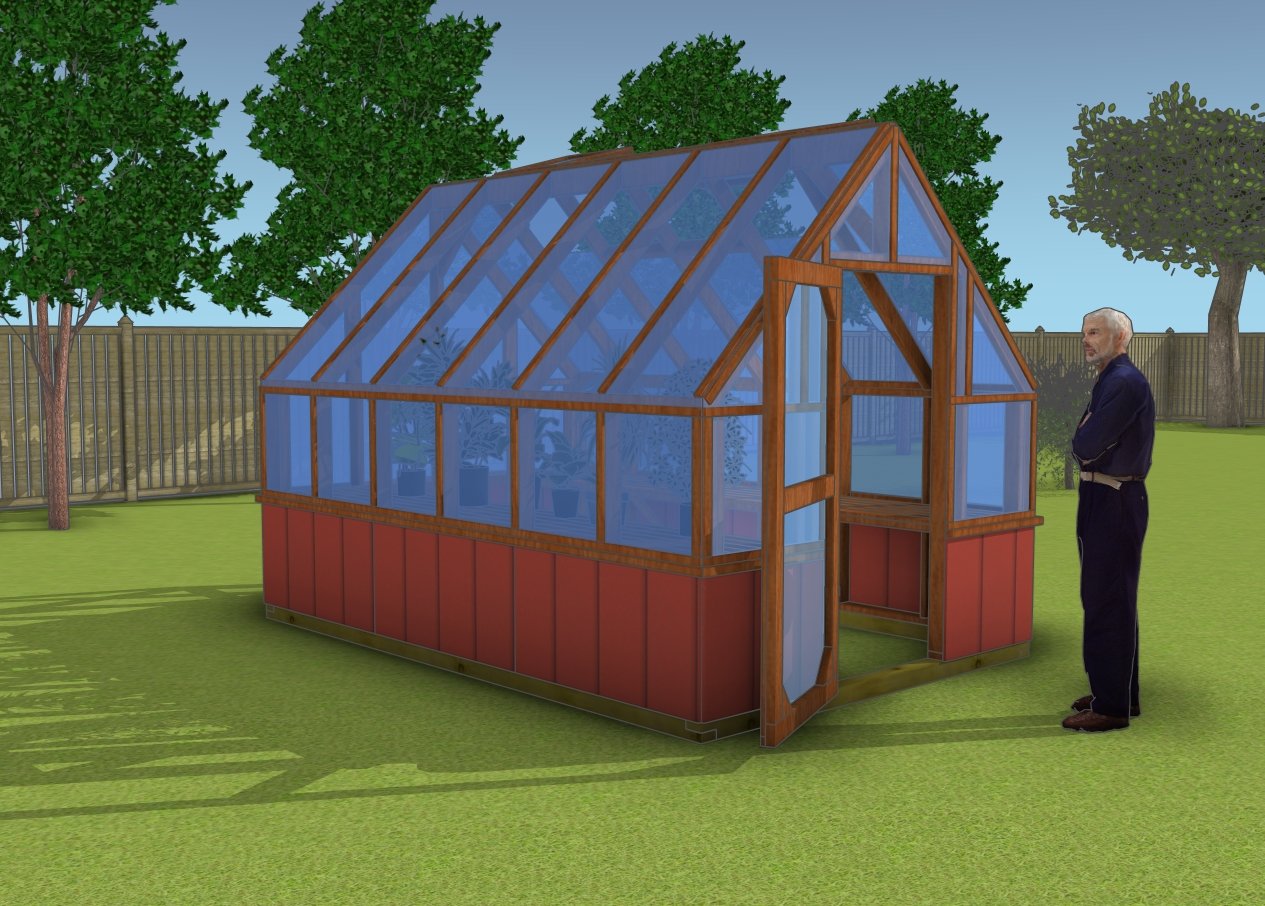
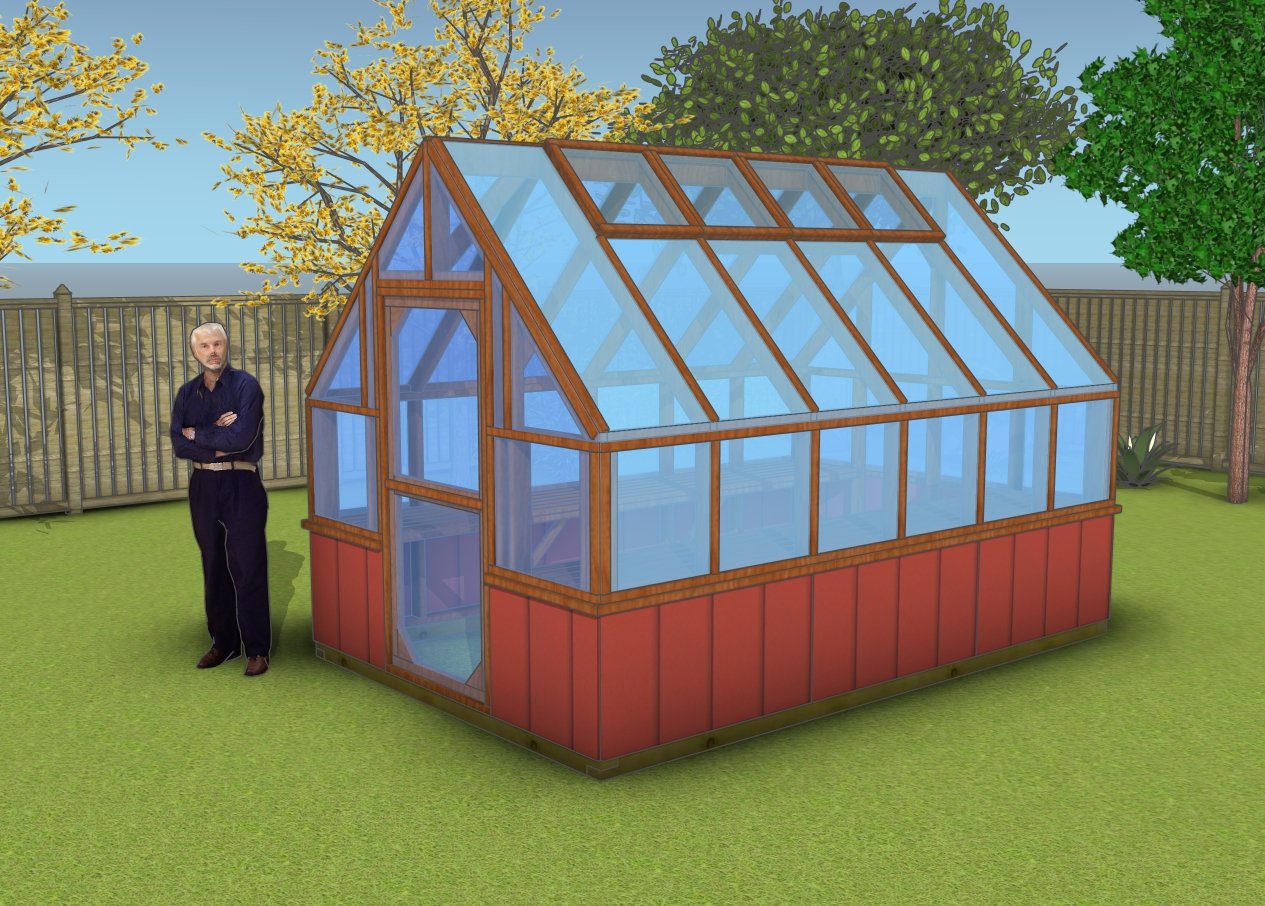
Welcome to Part 2 of my DIY 8×12 greenhouse build! In this section, we’re focusing on the key elements that bring your greenhouse to life: installing the vents, constructing the door, and fitting the greenhouse plastic. These steps are essential for creating a functional, weather-ready structure that’s tailored to your gardening needs. With clear instructions and helpful tips, we’ll guide you through building a well-ventilated, secure, and durable greenhouse that’s ready to nurture your plants year-round.
When buying the lumber, you should select the planks with great care, making sure they are straight and without any visible flaws (cracks, knots, twists, decay). Investing in cedar or other weather resistant lumber is a good idea, as it will pay off on the long run. Use a spirit level to plumb and align the components, before inserting the galvanized screws, otherwise the project won’t have a symmetrical look. If you have all the materials and tools required for the project, you could get the job done in about a day.
Projects made from these plans
8×12 Greenhouse Plans – Part 2
Building-a-8×12-greenhouse
Cut and Shopping Lists
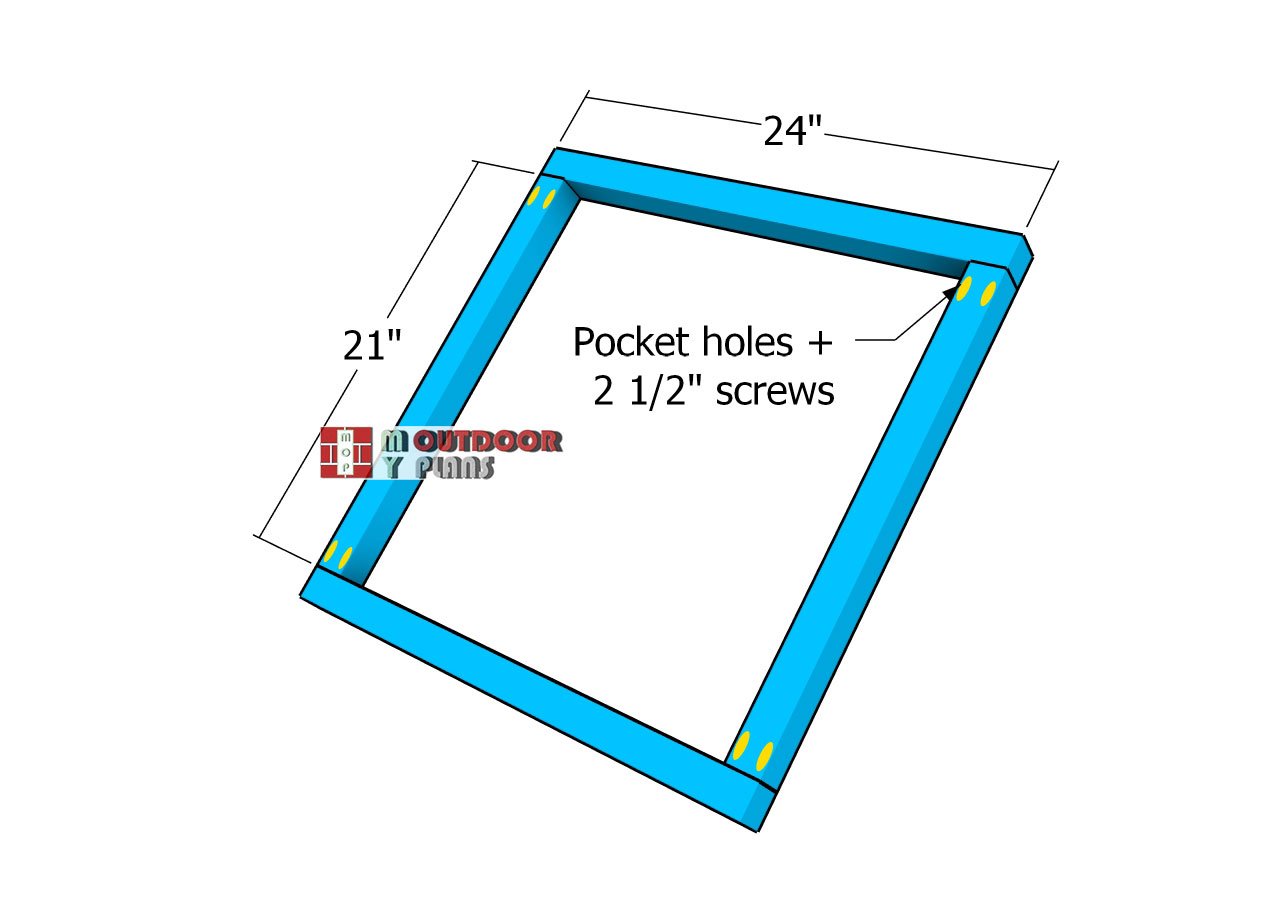
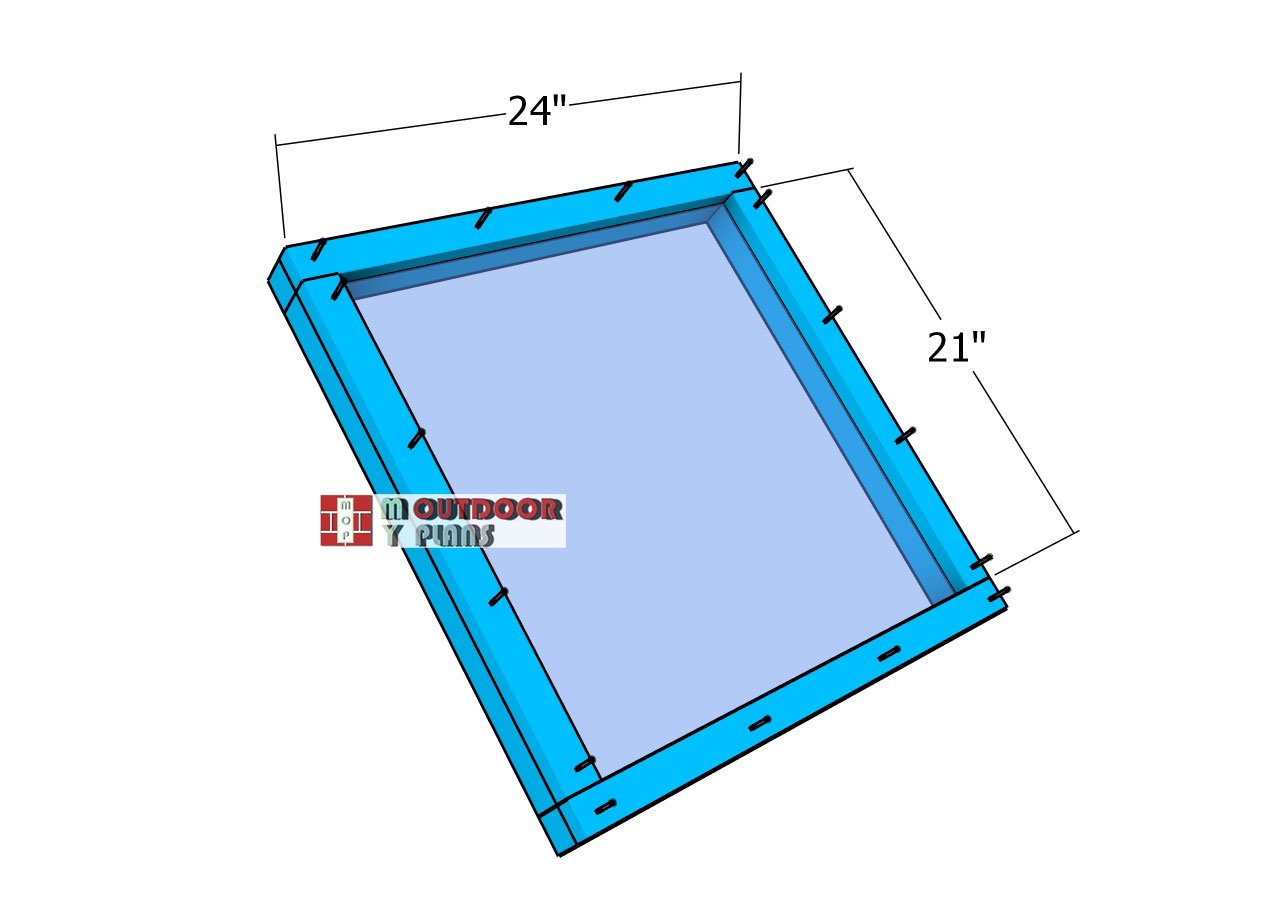
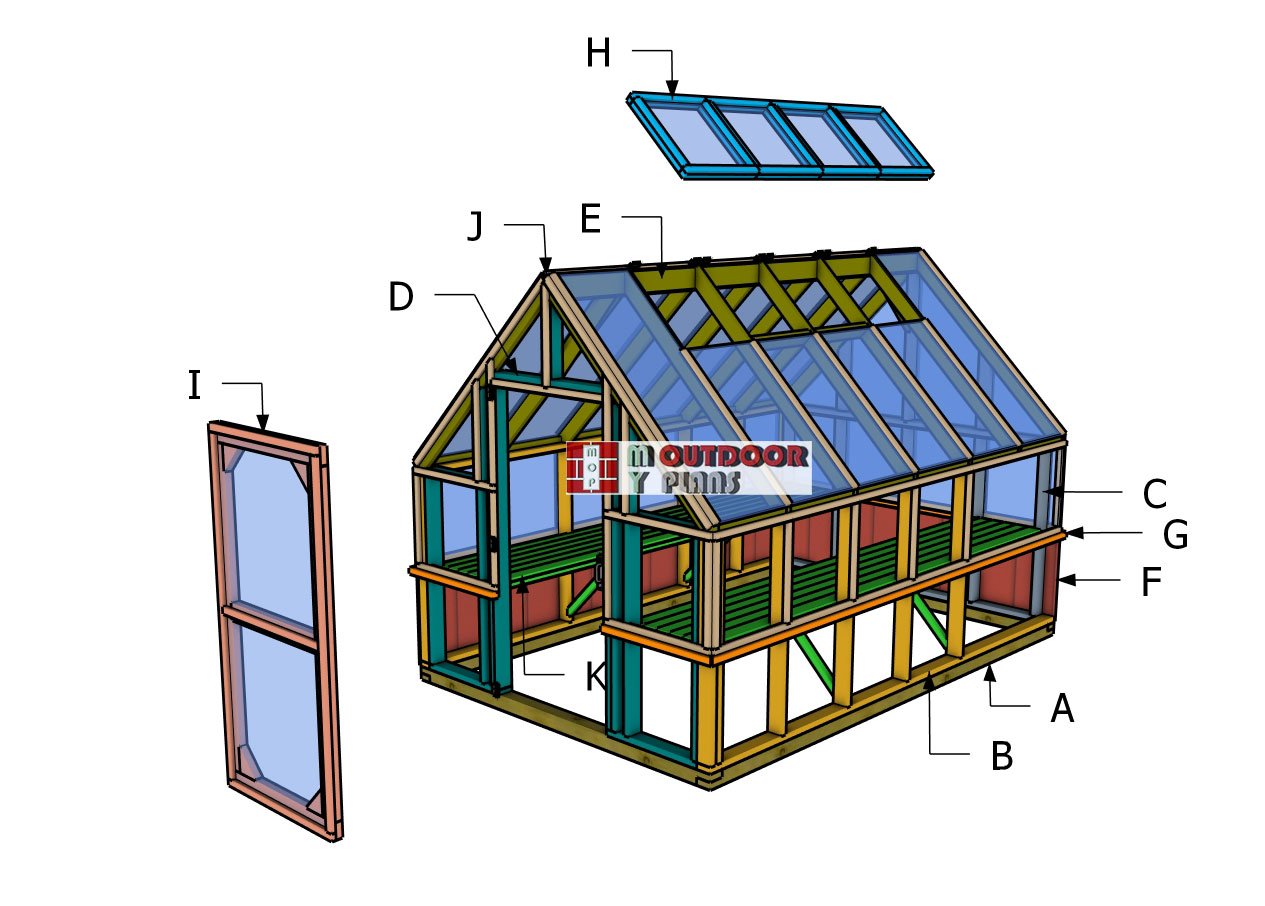
H – 4xVENT – 2 pieces of 2×2 lumber – 24″, 2 pieces – 21″, 2 pieces of 1×2 lumber – 24″, 2 pieces – 21″
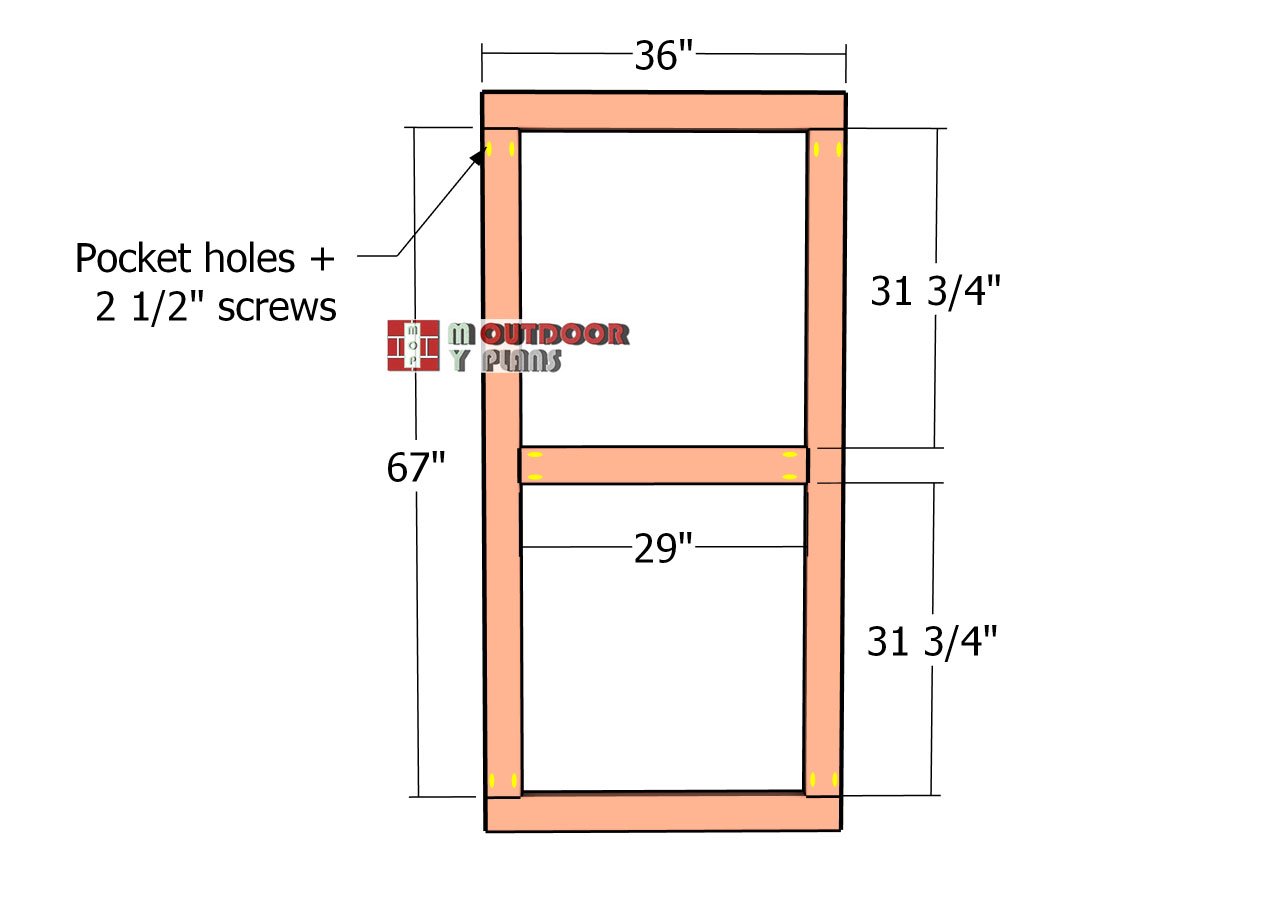
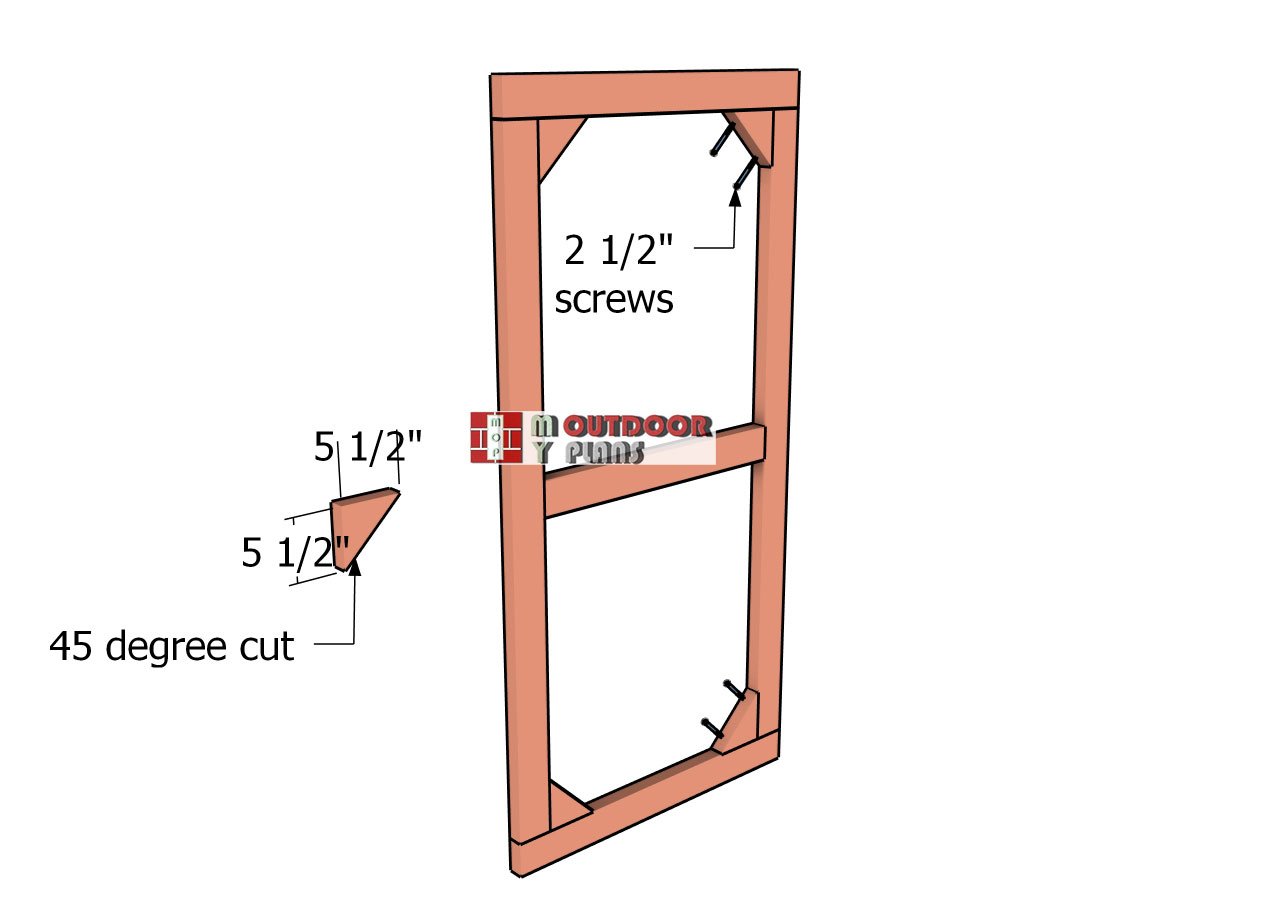
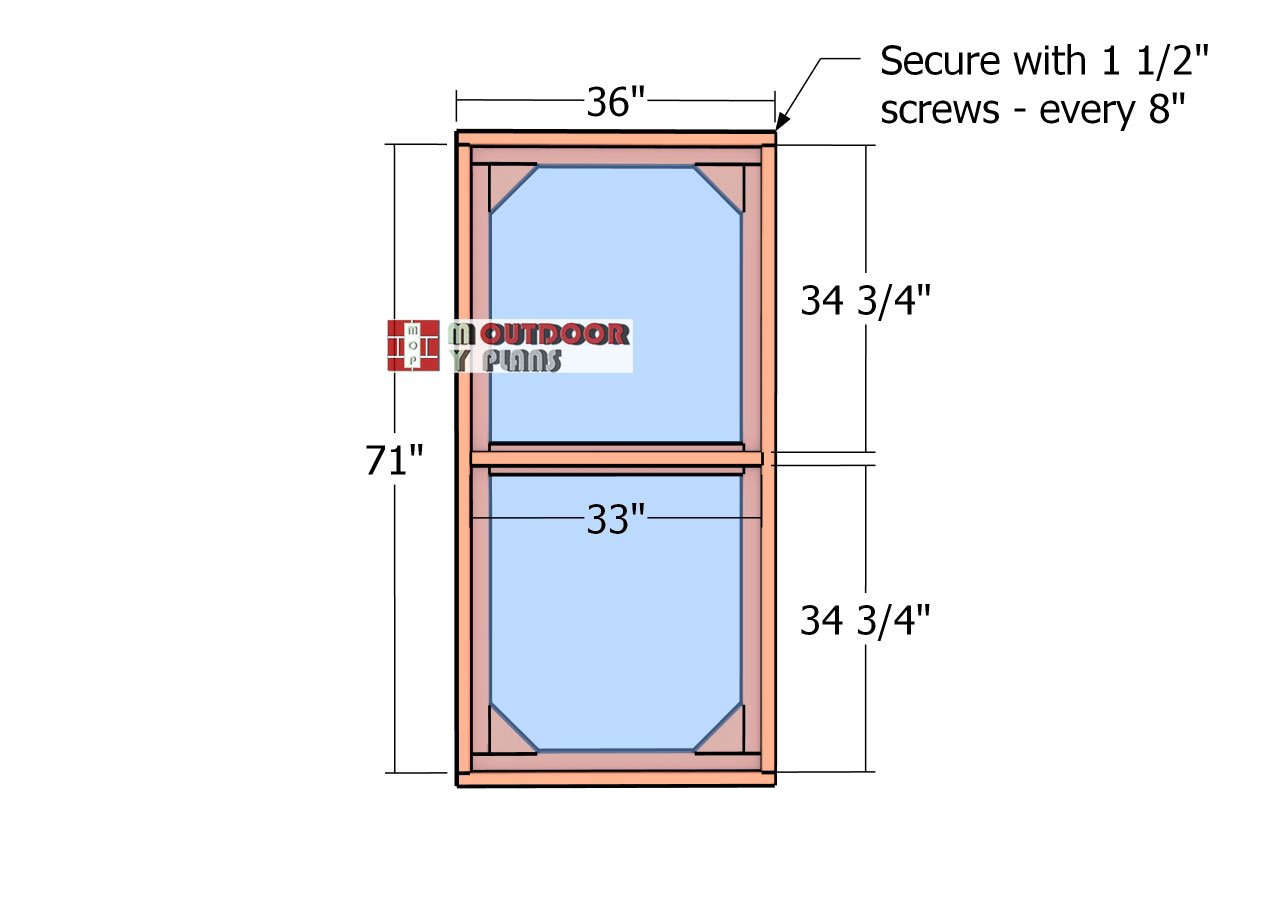
I – DOOR – 2 pieces of 2×4 lumber – 36″, 2 pieces – 67″, 1 piece – 29″, 2 pieces of 1×2 lumber – 36″, 2 pieces – 71″, 1 piece – 33″
J – TRIMS – 2 pieces of 1×2 lumber – 8 ft, 5 pieces – 12 ft, 23 pieces – 22 1/2″, 13 pieces – 66 3/4″, 5 pieces – 42 3/4″, 4 pieces – 30″, 4 pieces – 24″, 1 piece – 24 1/4″, 1 piece – 48 3/4″, 2 pieces – 29 1/4″, 1 piece – 36″
- 1×2 lumber 8 ft – 6 pieces
- 1×2 lumber 12 ft – 20 pieces
- 1×2 lumber 12 ft – 7 pieces
- 2×2 lumber 8 ft – 4 pieces
- 2×2 lumber 10 ft – 2 pieces
- 2×2 lumber 12 ft – 7 pieces
- 2×2 lumber 14 ft – 2 pieces
- 5/8″ T1-11 siding 4’x8′ – 2 pieces
- 5/8″ T1-11 siding 4’x4′ – 1 piece
- A88 strong tie – 4 pieces
- L88 strong tie – 4 pieces
- 1 1/2″ structural screws / nails – 1 box
- 300 sq ft of greenhouse plastic
- 1 5/8″ screws – 500 pieces
- 2 1/2″ screws – 200 pieces
- 3 1/2″ screws – 500 pieces
- 8d nails – 300 pieces
- automatic vent opener – 4 pieces
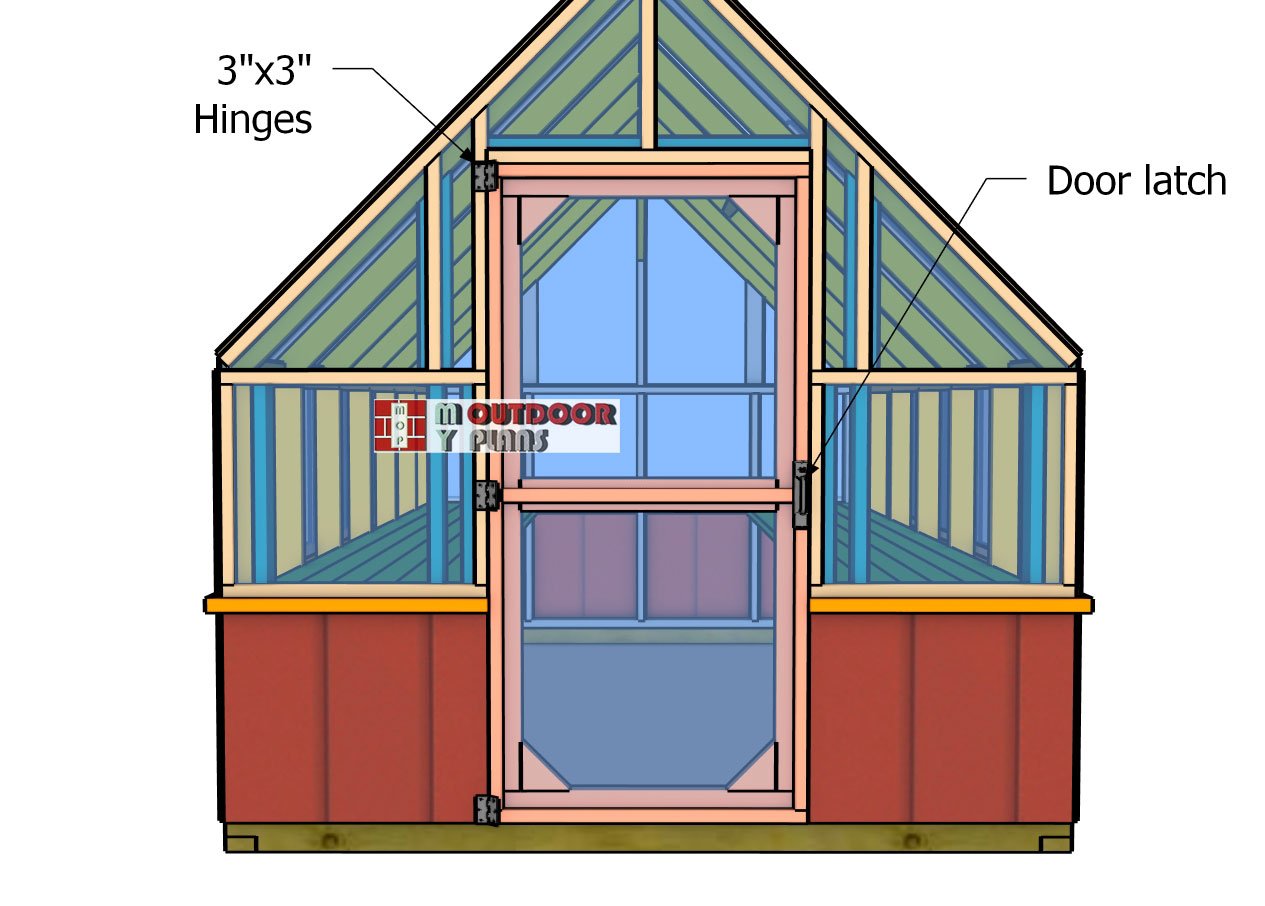
- 3″x3″ hinges – 11 pieces
- door latch & handle – 1 piece
Tools
![]() Hammer, Tape measure, Framing square, Level
Hammer, Tape measure, Framing square, Level
![]() Miter saw, Drill machinery, Screwdriver, Sander
Miter saw, Drill machinery, Screwdriver, Sander
![]() Safety Gloves, Safety Glasses
Safety Gloves, Safety Glasses
Time
Related
- PART 1: 8×12 Greenhouse Plans
- PART 2: 8×12 Greenhouse Plans – Part II
Step 5: Fitting the greenhouse plastic
Attaching-the-greenhouse-plastic
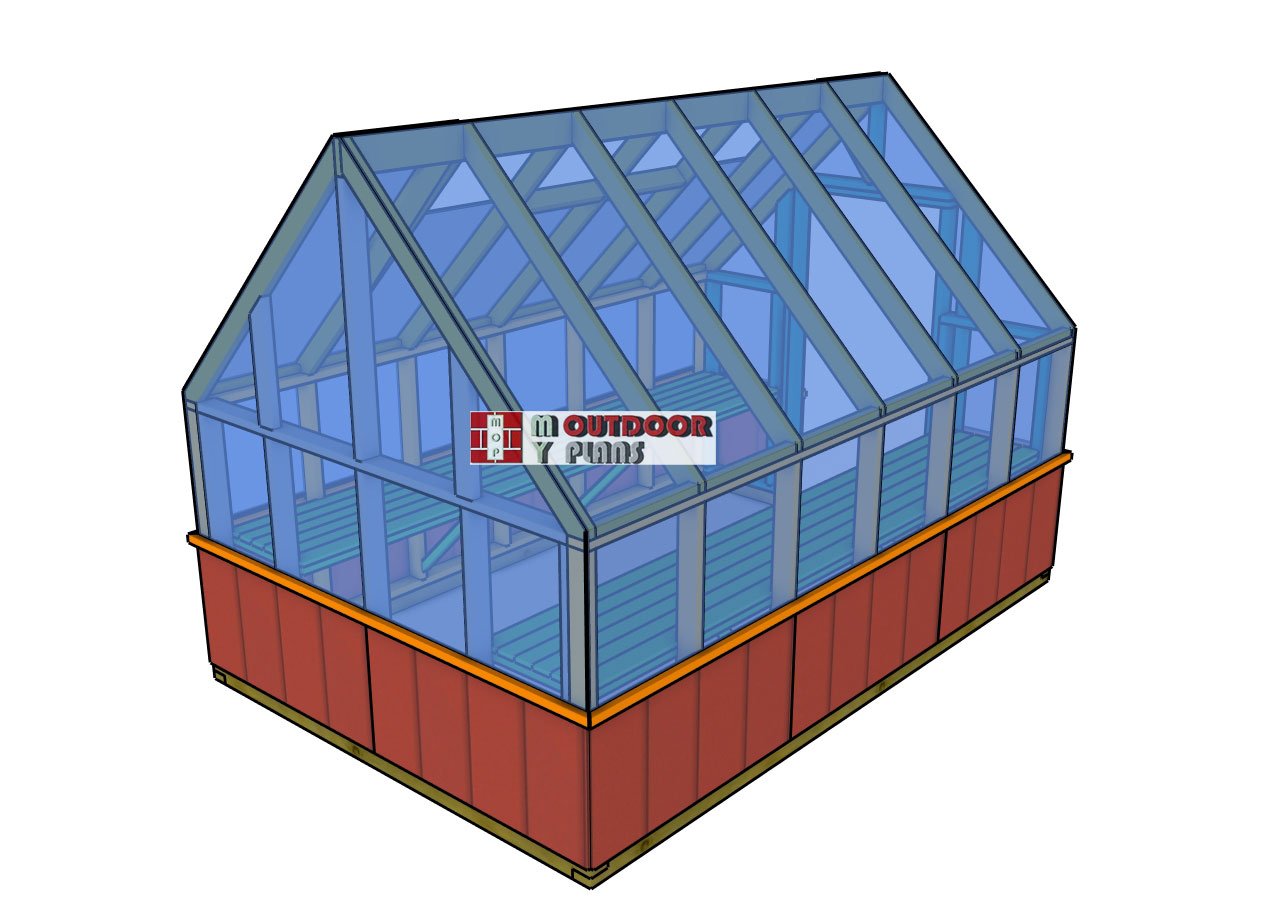
Fitting the greenhouse plastic is a critical step in creating a sealed and efficient growing environment. Start by cutting the plastic sheeting to size, ensuring enough material to cover the frame and allow for overlap at the edges. Secure the plastic by stapling it to the frame, pulling it taut as you work to eliminate wrinkles and sagging.
Side-trims-1
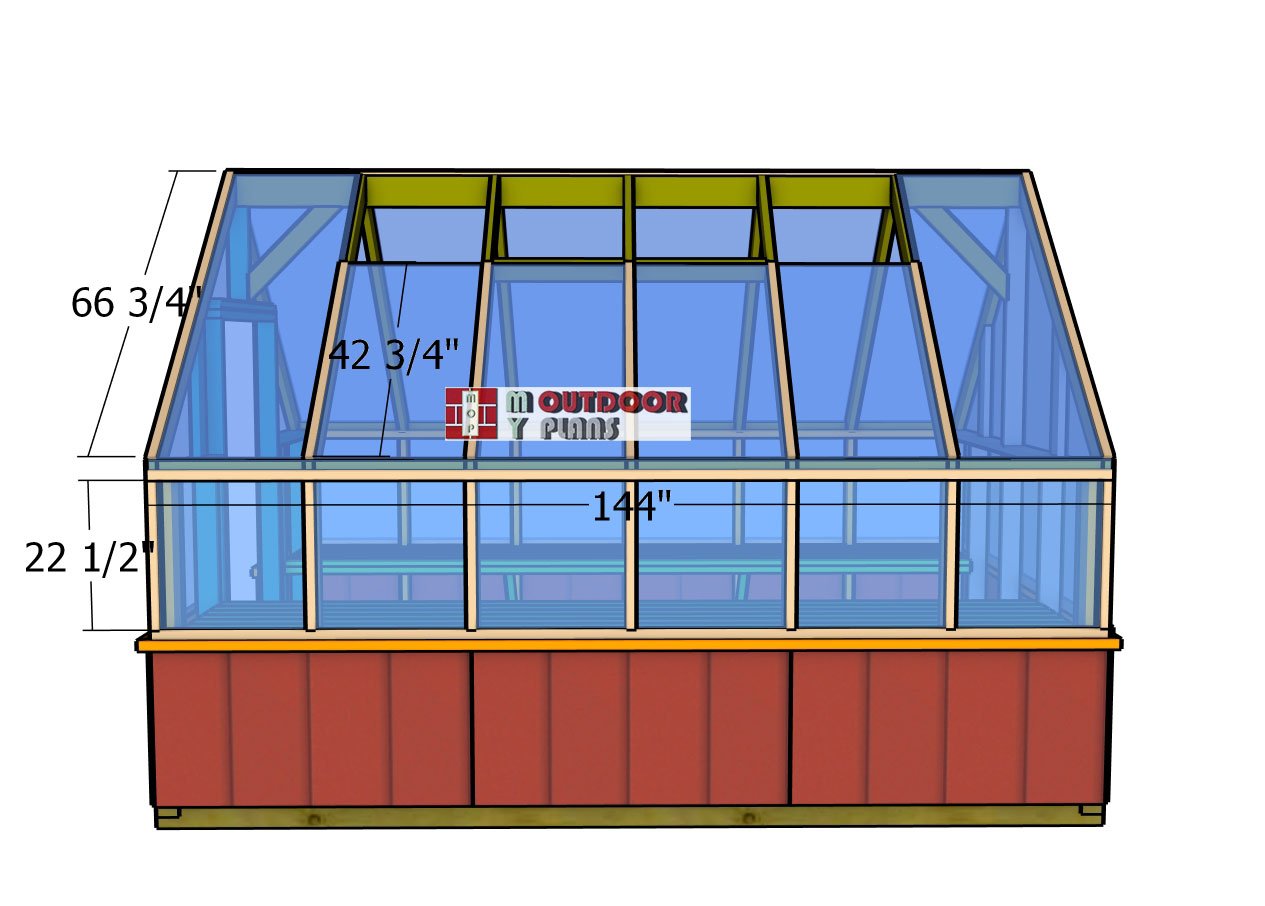
Use 1×2 wooden battens or plastic clips to reinforce the attachment, particularly around the edges and corners, for added durability. Make sure the plastic is tightly secured to prevent wind damage and create a well-insulated space for your plants. Properly installed, the greenhouse plastic will provide the ideal environment for your gardening needs. Use 1 5/8″ screws to secure the battens to the frame of the greenhouse.
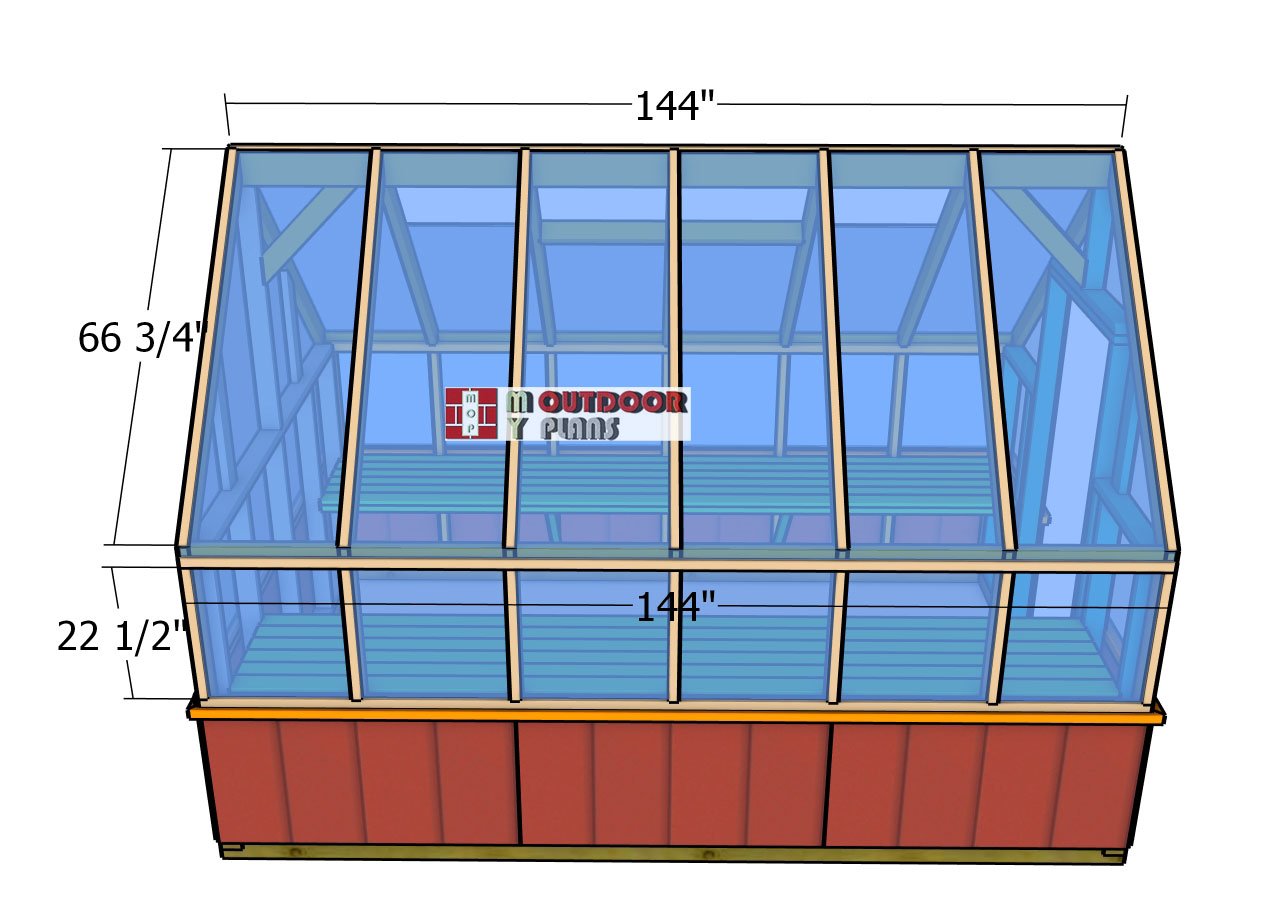
Side-trims-2
Attach the 1×2 battens to the other side of the greenhouse, as well.
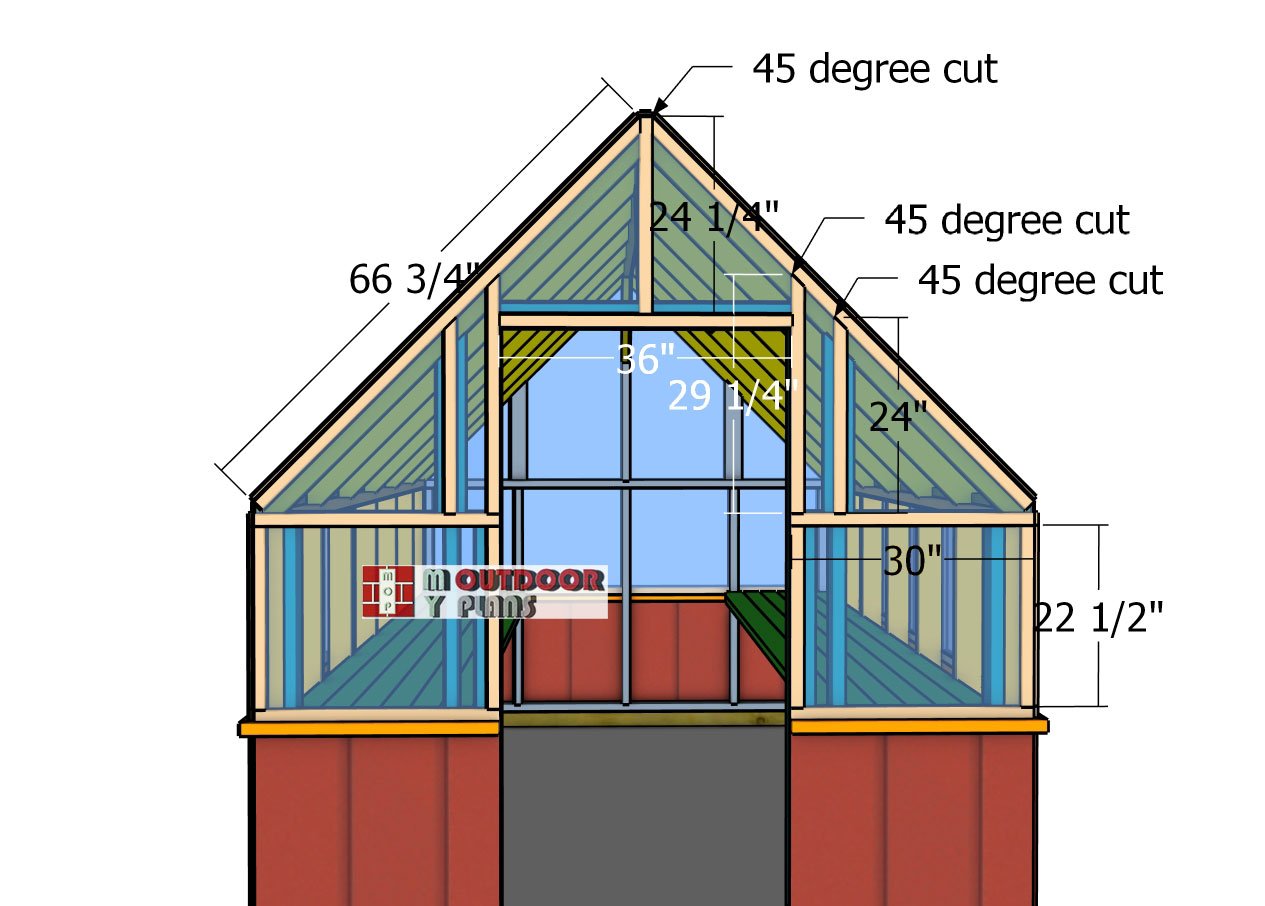
Front-wall-trims
Attach 1×2 battens to the front of the greenhouse to secure and reinforce the structure. Position the battens evenly across the surface, ensuring they align with the framing beneath for maximum support. Drill pilot holes to prevent splitting, then secure the battens with 1 1/2″ screws for a sturdy and lasting connection. These battens not only add structural integrity but also help secure the plastic sheeting, giving your greenhouse a clean and polished appearance.
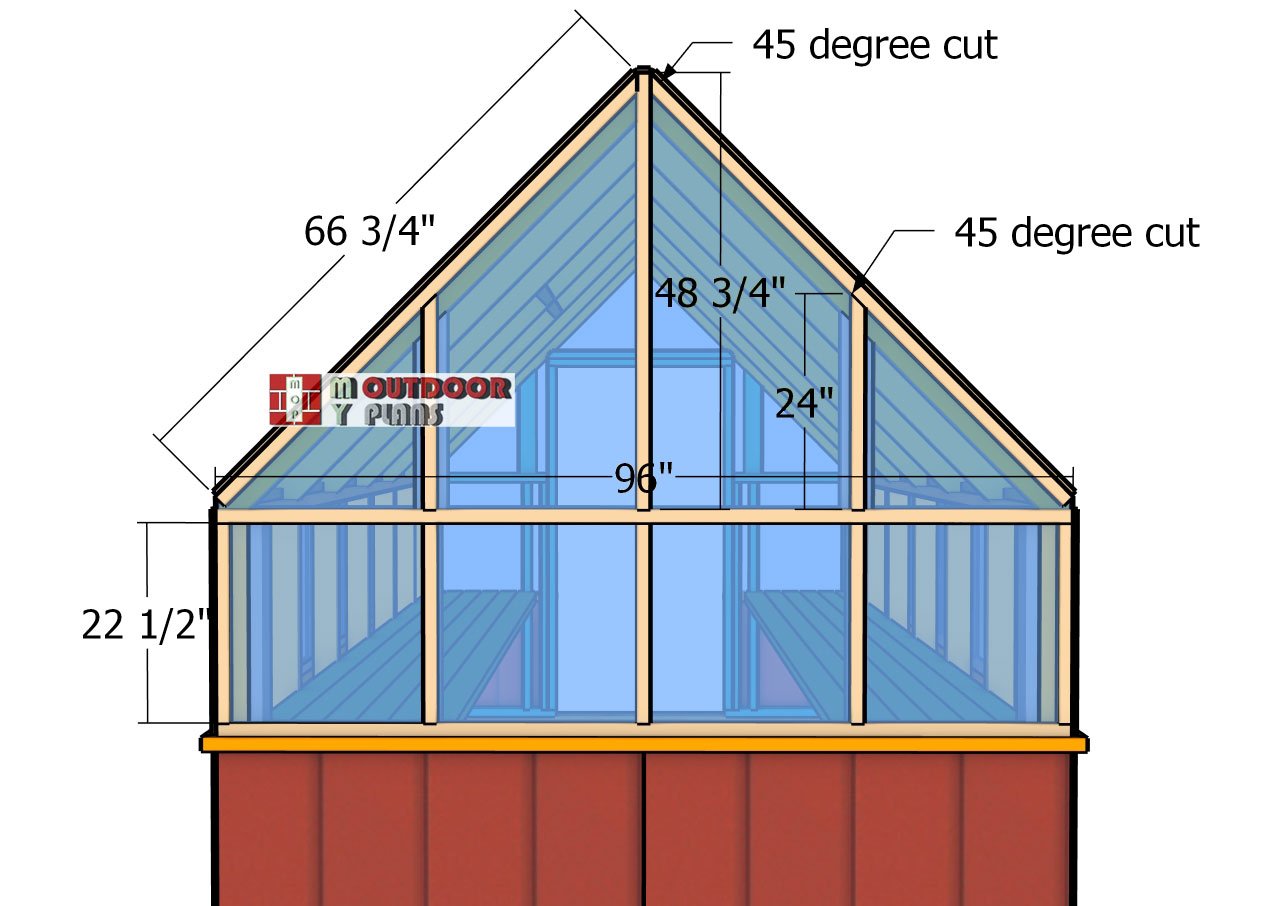
Back-wall-trims

