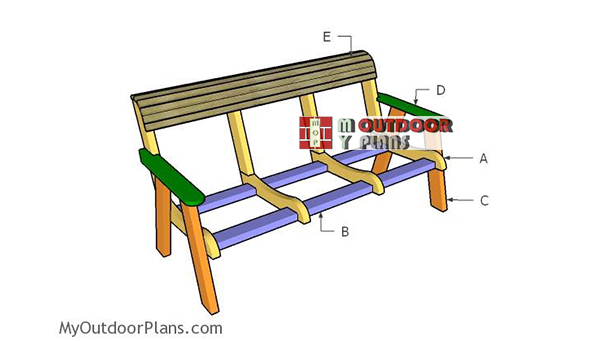
This step by step diy woodworking project is about outdoor bench plans free. I have designed this garden bench inspired by my porch swing with center console so you can enjoy a good book in the garden. This park bench is super comfortable and it is extremely sturdy. Take a look over these instructions and make adjustments if you want to get a professional result.
Make sure you invest in high quality materials, such as pressure-treated lumber, cedar, pine or redwood. Take accurate measurements and use a professional saw to get the job done. Always align the components at both ends before drilling the pilot holes and inserting the galvanized screws, in order to prevent the wood from splitting. Use waterproof glue to reinforce the joints. See all my Premium Plans HERE.
Projects made from these plans
Outdoor Bench Plans Free
Building-a-outdoor-bench
Cut + Shopping Lists
- A – 4 pieces of 2×4 lumber – 24″ long, 4 pieces – 21″ long FRAME
- B – 3 pieces of 2×4 lumber – 57″ long STRETCHERS
- C – 4 pieces of 2×4 lumber – 23″ long LEGS
- D – 2 piece of 1×4 lumber – 25 1/2″ long ARMRESTS
- E – 29 pieces of 1×2 lumber – 60″ long SLATS
- 6 pieces of 2×4 lumber – 8′
- 29 pieces of 1×2 lumber – 6′
- 1 piece of 1×4 lumber – 6′
- 2 1/2″ screws, 1 1/4″ screws
- wood glue, stain/paint
- wood filler
Tools
![]() Hammer, Tape measure, Framing square, Level
Hammer, Tape measure, Framing square, Level
![]() Miter saw, Drill machinery, Screwdriver, Sander
Miter saw, Drill machinery, Screwdriver, Sander
Time
Related
How to build an outdoor bench
Backrest-supports
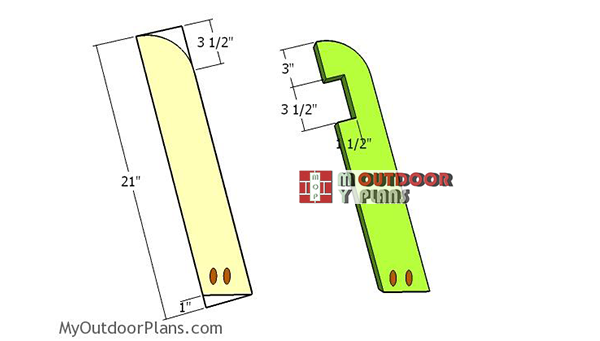
The first step of the project is to build the backrest supports from 2×4 lumber. As you can easily notice in the diagram, you need to mark the cut lines and make the notches to the center backrest supports. Make parallel cuts and then remove the excess with a chisel. Drill pocket holes to the base of the supports.
Base-supports—porch-swing
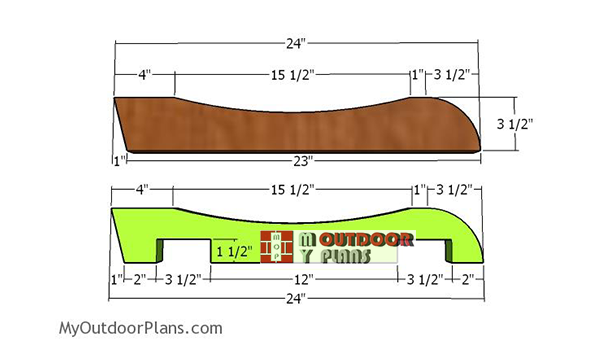
Next, you need to build the base supports for the bench from 2×4 lumber. Make the angle cuts to the supports and then use a jigsaw to male the curved cut. For the middle supports, you need to make the notches, so you can fit the stretchers. Make parallel cuts to the marked areas and then remove the excess with a chisel.
Assembling the frames
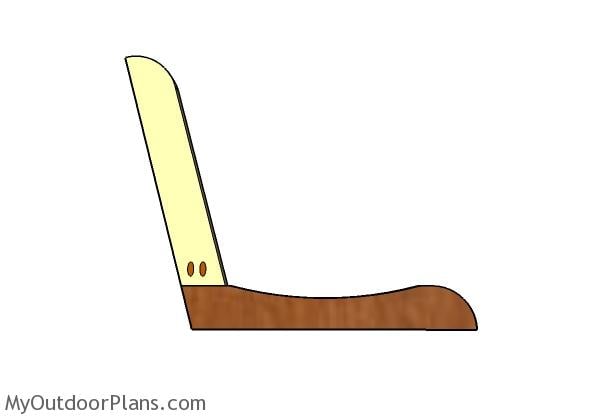
The next step of the project is to assemble the frames for the bench. Align the edges flush and insert 2 1/2″ screws to lock the supports together tightly. Add glue to the joints to reinforce the bond of the joints.
Assembling-the-frame-of-the-bench
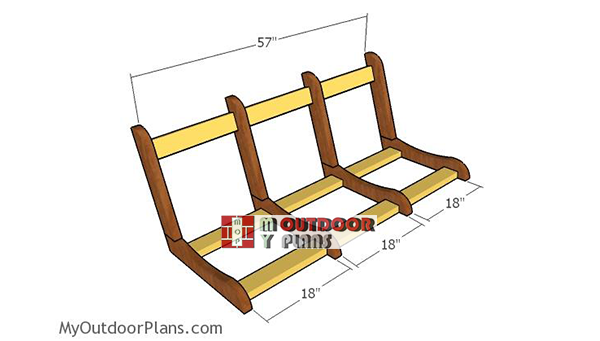
After assembling the four supports for the outdoor bench, you need to assemble the frame together tightly. Fit the 2×4 stretchers to the bench and space the supports evenly. Drill pilot holes through the stretchers and insert 2 1/2″ screws into the middle supports. Drill pocket holes at both ends of the stretchers and then insert 2 1/2″ screws into the end supports.
Fitting the seat slats
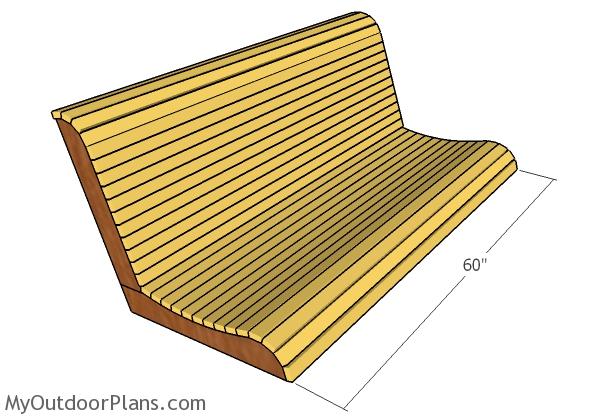
Fit the 1×2 slats to the bench frame. Align the edges flush, drill pilot holes and insert 1 1/4″ screws, so you can lock them together tightly. Countersink the head of the screws, for a professional result. You can round over the slats before fitting them into place, for an elegant look. Moreover, you can even space the slats.
Building-the-legs
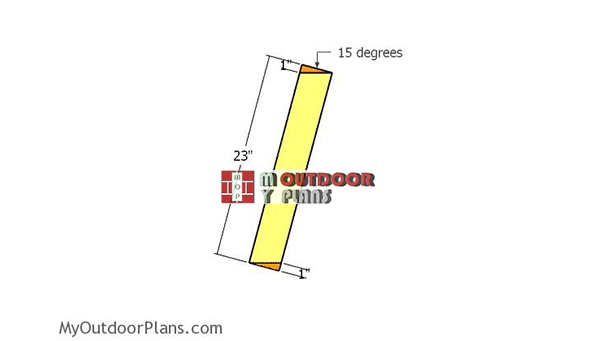
Use 2×4 lumber for the legs of the bench. Make 15 degree cuts to both ends of the legs, as shown in the diagram. Smooth the edges flush for a professional result.
Fitting the legs
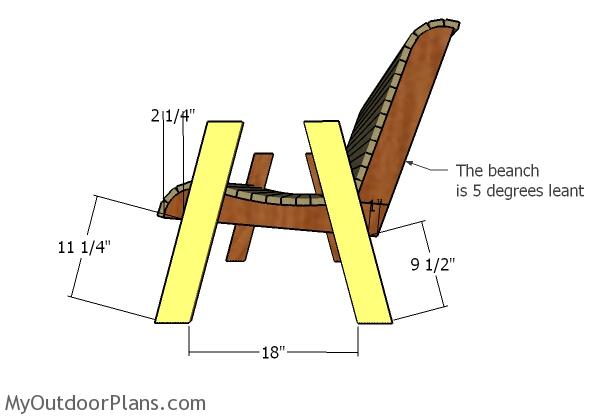
Fit the 2×4 legs to the sides of the park bench and align them, as shown in the diagram. Drill pilot holes through the legs and insert 2 1/2″ screws into the bench. Moreover, as you can easily notice in the plans, you need to lean the bench for about 5 degrees, for a more comfortable seating. However, you can make adjustments to suit your needs.
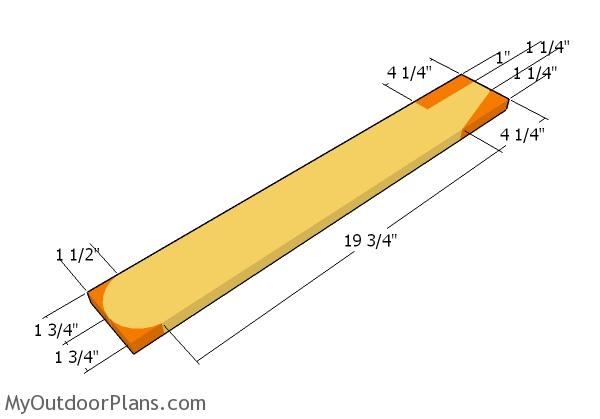
Building the armrests
Continue the backyard bench project by cutting the armrests. Mark the cut lines on the 1×4 slats and then get the job done with a jigsaw. You can even you 1×6 slats for the armrests and cut out a hole for beverages.
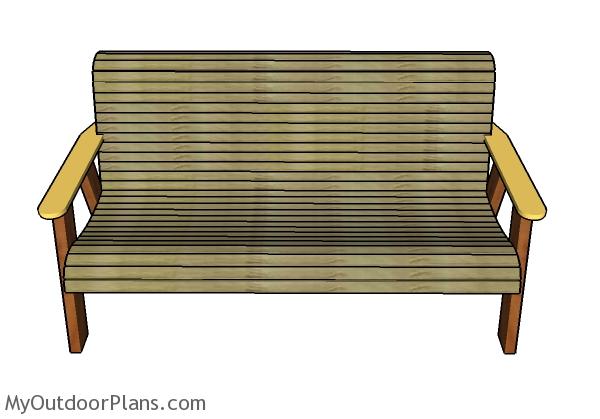
Fitting the armrests
Center the armrests to the top of the side legs and then lock them into place with 1 1/4″ screws and glue. Make sure you countersink the head of the screws, so you get a professional result. Round the exposed edges with a router, for a professional result.
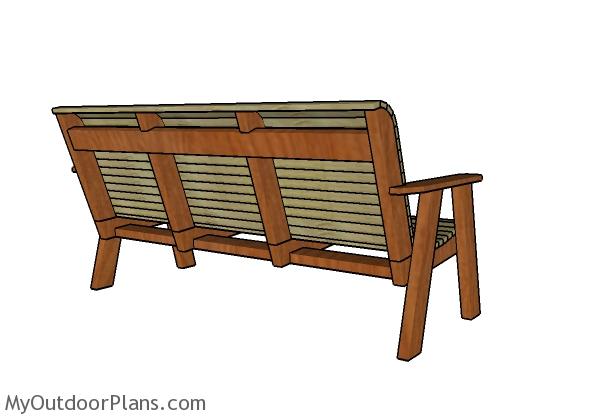
Outdoor bench plans – Back view
Fill the holes with wood putty and then smooth the surface with 120-220 grit sandpaper. Apply a few coats of paint or stain over the components so you enhance the look of the bench and to protect the wood from decay.
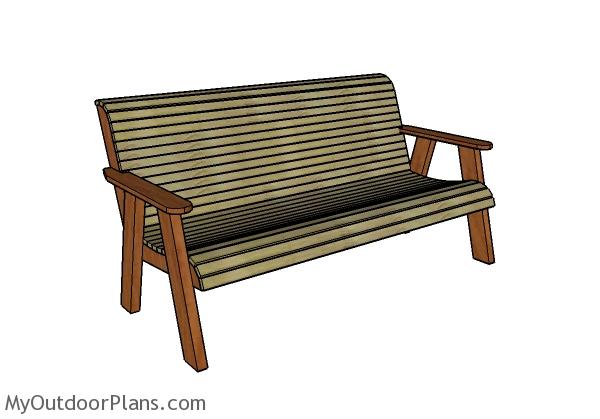
Outdoor bench plans free
This garden bench is 5′ wide and it features a distinctive look. If you want to build a matching porch swing with center console, make sure you take a look over the plans HERE.
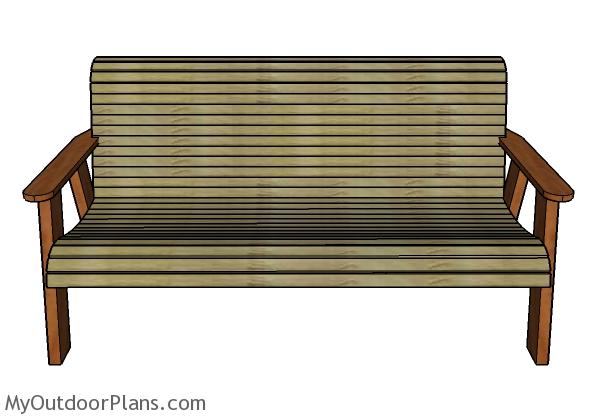
Outdoor bench plans
This bench is a great addition to any patio or garden, as it features a beautiful design and a really comfortable seating. If you build this bench, I would love to see it, so don’t forget to share a few images!
Top Tip: Don’t forget to take a look over the rest of my outdoor furniture plans, as there are so many designs and ideas you can choose from.
This woodworking project was about outdoor bench plans free. If you want to see more outdoor plans, I recommend you to check out the rest of our step by step projects.

13 comments
It’s fine that you write goals but not all countries spend inches.
Yours sincerely
Tom Hansen
Denmark
To convert my plans into metric you have this table to help you: http://myoutdoorplans.com/imperial-to-metric-conversion/
On the step labeled “Assembling the frames”, how do you insert the 2.5″ screws? Do these go in an angle? These screws support the entire backrest and are critical to the entire design.
You need to drill pocket holes. You have to use a pocket hole jig, like this one: https://amzn.to/2XRG45u After you drill the pocket holes, you insert the 2 1/2″ screws.
Thanks for the speedy reply, I’m helping my son with an Eagle Scout Project and two of these benches will be donated to a drug rehabilitation center, the Open Door Mission.
I had another question on the plans, how do you draw the 15.5 inch curvature on the Base supports? How deep does this go?
I’m worried if this is not just right, I’ll need to rip one of the 1×2 to make it fit correctly (qty 29).
Thanks again!
It is 1″ in depth. You mark the width and the point of maximum depth, and then you use a bendable item (a thin strip of wood, a plastic thing, it could be anything) along those marks. Once you have the right curve, use a pencil to trace the line.
We are working as time permits on this project but have not given up! One last question, how do you attach the legs to the bench?
” Drill pilot holes through the legs and insert 2 1/2″ screws into the bench. ”
Are these screw perpendicular to legs?
How many screws per leg?
While I did purchase the pocket hole kit, I do not see how it would be possible to apply it here. Perpendicular seems easy but also like a weak bond to bench.
Am I missing something here?
Thank you!
Yes, drill perpendicular pilot holes and insert 2 1/2″ screws into the bench frame. Two screws per joint will be enough. The pocket hole jig was necessarily for the frame of the bench.
I put four in each leg to the seat supports and two through the top of each arm rest and two through the outside back support into each arm rest from inside
I wonder if the connection between the backrest supports and the base supports would be better with a mortise and tenon or even a 1/2 lap?
Yes, that would be stronger, but I want to keep things simple with my plans. Not everyone can do complex joints due to lack of tools or patience.
if you show the centers of those arc’s and a radius on the base supports it would be easier to lay out
Is there a way to fasten the slats without screwing them through the surface. And isn’t there a formula for finding out what space would be between each one