This step by step woodworking project is about mailbox post plans. Building a decorative wooden post for your mailbox is easy and can be done by anyone. From our experience, we recommend you to choose a design that matches the style of your backyard, as well as the one of the wooden mailbox. Apply a few coats of paint to the wooden components, to protect them from decay.
There are many designs that you could choose form, so we recommend you to study the alternatives before starting the actual construction. For example, you could keep the expenditures under control and use 4×4 lumber, or you could use 6×6 lumber for a unique appearance. Fit a cap to the wooden post and a beautiful decorative brace, if you want to enhance the look of the wooden post. See all my Premium Plans HERE.
Projects made from these plans
Cut & Shopping Lists
- A – 1 piece of 4×4 lumber – 79” long POST
- B – 1 piece of 4×4 lumber – 27 1/2″ long SUPPORT
- C – 1 piece of 2×4 lumber – 14″ long BRACE
- D – 1 pieces of decorative post cap POST CAP
- tube form, concrete
- 4 pieces of 3 1/2″ screws
- 10 pieces of 2 1/2″ screws
- 2″ brad nails
- wood glue, stain/paint
- wood filler
Tools
![]() Hammer, Tape measure, Framing square
Hammer, Tape measure, Framing square
![]() Miter saw, Drill machinery, Screwdriver, Sander, Post-hole digger
Miter saw, Drill machinery, Screwdriver, Sander, Post-hole digger
Time
![]() One weekend
One weekend
Related
- Part 1: Wooden Mailbox Plans
- Part 2: Mailbox Post Plans
Building a wooden mailbox post
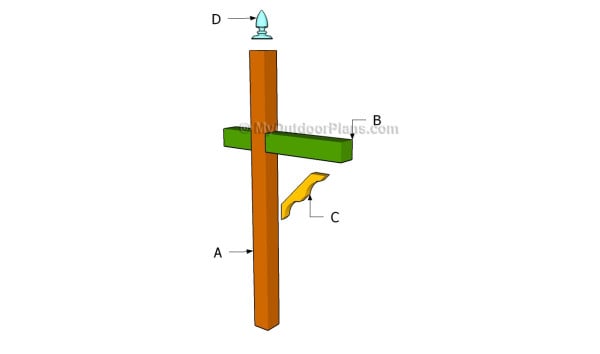
Building a mailbox post
Top Tip: After building the wooden mailbox, you need to set the posts into concrete, as to support it properly. There are many designs you could choose from, so make sure this project suits your needs and the design of your yard.
Mailbox Post Plans
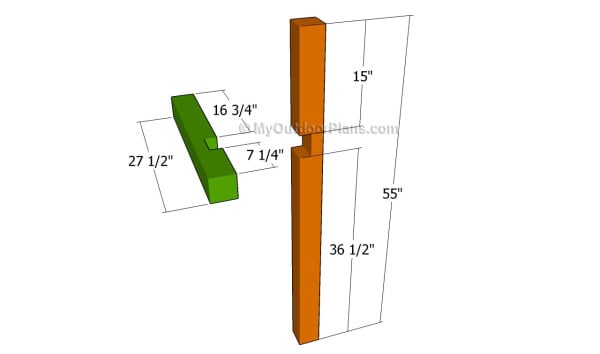
Build a wooden mailbox
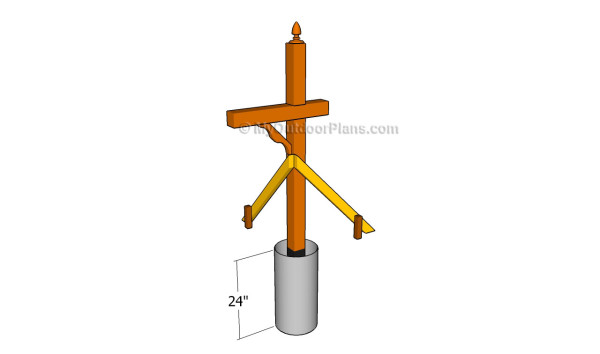
The first step of the woodworking project is to build the frame of the mailbox support. As you can see in the plans, you need to create a cross-shaped support out of 4×4 lumber. If you want to enhance the look of your project, we recommend you to use 6×6 lumber.
Cut out notches in the components, as to get a proper joint. Add waterproof glue and insert several screws to get a rigid joint.
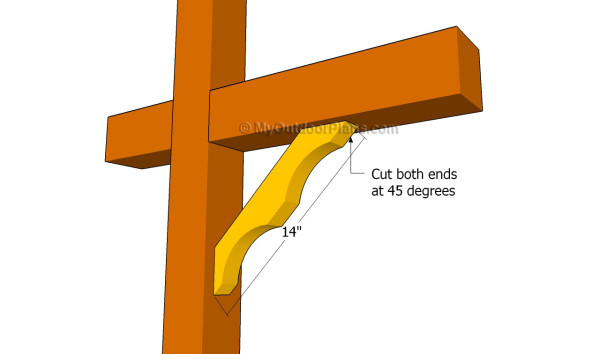
Fitting the brace
The next step is to add a decorative brace to the mailbox post. As you can see in the image, we recommend you to build the brace out of 2×4 lumber. Cut both ends of the brace at 45 degrees, by using a good miter/circular saw.
Align the brace at both ends, center it, drill pilot holes and insert 3 1/2″ galvanized screws into the support. Make sure you countersink the head of the screws, if you want to get a nice appearance.
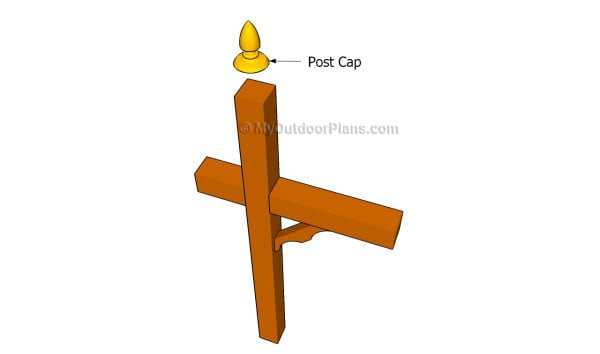
Fitting the post cap
You could also add a decorative cap to the wooden post, if you want to add value to your project and to make it unique. Choose a cap that fits the design of your yard and house and lock it to the post with waterproof glue.
Setting the posts into concrete
After building the mailbox post, we recommend you to set it into place properly. Therefore, dig a 24″ deep hole into the ground, fit a tube form and set the post into place.
After plumbing the post with a spirit level, we recommend you to brace it with support on two perpendicular directions. Fill the holes with concrete and level the surface with a trowel. Let the concrete to dry out for several days.
Attaching the mailbox to the post
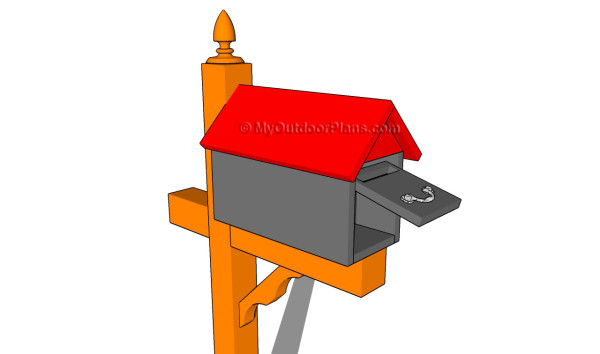
Last but not least, you have to take care of the finishing touches. Therefore, fill the holes and the cracks with wood filler and let it dry out for several hours, before sanding the surface with 120-grit sandpaper.
Top Tip: Protect the wooden components from rot by applying several coats of paint. We strongly recommend you to check out the rest of the project, about building the wooden mailbox.
This woodworking project was about wooden mailbox post plans. If you want to see more outdoor plans, we recommend you to check out the rest of our step by step projects. I would love you to share our projects on Facebook, Pinterest or Google+.
EXPLORE MORE IDEAS FOR:
 |
 |
 |
 |

3 comments
Followed the plans to the inch for the mailbox post. If it is on the internet it must be true. The question is, how far above the ground will the mailbox be once the 55 inch pole is set two feet into the ground? Might want to put plans on how to scab two 4X4’s together too. Seriously, the overall length measurement is wrong on the plan. Will work fine for my Mazda Miata, but don’t think the Post Lady will like it….:)
If you actually took the time to read the plans and the cut list, instead of leaving sarcastic comments on the internet, you would have seen that the post is actually 79″ long and you set it 24″ in concrete. And no, the measurements are correct. The diagram shows the section that is above the ground (you also have the option to use a post anchor).
Don, you should not be allowed near power tools if you missed the 79″ pole set 24″ in the ground equals 55″