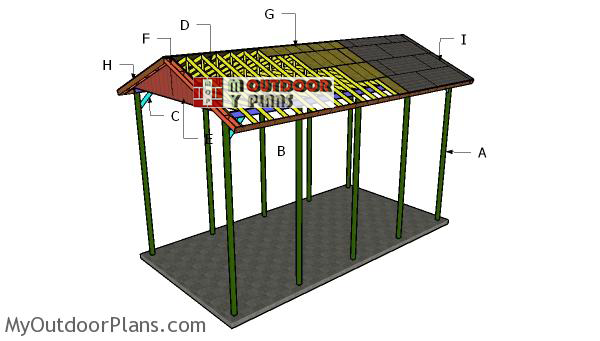
This step by step diy project is about 20×40 rv carport carport plans. This sturdy but simple carport is very large so it can shelter a RV. The carport walls are 14′ high, making it ideal for large RVs and boats. Make sure you read the local building codes before starting the project, so you get aware of the legal requirements and make the necessarily adjustments. Take a look over the rest of my woodworking plans, if you want to get more building inspiration.
When buying the lumber, you should select the planks with great care, making sure they are straight and without any visible flaws (cracks, knots, twists, decay). Investing in cedar or other weather resistant lumber is a good idea, as it will pay off on the long run. Use a spirit level to plumb and align the components, before inserting the galvanized screws, otherwise the project won’t have a symmetrical look. If you have all the materials and tools required for the project, you could get the job done in about a day. See all my Premium Plans HERE.
Projects made from these plans
20×40 RV Carport Plans
Building-a-20×40-rv-carport
Cut & Shopping Lists
- A – 10 pieces of 6×6 lumber – 20′ long POSTS
- B – 4 pieces of 2×8 lumber – 40′ long SUPPORT BEAMS
- C – 4 pieces of 3×6 lumber – 48″ long BRACES
- 10 pieces of 6×6 lumber – 20′
- 4 piece of of 2×8 lumber – 40′
- 2 pieces of 3×6 lumber – 8′
- post anchor
- 6″ carriage bolts
- wood glue, stain/paint
- wood filler
- post anchors
- structural screws for connectors
- post to beam connector
Tools
![]() Hammer, Tape measure, Framing square, Level
Hammer, Tape measure, Framing square, Level
![]() Miter saw, Drill machinery, Screwdriver, Sander
Miter saw, Drill machinery, Screwdriver, Sander
![]() Concrete mixer, Post hole digger
Concrete mixer, Post hole digger
Time
![]() One weekend
One weekend
Related
- PART 1: 20×40 RV Carport Plans
- PART 2: 20×40 RV Carport Roof Plans
- Flat roof carport plans
- Lean to carport plans
Large RV carport plans
Total Posts
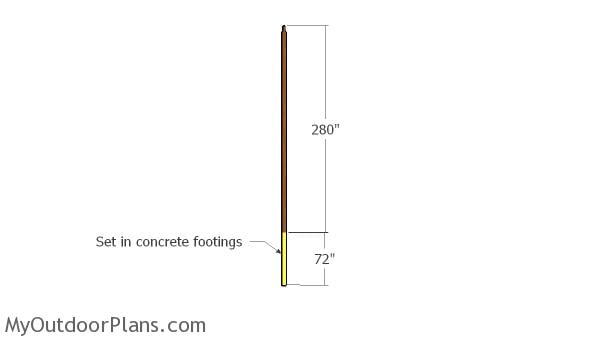
The first step of the project is to build the posts for the carport, using 6×6 lumber. As you can see in the plans, you need to set the posts 6′ deep into concrete.
Posts
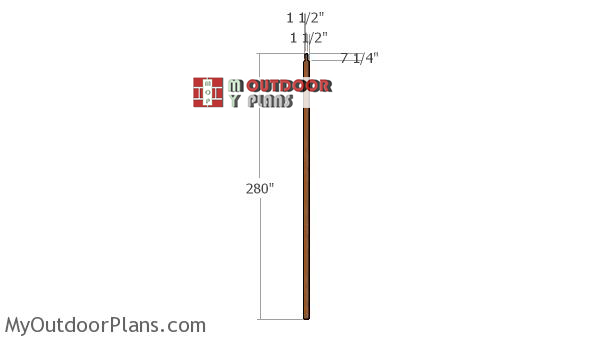
Use a circular saw to make notches to the top of the posts, so you can fit the support beams. Use a circular saw to make 1 1/2″ deep parallel cuts inside the marked areas and then clean the recesses with a chisel. Smooth the surface with sandpaper.
Fitting-the-posts-rv-carport
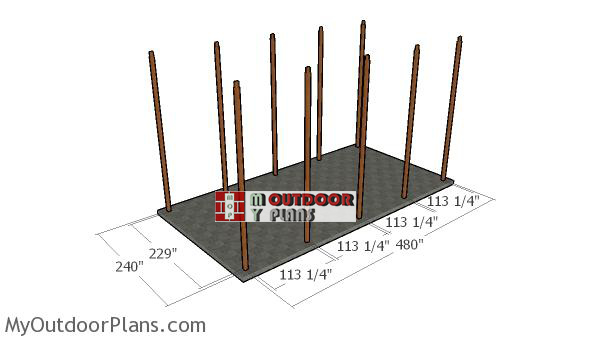
Next, you need to lay out the carport in a professional manner. Build batter boards and use string to layout everything in a professional manner. Apply the 3-4-5 rule to every corner and make sure the diagonal are equal, otherwise the corners won’t be square. Select the location for the carport with attention, making sure it complies with the local codes. Get a building permit if needed. Level the surface with attention, removing the vegetation layer.
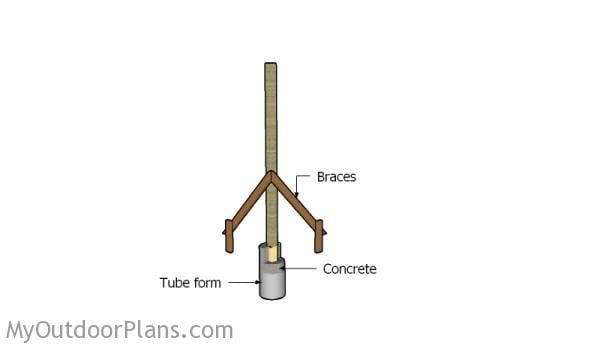
Setting the posts in concrete
You need to set the posts in concrete (about 6′ deep – make sure you read the local building codes for accurate information). Use a post hole digger to make the holes. Pour a 2″ layer of concrete on the bottom of the holes so you level them. Fit the tube forms and then the 6×6 posts. Use a spirit level to make sure the posts are plumb and then secure them temporarily into place with braces. Fill the tubes with concrete and let it dry out as shown on the bags. Make sure the top of the posts are level.
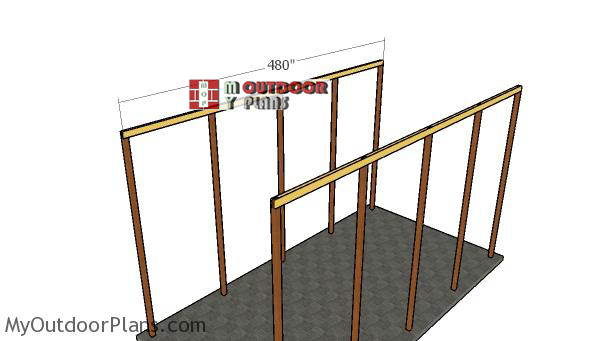
Fitting-the-support-beams
After fitting the 6×6 posts to the sides of the carport, you need to attach the 2×8 support beams. Clamp the 2×8 beams into place and then make sure the corners are square. Drill pilot holes through the beams and posts and then insert 6″ carriage bolts. Use at least 2 bolts for each joint.
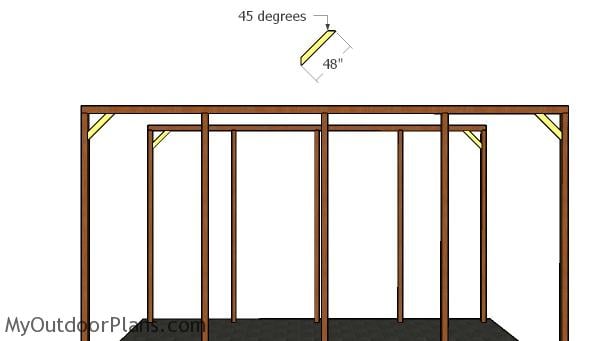
Braces
Use 3×6 lumber for the braces, especially if you live in a windy area. These braces will add support to the frame of the carport. Cut both ends of the braces at 45 degrees and then smooth the edges flush. Fit the braces into place and then lock them into place with 3 1/2″ screws.
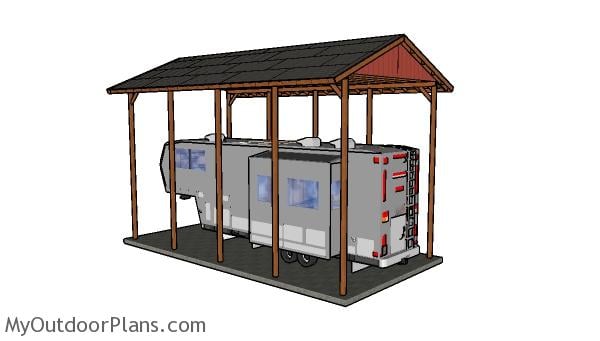
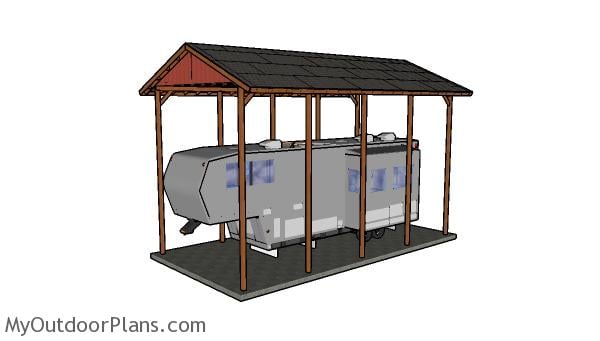
Large RV Carport Plans
This large single carport features an elegant design, having a roof with a nice slope. You can adjust the slope of the roof, if you live in areas with high precipitations.
20×40 RV Carport Plans
Please take a look over PART 2 of the project, so you learn more on how to build the carport roof. You can make a few modifications to my design, so you can create storage space to the sides of the carport.
If you want to get PREMIUM PLANS for this project, in a PDF format, please press GET PDF PLANS button bellow. Thank you for the support.

This woodworking project was about 20×40 single carport plans. If you want to see more outdoor plans, check out the rest of our step by step projects and follow the instructions to obtain a professional result.

EXPLORE MORE IDEAS FOR:
 |
 |
 |
 |
8 comments
I like this website a lot, there are many really good ideas.
I noticed you have A, B and C listed under materials needed, but not D, E, F, G, H, I.
And 3″x6″ lumber is not commonly sourced, I wonder why that particular dimension was chosen?
Keep up the good work!
Rick
Hi there. Thank you. D E F G H I are labeled on PART 2 of the project (see the NEXT button at the bottom of the article). 3×6 is used because it need to bit between the support beams (2 1/2″ wide).
Ah ha!
Thank you, for explaining!
Sincerely,
Rick W.
Greetings: Thanks for offering your plans. Why so deep on the main supports? Is it because you needed to account for all soil types that the sonotubes might be placed in? Also, to further fight against rot, would it be acceptable to have the sonotubes above ground about 1′ but have the remaining 5′ underground? Lastly, you meant to say that the total length of the support posts are 240″, right?
In most cases 3-4′ into the ground will me more than enough, because the frost line it’s under 3′. That is why I recommend you to read the local codes. You should set the total length of the supports according to the height of your RV. There is no need to have a 16′ post above the ground if your RV is 8′ for example. You should adjust that to suit your needs perfectly.
I would like to have a copy of the plans for a 20×40 rv carport. I will buy these if you can send me a link
No Premium Plans for this at the moment. A free version is still available: https://myoutdoorplans.com/faq/
What is the cost to build?