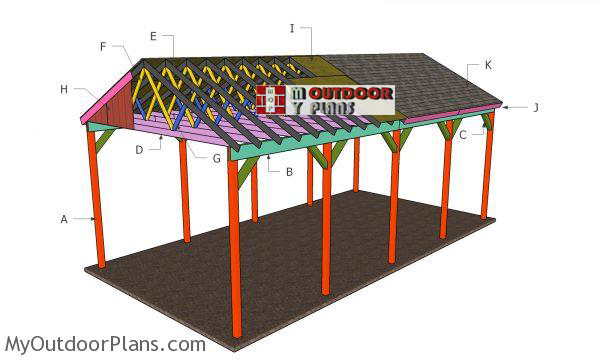
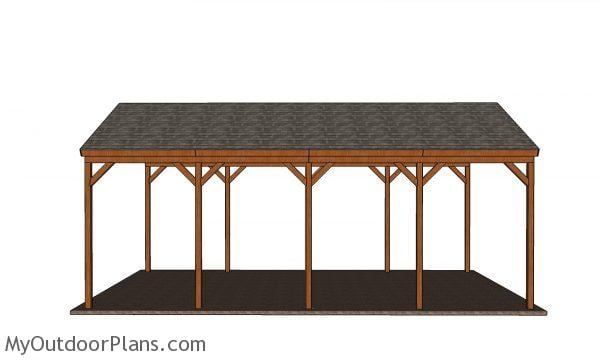
This step by step woodworking project is about 20×40 rv carport roof plans. This carport features a sturdy structure and a gable roof with a 6:12 pitch. In this article I show you how to build the trusses for the gable roof. This is a sturdy carport and one of the distinctive elements is represented by the gable roof. Alternatively, you can also buy engineered trusses if you find it hard to assemble trusses.
This carport has a gable roof and a super sturdy structure. If you have a large boat or a recreational vehicle, this is the structure to choose. First of all, you need to measure the vehicle and to design the size of the carport accordingly. Make sure you set the posts into concrete (3-6′ according to the soil structure), otherwise the structure won’t be rigid enough to resist to strong winds.
Projects made from these plans
20×40 RV Carport – Gable Roof Plans
Building-a-20×40-rv-carport
Cut & Shopping Lists
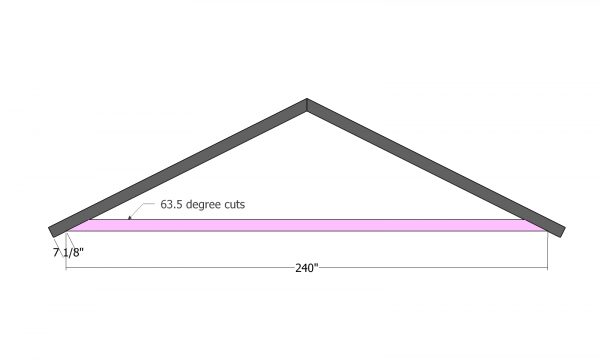
- D – 21 pieces of 2×6 lumber – 20 ft long BOTTOM CHORD
- E – 42 pieces of 2×6 lumber – 12 ft long RAFTERS
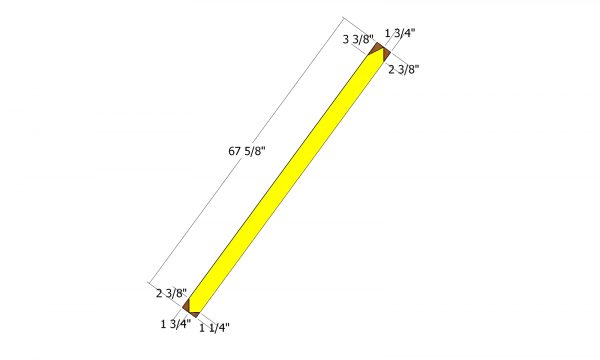
- F, G – 42 pieces of 2×4 lumber – 67 5/8” long, 42 pieces – 32″ long WEBS
- H – 4 pieces of 5/8″ T1-11 siding – 48″x30 1/8″ long, 4 pieces – 48″x54 1/8″long, 2 pieces – 48″x66 1/8″ long SIDING
- I – 28 pieces of 1/2″ plywood – 4’x8′ long, 4 pieces – 4’x4′ long ROOF
- J – 8 pieces of 1×8 lumber – 10 ft long, 4 pieces – 10′ 5/8″ long, 4 pieces – 25″ long TRIMS
- K – 1000 sq ft of tar paper & shingles ROOFING
![]() Hammer, Tape measure, Framing square, Level
Hammer, Tape measure, Framing square, Level
![]() Miter saw, Drill machinery, Screwdriver, Sander
Miter saw, Drill machinery, Screwdriver, Sander
![]() Post hole digger, Concrete mixer
Post hole digger, Concrete mixer
Time
![]() One day
One day
Rv Carport Roof Plans
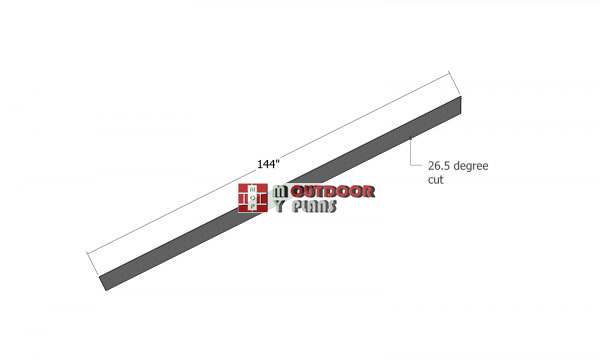
Use 2×6 lumber for the rafters. Make 26.5 degree cuts to one end of the rafters. Smooth the edges smooth.
Bottom rafter
Use 2×6 lumber for the bottom chord. Make 63.5 degree cuts to both ends of the beams. Lay everything on a level surface and align the edges flush.
First support
Use 2×4 lumber for the web supports for the trusses. Make the cuts to the supports, as shown in the diagram.
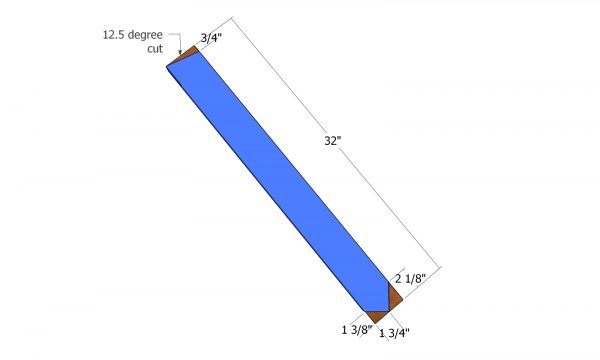
Second w support
Use 2×4 lumber for the second web supports. Make angle cuts to both ends of the webs, as shown in the diagram.
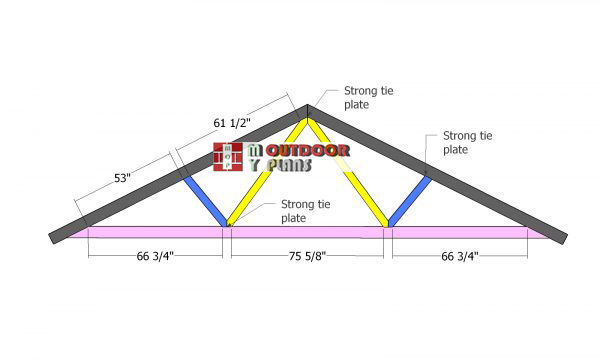
20-ft-truss-for-carport
Fit the webs to the trusses, as shown in the diagram. Fit the strong tie plates over the joints. Insert 1 1/2″ structural nails to secure the plates into place. Fit the plates on 2 sides of the trusses.
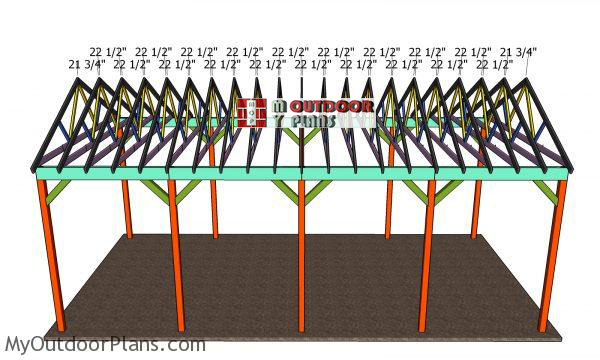
Fitting-the-trusses-to-the-carport
Fit the trusses to the top of the carport. Plumb the trusses vertically and lock them to the support beams with rafter ties. Place the trusses every 24″ on center.
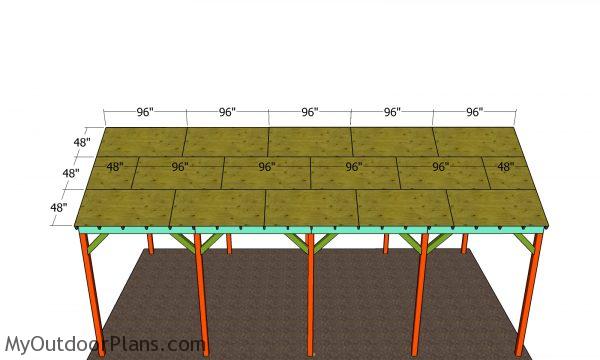
Roof sheets – 20×40 carport
Use 1/2″ plywood for the roof sheets. Start laying the sheets from bottom left of the roof structure. Leave no gaps between the sheets and align the edges flush. Insert 1 5/8″ screws every 8″ along the rafters.
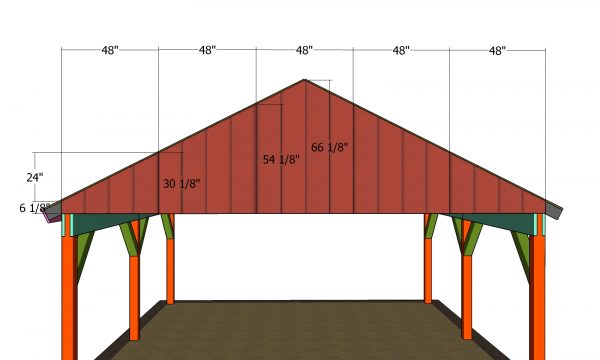
Gable end panels
Use 5/8″ T1-11 siding for the gable end panels. Cut the panels as shown in the diagram and then attach them to the gable ends of the carport. Leave no gaps between the panels and align the edges flush. Insert 1 5/8″ screws to lock the panels into place tightly.
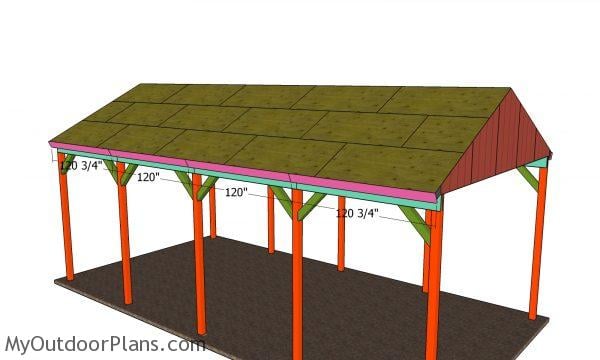
Side roof trims
Fit the 1×8 trims to the sides of the carport. Align the edges flush. Insert 2″ nails to secure the trims to the ends of the rafters.
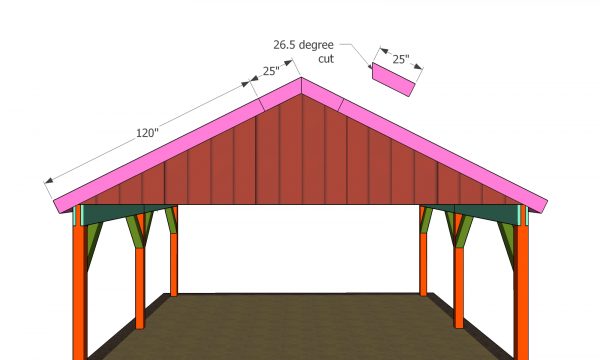
Fitting the front and back gable trims
Fit the 1×8 trims to the gable ends of the carport. Align the edges flush and insert 2″ nails to secure the trims into place.
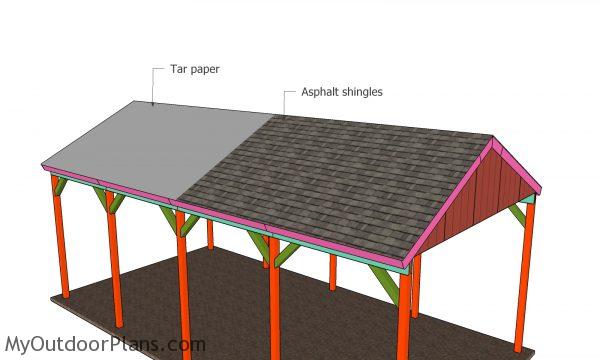
Fitting the roofing
Fit the tar paper to the roof of the carport. Next, install the drip edges. Install the asphalt shingles over the roof of the carport, according to the manufacturer’s instructions.
RV Carport – side view
Check out PART 1 of the project, where I show you how to build the frame of the carport. PART 1 also comes with a full shopping list.
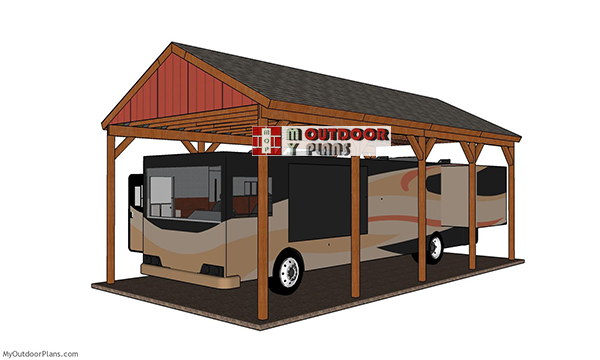
How-to-build-a-20×40-rv-carport
Last but not least, take care of the final touches. Therefore, fill the gaps with wood putty and let the compound dry out for several hours, before sanding the surface with medium grit sandpaper. Afterwards, clean the surface with a cloth and apply several coats of wood stain or paint, to protect the wood from rot.
Top Tip: You could fit lattice panels between the posts, if you want to protect your recreational vehicle from bad weather. In addition, the panels would add character to your construction.
This woodworking project was about rv 20×40 carport plans. If you want to see more outdoor plans, we recommend you to check out the rest of our step by step projects.

EXPLORE MORE IDEAS FOR:
 |
 |
 |
 |