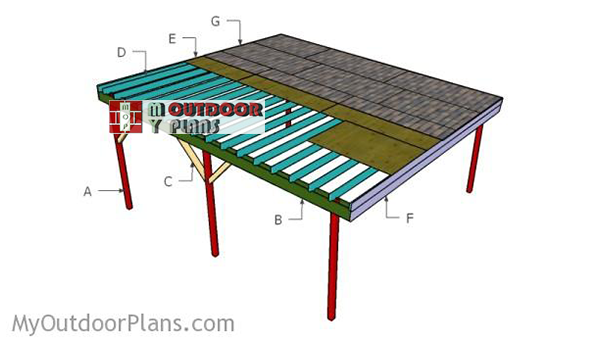
This step by step diy woodworking project is about 2 car carport plans. The project features instructions for building a double carport made from wood, having a flat roof and sharp modern design. If you want to protect your cars from bad weather, but a garage is too expensive or just too complex for your needs, building this two car carport with a is a great option. Make sure you check out the rest of plans to see alternatives and more projects for your garden.
When buying the lumber, you should select the planks with great care, making sure they are straight and without any visible flaws (cracks, knots, twists, decay). Investing in cedar or other weather resistant lumber is a good idea, as it will pay off on the long run. Use a spirit level to plumb and align the components, before inserting the galvanized screws, otherwise the project won’t have a symmetrical look. If you have all the materials and tools required for the project, you could get the job done in about a day. See all my Premium Plans HERE.
Projects made from these plans
2 Car Carport Plans
Building-a-two-car-carport
Cut & Shopping Lists
- A – 2 pieces of 4×4 lumber – 132″ long, 2 pieces – 140 1/4″ long, 2 pieces – 148 1/2″ long POSTS
- B – 4 pieces of 2×8 lumber – 264″ long BEAMS
- C – 2 pieces of 4×4 lumber – 42 1/2″ long, 2 pieces – 47 1/2″ long, 2 pieces – 55″ long, 2 pieces – 59″ long BRACES
- D – 18 pieces of 2×6 lumber – 240″ long RAFTERS
- E – 10 pieces of 3/4″ plywood- 48″x96 long, 5 pieces – 48″x72″ long ROOF
- F – 2 pieces of 1×6 lumber – 265 1/2″ long, 2 pieces – 240″ long, 2 pieces of 1×8 lumber – 240″ long TRIMS
- G – 500 sq ft of tar paper, 500 sq ft of asphalt shingles ROOFING
- 4 pieces of 4×4 lumber – 12′
- 2 pieces of 4×4 lumber- 14′
- 4 piece of 2×8 lumber – 22′
- 15 pieces of 3/4″ plywood – 4’x8′
- 18 pieces of 2×6 lumber – 20′
- 4 pieces of 1×6 lumber – 24′
- 2 pieces of 1×8 lumber – 20′
- post anchor
- 500 sq ft of tar paper
- 500 sq ft of asphalt shingles
- 200 pieces of 2 1/2″ screws
- 100 screws of 3 1/2″ screws
- 800 pieces of 1 5/8″ screws
- rafter ties
Tools
![]() Hammer, Tape measure, Framing square, Level
Hammer, Tape measure, Framing square, Level
![]() Miter saw, Drill machinery, Screwdriver, Sander
Miter saw, Drill machinery, Screwdriver, Sander
Time
![]() One weekend
One weekend
It’s that simple to build a flat roof carport!
How to build a two carport
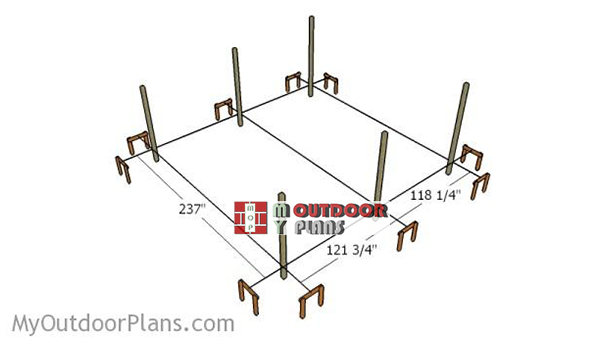
Laying-out-the-posts
The first step of the project is to layout the posts in a professional manner. Therefore, I recommend you to use batter boards (made from 2x4s) and string. Measure the diagonals and make adjustments until they are perfectly equal. Apply the 3-4-5 rule to the corners to make sure they are right-angled.
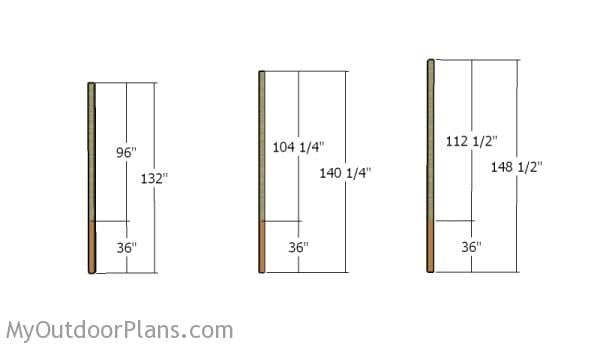
Building the posts
Build the posts from 4×4 lumber. If you want to add more support to the carport, you should consider using 6×6 lumber. As you can easily notice in the diagram, you need to set the posts 36″ in concrete. Make sure you make 4 degree cuts to the top of the posts, for a professional result. You can get by without making the cuts, but it will be harder to align the support beams to the top of the posts.
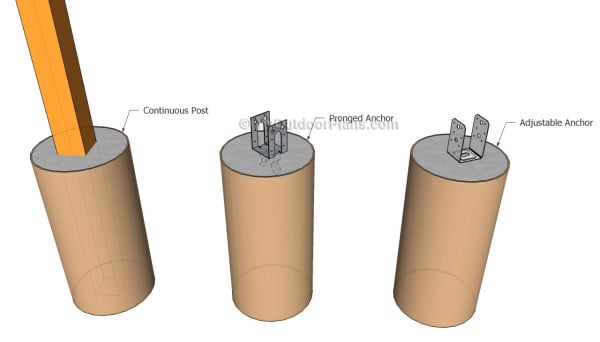
Anchoring the post into concrete
There are several ways to lock the posts into place. Therefore, you could dig holes in the ground and set the posts into concrete, or you could use post anchors. Nevertheless, taking into account the complexity of the construction, we recommend you to lock the posts into concrete.
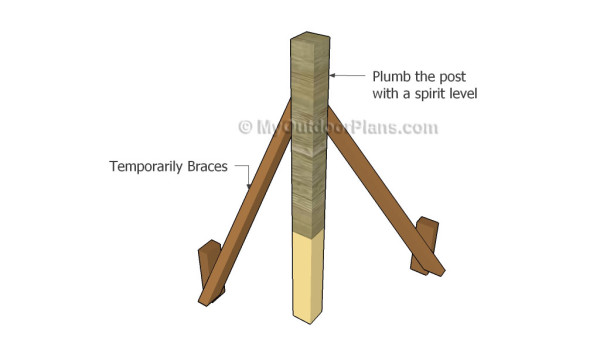
Installing the post
Level the posts with a spirit level and secure them temporarily with 2×4 braces. Make sure the top of the posts are at the same level, otherwise the structure of the carport won’t be sturdy enough.
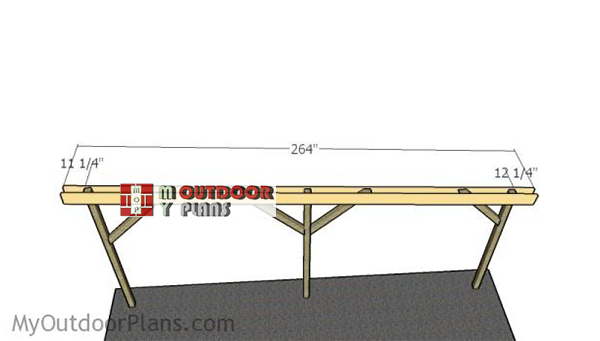
Fitting-the-support-beams
After the concrete sets out, you need to attach the 2×8 support beams to the top of the posts, as shown in the diagram. Align the beams with attention and clamp them to the posts tightly.
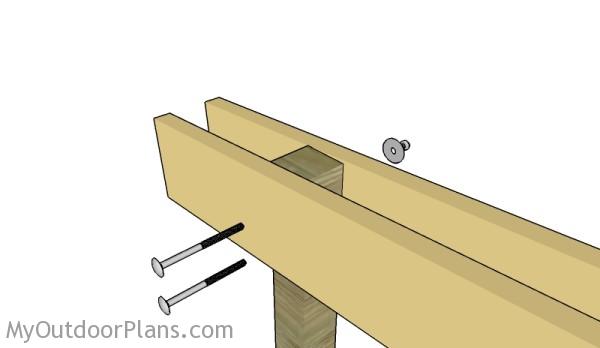
Securing the support beams to the posts
Drill pilot holes through both the beams and through the posts. Next, insert 6 1/2″ carriage bolts to lock the beams to the top of the posts.
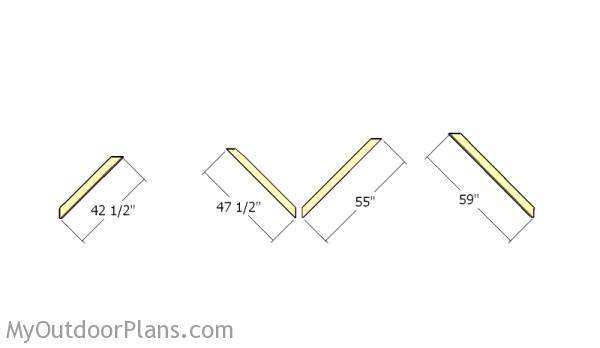
Building the braces
Build the braces for the carport from 4×4 lumber. Cut both ends of the braces at 45 degrees. Smooth the cut edges with sandpaper.

Fitting the braces
Fit the braces to the sides of the carport. Align the edges with attention, drill pilot holes and use 3 1/2″ screws to lock them into place. The braces will add support to the structure, especially if you live in a windy area.

Building the rafters
Build the rafters from 2×6 lumber. As you can easily notice in the diagram, you need to make notches to the rafters. Use a circular saw to make parallel cuts to the marked areas and remove the excess material with a chisel.
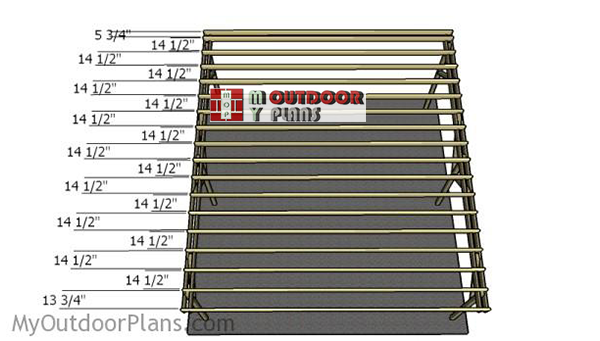
Fitting-the-rafters
Fit the rafters to the support beams and place the equally-spaced. Use metal connectors to lock the rafters to the support beams.
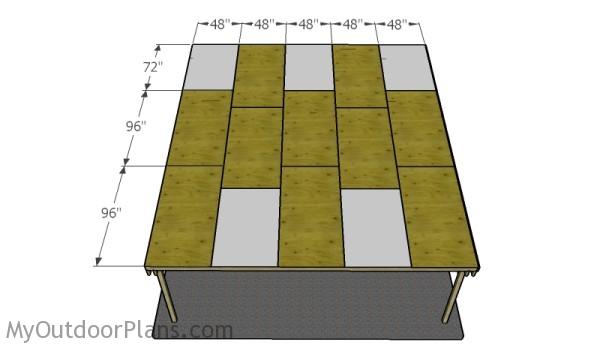
Attaching the roofing sheets
Build the roof of the carport from 3/4″ plywood. Cut the sheets at the right dimensions and place them to the rafters. Use 1 5/8″ screws to secure the sheets into place, every 8″. Leave no gaps between the sheets for a professional result.
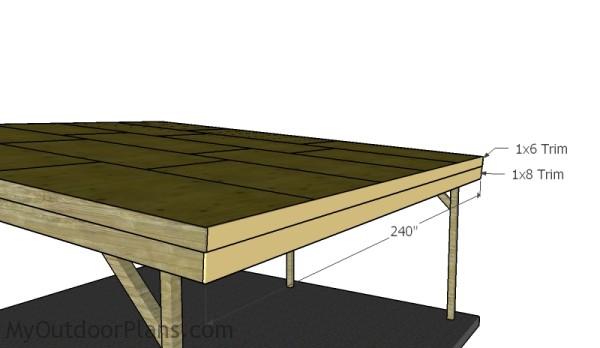
Fitting the side trims
Attach 1×6 trims to the sides of the rafters. Use brad nails to secure the trims into place.
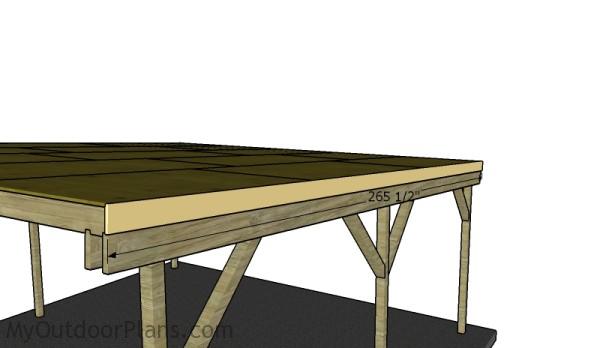
Fitting the front and back trims
Next attach the trims to the front and back of the carport. The top trims are made from 1×6 lumber, while the bottom trims are made from 1×8 lumber.
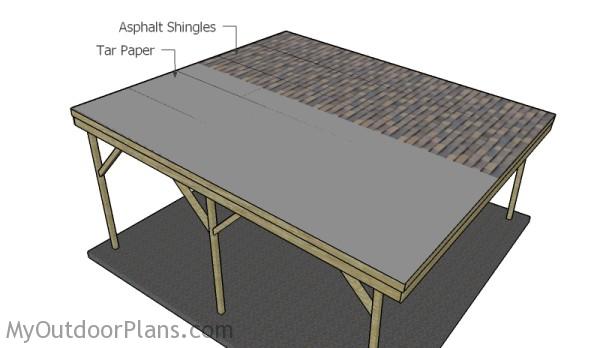
Fitting the roofing
Cover the roof with tar paper. Use staples to secure the tar paper into place. Next, you should install asphalt shingles to the roof, starting from the bottom up to the top. Install a ridge cap to waterproof everything in a professional manner.

Building a double carport plans
After assembling the double carport, you need to take care of the finishing touches. Fill the holes with wood putty and smooth the surface with sandpaper. Remove the residues with a damp cloth. Apply a few coats of paint or stain to protect the components from decay.

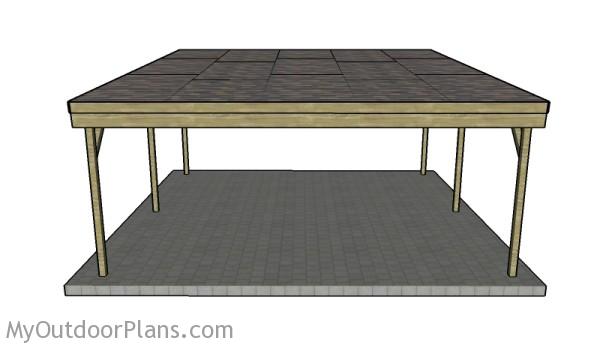
2 Car Carport Plans
This simple structure has enough space for two cars. Make sure you consult a specialized engineer before starting the actual construction. Your project needs to comply with the local codes.
Two car Carport Plans
Top Tip: If you live in an area with heavy winters, you should increase the slope of the roof. This carport design is more suitable for area with mild winters.
This woodworking project was about flat roof carport plans. If you want to see more outdoor plans, check out the rest of our step by step projects and follow the instructions to obtain a professional result.
EXPLORE MORE IDEAS FOR:
 |
 |
 |
 |
19 comments
Nice plans.
It would be great if more of the Simpson hardware was listed for this carport, such as the tie straps.
Thanks
Thanks for the feedback. I hope other will find it useful.
What type of metal connectors are you using to attach the rafters to the beams. The photos don’t show this step but it’s in the instructions.
Rafter ties: http://amzn.to/2xlxeyY
I am very glad that I found this. I am not a carpenter or have very much DIY experience (although I am learning). I am using this information to so that I can build a cover for a 16′ x 26′ chicken run. The chicken run is made out of a dog kennel. My plan is to also add gutters to it and adding a rain barrel to tie in for a chicken waterer.
Any suggestions from you would be greatly appreciated.
Make sure you plan everything ahead. Pen and paper or Sketchup, so you can prevent mistakes.
I followed these plans as closely as I could, given that my driveway has a gentle slope. I also added 2 truss beams in the back and four smaller in the middle and front for greater lateral stability, because it would sway quite a bit while I was applying the shingles.
Thanks for the plans.
Thank you for the feedback. Congrats for the project. I would love to feature your project on the blog. You can send a few pics here: http://myoutdoorplans.com/contact/
IIf you use 29-30 gauge metal roofing panels, it seems you could eliminate the necessity of using plywood and use 2×4 rafters. The load would be much lighter.
One could also replace the 2×6 rafters with 2×4 steel tube 14 gauge thick, which comes up to 40 feet long for a huge car port!
I love your plans. How can I print plans without advertisements? And, can I present them to my city to get building and inspection permits?
Here: https://myoutdoorplans.com/faq/ Also the Premium Plans don’t have ads, as well, but for the time being I have no Premium Plan for this carport.
How can you prevent sway from side to side (240″ side)?
Diagonal braces.
is it rated to carry snow? can you make it carry snow?
No, a flat roof is never intended for snow areas.
I’m building 16×20 carport following this plan but my local store does not have logger than 12′ lumber (my car cannot transport longer than 10′ lumbers also). Can I join 2 pieces of lumber together to make rafters length without middle supporting post? I also make the roof 10 degrees raising and the long connecting rafters seems wabbling so far, I’m hoping it will be more sturdy after i add a cross support in between of them but I afraid it gets too heavy for the roof the way i do. Because of all these, I replacing rafters to only 2×2″ lumber and tarps cover with hope to lightening it up. Please advise if this sounds safe?
I’m thinking this carport won’t work for a Canadian winter with lots of snow? Or would metal sloped roof help at all???
What advice can you give me with a tar seal / asphalt base.