This step by step diy project is about squirrel feeder plans. If you want to attract squirrels to your garden or you just need a simple woodworking project for your kids, then you should give a go to this article. There are several designs you could choose from, so take a look over several alternatives before starting the actual construction. In addition, you can make kits and give them to the dear ones.
Taking into account the squirrels are sensitive to toxic substances, we recommend you to select the lumber with great attention. Therefore, avoid lumber that has been treated with toxic substances and choose weather-resistant lumber, such as pine, cedar or redwood. Cut the components at the right size with a saw and lock them together with waterproof glue and finishing nails. See all my Premium Plans HERE.
Projects made from these plans
Cut & Shopping Lists
- A – 1 piece of 1×6 lumber – 12″ long FLOOR
- B – 2 pieces of 1×6 lumber – 6″ long SIDES
- C – 1 piece of 1×8 lumber – 11” long BACK
- D – 1 piece of 1/4″ plexiglass – 6 1/2″ x 7″ long FRONT FACE
- E – 2 pieces of 1×6 lumber – 5″ long ROOF
Related
![]() Hammer, Tape measure, Framing square, Level
Hammer, Tape measure, Framing square, Level
![]() Miter saw, Drill machinery, Screwdriver, Sander
Miter saw, Drill machinery, Screwdriver, Sander
Time
Related
Building a squirrel feeder
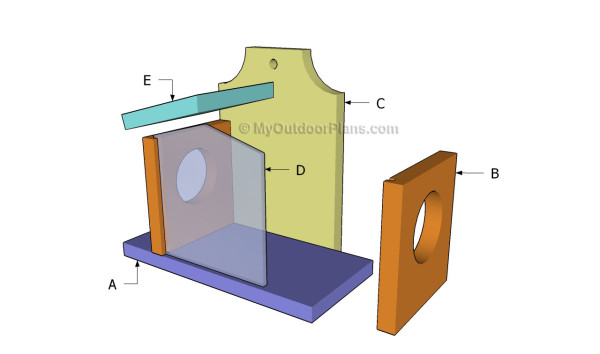
Building a squirrel feeder
Top Tip: Building a squirrel feeder is a great project for your kids, as it requires basic techniques and materials. Moreover, this is the perfect opportunity to pass down several skills you have learned over the years.
Squirrel Feeder Plans
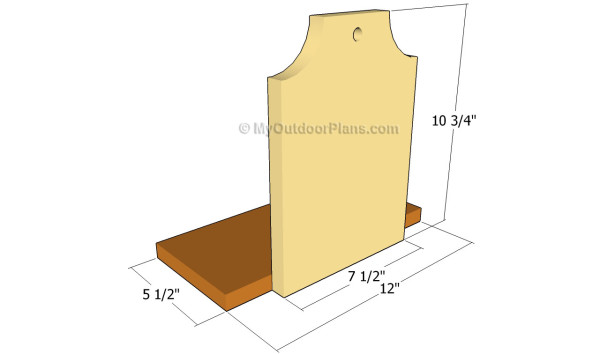
Building the frame of the feeder
The first step of the woodworking project is to build the frame of the feeder. As you can see in the image, we recommend you to build the bottom components from 1×6 lumber, while the back of the box should be made out of 1×8 lumber.
Cut the wooden components at the right size by using a sharp saw. Align the components, drill pilot holes, add waterproof glue and insert finishing nails to lock the components together.
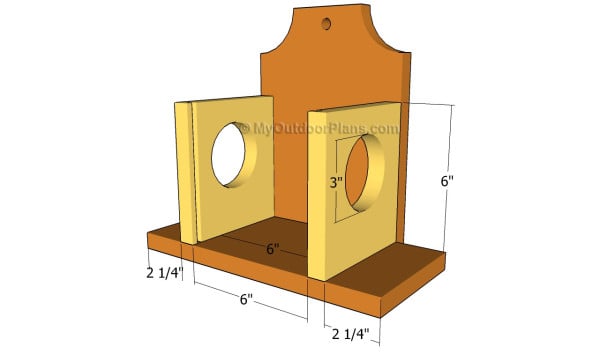
Installing the side walls
The next step of the outdoor project is to build the sides of the squirrel feeder and to attach them to the frame, as shown in the free plans. Cut out the round openings in the slats by using a jigsaw or a hole-saw drill bit.
Make a 1/4″x1/4″ channel on one side of the faces, in order to insert the plexi-glass panel on the front face. Drill pilot holes trough the bottom component and insert finishing nails into the side walls.
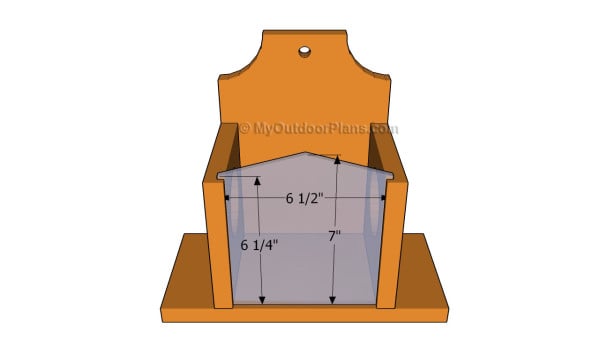
Installing the plexi-glass wall
Cut a small piece of 1/4″ plexi-glass using the pattern shown in the diagram and fit it inside the channels. Make sure you draw the cut lines properly before adjusting the size of the glass with a small saw with fine teeth.
Top Tip: Slide the piece of plexi-glass inside the channels and check if there are any sharp edges that might hurt the squirrels. Smooth the edges with fine-grit sandpaper.
Attaching the roof
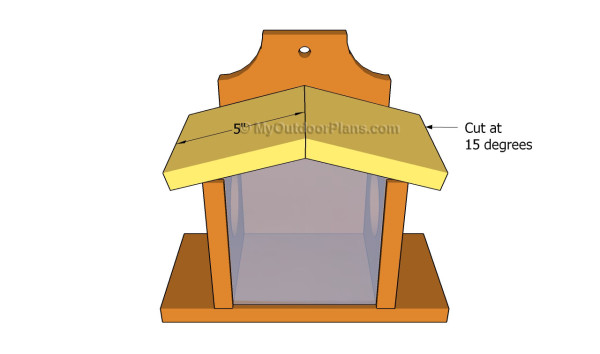
Next, you have to build a basic roof for the squirrel feeder. As you can see in the image, we recommend you to cut the ends of the components at 75 degrees, by using a good circular saw.
Place the components into positions and lock them to the frame of the box with waterproof glue and finishing nails. It is essential to lock the roof temporarily, as you might want to clean the inside of the feeder.
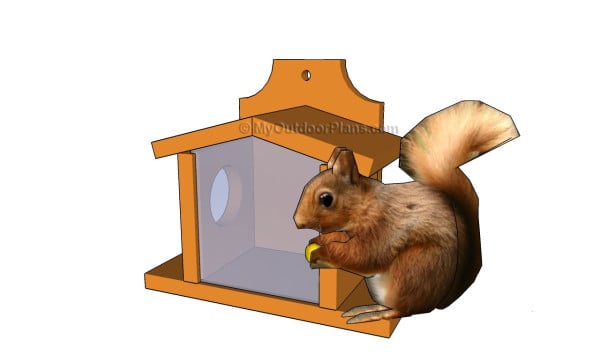
Squirrel feeder plans
Taking care of the finishing touches is the last step of the woodworking project. Therefore, fill the holes with putty and smooth the wooden surfaces with 120-grit sandpaper. Clean the residues before applying several coats of paint over components.
Top Tip: Make sure you place the feeder in a tree, far away from cats and other predators. Clean regularly the interior of the feeder if you want the squirrels to come by every day.
This woodworking project was about squirrel feeder plans. If you want to see more outdoor plans, we recommend you to check out the rest of our step by step projects.
