This step by step diy project is about 5×5 shooting house plans. This is PART 2 of the deer stand project, where I show you how to attach the exterior walls and how to build the door. You can even get the job done with hand tools! Take a look over the rest of my woodworking plans, if you want to get more building inspiration.
When buying the lumber, you should select the planks with great care, making sure they are straight and without any visible flaws (cracks, knots, twists, decay). Investing in cedar or other weather resistant lumber is a good idea, as it will pay off on the long run. Use a spirit level to plumb and align the components, before inserting the galvanized screws, otherwise the project won’t have a symmetrical look. If you have all the materials and tools required for the project, you could get the job done in about a day. See all my Premium Plans HERE.
Projects made from these plans
5×5 Shooting House Roof Plans
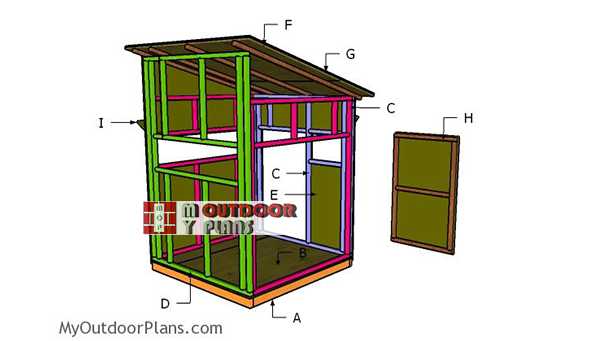
Building-a-5×5-shooting-house
Cut & Shopping Lists
- D – 1 piece of 1/2″ plywood – 24″x86″ long, 1 piece – 48″x86″ long, 1 piece 48″x70 1/4″ long, 1 piece – 24″x70 1/4″ long, 2 pieces – 48″x88″ long, 2 pieces – 24″x88″ long WALLS
- G – 1 piece of 3/4″ plywood – 24″x72″ long, 1 piece – 48″x72″ long ROOF
- H – 2 pieces of 2×2 lumber – 46 1/2″ long, 2 pieces – 29 1/4″ long, 1 piece – 26 1/4″ long, 1 piece of 3/4″ plywood – 30 1/4″x50 1/2″ long DOOR
- I – 1 piece of 3/4″ plywood – 12″x50″ long, 2 pieces – 12″x54″ long, 1 piece – 12″x18 1/4″ long BLINDS
- 4 pieces of 2×2 lumber – 6′
- 7 pieces of 1/2″ plywood – 4’x8′
- 2 pieces of 3/4″ plywood – 4’x8′
- 40 sq ft of tar paper, 40 sq ft of asphalt shingles
- hinges, latch
- 2 1/2″ screws, 3 1/2″ screws, 1 5/8″ screws
- 4d nails, 16d nails
- wood filler , wood glue
- camo paint
Tools
![]() Hammer, Tape measure, Framing square, Level
Hammer, Tape measure, Framing square, Level
![]() Miter saw, Drill machinery, Screwdriver, Sander
Miter saw, Drill machinery, Screwdriver, Sander
Time
Related
- PART 1: 5×5 Shooting House Plans
- PART 2: 5×5 Shooting House Roof Plans
How to build a 5×5 shooting house
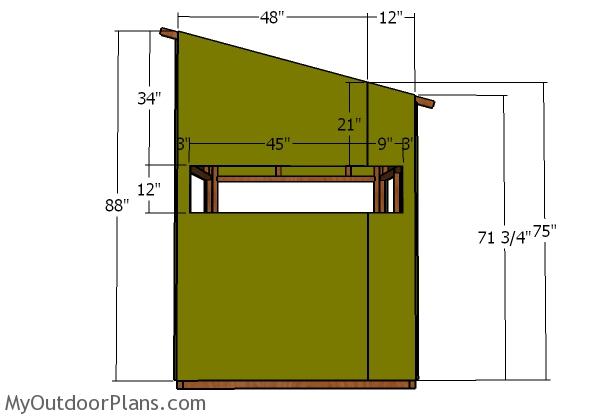
Side walls – Exterior
Use 1/2″ plywood for the exterior walls. Mark the cut lines on the sheets and then get the job done with a saw. To cut out the window openings, you need to drill a starting hole and get the job done with a saw. Smooth the edges with attention and then align the edges flush. Insert 6-8d nails, every 8″ along the framing.
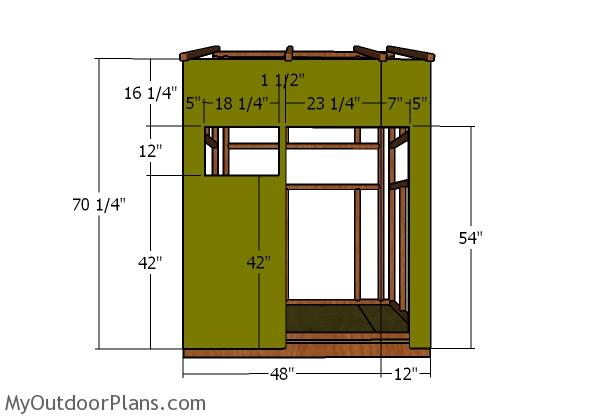
Back wall – Exterior
Cut the sheets for the back of the deer blind, using the pattern described in the diagram. Take accurate measurements before cutting the panels, otherwise they won’t fit into place tightly.
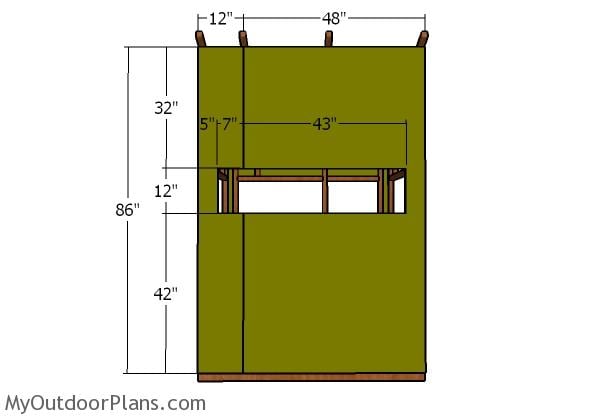
Front wall – Exterior
Cut and fit the 1/2″ plywood to the front of the shooting house, as well.
Fitting-the-roof-sheets
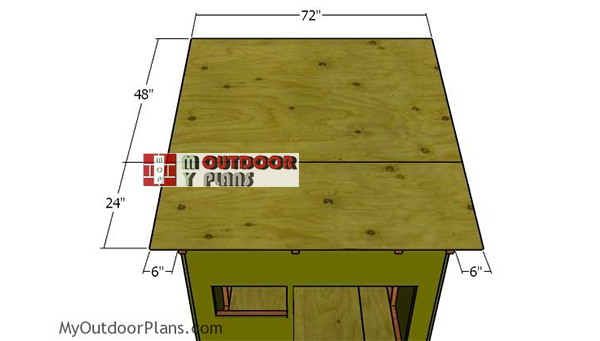
Fit the 3/4″ plywood decking to the roof of the structure, as well. Center the sheets into place, so you have equal overhangs on the sides. Insert 1 5/8″ screws to secure the sheets to the rafters, every 8″.
Fitting the roofing
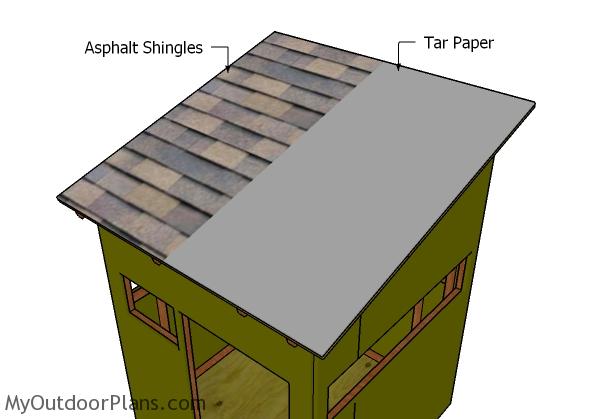
Cover the roof of the shed with roofing felt, making sure the strips overlap at least 2″. Secure the tar paper to the plywood sheets with roofing staples. In addition, cut a large piece for the top ridge.
Fit the side drip edges over the roofing felt, while the bottom drip edges should be fit under. Read the instructions labeled on the asphalt shingle packs before installing them into place tightly. Start with the bottom left side of the roof and install them all the way to the top.
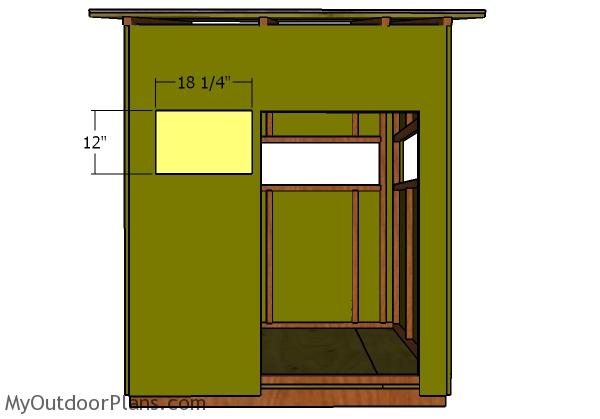
Back blind
Fit the panel that you have cut out from the back panel to the opening. Use hinges to secure the blinds into place tightly.
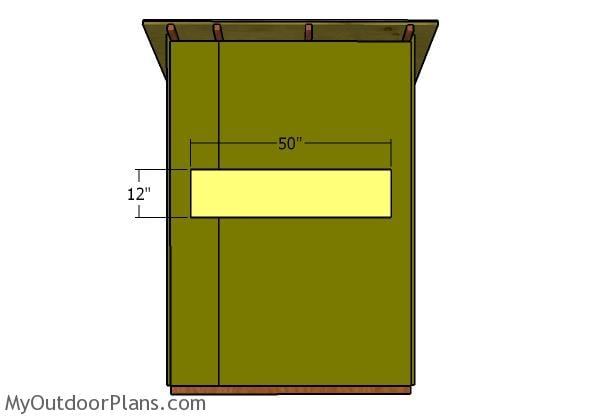
Front blind
Fit the blinds to the front of the shooting house, as well.

Side blind
Fit the blinds to the sides of the shooting house.

Building-the-door-frame
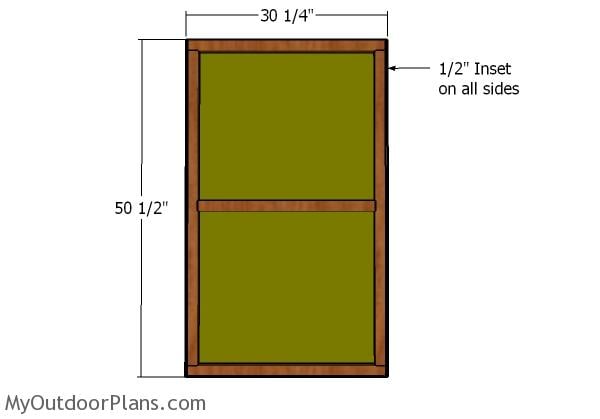
Build the door frame from 2×2 lumber. Use the information from the diagram and then cut the components at the right dimensions. Drill pilot holes and insert 2 1/2″ screws to lock the frames together tightly. Make sure the corners are square and align the edges flush.
Assembling the door
Next, you need to lay the door frame on a level surface and center the panel into place tightly. Leave about 1/2″ on all sides of the panel. Insert 1 5/8″ screws every 8″ along the framing, for a professional result.
Fitting the door
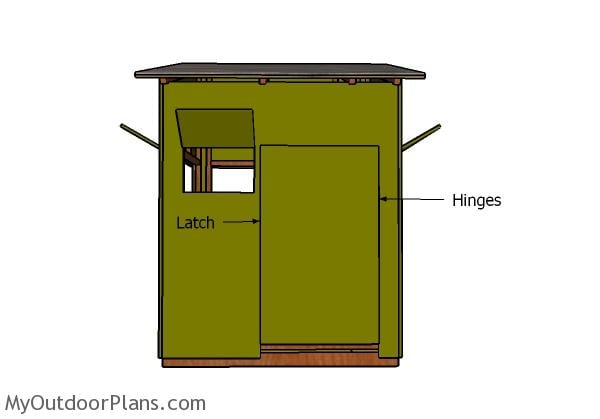
Fit the door to the opening, as shown in the free plans. Align the edges and then use hinges so you lock it to the wall. Install a latch so you can keep the door tightly locked.
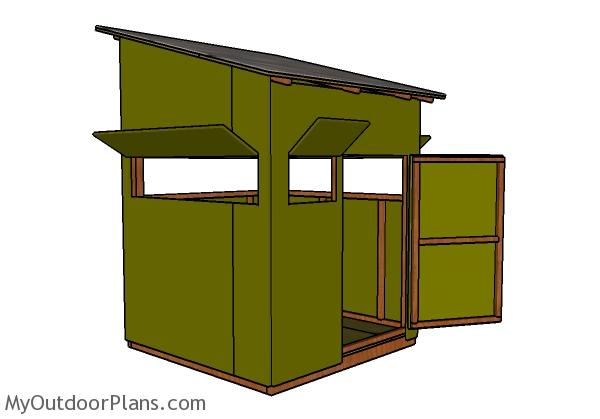
5×5 Deer Blind Plans – Back View
Last, but not least, you need to take care of the finishing touches. Apply a few coats of paint so you protect the components from decay and to enhance the look of the project. Make sure you check out the rest of my hunting projects HERE.
This woodworking project was about 5×5 deer blind plans. If you want to see more outdoor plans, check out the rest of our step by step projects and follow the instructions to obtain a professional result.


5 comments
How are you raising and keeping the blinds up?
String. You tie a piece of string to the bottom of the blinds and the drill a hole through the plywood, so you can pull them up from inside.
Thanks for these plans. I’ve been trying to design something similar to this, but I like this one…simple and easy! I appreciate the materials list and cut sheet as it makes it easier when going to purchase materials. I made a few feature changes such as metal roof and siding with 3/4” foam board…mostly for sound, and installed solid core door and slider windows…all were used one only added a total of $20 to cost. I also lowered the height of the front wall by 6”. The windows at this height are a little higher than I like, but left them as in your layout. I will lower them on the next one. We built in in our backyard, disassembled and set it back up on location, and it took my wife and I less than an hour to re-assemble.
We also will use your layout for some other projects at the ranch.
Thanks again for your work!!!
Thank you for sharing! Your project sounds awesome and I would love to see a few pics of it. This would help and inspire other builders!
How much did the build cost?