This step by step diy project is about wooden doormat plans. I have designed this doormat so you can have something to display at your front door that will show your passion for woodworking. In addition, this is an unique doormat that will enhance the look of your property and add style. Take a look over the rest of my woodworking plans, if you want to get more building inspiration.
When buying the lumber, you should select the planks with great care, making sure they are straight and without any visible flaws (cracks, knots, twists, decay). Investing in cedar or other weather resistant lumber is a good idea, as it will pay off on the long run. Use a spirit level to plumb and align the components, before inserting the galvanized screws, otherwise the project won’t have a symmetrical look. If you have all the materials and tools required for the project, you could get the job done in about a day. See all my Premium Plans HERE.
Projects made from these plans
Wooden Doormat Plans

Building a wooden doormat
Cut & Shopping Lists
- A – 33 pieces of 2×2 lumber – 8″ long FRAME
- B – 12 pieces of 2×2 lumber – 1 1/2″ long ENDS
- C – 6 pieces of 1/4″ threaded rod – 20″ long RODS
- 3 pieces of 2×2 lumber – 8′
- 1 piece of 1×3 lumber – 8′
- 1/4″ threaded rod
- wood glue, stain/paint
- wood filler
Tools
![]() Hammer, Tape measure, Framing square, Level
Hammer, Tape measure, Framing square, Level
![]() Miter saw, Drill machinery, Screwdriver, Sander
Miter saw, Drill machinery, Screwdriver, Sander
Time
![]() One day
One day
Related
Building a wood door mat

Building the components
The first step of the project is to build the components for the door mat. Cut the components from 2×2 lumber. Mark the location for the holes and use a 3/8″ drill bit to get the job done. If you want to speed the process, I recommend you to use a drill press. Fit a stop to the dill press to get accurate holes for all the components.

Marking the holes
As you can see in this diagram, all you need to do is mark the center for a 1 1/2″x1 1/2″ square and then make the holes with a dill bit. Make sure you don’t apply too much pressure when drilling the holes, otherwise you risk chipping the surface.

Building the end pieces
Make the holes to the end components, as well. Determine the center and then drill the hole with a 3/8″ bit.

Assembling the doormat
After cutting all the components for the doormat I recommend you to smooth the edges with sandpaper. Fit 20″ long 1/4″ threaded rods to assemble the doormat. Tighten nuts at both ends of the rods and also add washers to lock them into place tightly.

Wood Door mat Plans
Make sure you build the doormat from weather resistant lumber, such as cedar or redwood, as it will be exposed to the elements. If you want to enhance the look of the project, you can easily add a few coats of stain.
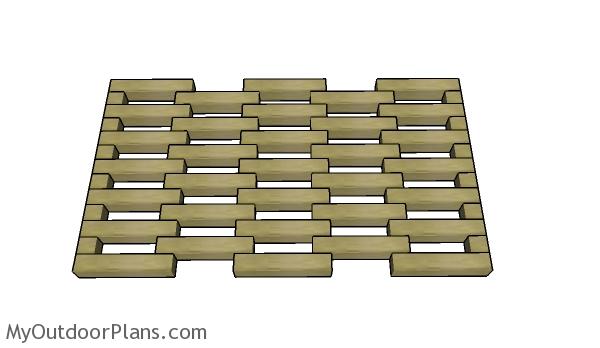
Wooden Doormat Plans
I have designed this door mat so you can have something to build quickly that can also be displayed on the front of your house. If you build this, I would love to see your project.
This woodworking project was about free wooden doormat plans. If you want to see more outdoor plans, check out the rest of our step by step projects and follow the instructions to obtain a professional result.
- EXPLORE MORE IDEAS FOR -
 |
 |
 |
 |