This step by step diy project is about shooting target stand plans. I have designed this target stand so anyone can get the job done using just 2x4s and 2 1/2′ screws. Remember that you need to adjust the size of the stand so it suits your needs. This diy shooting target stand is sturdy and has compact dimensions, so storing it shouldn’t be an issue. Take a look over the rest of our woodworking plans, if you want to get more building inspiration.
When buying the lumber, you should select the planks with great care, making sure they are straight and without any visible flaws (cracks, knots, twists, decay). Investing in cedar or other weather resistant lumber is a good idea, as it will pay off on the long run. Use a spirit level to plumb and align the components, before inserting the galvanized screws, otherwise the project won’t have a symmetrical look. If you have all the materials and tools required for the project, you could get the job done in about a day. See all my Premium Plans HERE.
Projects made from these plans
Shooting Target Stand Plans
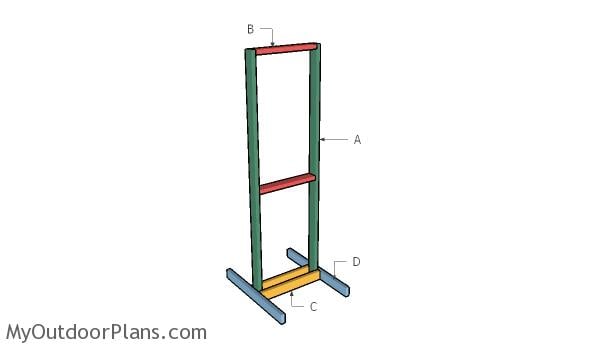
Building a target stand
Cut & Shopping Lists
- A – 2 pieces of 2×4 lumber – 86″ long SIDES
- B – 2 pieces of 2×4 lumber – 23″ long FRAME
- C – 2 pieces of 2×4 lumber – 26″ long SUPPORTS
- D – 2 pieces of 2×4 lumber – 36″ long BASE
- 4 pieces of 2×4 lumber – 8′
- 2 1/2″ screws
- shooting target
- wood glue, stain/paint
- wood filler
Tools
![]() Hammer, Tape measure, Framing square, Level
Hammer, Tape measure, Framing square, Level
![]() Miter saw, Drill machinery, Screwdriver, Sander
Miter saw, Drill machinery, Screwdriver, Sander
Time
Related
How to build a shooting target stand
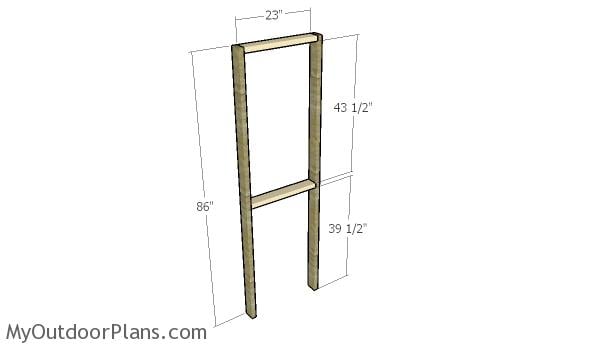
Building the frame for the target stand
The first step of the project is to build the frame for the shooting target stand. Cut the components from 2×4 lumber. Drill pilot holes through the side vertical supports and insert 2 1/2″ screws into the horizontal supports. Make sure you align the edges with attention and add glue to the joints. Use a carpentry square to make sure the corners are right-angled.
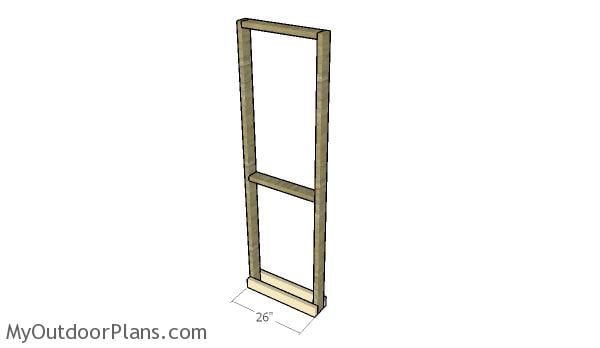
Fitting the bottom supports
Attach the 2×4 supports to the base of the target stand. Drill pilot holes through the supports and insert 2 1/2″ screws. Align the edges before inserting the screws to get a professional result.
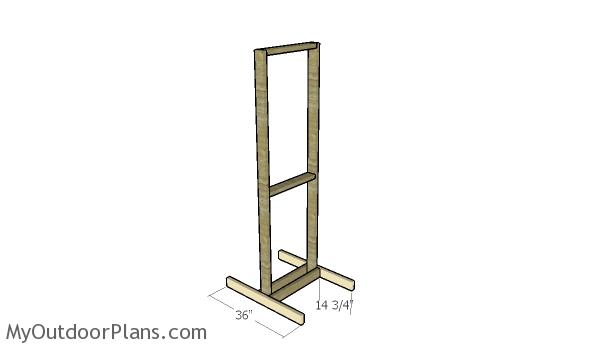
Attaching the base supports
Build the base from 2×4 lumber. Cut the components at 36″ and attach them to the frame of the target stand with 2 1/2″ screws. Drill pilot holes through the base and insert the screws into the vertical supports. Add waterproof glue to the joints.
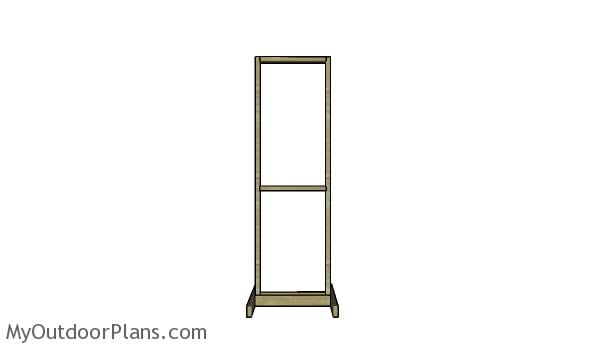
DIY Target Stand Plans
Once you have assembled the target stand, you need to take care of the finishing touches. Fill the holes with wood putty and smooth the surface with 120-220 grit sandpaper. Apply a few coats of stain to enhance the look of the shooting stand and to protect the lumber from the elements. Seal everything with spar varnish. alternatively, you can just use weather-resistant lumber.
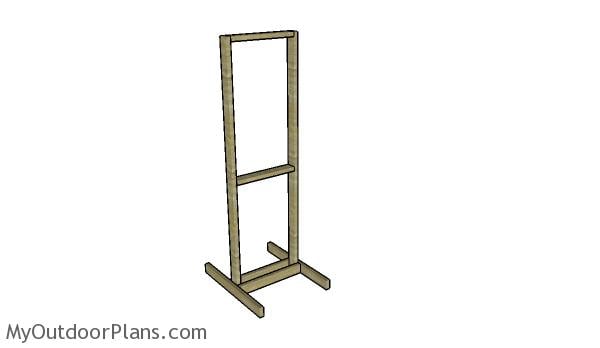
Shooting Target Stand
This is a super simple project anyone should be able to build in a day without much effort. Remember that you need to adjust the size of the components so they suit your particular own needs. Take a look over the rest of my hunting plans, if you want even more building inspiration.
This woodworking project was about shooting target stand plans free. If you want to see more outdoor plans, check out the rest of our step by step projects and follow the instructions to obtain a professional result.

4 comments
What is the purpose for the highness of this stand.
Looks like just the bottom portion would be fine for any shooting up to as much as 300 yds.?
Public ranges require the center of target to be 54″. This is to prevent richetes off the ground from aiming downward at a lower trajectory.
Great instructions and diagram…however one area i suggest you look at is the 26″ boards at the bottom. They need to be 27″ in to cover the width of the 23″
board + the 2x 2″ vertical boards to be flush on the side with the 36″ support.
I suggest you look at this table. 2x* lumber is actually 1 1/2″ thick. Therefore, the measurements are corrects: https://myoutdoorplans.com/imperial-to-metric-conversion/