This step by step diy project is about miter saw stand plans. I have designed this miter saw stand so you can save space and make accurate cuts with your saw. The caster wheels and the storage shelves make this miter saw cart the obvious choice, if you are passionate about DIY projects and want to be a better woodworker. Take a look over the rest of my woodworking plans, if you want to get more building inspiration. Premium Plans for this project available in the Shop.
When buying the lumber, you should select the planks with great care, making sure they are straight and without any visible flaws (cracks, knots, twists, decay). Investing in cedar or other weather resistant lumber is a good idea, as it will pay off on the long run. Use a spirit level to plumb and align the components, before inserting the galvanized screws, otherwise the project won’t have a symmetrical look. If you have all the materials and tools required for the project, you could get the job done in about a day. See all my Premium Plans HERE.
Projects made from these plans
Miter Saw Stand Plans
Building-a-miter-saw-stand
Cut & Shopping Lists
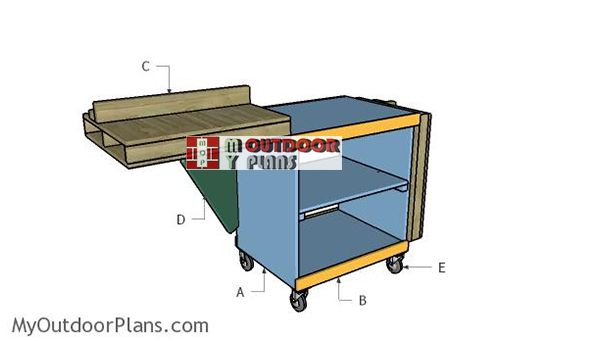
- A – 2 pieces of 3/4″ plywood – 24″x31 3/4″ long, 2 pieces – 24″x30″ long, 1 piece – 24″x33 1/2″ long, 4 pieces of 2×2 lumber – 24″ STAND
- B – 2 pieces of 1×3 lumber – 31 1/2″ long, 2 pieces – 33 1/2″ long TRIMS
- C – 2 pieces of 3/4″ plywood – 24″x30″ long, 3 pieces – 2 3/4″x30″ long 2xLEAF
- D – 2 pieces of 3/4″ plywood – 22″x26″ long SUPPORTS
- E – 4 pieces of 5″ caster wheel with locks CASTERS
- 2 pieces of 2×4 lumber – 6′
- 1 piece of of 2×2 lumber – 8′
- 3 pieces of 3/4″ plywood – 4’x’8′
- 2 piece of 1×3 lumber – 8′
- 2″ brad nails
- 1 1/4″ pocket screws
- 2″ screws
- piano hinge, casters
- wood glue, stain/paint
- wood filler
Tools
![]() Hammer, Tape measure, Framing square, Level
Hammer, Tape measure, Framing square, Level
![]() Miter saw, Drill machinery, Screwdriver, Sander
Miter saw, Drill machinery, Screwdriver, Sander
Time
Related
It’s that easy to build a miter saw stand!
How to build a miter saw stand
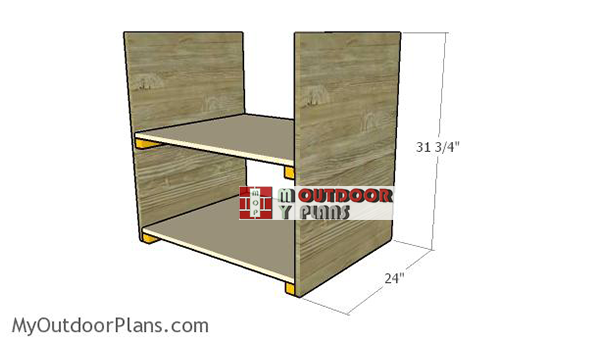
Building-the-sides
The first step of the project is to build the cabinet for the miter saw stand. Cut the components from 3/4″ plywood after taking accurate measurements. Smooth the edges with sandpaper for a professional result.
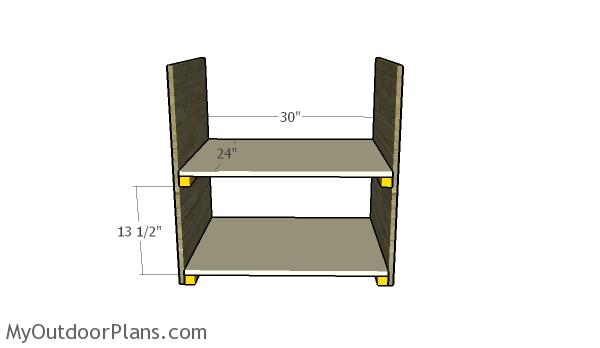
Fitting the shelves
Next, you need to attach 2×2 cleats to the side panels. Drill pilot holes and insert 2″ screws to secure the cleats into place. Add glue to the joints and make sure the cleats are perfectly horizontal. Fit the 3/4″ plywood shelves to the cleats, making sure the edges are flush and the corners right-angled. Drill pilot holes through the shelf and insert 1 1/4″ screws into the cleats.
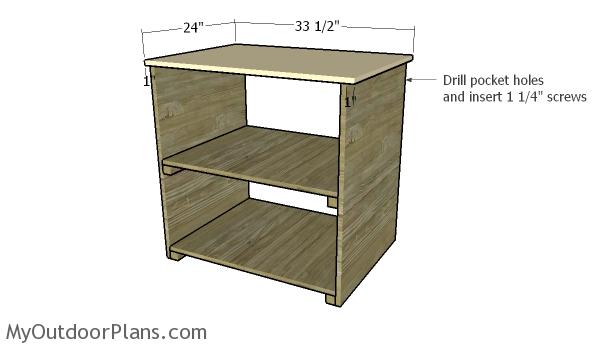
Attaching the top of the stand
Drill pocket holes along the top of the side panels and attach the top into place. Center the plywood panel so that the side overhangs are even. Make sure the corners are square and add 1 1/4″ screws to secure the top into place. Add glue to the joints.
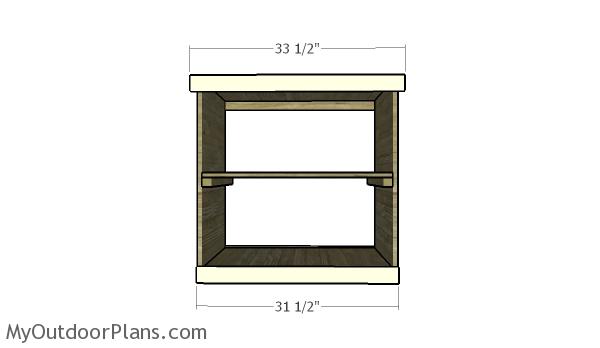
Fitting the trims
Fit 1×3 trims to the front and to the back of the miter saw stand, so you add rigidity. Use 2″ brad nails and glue to secure the trims into place.
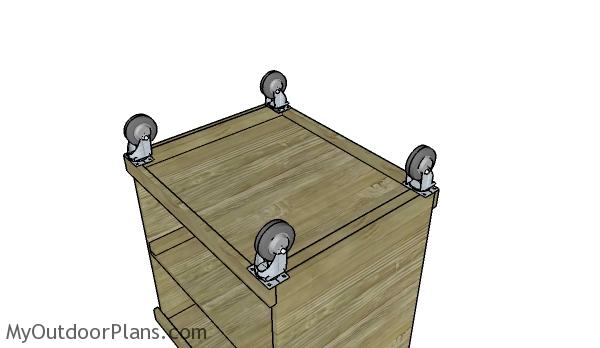
Fitting the caster wheels
Attach 5″ caster wheels to the bottom of the miter saw stand. Align the casters to the base and use screws to secure them into place tightly. Make sure you buy casters with locks, so you can use the stand properly without moving.
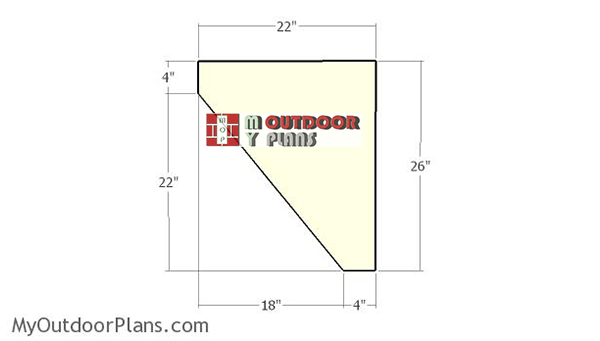
Building-the-leaves-supports
Next, you need to build the supports for the leaves. Cut the supports from 3/4″ plywood after taking measurements and marking the cut lines into place. Use a saw to make the cuts and smooth the edges with sandpaper.
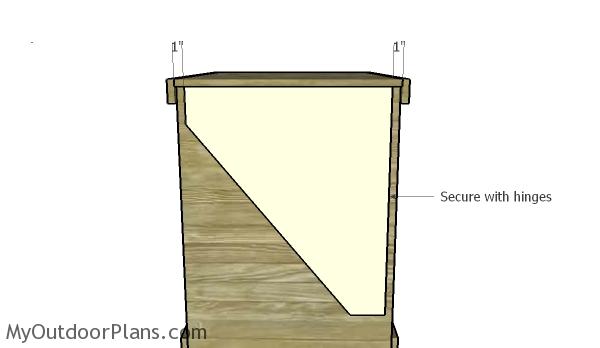
Fitting the leaves supports
Fit the supports to the sides of the miter saw table. Use hinges to secure the supports to the stand, as shown in the diagram. Make sure the supports swing easily and check if the top is perfectly horizontal.
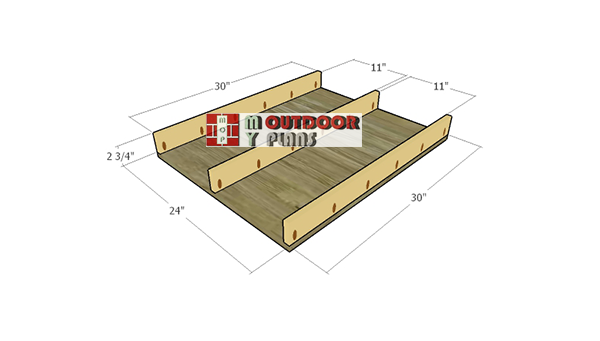
Building-the-leaves
Next, you have to build the extensions for the miter saw stand. Cut the components from 3/4″ plywood, as shown in the diagram. Drill pilot holes through the supports and insert 1 1/4″ screws into the bottom. Align the edges and add glue to the joints. Remember that the height of the leaves should match the height of your miter’s saw deck. For these plans I considered the deck height to be 3 1/2″, so make sure you adjust it to suit your needs.
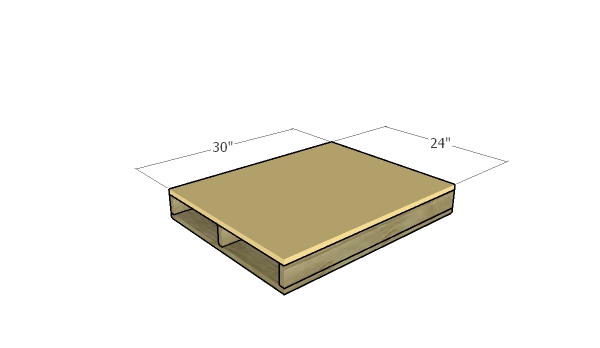
Fitting the top of the leaves
Attach the top to the leaves. Align the edges and use 2″ brad nails and glue to secure them into place tightly.
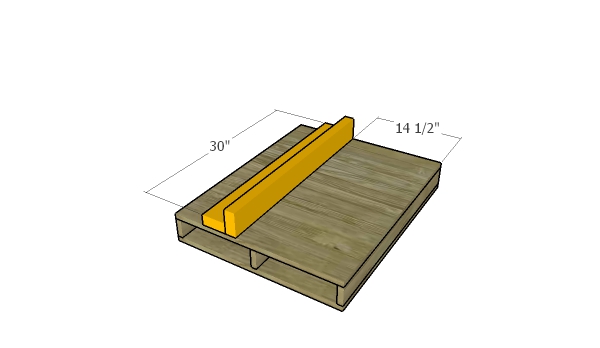
Attaching the fence
In order to make accurate and square cuts, you need to make some kind of a fence and add it to the extensions. Assemble the fences from 2×4 lumber using glue and 2 1/2″ screws. Fit the fences to the top of the leaves and secure them into place with 2″ screws.
Remember that you need to adjust the position of the fence according to the type of miter saw you own. The dimensions in the diagram are just an example, so make the needed adjustments.
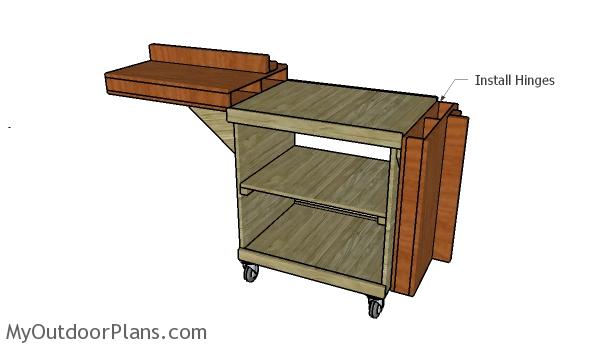
Attaching the leaves
Fit the leaves to the sides of the miter saw stand, as shown in the image. Use a piano hinge to secure the leaves to the top of the stand. Make sure you align everything with attention, otherwise the extensions won’t fold down easily and the work surface won’t be plane.
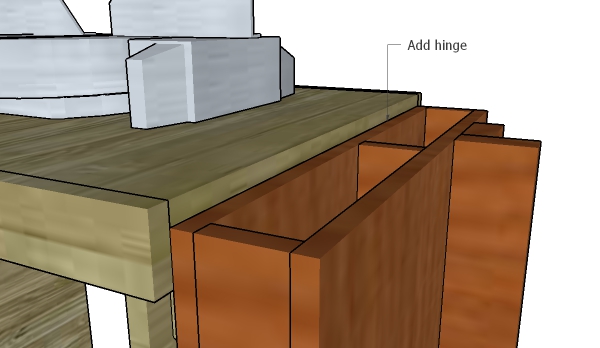
Hinge detail
Detail with the hinge installation.
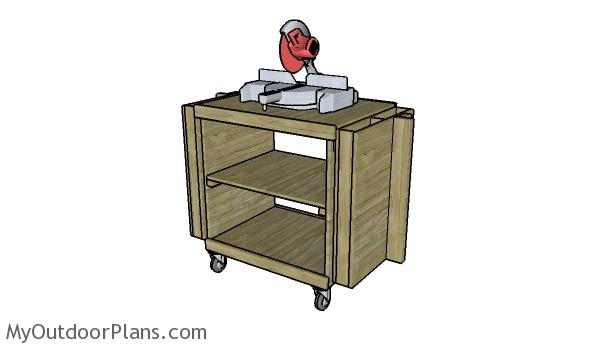
Miter Saw Stand Plans – Folded
Now that you have everything joined together tightly, you need to make sure everything works properly. When the extensions are folded down, the miter saw car is compact and can be stored easily in your workshop. The caster wheels make the job easier, so you can move it with just one hand.
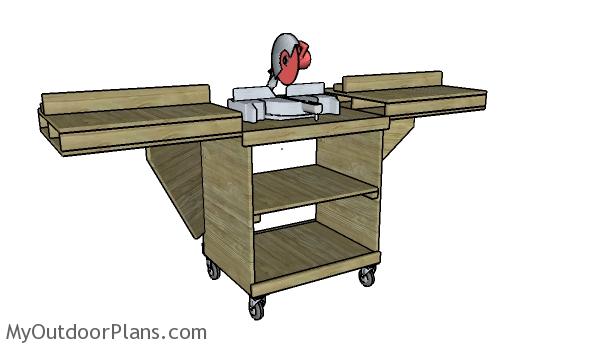
Miter Saw Stand Plans
When the extensions are up, you can make accurate cuts to long slats and beams. In addition, the miter saw cart features a lot of storage space for more tools or for scraps. If the extensions are level and if you have adjusted the height of the leaves to match the deck of the saw, you should be able to make lots of cuts with precision.
Furthermore, you can even add a measure line to the fences, so you save time. In addition, fit a few clamps to lock the lumber beams into place before making the cuts. This is handy especially when you have to cut wide boards.
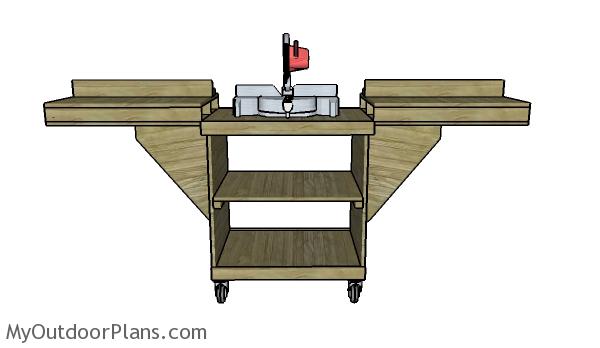
Miter Saw Table Plans
This is a super simple project anyone should be able to build in a few days without much effort. Remember that you need to adjust the size of the components so they suit your particular own needs. This is a project that will help you be better when building DIY projects. Premium Plans for this project available in the Shop.
This woodworking project was about miter saw stand plans free. If you want to see more outdoor plans, check out the rest of our step by step projects and follow the instructions to obtain a professional result.

4 comments
What size hinges do you use for the leaves and sides? Thanks
Piano hinges are the best option, from my point of view. You have the link in the materials list.
I love this work bench it is just the rite size for a small work area and i will be using these plans to make one for myself if you dont mind Great job
Good luck with the project, John. Can’t wait to see how it comes out.