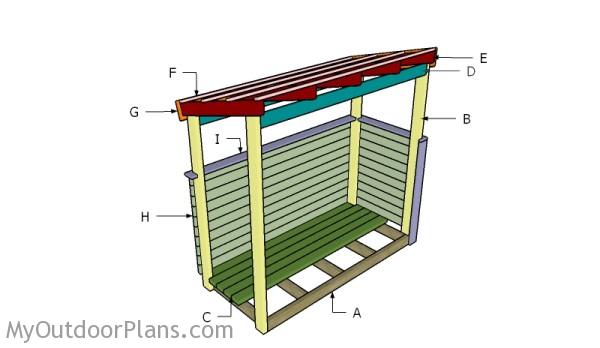
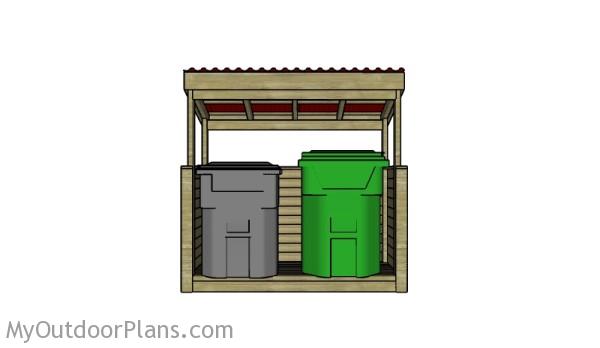
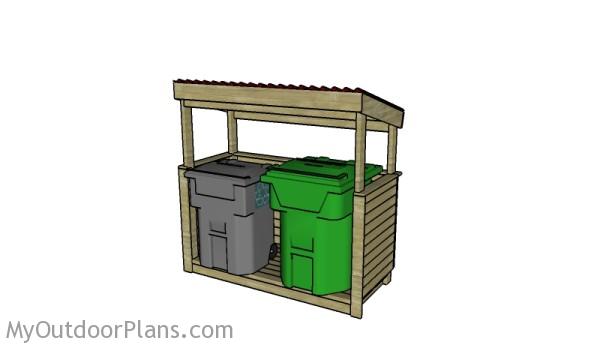
This step by step diy woodworking project is about trash shed plans. This small lean to shed is ideal for keeping the trash bins away from the public eye. You can build this project in just one weekend with common household tools. Make sure you take a look over the rest of plans to see alternatives and more projects for your garden.
Work with attention and don’t forget that a good planning will save you from many issues and it will keep the costs withing the total budget. Invest in high quality materials, such as pine, redwood or cedar. Drill pocket holes before inserting the galvanized screws, to prevent the wood from splitting. Add waterproof glue to the joints, in order to enhance the rigidity of the structure. See all my Premium Plans HERE.
Projects made from these plans
Trash Shed Plans
Building a trash shed
Cut & Shopping Lists
- A – 2 pieces of 2×4 lumber – 66″ long, 5 pieces – 27″ long FRAME
- B – 2 piece of 2×4 lumber – 59″ long, 2 pieces – 66″ long POSTS
- C – 2 pieces of 2×4 – 63″ long, 6 pieces – 66″ long FLOOR
- D – 2 piece of 2×4 lumber – 63″ long BEAMS
- E – 5 pieces of 2×4 lumber – 36″ long RAFTERS
- F – 4 pieces of 1×2 lumber – 69″ long SUPPORTS
- G – 2 pieces of 1×6 lumber – 70 1/2″ long, 2 pieces – 36 1/4″ long TRIMS
- H – 10 pieces of 1×4 lumber – 70 1/2″ long, 20 pieces – 30″ long WALLS
- I – 2 pieces of 1×4 lumber – 28 1/4″ long, 1 piece – 73″ long, 2 pieces – 40″ long TRIMS
- 18 pieces of 2×4 lumber – 8′
- 23 piece of 1×4 lumber – 8′
- 4 pieces of 1×2 lumber – 8′
- 3 pieces of 1×6 lumber – 8′
- 100 pieces of 2 1/2″ / 3″ screws
- 100 pieces of 1 5/8″ screws
Tools
![]() Hammer, Tape measure, Framing square, Level
Hammer, Tape measure, Framing square, Level
![]() Miter saw, Drill machinery, Screwdriver, Sander
Miter saw, Drill machinery, Screwdriver, Sander
![]() Post hole digger, Concrete mixer
Post hole digger, Concrete mixer
![]() Safety Gloves, Safety Glasses
Safety Gloves, Safety Glasses
Time
![]() One weekend
One weekend
Related
Building a trash shed
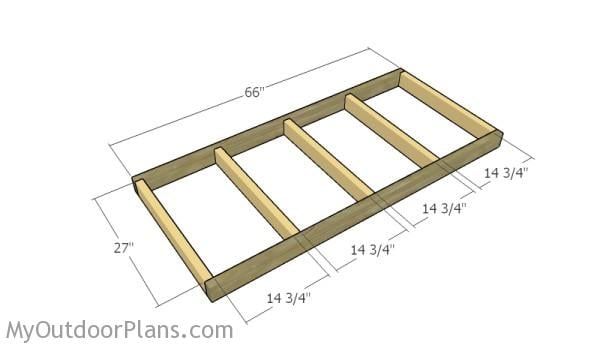
Assembling the floor frame
The first step of the project is to build the frame for the shed. Cut the 2×4 slats at the right dimensions and align the edges. Make sure the corners are square. Drill pilot holes through the rim joists and insert 2 1/2″ screws into the joists. Leave no gaps between the components.
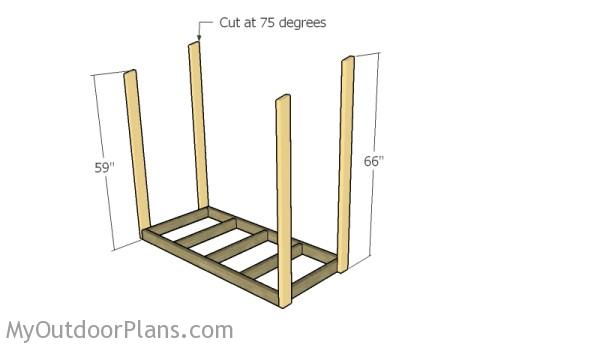
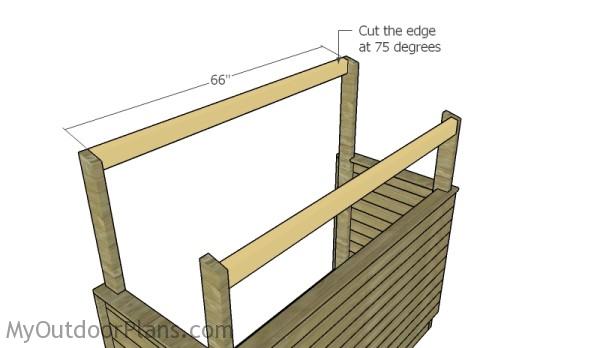
Fitting the side posts
Attach the 2×4 posts to the floor frame. Cut the top of the posts at 75 degrees. Plumb the posts with a spirit level, drill pilot holes and insert 3″ lag bolts into the frame.
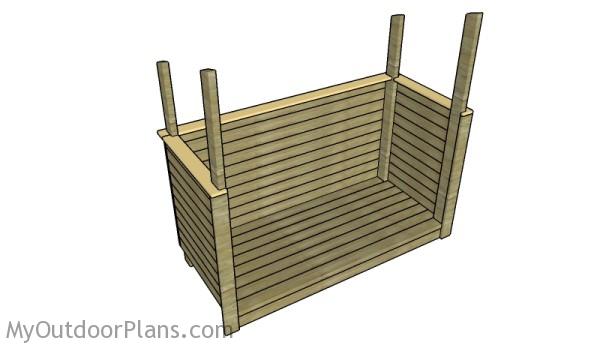
Attaching the floor slats
Attach the 2×4 decking to the floor frame. Place the slats equally-spaced for a professional result. Drill pilot holes through the slats and insert 2 1/2″ screws into the joists.
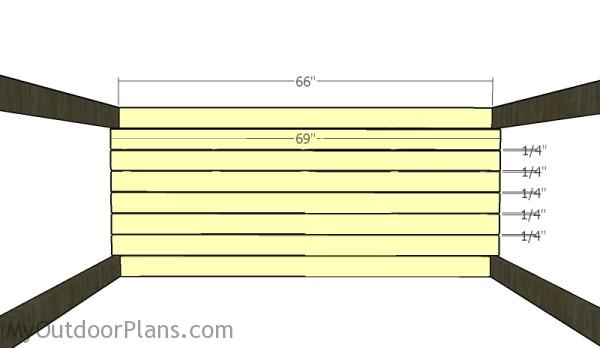
Side walls
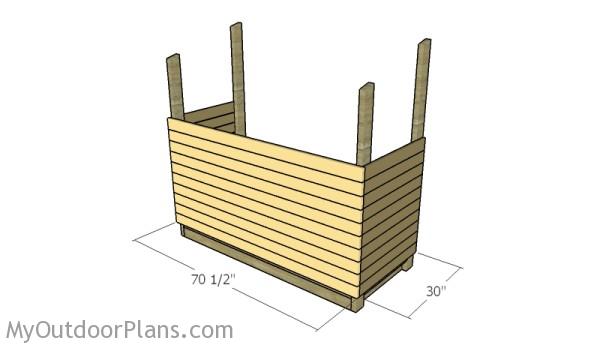
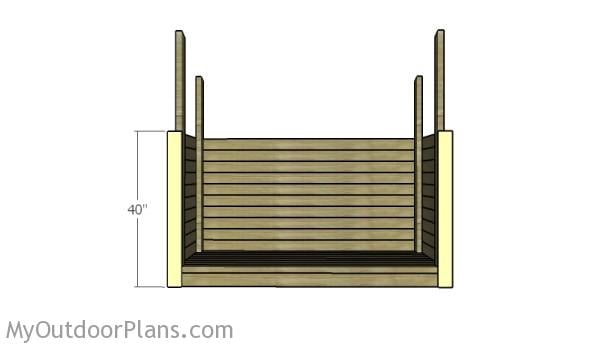
Attach 1×4 slats to the sides and to the back of the trash shed. Leave no gaps between the slats and lock them to the posts with 1 5/8″ screws. Drill pilot holes to prevent the wood from splitting.
Front trims
Attach 1×4 trims to the front of the shed, as shown in the free plans. Align the edges and lock the slats to the frame with brad nails.
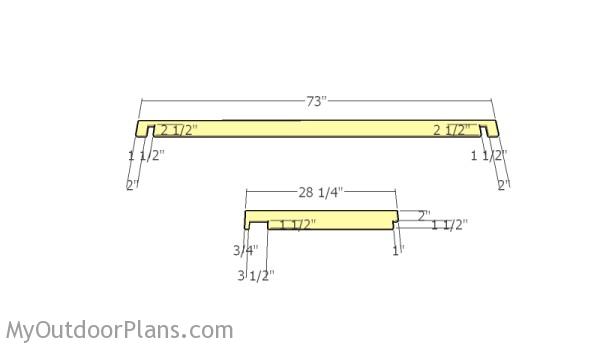
Top side walls trims
Build the top trims from 1×4 lumber. Mark the cut lines on the slats and get the job done with a circular saw. Smooth the edges with sandpaper for a professional result.
Fitting the side wall trims
Fit the trims to the top of the side walls of the sides. Align the edges and lock the trims into place with bad nails.
Fitting the top beams
Fit 2×4 supports to the top of the posts, as shown in the diagram. Make a 15 bevel cut to the top of the beam, as in the plans. Drill pilot holes through the posts and insert 2 1/2″ screws into the beams. Make sure the corners are square before inserting the screws.
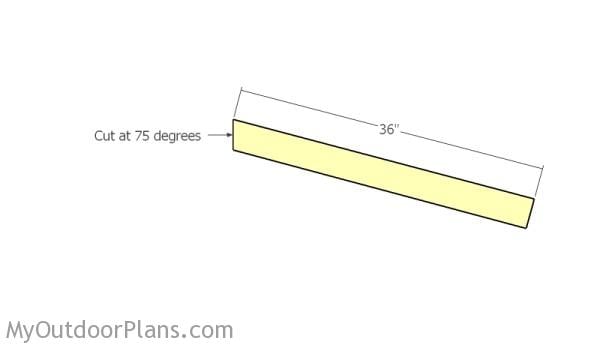
Building the rafters
Build the rafters from 2×4 lumber. Mark the cut lines on the slats and get the job done with a saw.
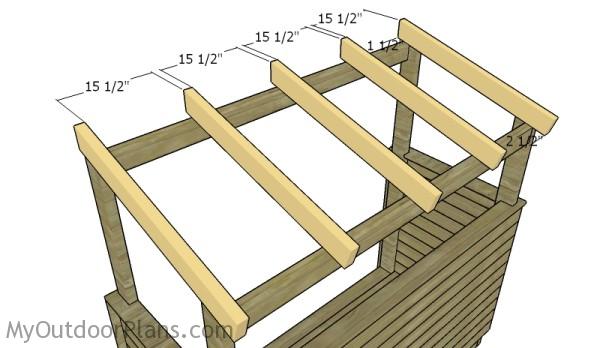
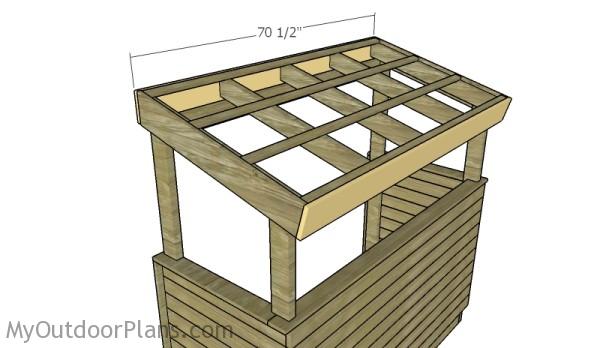
Fitting the rafters
Fit the rafters to the top of the trash shed. Place the rafters equally-spaced and toe-nail them into place with 3″ screws.
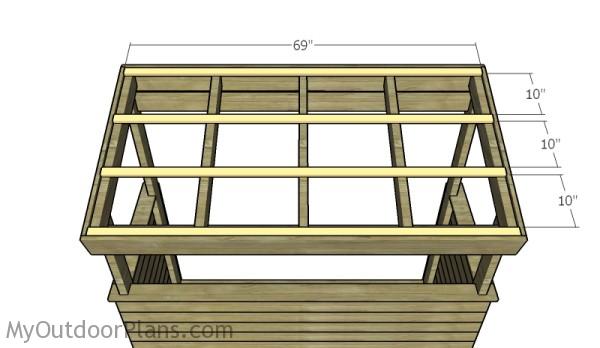
Fitting the roofing slats
Attach 1×2 support slats to the rafters, if you want to keep thing simple and install corrugated sheets. Alternatively, you can install 3/4″ plywood sheets and then cover the surface with shingles. Use 1 5/8″ screws to lock the slats to the rafters and place them equally-spaced.
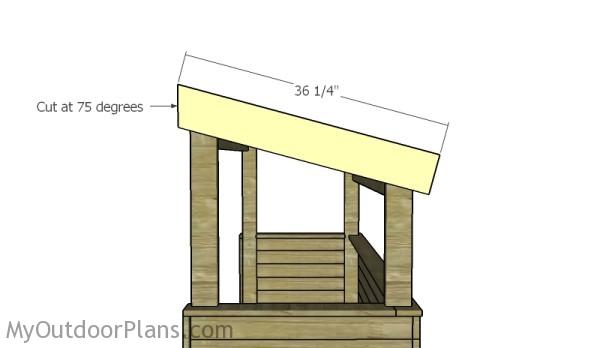
Fitting the side roof trims
Fit 1×6 trims to the sides of the shed. Use 1 5/8″ brad nails to lock the trims to the rafters.
Fitting the front and back rood trims
Attach 1×6 trims to the front and to the back of the shed. Align the edges with attention, leave no gaps between the slats and lock them into place with brad nails.
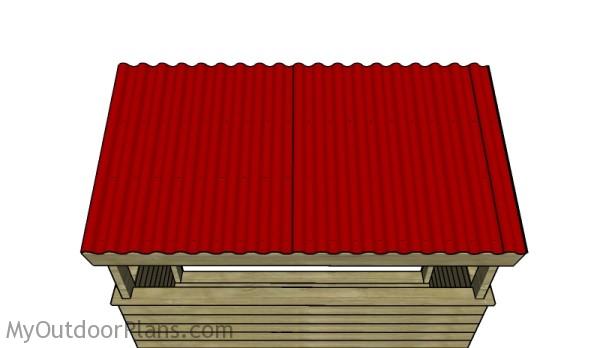
Fitting the corrugated sheets
Fit the corrugated sheets to the roof structure and lock them to the support slats with appropriate screws.
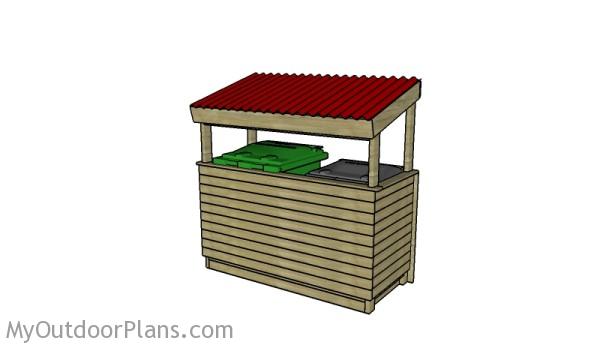
DIY Trash shed plans
Make sure the components are locked together tightly.
Building a trash can
Remember that you should adjust the dimensions of the shed according to the size of the trash bins you have, otherwise they might not fit into place easily.
Trash shed plans
One of the last steps of the woodworking project is to take care of the finishing touches. Therefore, fill the pilot holes with wood putty and smooth the surface with 120-150 grit sandpaper.
Top Tip: If you want to enhance the look of the woodworking project and to protect the small shed from decay, we recommend you to cover the components with paint or stain.
This woodworking project was about trash shed plans. If you want to see more outdoor plans, we recommend you to check out the rest of our step by step projects. LIKE us on Facebook and Google + to be the first that gets out latest projects.