This step by step diy project is about 2×4 barn shaped vegetable display case plans. This Part 2 of the barn shaped display case for veggies, where I show you how to build the gambrel roof and how to assemble the doors. I tried to keep things simple so you can build this with basic materials. This is not a fancy project, more like an utilitarian one. However, if you feel inspired, you can add your personal touch to the project and make it stand out.
It is essential to adjust the size of the shed to your needs. Work with attention and plan everything from the very beginning, if you want to get the job done as a professional from the very first attempt. In addition, we recommend you to take a look on the second part of the project, if you want to learn how to build the door and how to attach the siding. See all my Premium Plans HERE.
Projects made from these plans
2×4 Barn Display Case Plans – Part 2
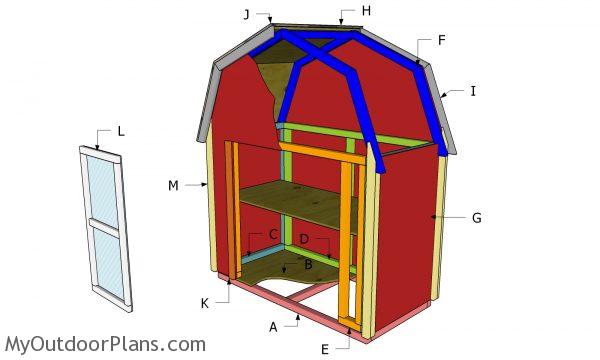
Building a 2×4 barn shed for vegetable display
Cut & Shopping Lists
- F – 8 pieces of 2×2 lumber – 20″ long, 1 piece – 21″ long TRUSSES
- G – 2 pieces of 1/2″ plywood – 48″x59 3/4″ long PANELS
- H – 4 pieces of 1/2″ plywood – 20″x28″ long ROOF
- I – 8 pieces of 1×2 lumber – 20 1/2″ long TRIMS
- J – 20 sq ft of tar paper, 20 sq ft of asphalt shingles ROOFING
- K – 2 pieces of 1×2 lumber – 34 1/2″ long, 1 piece – 36″ long JAMBS
- L – 2 pieces of 1×2 lumber – 31 1/2″ long, 2 pieces – 16 1/2″ long, 1 piece – 13 1/2″ long 2xDOOR
- M – 4 pieces of 1×2 lumber – 33 1/2″ long, 4 pieces – 39 1/4″ long TRIMS
- 2 pieces of 1/2″ plywood – 4’x8′
- 2 pieces of 2×2 lumber – 8 ft
- 7 pieces of 1×2 lumber – 8 ft
- 20 sq ft of tar paper, 20 sq ft of asphalt shingles
- 3 1/2″ screws
- 2 1/2″ screws
- 1 5/8″ screws
- 1 1/4″ screws
- 6d nails
- 4xrafter tie
- wood stain
- wood filler
- construction glue
- 2x clear polycarbonate sheet
- latch
- 4xhinge
Tools
![]() Hammer, Tape measure, Framing square, Level
Hammer, Tape measure, Framing square, Level
![]() Miter saw, Drill machinery, Screwdriver, Sander
Miter saw, Drill machinery, Screwdriver, Sander
![]() Post hole digger, Concrete mixer
Post hole digger, Concrete mixer
Time
![]() One day
One day
Related
- Part 1: 2×4 Barn Shaped Vegetable Display – Free DIY Plans
- Part 2: 2×4 Barn Shaped Vegetable Display – PART 2
2×4 Barn Display Case Roof
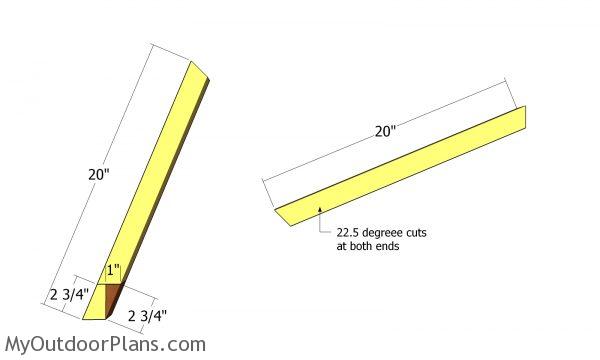
Rafters
The first step of the project is to build the rafters for the barn display case. Use a miter saw to make 22.5 degree cuts at both ends of the rafters. You should also make the birds-mouth cuts to the base rafters. Use a circular saw to make the cuts, as shown in the diagram.
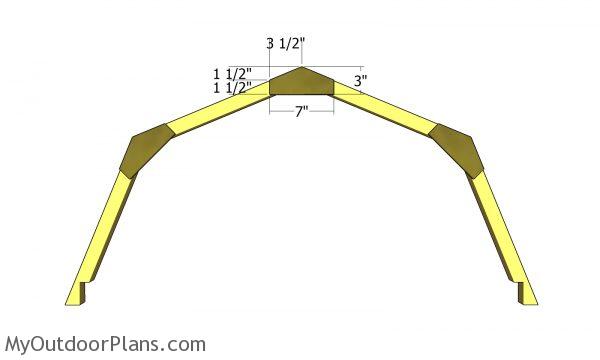
Gussets for trusses
Use 1/2″ plywood for the gussets. Make the cuts to the gussets and then lay them over the truss joints. Leave no gaps between the rafters. Insert 1 5/8″ screws to lock the gussets over the rafters.
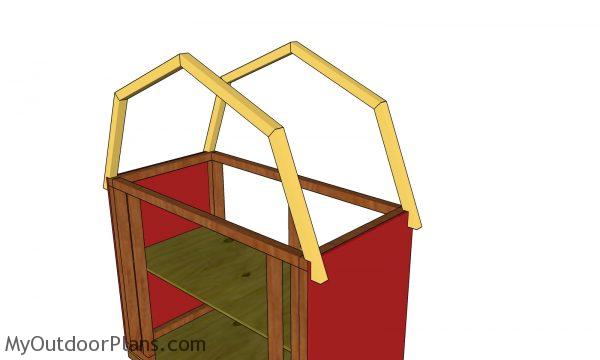
Fitting the trusses – barn shaped veg display box
Fit the trusses to the top of the display box. Plumb the trusses with a spirit level and lock them into place with rafter ties.
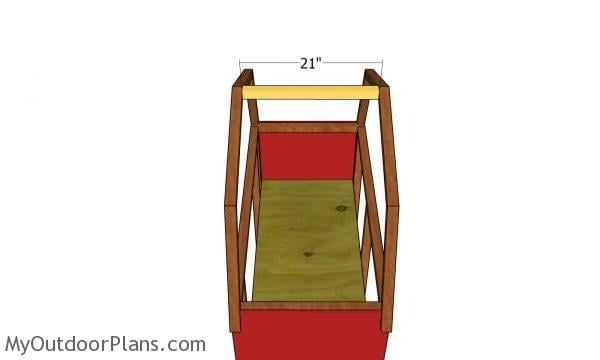
Ridge beam
Fit a piece of 2×2 lumber to the top of the barn roof. This will enhance the rigidity of the roof structure. Drill pocket holes at both ends of the ridge beam and insert 2 1/2″ screws to lock it to the trusses.
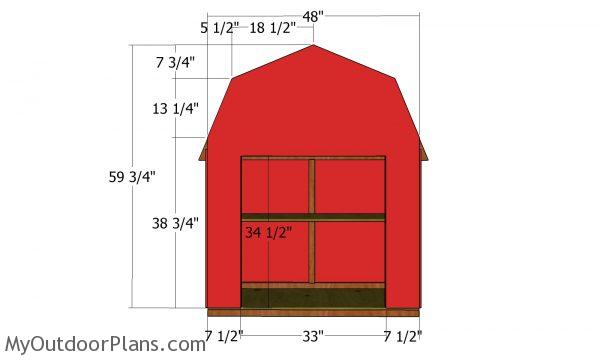
Front wall panel – barn shaped veggie display box
Use 1/2″ plywood for the exterior panels. Use 6d nails and construction glue to secure the panel to the frame. Mark the cuts lines and get the job done with a circular saw. Make sure you cut the opening so you can fit the double doors, later on.
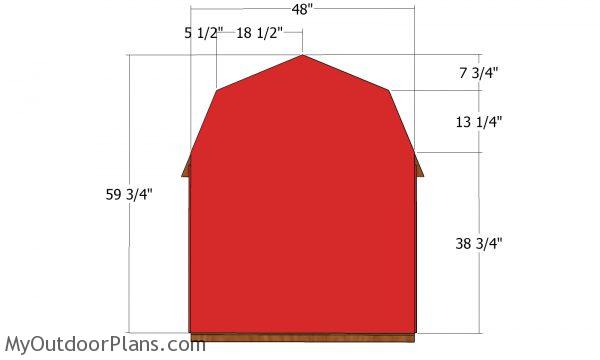
Back wall panel
Attach the panel to the back of the shed, as well. Align the edges flush and insert 6d nails to secure the panels into place.
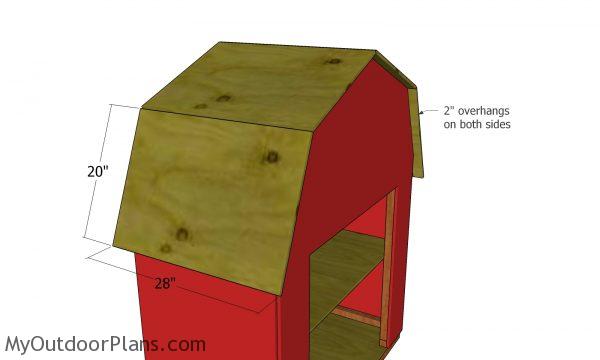
Roof sheets
Use 1/2″ plywood for the roof panels. Center the sheets to the gambrel roof so the front and back overhangs are equal. Use 1 5/8″ screws to lock the sheets to the trusses, every 8″.
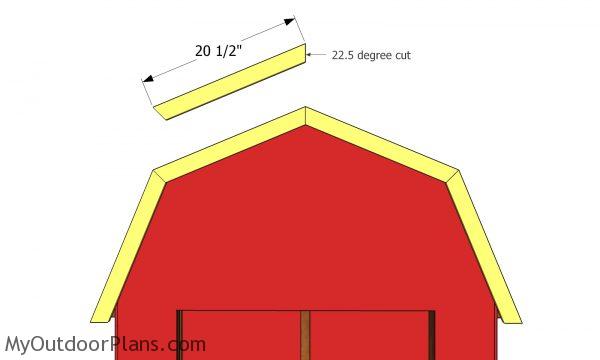
Trims for gambrel roof
We are going to use 1×2 lumber for the trims. The trims will add extra appeal to the project. Use a miter saw to make the 22.5 degree cuts at both ends. Align the edges flush and insert 6d nails to secure the to the plywood rood. Add construction glue, as well.
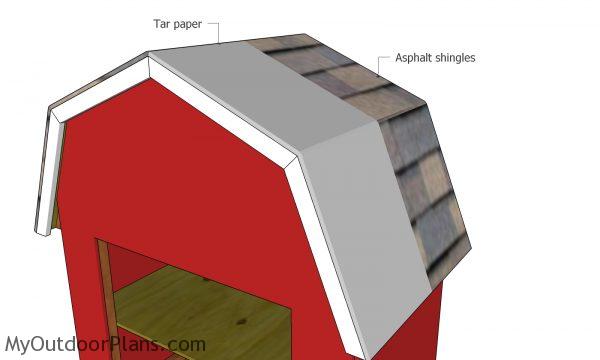
Fitting the roofing
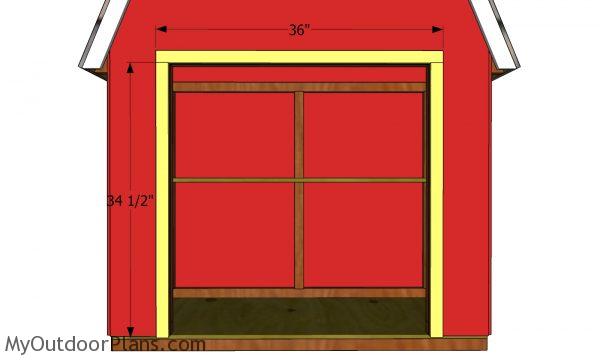
Fitting the door jambs
Use 1x2s for the door jams. Use construction glue and 6d nails to secure the trims around the door opening.
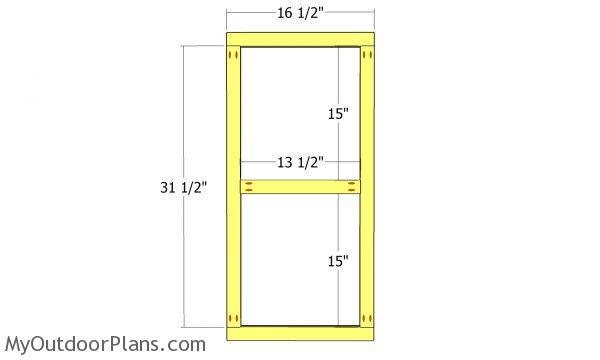
Door frame
Next, we will build the double doors. Start by assembling the frame from 1x2s. Drill pocket holes at both ends of the vertical and middle components. Insert 1 1/4″ screws to secure the frame together. Align the edges flush and check if the corners are square.
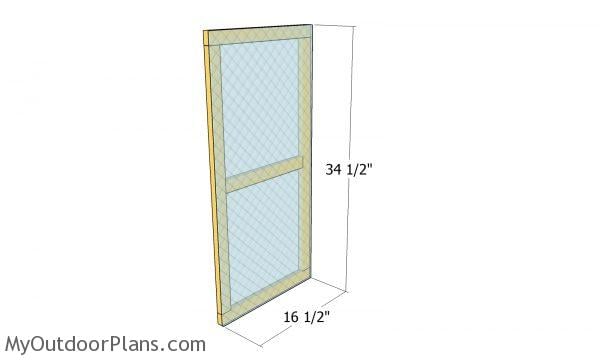
Door glass panel
Use clear polycarbonate for the door panel. Use construction glue to secure the panels to the door frame. Align the edges flush.
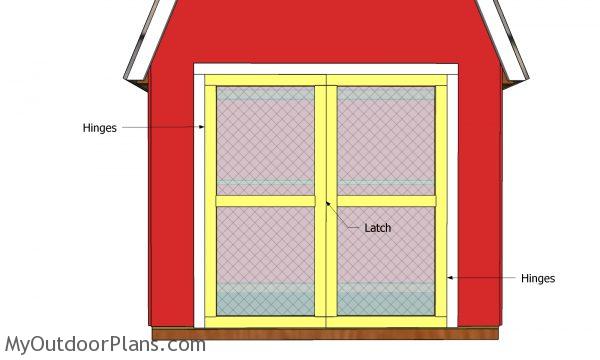
Fitting the double doors
Fit the doors to the opening and secure them to the jambs with hinges. Use a latch to keep the doors shut.
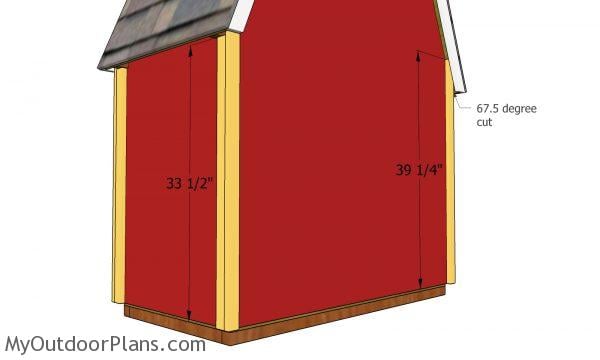
Fitting the corner trims – vegetable display box
1×2 trims to the corners will add more appeal to the display case.
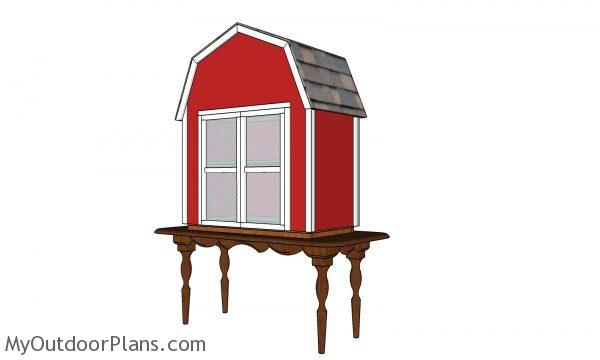
Barn shaped produce box plans
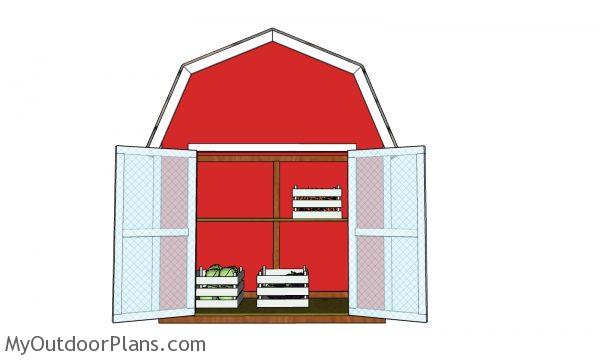
2×4 Barn Shed for Vegetables Display
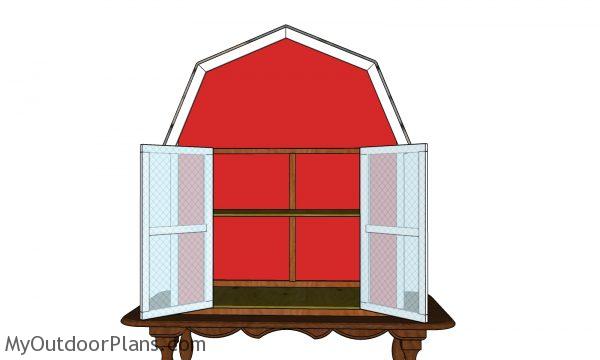
Barn shaped produce box – front view
Fill the holes with wood putty and let them dry out for a few hours. Smooth the surface with 100-220 grit sandpaper and remove the residues with a damp cloth. Apply a few coats of paint or stain to the components, to enhance the look of the project.
This woodworking project was about 2×4 barn display case for vegetables plans. If you want to see more outdoor plans, we recommend you to check out the rest of our step by step projects.
