This step by step diy project is about 12×20 11 cord firewood shed plans. I have designed this large firewood storage shed so you can shelter 11 cords of wood with style. The roof pitch for this shed is 2:12. This wood shed has a lean to roof and a wide front opening, for easy access inside. The other 3 sides of the shed are enclosed with slats. The walls have small gaps between the slats, so you let the air speed up the drying up process. See the rest of my firewood shed free plans HERE. Take a look over the rest of my woodworking plans, if you want to get more building inspiration. Premium Plans for this project available in the Shop.
When buying the lumber, you should select the planks with great care, making sure they are straight and without any visible flaws (cracks, knots, twists, decay). Investing in cedar or other weather resistant lumber is a good idea, as it will pay off on the long run. Use a spirit level to plumb and align the components, before inserting the galvanized screws, otherwise the project won’t have a symmetrical look. If you have all the materials and tools required for the project, you could get the job done in about a day.
12×20 11 Cord Firewood Shed Plans
Building a 11 cord firewood shed
Cut & Shopping Lists
Tools
![]() Hammer, Tape measure, Framing square, Level
Hammer, Tape measure, Framing square, Level
![]() Miter saw, Drill machinery, Screwdriver, Sander
Miter saw, Drill machinery, Screwdriver, Sander
Time
![]() One weekend
One weekend
Related
It’s that easy to build a wood shed!
How to build a 12×20 wood shed

Shed-floor-frame
First, you need to build the two floor frame. Drill pilot holes through the 110 ft joists and insert 3 1/2″ screws into the perpendicular components. Align the edges flush and check if the corners are square. Measure the diagonals and make adjustments until they are equal.
Place the joists every 16″ on center. Select the location for the shed and level the surface thoroughly. Compact a 3- 4″ layer of gravel under the shed, because that will help with draining the excess moisture.
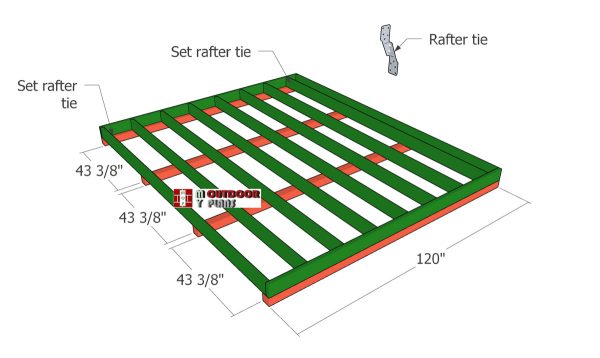
Setting-the-skids
Use 4×4 lumber for the skids. It would be a great idea to use pressure treated lumber. Fit the skids under the floor frame, and use 2 rafter ties for each skid. Insert 1 1/2″ structural screws to secure the ties into place. Butt in the two frames and align the edges flush. Lock them with 3″ screw, driven every 8″.
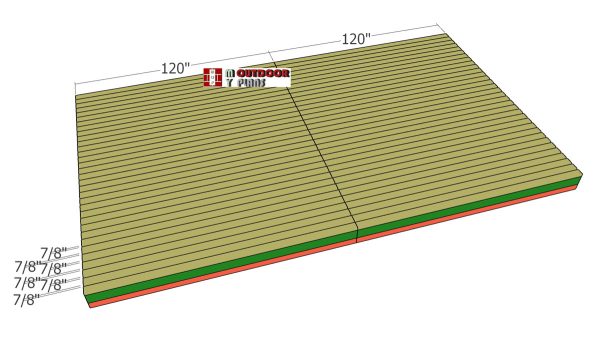
Attaching-the-floor-slats
Next, fit the 2×4 slats to the floor frame. Fit a piece of 7/8″ wood between the slats to create even gaps. Align the edges at both ends, drill pilot holes and insert 2 1/2″ screws to lock them to the floor frame.
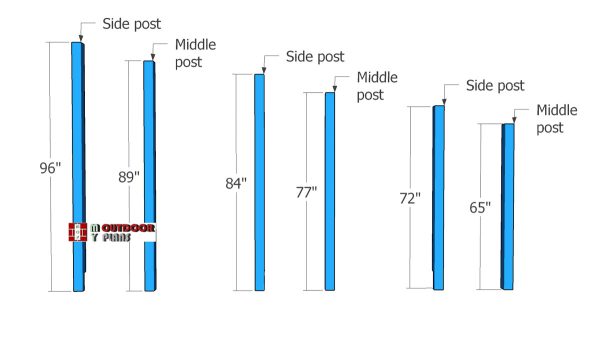
Cutting-the-posts-for-the-shed
Use 4×4 lumber for the posts. Cut the posts at the right dimensions, as shown in diagram. Align the components, making sure the edges are flush. Drill pilot holes and assemble the corner posts with 2 1/2″ screws.
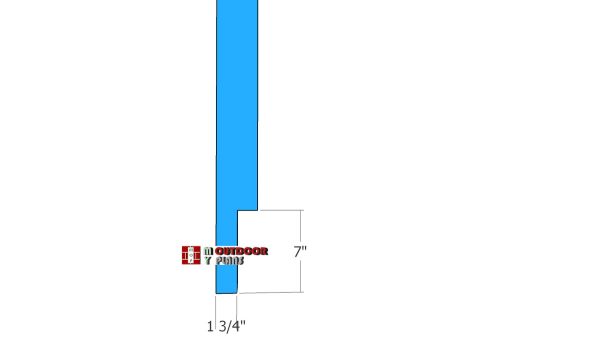
Notches-for-posts
Make notches to the bottom of the side posts. Make parallel cuts inside the marked areas and remove the excess with a hammer. Clean the recess with a chisel.
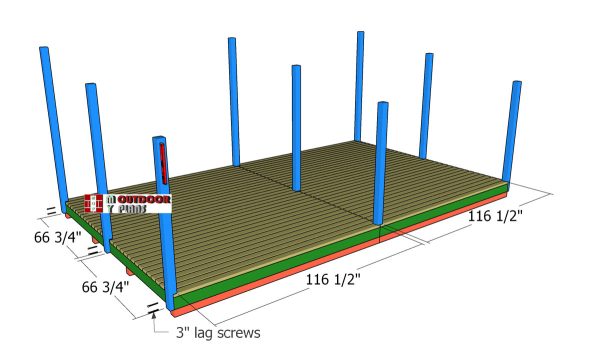
Installing-the-posts
Fit the posts to the floor of the shed. Plumb the posts with a spirit level and lock them to the floor frame with 3″ lag screws. Drill plot holes before inserting the screws, to prevent the wood from splitting.
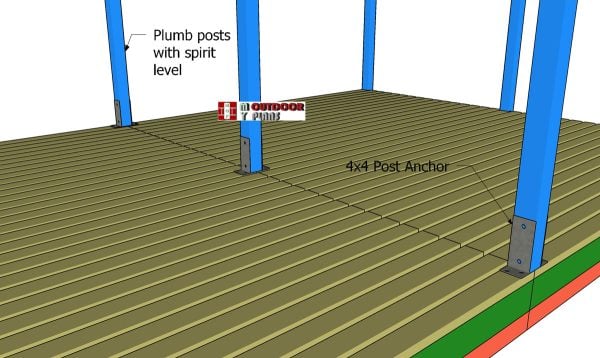
Anchors-for-middle-posts
Attach the middle posts to the floor of the shed using post anchors and screws. Center the anchors to the floor of the shed. Plumb the posts vertically before locking them to the base anchors.
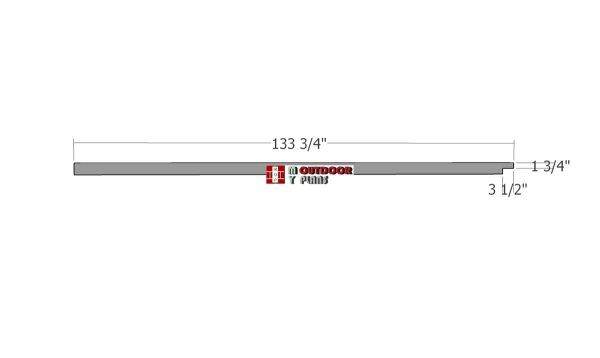
Top-beams
Next, we need to cut the beams for the top supports. Make notches to one end of the beams, as shown in the diagram.
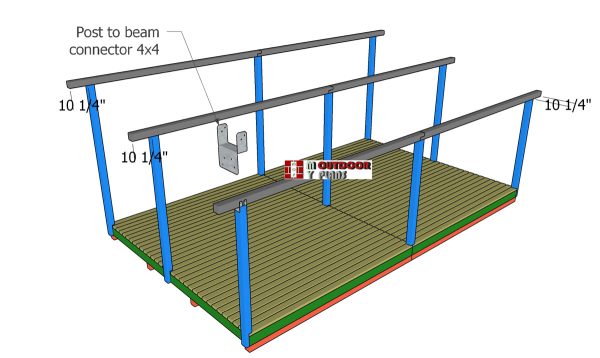
Fitting-the-support-beams
Fit the beams to the top of the posts. Align the edges with attention, so you get 10 1/4″ overhangs on both sides. Secure them into place with 4×4 post to beam connectors. For the middle joints, also insert two 8″ screws.
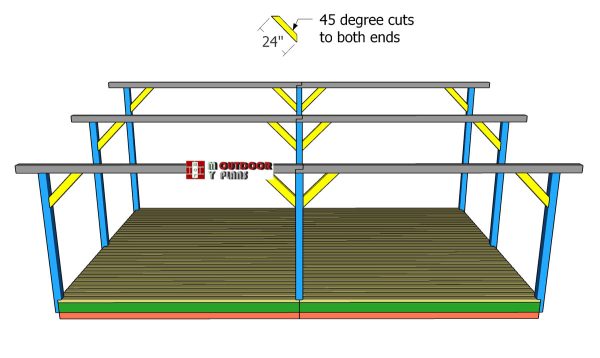
Setting-the-braces-to-the-frame-of-the-firewood
Use 4×4 lumber for the braces and make 45 degree cuts to both ends. Plumb the posts and attach the braces with 5 1/2″ screws. Drill pilot holes before inserting the screws, to prevent the wood from splitting. Use 2 screws per joint.
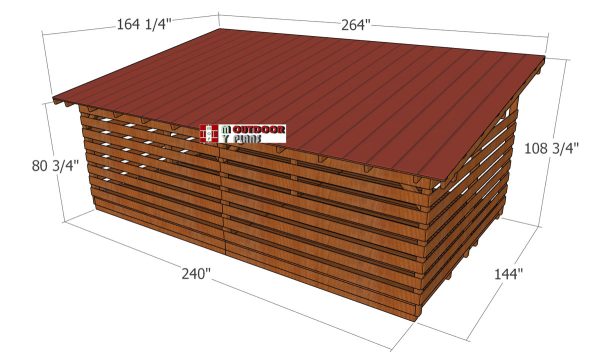
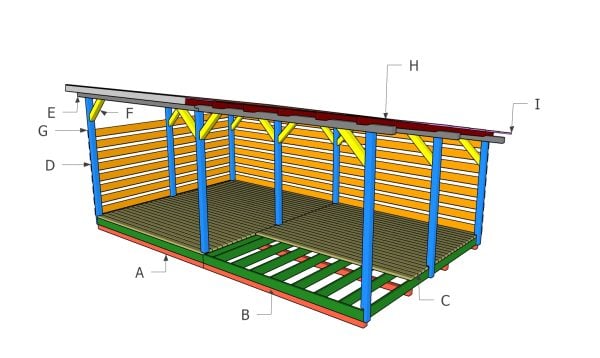
12×20-firewood-shed—overall-dimensions
Check PART 2 of the project, to learn more on how to build the roof.
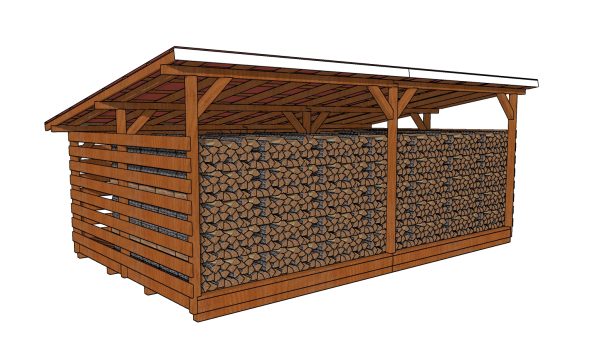
12×20 firewood shed plans – build it
This lean to shed is sturdy and the roof angle allows the snow and other elements to drain easily to the back. Make sure you read the local codes, so the plans comply with your local regulations.
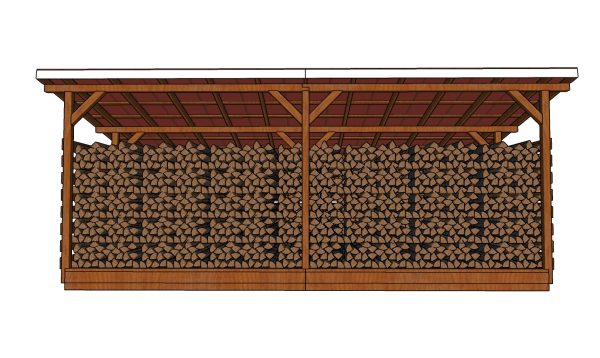
12×20 firewood shed plans – front view
If you heat your home with firewood, then you most certainly need a large shed that will keep the fuel dry and ready to use. This lean to shed can hold 11 cords of wood (and even more if you stack it up to the top of the roof) and it is designed to be cost efficient. I strongly recommend you to use Pressure Treated lumber for the skids and floor of the shed.
You should also check out my 3 cord firewood shed plans. I have many design ideas on this blog, so make sure you take a look over all the alternatives before taking a decision. Premium Plans for this project available in the Shop.
This woodworking project was about 12×20 wood shed plans. If you want to see more outdoor plans, check out the rest of our step by step projects and follow the instructions to obtain a professional result.

EXPLORE MORE IDEAS FOR:
 |
 |
 |
 |