This step by step diy project is about free 12×16 run in shed plans. This is a relatively compact run in shed that can be built on a budget, using basic materials and tools. The roof has a 2:12 pitch and features a large opening, for easy access. You can use this shed for animals or for firewood. Read the local codes before starting the project, so you comply with the legal requirements. Take a look over the rest of my woodworking plans, if you want to get more building inspiration.
When buying the lumber, you should select the planks with great care, making sure they are straight and without any visible flaws (cracks, knots, twists, decay). Investing in cedar or other weather resistant lumber is a good idea, as it will pay off on the long run. Use a spirit level to plumb and align the components, before inserting the galvanized screws, otherwise the project won’t have a symmetrical look. If you have all the materials and tools required for the project, you could get the job done in about a day. See all my Premium Plans HERE.
Projects made from these plans
12×16 Run In Shed Plans – Free PDF Download
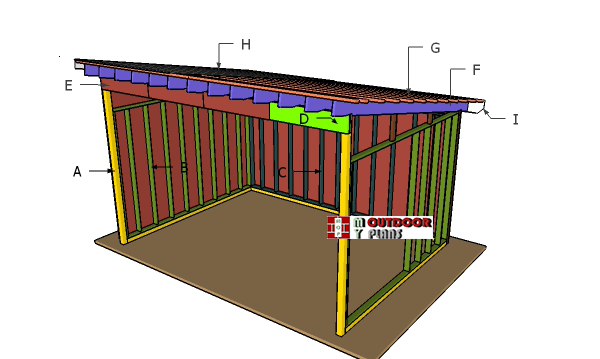
Building-a-12×16-run-in-shed
Cut List
- A – 2 pieces of 4×4 lumber – 96″ long, 2 pieces – 113 3/4″ long, 1 piece – 192″ long, 1 piece – 185″ long, 2 pieces – 137″ long POSTS
- B – 2 pieces of 2×4 lumber – 137″ long, 10 pieces – 93″ long 2xSIDE WALL
- C – 2 pieces of 2×4 lumber – 185″ long, 13 pieces – 89 1/2″ long BACK WALL
- D – 2 pieces of 2×10 lumber – 16 ft long HEADER
Shopping List
- 2 pieces of 4×4 lumber – 8′
- 2 pieces of 4×4 lumber – 10′
- 2 pieces of 4×4 lumber – 12′
- 2 pieces of 4×4 lumber – 16′
- 2 pieces of 2×4 lumber – 16′
- 4 pieces of 2×4 lumber – 12′
- 33 pieces of 2×4 lumber – 8′
- 2 pieces of 2×10 lumber – 16′
- 1 piece of 1/2″ plywood – 2’x8′
- 12 pieces of corner brackets
- 200 pieces of 2 1/2″ screws
- 700 pieces of 3 1/2″ screws
- 700 pieces of 6d nails
- 4 pieces of concrete form
- 4 pieces of post anchors
- 2 pieces of post to beam connector
- 1 box of 1 1/2″ structural screws
- wood filler , stain/paint
- heavy duty glue
Tools
![]() Hammer, Tape measure, Framing square, Level, Pocket Hole Jig
Hammer, Tape measure, Framing square, Level, Pocket Hole Jig
![]() Miter saw, Drill machinery, Screwdriver, Sander
Miter saw, Drill machinery, Screwdriver, Sander
Time
Time
- PART 1: 12×16 Run in Shed Plans
- PART 2: 12×16 Run in Roof Shed Plans
Building a 12×16 run in shed
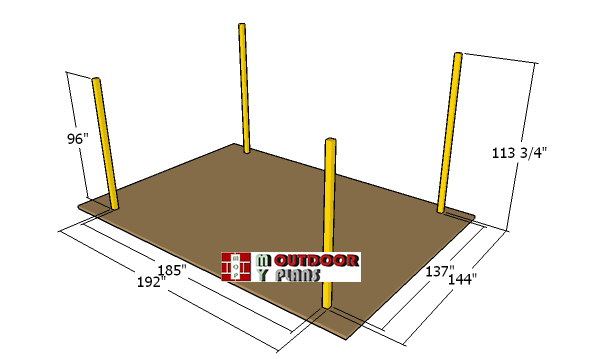
Laying-out-the-posts
The first step of the project is to layout the posts for the run in shed and to set them into place.
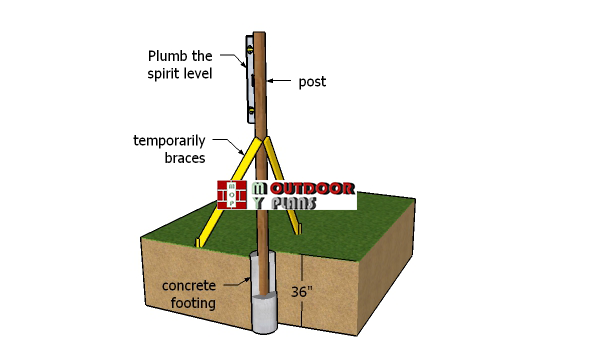
Laying-out-the-posts
Dig 3′ deep 12″ in diameter holes for the concrete footings. Set the concrete forms and then fill them with concrete. Set the post anchors, making sure they are aligned properly. After a few days, set the 4×4 posts into place with lag screws and temporarily braces. Alternatively, you could set the posts directly into concrete.
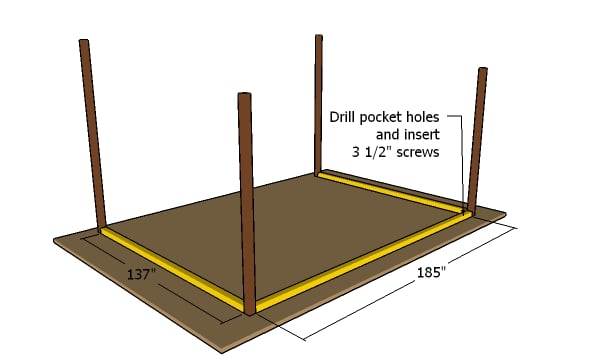
Fitting the skids
Use 4×4 skids between the posts. Drill pocket holes at both ends and insert 3 1/2″ screws to secure them to the posts (on both sides). Make sure the corners are square and align the edges flush.
Building the shed walls

Back-wall-framing
Next, we need to assemble the shed wall frame. Drill pilot holes through the plates and insert 3 1/2″ screws into the uprights. Place the studs every 16″ on center. Measure the diagonals and make adjustments until they are perfectly equal.
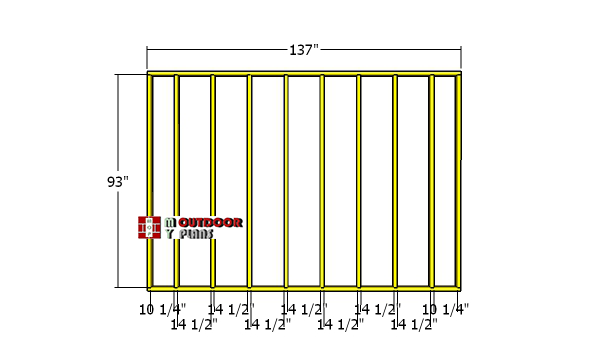
Building-the-side-wall-framing
Assemble the side wall frames using 2x4s and 3 1/2″ screws.
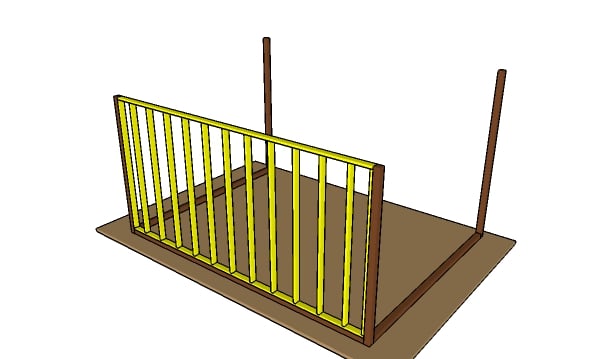
Fitting the back wall frames
Fit the wall frame to the back of the shed. Align the edges and plumb it with a spirit level. Drill pilot holes and insert 3 1/2″ screws to lock the frames to the skids and posts.
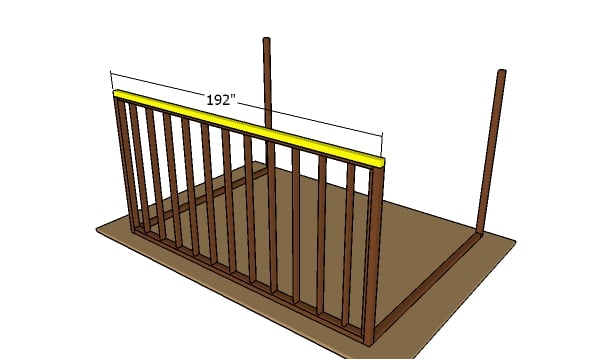
Back wall header
Fit the 4×4 beam to the top of the back wall. Drill pilot holes through the top plate and insert 3 1/2″ screws into the to beam.
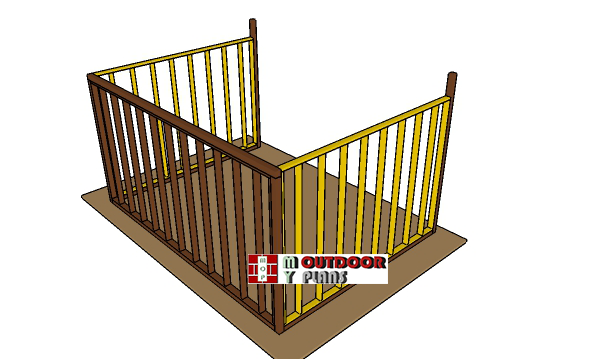
Fitting-the-side-wall-frames
Next, attach the side walls to the shed, as well. Align the edges flush and insert 3 1/2″ screws into the framing.
Building the headers
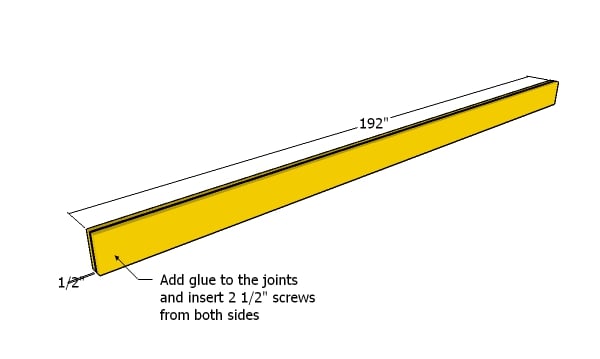
Assembling the header
Use 2×10 beams and 1/2″ plywood to make the back wall headers. Use heavy duty glue and 2 1/2″ screws to assemble the beams. Insert the screws from both sides.
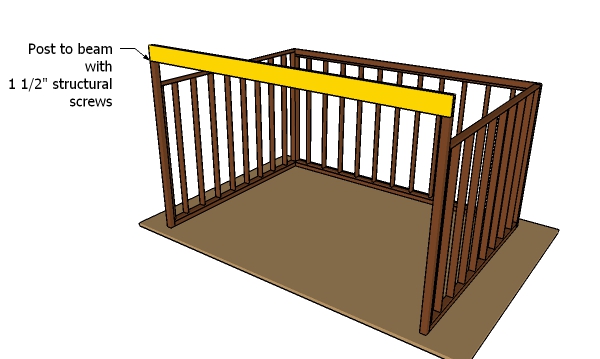
Fitting the header
Fit the beams to the top of the posts. Use post to beam connectors and 1 1/2″ structural screws to secure the beams to the posts. Make sure the posts are plumb and check if the corners are square. Align everything with attention.
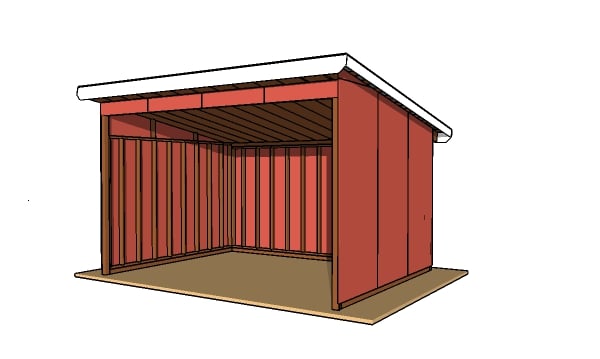
12×16 run in shed
This is a large run in shed that features a huge opening to the front, so you can have an easy access with equipment and other items. Total height for this shed is 133″.

12×16-run-in-shed—overall-dimensions
Check out PART 2 of the 12×16 run in shed project project to learn more on how to build the lean to roof structure. I have tons of other woodworking plans, so you should check out the whole list HERE. If you want to get these plans as a PDF file with full Cut and Shopping lists, check out the GET PDF PLANS button bellow.
This woodworking project was about 12×16 run in shed plans free. If you want to see more outdoor plans, check out the rest of our step by step projects and follow the instructions to obtain a professional result.


