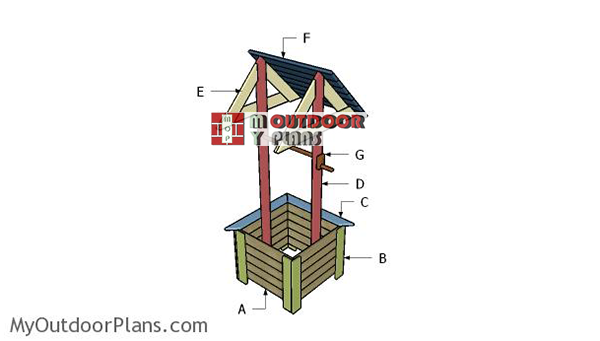
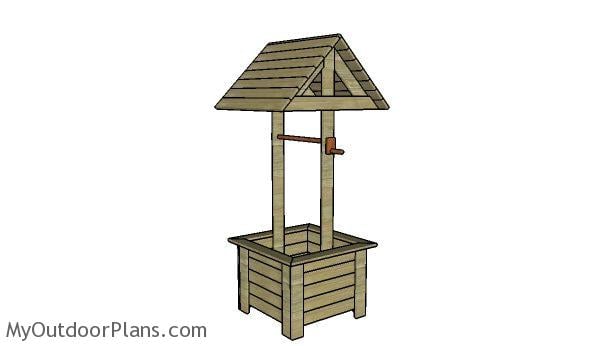
This step by step diy project is about wooden wishing well plans. I have designed this large wishing well so you can enhance the look of your backyard. A decorative wishing well is always nice to have in the garden, as it adds unique appeal. Take a look over the rest of my woodworking plans, if you want to get more building inspiration.
When buying the lumber, you should select the planks with great care, making sure they are straight and without any visible flaws (cracks, knots, twists, decay). Investing in cedar or other weather resistant lumber is a good idea, as it will pay off on the long run. Use a spirit level to plumb and align the components, before inserting the galvanized screws, otherwise the project won’t have a symmetrical look. If you have all the materials and tools required for the project, you could get the job done in about a day. See all my Premium Plans HERE.
Projects made from these plans
Wooden Wishing Well Plans
Building-a-wishing-well
Cut & Shopping Lists
- A – 10 pieces of 1×4 lumber – 24″ long, 10 pieces – 22 1/2″ long BASE
- B – 8 pieces of 1×4 lumber – 20″ long LEGS
- C – 4 pieces of 1×4 lumber – 29 1/2″ long TRIMS
- D – 2 pieces of 1×4 lumber – 72″ long STAKES
- E – 4 pieces of 1×4 lumber – 22″ long, 2 pieces – 34 3/4″ long RAFTERS
- F – 14 pieces 1×4 lumber – 30 1/2″ long, 1 piece of 1×1 lumber – 30 1/2″ long ROOF
- G – 1 piece of 1″ dowel – 23 1/2″ long, 1 piece – 4″ long, 1 piece of 1×3 lumber – 4″ long, 1 piece – 2″ long SPINDLE
- 21 pieces of 1×4 lumber – 8′
- 1 piece of 1×1 lumber – 6′
- 1 piece of 1″ dowel
- 2 1/2″ screws, 1 1/4″ screws
- wood filler , wood glue, stain/paint
Tools
![]() Hammer, Tape measure, Framing square, Level
Hammer, Tape measure, Framing square, Level
![]() Miter saw, Drill machinery, Screwdriver, Sander
Miter saw, Drill machinery, Screwdriver, Sander
Time
![]() One day
One day
Related
How to build a large wishing well
The-other-side-panels
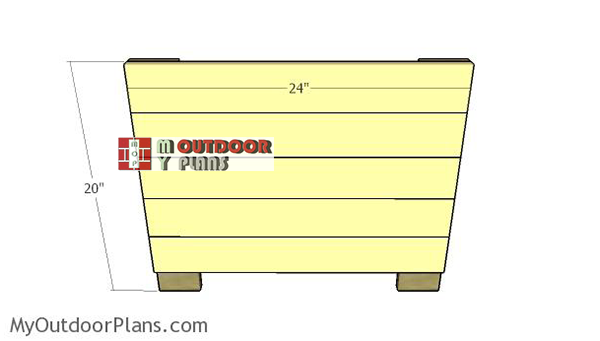
The first step of the project is to build the sides of the wishing well planter. Cut the components from 1×4 lumber and smooth booth ends with sandpaper. Align the edges, drill pilot holes and insert 1 1/4″ screws. Add waterproof glue to the joints and leave no gaps between the components.

Side panels
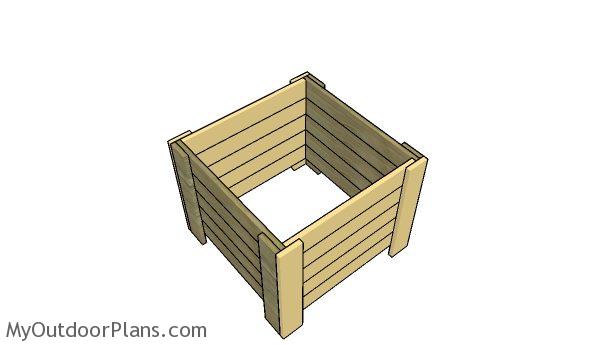
Continue the project by attaching the other two sides of the planter. Make sure you align everything with attention before attaching the slats to the legs. Leave no gaps between the slats for a neat appearance.
Assembling the wishing well planter
After assembling all sides of the wishing well base, you need to assemble the planter box. Align the edges and make sure the corners are square. Drill pilot holes and insert 1 1/4″ screws to lock the sides together tightly.
Fitting the top trims
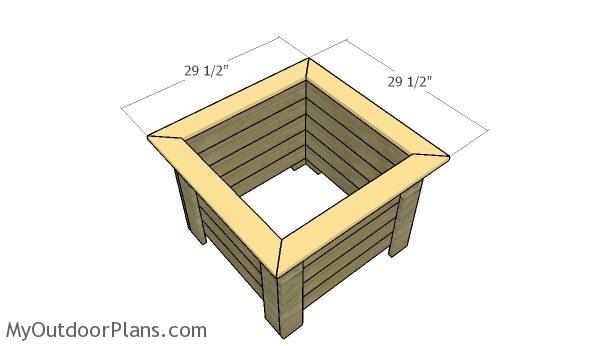
Attach 1×4 trims to the top of the planter. Cut both ends of the 1×4 trims at 45 degrees and secure them to the top of the planter with 1 1/2″ finishing nails. Leave no gaps between the trims for a neat result.
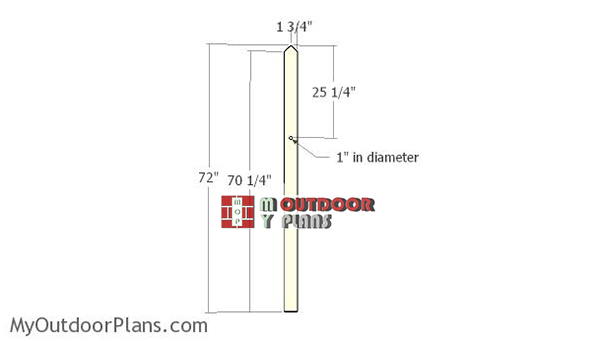
Building-the-stakes
Build the stakes for the wishing well from 1×4 lumber. Cut the top of the stake at 45 degrees, as in the diagram. In addition, drill a 1″ hole in diameter in the stakes.
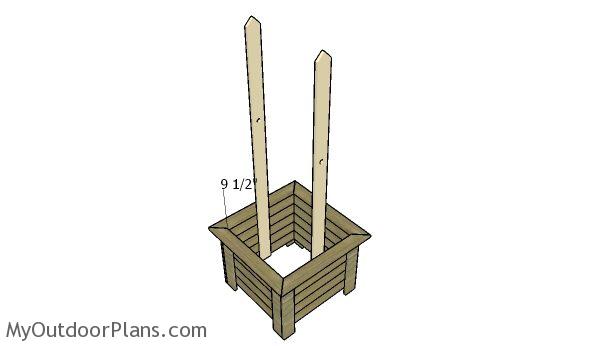
Fitting the stakes
Fit the stakes to the planter box, as shown in the image. Use a spirit level to plumb the stakes and center them to the planter boxes. Drill pilot holes and insert 1 1/4″ screws to secure the stakes to the base in a professional manner.
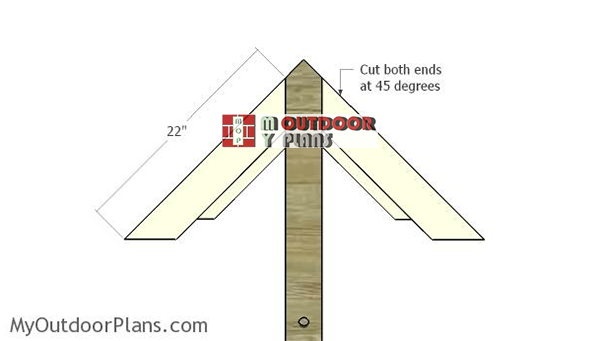
Attaching-the-rafters
Build the rafters from 1×4 lumber. Fit the rafters to the top of the stakes and secure them into place with waterproof glue and screws. Align the edges and leave no gaps between the components.
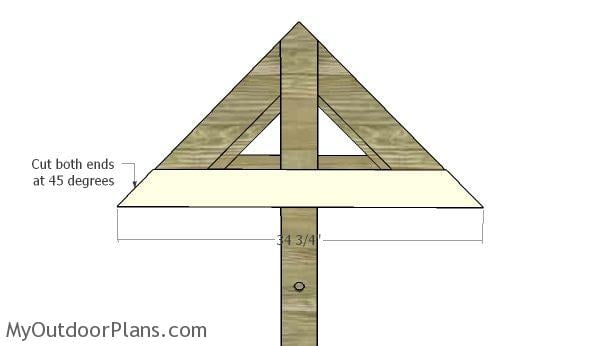
Horizontal rafters
Build the bottom rafters from 1×4 lumber and cut both ends at 45 degrees. Fit the bottom rafters to the sides of the roof and lock them into place with screws, after drilling pilot holes.
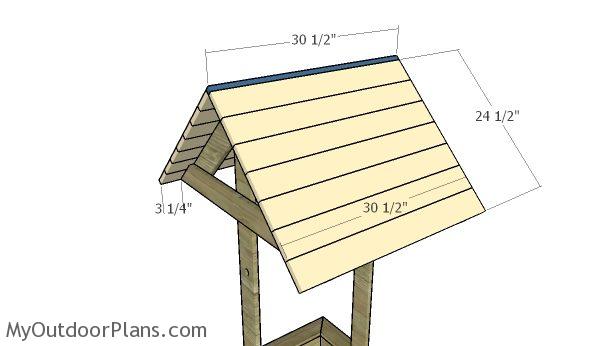
Fitting the roof slats
Attach 1×4 slats to the top of the wishing well. Align the edges with attention, drill pilot holes and insert 1 1/4″ screws into the rafters. Leave no gaps between the slats for a neat result.
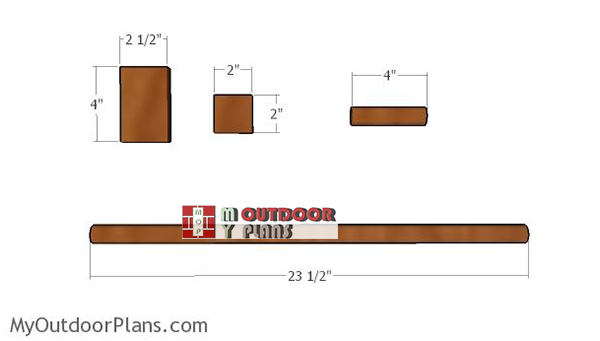
Building-the-spindle
Build the spindle, the handle and washers for the wishing well using the information in the diagram. For the spindle you should use 1″ dowels.
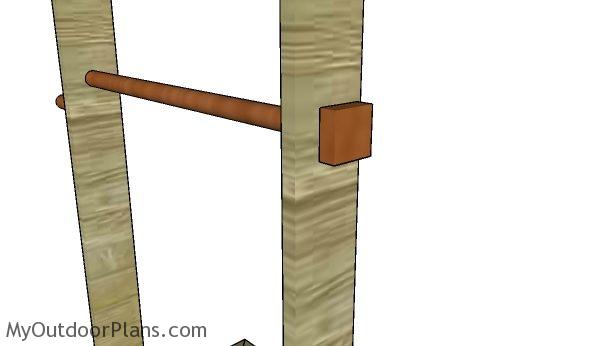
Fitting the washer
Fit the spindle to the stakes and then connect the washer, as shown in the diagram. Drill pilot holes and secure the washer to the spindle.
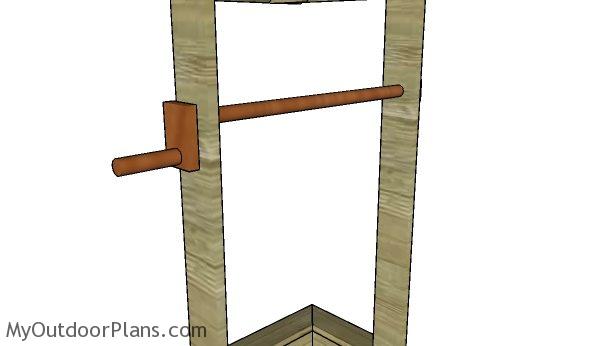
Fitting the handle
Assemble the handle to the opposite end of the wishing well. Smooth the edges of the handle with 120 sandpaper.
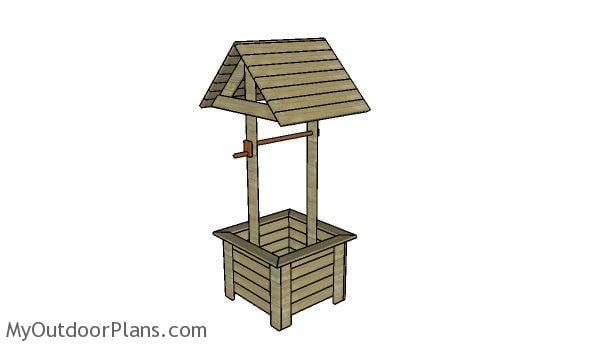
Wooden wishing well plans
Fill the holes with wood putty and smooth the surface with 120-220 grit sandpaper. Cover the components with stain or paint to enhance the look of the wishing well and to protect the components from decay. Alternatively, you can use weather resistant lumber, such as cedar or redwood.
How to build a wishing well
This is a simple project you should be able to build in a few hours without much effort. You can hang a bucket to the spindle to add value to the outdoor project. Don’t forget to check out the rest of my outdoor furniture projects, as I have designed lots of plans.
If you want to get this project as a PDF file, with 1 full cut list and 1 full shopping list, check out the GET PDF PLANS button bellow.

This woodworking project was about wooden wishing well plans free. If you want to see more outdoor plans, check out the rest of our step by step projects and follow the instructions to obtain a professional result.
EXPLORE MORE IDEAS FOR:
 |
 |
 |
 |
16 comments
Nice well and easy plans
Thank you. Let me know how it comes out!
I have built 20 of your 6ft picnic tables, so easy with great instructions.
That’s great. I would love to see a couple of pics. You can send them here: http://myoutdoorplans.com/contact/
So why the 2 1/2 screws I don’t see where you used them
They are for the roof structure.
Great plan, easy to follow. It did take me a little longer to finish, but I’m an old lady! Thanks for sharing your plans!
Thank you for the nice words. Thank you for sending the brag project. Looks brilliant! Slow and steady wins the race.
Easy to follow instructions. Curious what the 1″x1″ piece was for?
Spindle
Thank-you very much very nicely documented plans and detailed.
Did you cut down wider boards to get the 20″ height for the base? 5 1x4s would not equal 20″
1×4 lumber is 3/4″x3 1/2″. 20″ is the height of the posts, not of the panels
All your plans are great. Very easy to follow and fun.
Thanks. Appreciate the feedback 🙂
I have built a two seat bench with a table in the middle, a kid picnic table, Adirondack chair and a complete playhouse with your plans I added a loft to the playhouse and everything I’ve built has come out unbelievable. I cannot wait to try this one in the shop this winter. This is to me by far the best DIY site out there thank you for the plans.