This step by step diy project is about rocking chair plans. I have designed this rocking chair so you can build one for your porch or backyard patio. Anyone can get the job done in just a few days, if you follow the step by step instructions and diagrams. In addition, you can even adjust the size of the rocking chair to suit your needs. Take a look over the rest of our woodworking plans, if you want to get more building inspiration.
When buying the lumber, you should select the planks with great care, making sure they are straight and without any visible flaws (cracks, knots, twists, decay). Investing in cedar or other weather resistant lumber is a good idea, as it will pay off on the long run. Use a spirit level to plumb and align the components, before inserting the galvanized screws, otherwise the project won’t have a symmetrical look. If you have all the materials and tools required for the project, you could get the job done in about a day. See all my Premium Plans HERE.
Projects made from these plans
It’s that simple to build a rocking chair!
Rocking Chair Plans
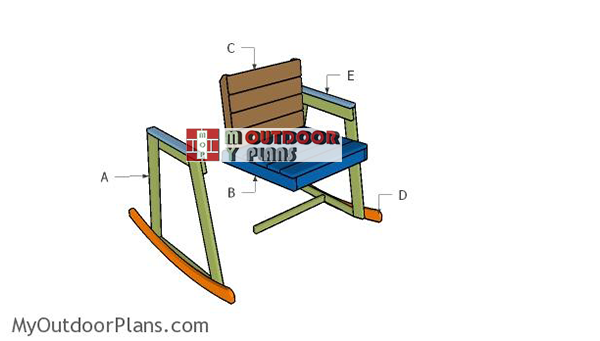
Building-a-rocking-chair
Cut & Shopping Lists
- A – 4 pieces of 1×3 lumber – 25″ long, 2 piece – 16 3/4″ long, 2 piece of 1×2 lumber – 19 1/2″ long SIDES
- B – 2 pieces of 1×3 lumber – 22 3/4″ long, 2 pieces – 18 1/2″ long, 5 pieces of 1×4 lumber – 20″ long SEAT
- C – 2 pieces of 1×3 lumber – 18 1/2″ long, 4 pieces of 1×4 lumber – 18 1/2″ long BACKREST SUPPORTS
- D – 2 piece of 1×6 lumber – 36″ long ROCKERS
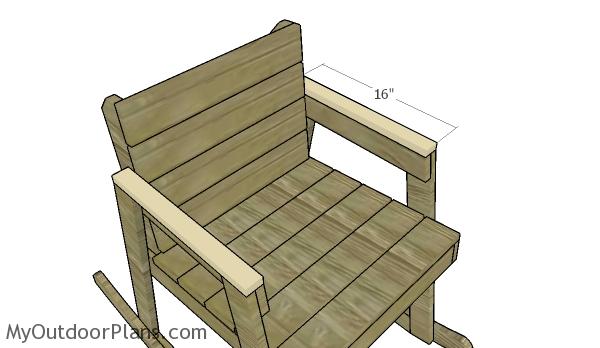
- E – 2 pieces of 1×2 lumber – 16″ long ARMRESTS
- 1 piece of 1×2 lumber – 8′
- 3 piece of of 1×3 lumber – 8′
- 2 pieces of 1×4 lumber – 8′
- 1 piece of 1×6 lumber – 6′
- 1 1/4″ pocket screws, 1 1/4″ screws
- wood glue, stain/paint, wood filler
Tools
![]() Hammer, Tape measure, Framing square, Level
Hammer, Tape measure, Framing square, Level
![]() Miter saw, Drill machinery, Screwdriver, Sander
Miter saw, Drill machinery, Screwdriver, Sander
Time
Related
Building a rocking chair
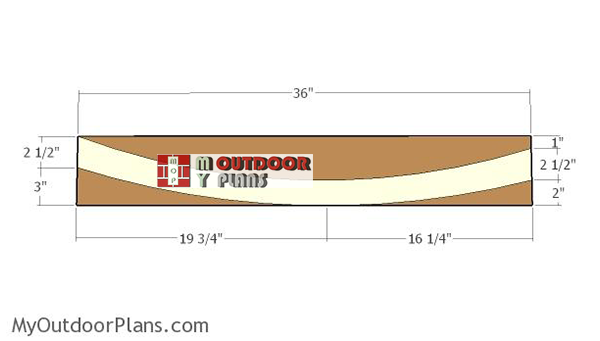
Building-the-rockers
The first step of the project is to build the rockers for the chair. Mark the cut lines on the 1×6 boards and get the job done with a jigsaw. Smooth the edges with sandpaper and round the exposed corners before fitting them into place.
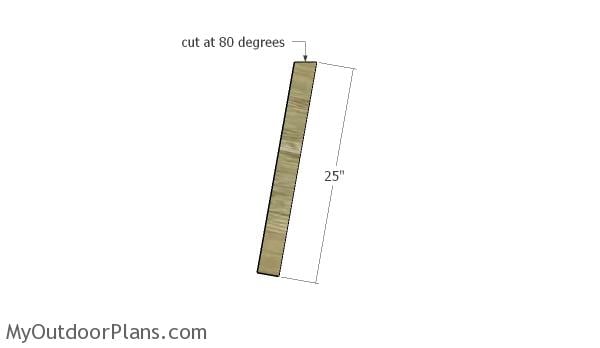
Building the legs
Build the legs for the chair from 1×3 lumber. Cut one end of the legs at 80 degrees using a miter saw.
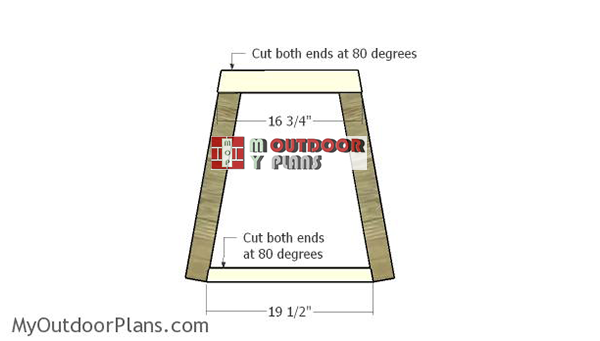
Assembling-the-sides
Continue the project by assembling the sides for the rocking chair. Use 1×3 lumber for the top support. Cut both ends at 80 degrees (set miter saw at 10 degrees) and add glue to the joints. Drill pilot holes and insert 1 1/4″ screws. Cut the bottom support from 1×2 lumber. Drill pocket holes and insert 1 1/4″ screws to assemble them together tightly.
Building-the-frame-of-the-chair
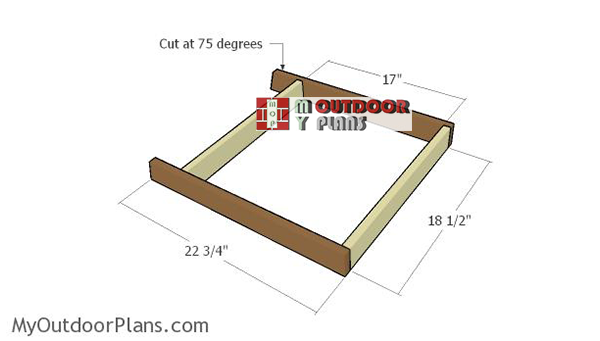
Build the frame for the seat from 1×3 lumber. Drill pocket holes at both ends of the 18 1/2″ long supports and insert 1 1/4″ screws into the perpendicular slats. Make sure the corners are square, add glue to the joints before inserting the screws.
Fitting the seat slats
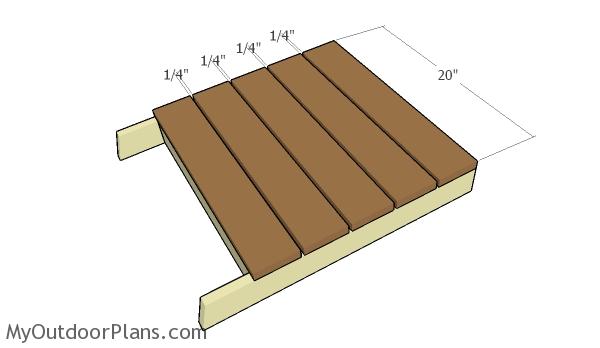
Fit 1×4 slats to the seat of the chair. Drill pilot holes at both ends and insert 1 1/4″ screws into the frame. Place a piece of 1/4″ plywood between the slats to create even gaps. Countersink the head of the screws for a professional result.
Fitting-the-seat
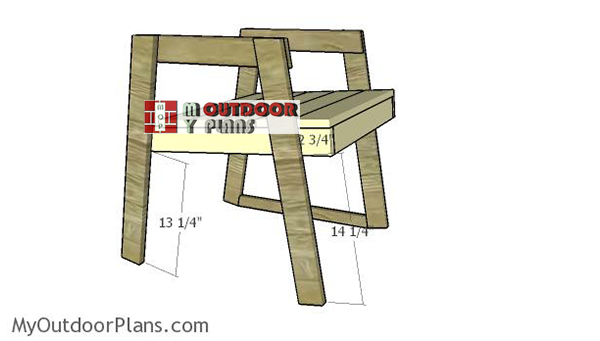
After assembling the seat, you need to attach it to the sides of the chair. Align everything as shown in the plans, drill pilot holes through the frame and insert 1 1/4″ screws into the side legs. Add glue to the joints for a professional result.
Building the backrest supports
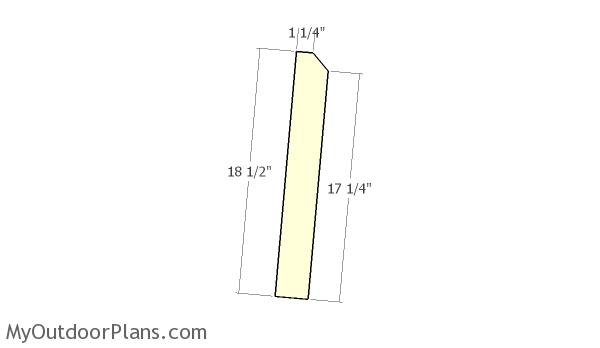
Build the backrest supports from 1×3 lumber.
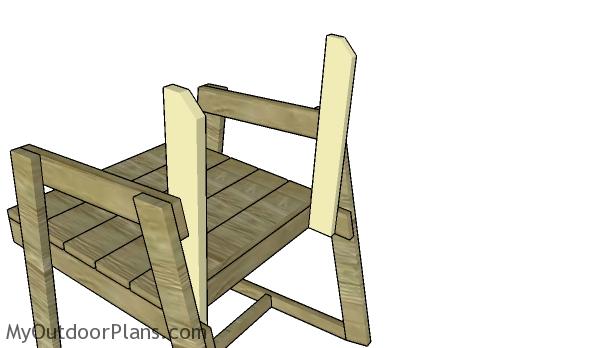
Fitting the backrest supports to the chair
Fit the backrest to the back of the chair. Drill pilot holes through the supports and insert 1 1/4″ into the frame of the chair. Add glue to the joints, drill pilot holes and insert 1 1/4″ screws to lock everything tightly.
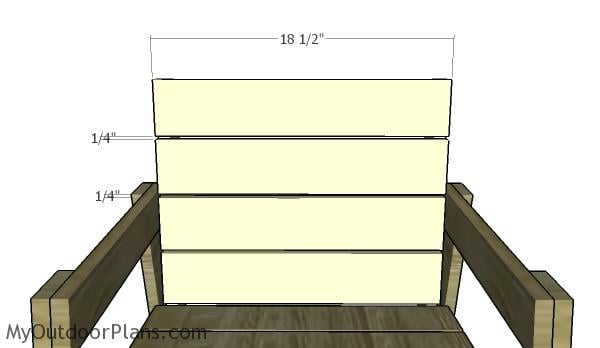
Fitting the backrest supports
Use 1×4 lumber for the backrest. Place a piece of 1/4″ plywood between the slats, drill pilot holes and insert 1 1/4″ screws into the supports. Smooth the edges with sandpaper.
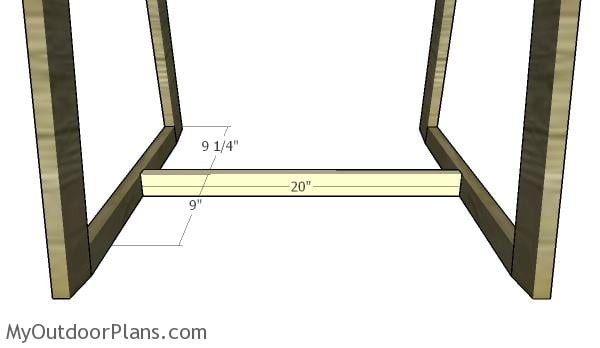
Fitting the stretcher
Build the stretcher from 1×2 lumber and drill pocket holes at both ends. Fit the stretcher to the bottom of the chair to enhance the rigidity of the structure. Use 1 1/4″ pocket screws to secure the stretcher into place tightly.
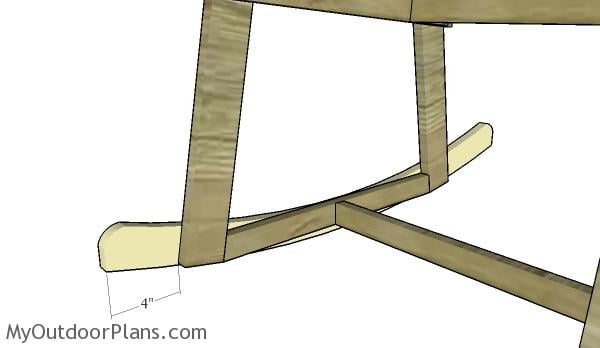
Fitting the rockers
Fit the rockers to the base of the chair. Align everything, drill pilot holes through the frame and insert 1 1/4″ screws into the rockers. Add glue to the joints and leave no gaps between the components.
Fitting the armrests
Build the armrests from 1×2 lumber. Fit them to the chair and insert 1 1/2″ nails to secure it into place tightly. Add glue to the joints and align everything with attention.
Rocker chair plans
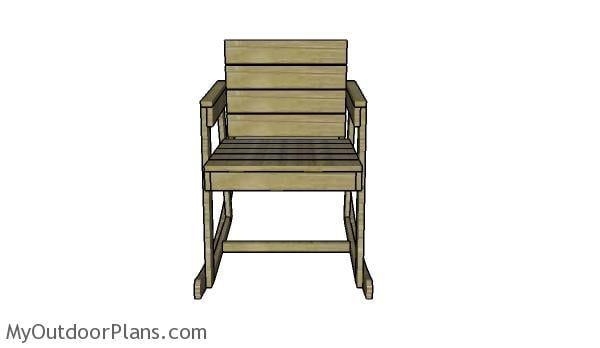
Last but not least, you need to take care of the finishing touches. Smooth the edges with sandpaper, fill the holes with wood putty. Next, sand everything with 120-220 grit sandpaper. Apply a few coats of stain and then seal everything with lacquer.
Rocking chair plans
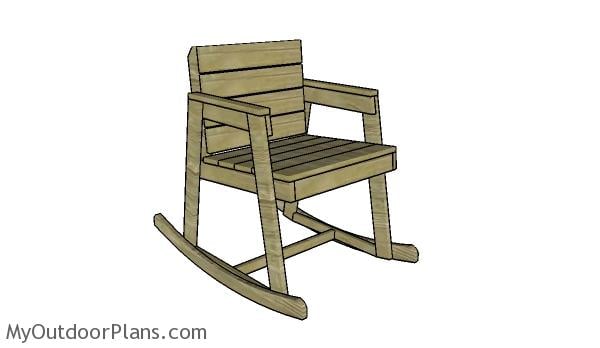
This simple to build rocking chair has a nice appearance and it would look perfect on a deck or patio. Check out the rest of the my free woodworking plans HERE. If you build this, I would love to see your project.
This woodworking project was about rocking chair plans free. If you want to see more outdoor plans, check out the rest of our step by step projects and follow the instructions to obtain a professional result.

13 comments
I am in process to make a rocking chair.Where in the seat arrangement does the two 17 in pieces go. I have looked at the picture by picture sketch and can’t see where they fit in.. I am amateur at woodworking and trying to make a few things. Thanks for the web site and plans.
Sorry for that. There was a typing mistake in the cut list. The 17″ supports are actually 22 3/4″. Looking forwards to seeing your projects.
Thank you for the plans
You’re very welcome. Let me know how it comes out!
A – 2 pieces of 1×3 lumber – 25″ long, 1 piece – 16 3/4″ long, 1 piece of 1×2 lumber – 19 1/2″ long SIDES
B – 2 pieces of 1×3 lumber – 22 3/4″ long, 2 pieces – 18 1/2″ long, 5 pieces of 1×4 lumber – 20″ long SEAT
C – 2 pieces of 1×3 lumber – 18 1/2″ long, 4 pieces of 1×4 lumber – 18 1/2″ long BACKREST SUPPORTS
D – 2 piece of 1×6 lumber – 36″ long ROCKERS
E – 2 pieces of 1×2 lumber – 16″ long ARMRESTS
1 piece of 1×2 lumber – 6′
3 piece of of 1×3 lumber – 6′
2 pieces of 1×4 lumber – 8′
1 piece of 1×6 lumber – 6′
1 1/4″ pocket screws, 1 1/4″ screws
wood glue, stain/paint, wood filler
Do you need all of these boards, A-E and the ones listed below them? The top under A says 6-1×3 boards and the bottom section says 3-1×3. I am just trying to determine what I need to buy. Thanks
A-E is the cut list. The other one is the materials list.
I just did the math out and was just figuring that you may be one 1×3 short if doing the two sides. Looks like the material list is made for one side. I could be completely off though.
True. I’ve updated the cut list. You need 3 pieces but 8 ft long.
Thank you very much! I can’t wait to get started tonight!
When drawing out the rockers how do you get those nice and even flowing, circular/oval lines essential for smooth rocking? I’m thinking of driving a nail at the measurement points and then using a thin piece of wood to bend around them in order to trace the lines, but would be highly open to suggestions.
Also, (apologies to experienced woodworkers for this question) to achieve the 80 and 75 degree cuts I believe I should be setting the miter box at 35 and 30 degrees respectively, correct?
Thanks so much for the plans and the help, I’m excited to get started!
Yes, thin strip of wood or a conduit will do the trick. For 80 degree set the miter at 10 degrees, for 75 degrees set the miter at 15 degrees.
How did you figure out the angle on the rockers on the bottom. I see the measurements but how do I draw the angle?. Are there any other measurements in detail to go by?
Hi,
Why are all measurements in the projects shown with inches. Is it not possible to do this also in cm and mm?
I’m living in Europe and we don’t use inches. To convert it into cm takes a lot of time and is not accurate enough.
I look forward to receiving a response from you.