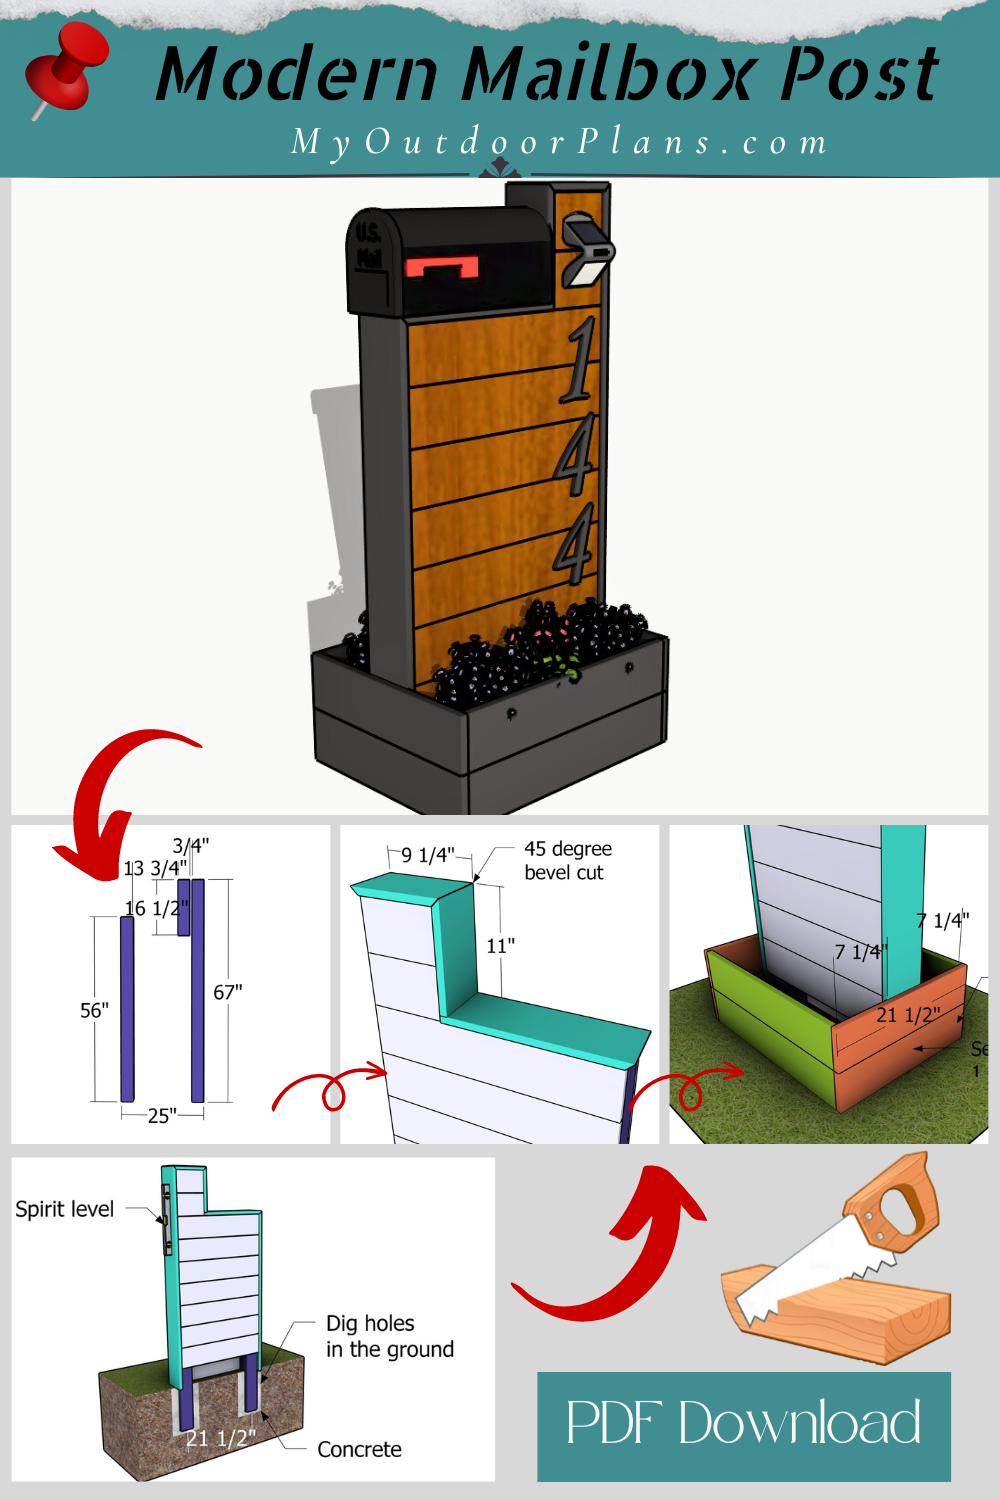
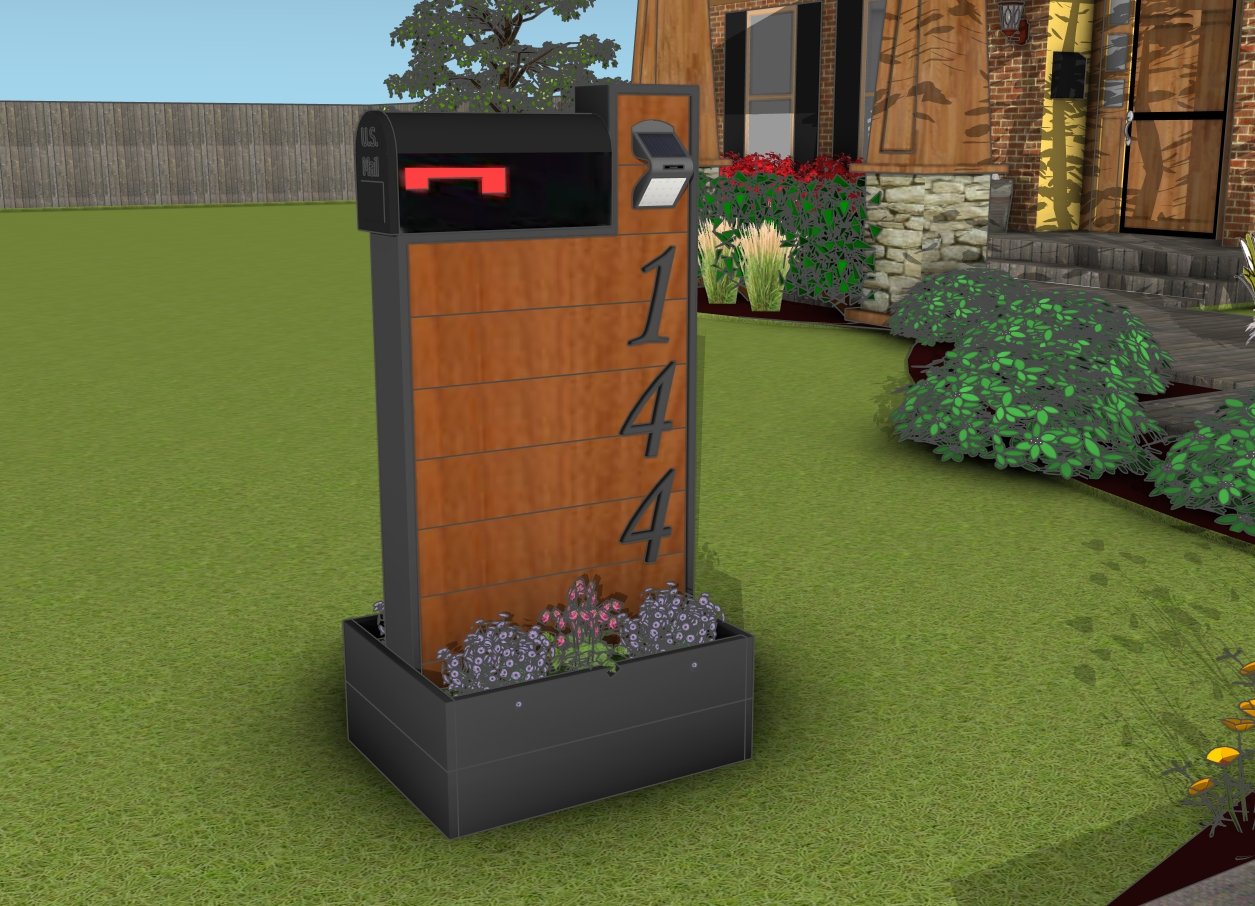
Today, we’re tackling an exciting project: building a custom mailbox stand with a built-in planter. This free project plan not only adds a touch of modern charm to your front yard but also showcases your woodworking skills. Follow along as we break down each step to create a beautiful and functional addition to your home! Take a look over the rest of my woodworking plans, if you want to get more building inspiration. Premium Plans for this project available in the Shop.
Before we dive in, let’s talk cost and time. You’re looking at spending around $75 to $150 on materials for this project, depending on the quality of wood and hardware you choose. As for time, set aside a good weekend to get this done—about 8 to 10 hours total. So, roll up your sleeves and let’s get building!
For this project, I recommend using cedar or hardwood for their durability and natural resistance to the elements. Cedar is a fantastic option because it’s lightweight, rot-resistant, and has a beautiful, rustic look. Hardwood, on the other hand, provides superior strength and longevity, making your mailbox stand a sturdy and stylish addition to your home.
Projects made from these plans
Modern Wooden Mailbox Post – PDF Download
Building-a-modern-mailbox-stand
Cut and Shopping Lists
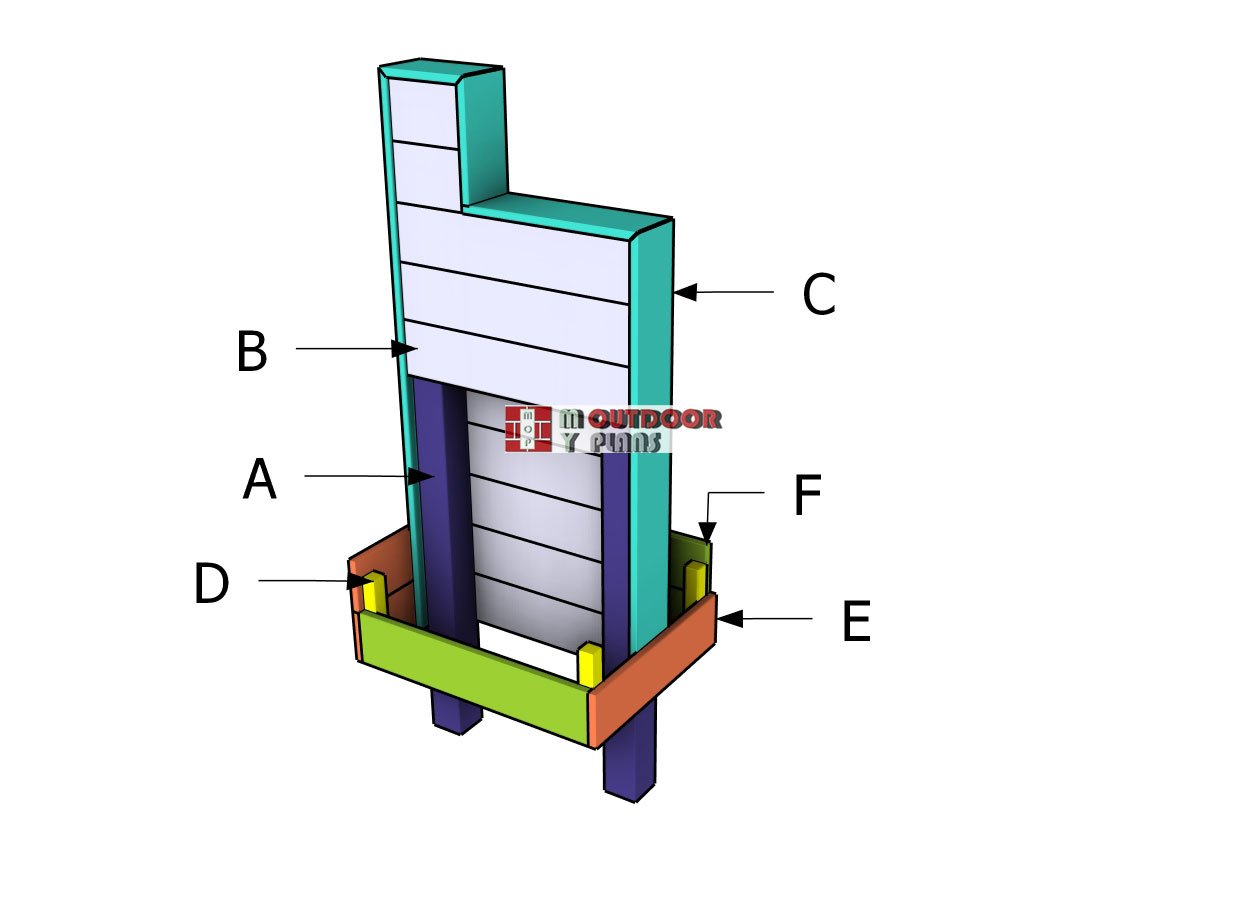
A – Frame – 4×4 lumber 67″ long – 1 piece
A – Frame – 4×4 lumber 56″ long – 1 piece
A – Frame – 4×4 lumber 16 1/2″ long – 1 piece
B – Panels – 1×6 lumber 25″ long – 16 pieces
B – Frame – 2×4 lumber 7 3/4″ long – 4 pieces
C – Trims – 1×6 lumber 55 3/4″ long – 1 piece
C – Trims – 1×6 lumber 44 3/4″ long – 1 piece
C – Trims – 1×6 lumber 18″ long – 1 piece
C – Trims – 1×6 lumber 11″ long – 1 piece
C – Trims – 1×6 lumber 9 1/4″ long – 1 piece
D – Supports – 2×2 lumber 9″ long – 4 pieces
E – Planter Boards – 1×6 lumber 21 1/2″ long – 4 pieces
F – Planter Boards – 1×6 lumber 26 1/2″ long – 4 pieces
- 4×4 lumber 8 ft – 2 pieces
- 2×2 lumber 4 ft – 1 piece
- 1×6 lumber 8 ft – 2 pieces
- 1×6 lumber 10 ft – 4 pieces
- 1×6 lumber 12 ft – 1 piece
- 1 5/8″ screws – 150 pieces
- 2″ nails – 100 pieces
- Wood glue – 1 can
- Stain – 1 can
- Mailbox – 1 piece
- Solar lamp – 1 piece
- House numbers
- Concrete – 1 bag
- Landscape fabric – 10 sq ft
- Staples – 100 pieces
Tools
![]() Hammer, Tape measure, Framing square, Level
Hammer, Tape measure, Framing square, Level
![]() Miter saw, Drill machinery, Screwdriver, Sander
Miter saw, Drill machinery, Screwdriver, Sander
![]() Safety Gloves, Safety Glasses
Safety Gloves, Safety Glasses
Time
![]() One weekend
One weekend
Related
It’s that easy to build a mailbox post!
Pin for Later
How to build a modern mailbox stand
Posts-for-mailbox
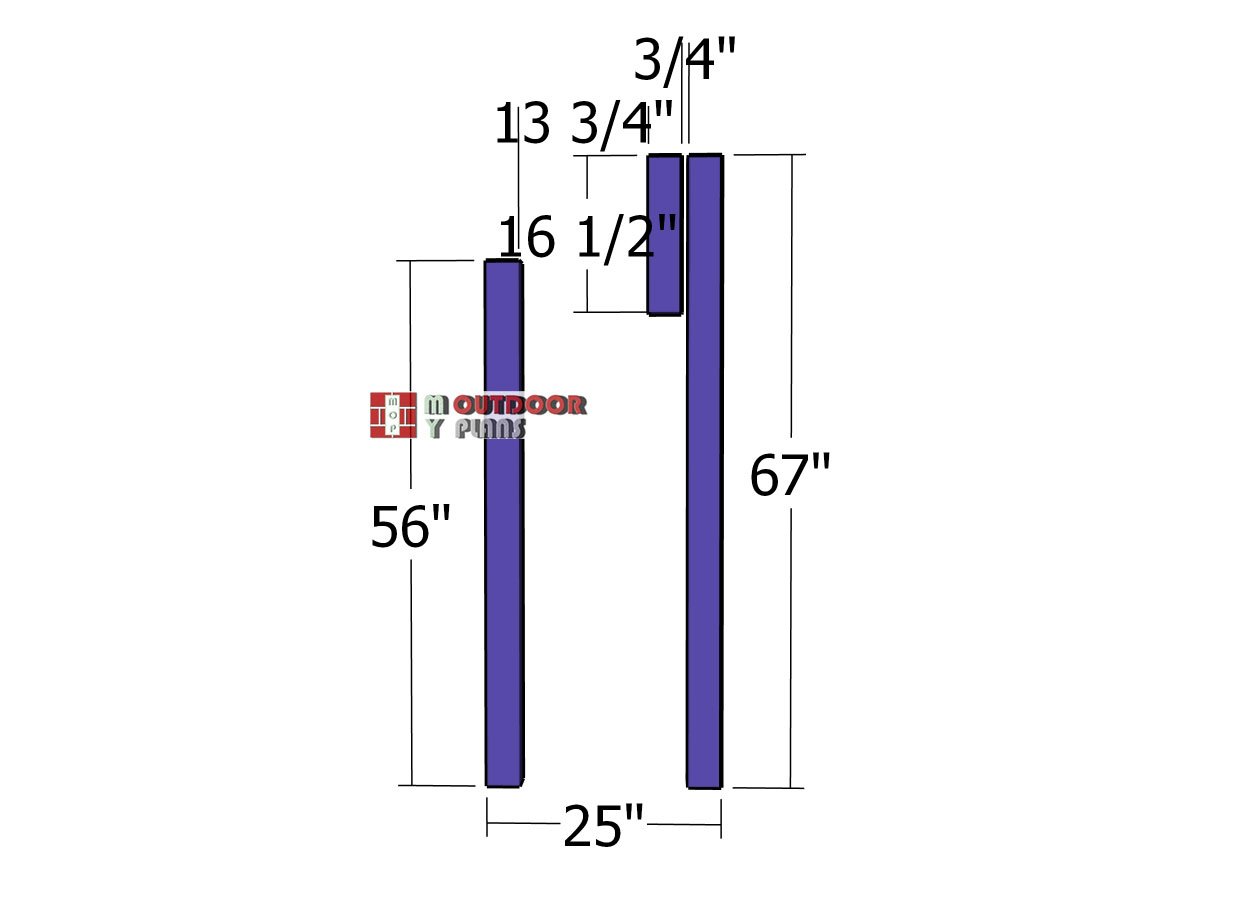
First, let’s cut the posts for the mailbox stand. Grab your 4×4 lumber and make three cuts: one at 56″, one at 67″, and one at 16 1/2″. Lay these posts on a level surface, making sure to align the bottom ends with a straight edge for accuracy.
Side-planks
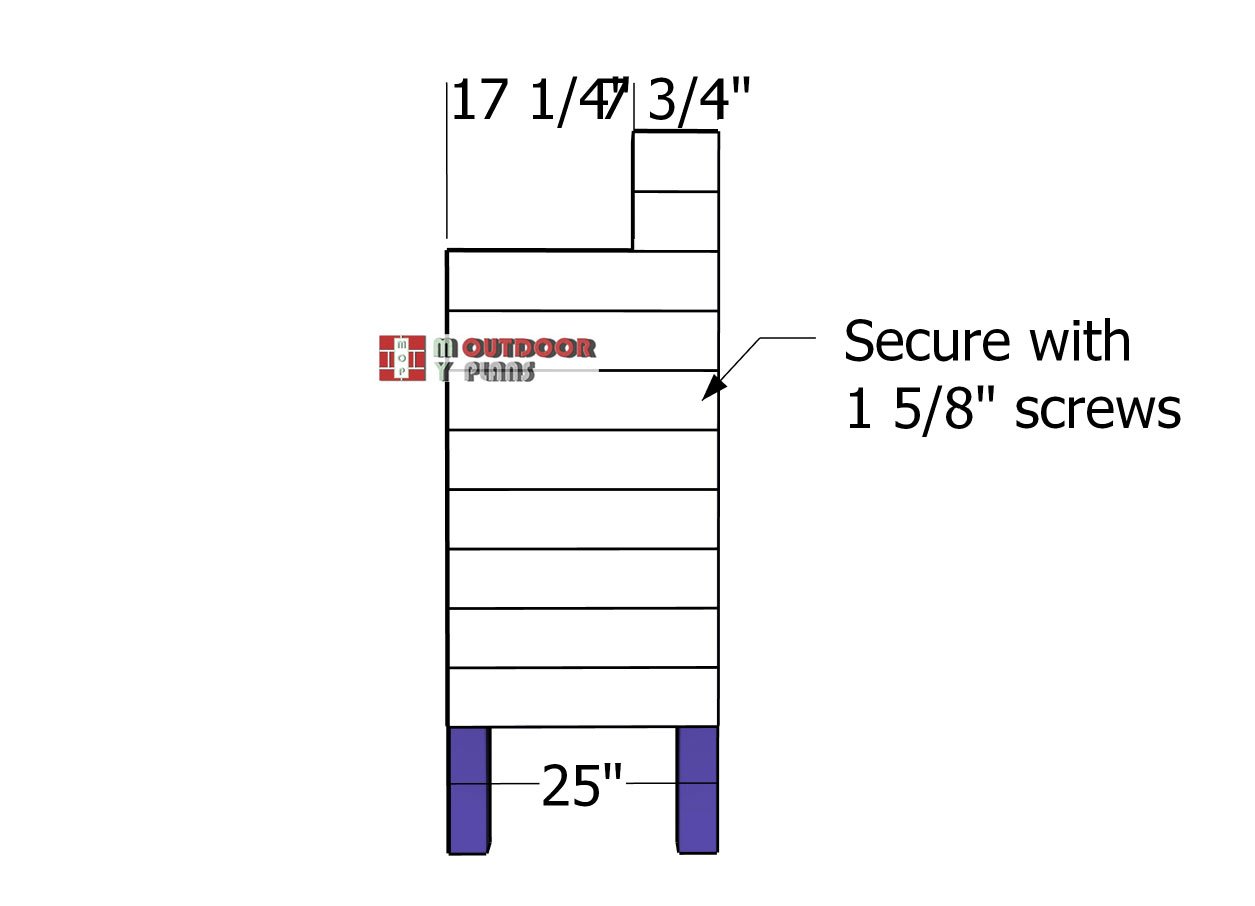
Next up, we need to attach the 1×6 boards to both sides of the mailbox stand. Align the edges flush at both ends, making sure there are no gaps between the boards. Drill pilot holes through the boards, then secure them to the posts with 1 5/8″ screws. Use two screws at each end to keep everything nice and sturdy.
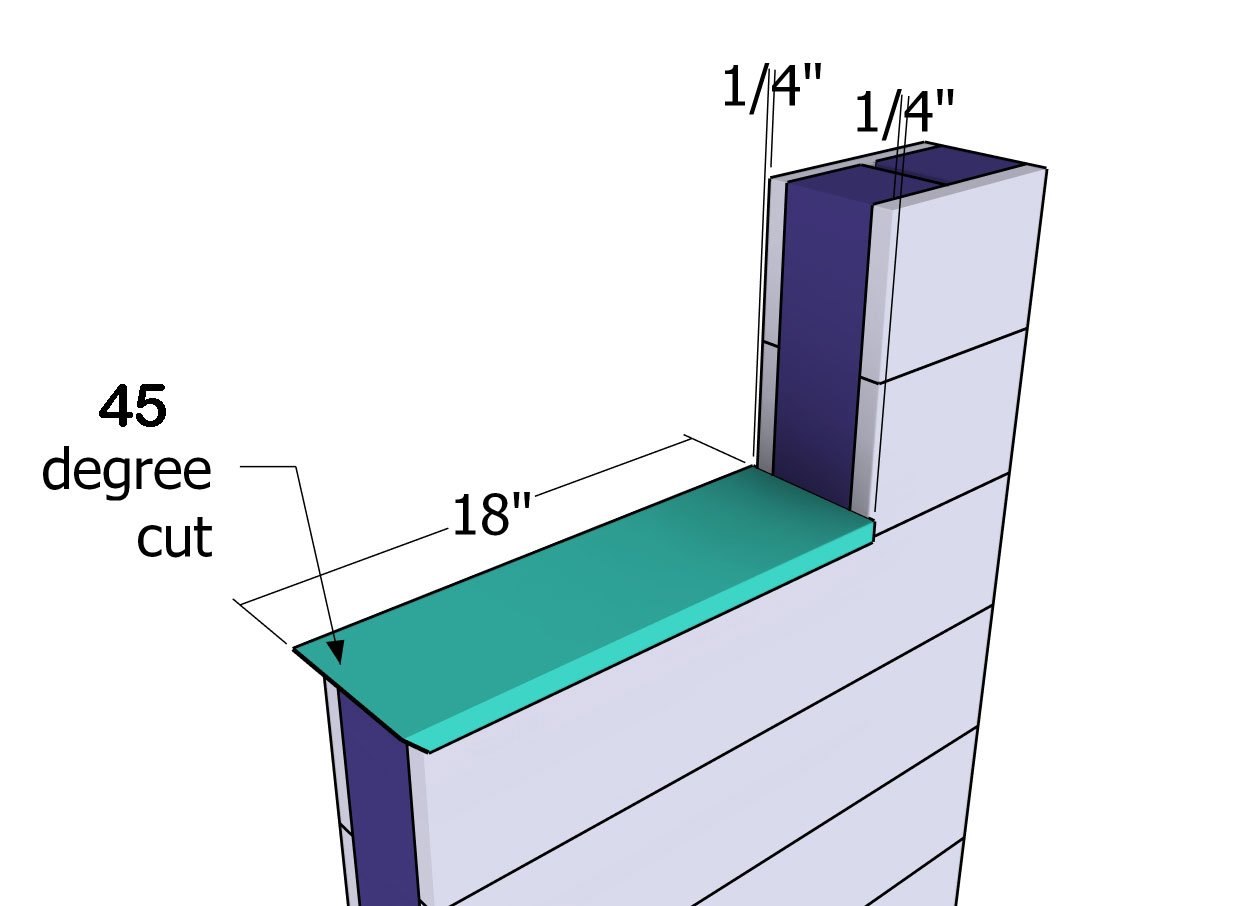
Top-trim
Next, it’s time to start attaching the exterior trims for our modern mailbox stand. Take your 1×6 boards and make a 45-degree bevel cut on one end, just like in the diagram. Center the trim on the stand, ensuring you have 1/4″ overhangs on both sides. Secure the trims with 2″ nails and a bit of wood glue to keep everything firmly in place.
Top-trims
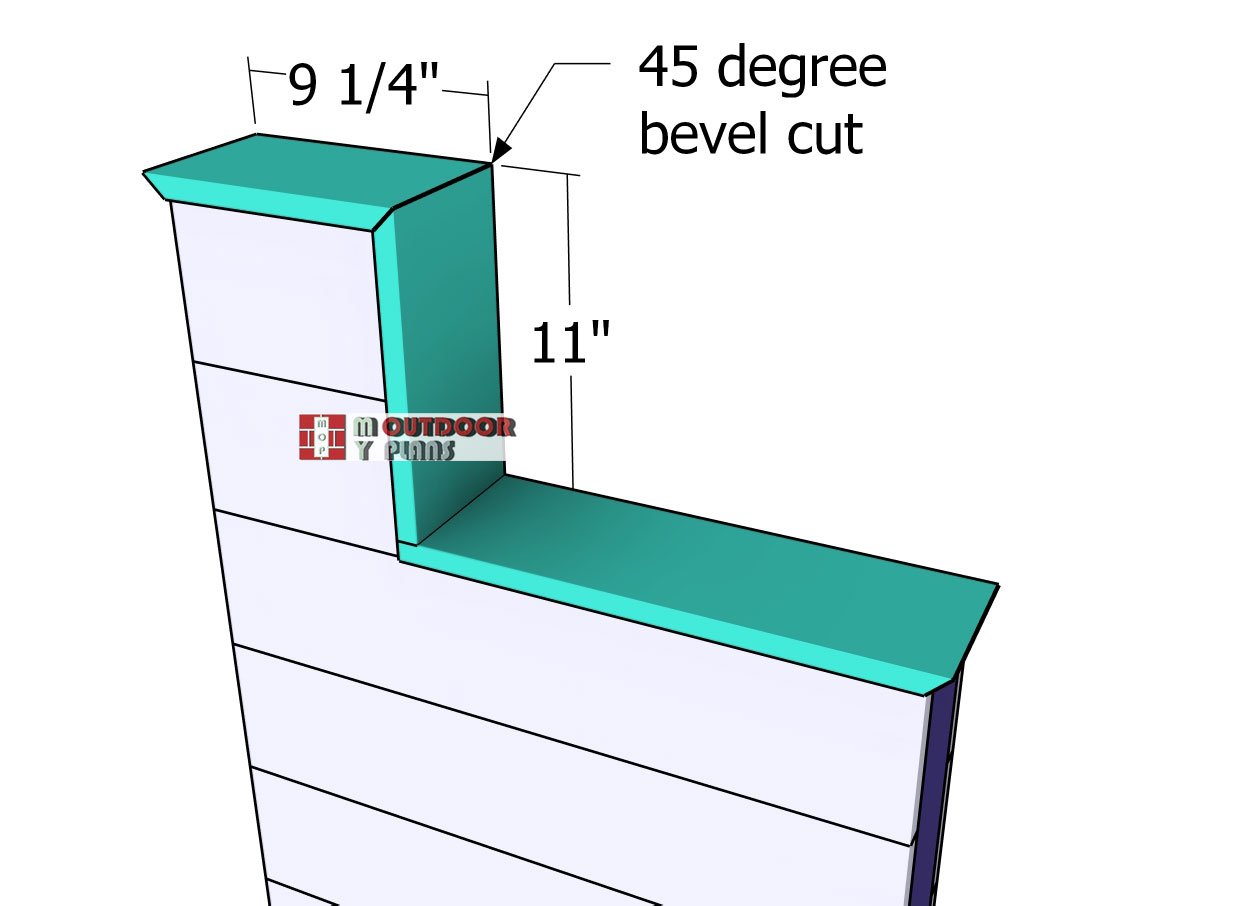
Keep attaching the trims to the stand, following the details in the diagram. Make sure there are no gaps between the trims and align them carefully. The top trim will need 45-degree bevel cuts on both ends for a perfect fit.

Side-trims
Now, let’s attach the final trim board to the back of the mailbox post. Make sure it’s aligned properly and fits snugly against the post. Secure it with nails and a bit of wood glue, just like we did with the other trims. This will give our mailbox stand a nice, finished look from all angles.
Fitting-the-mailbox-stand-into-place
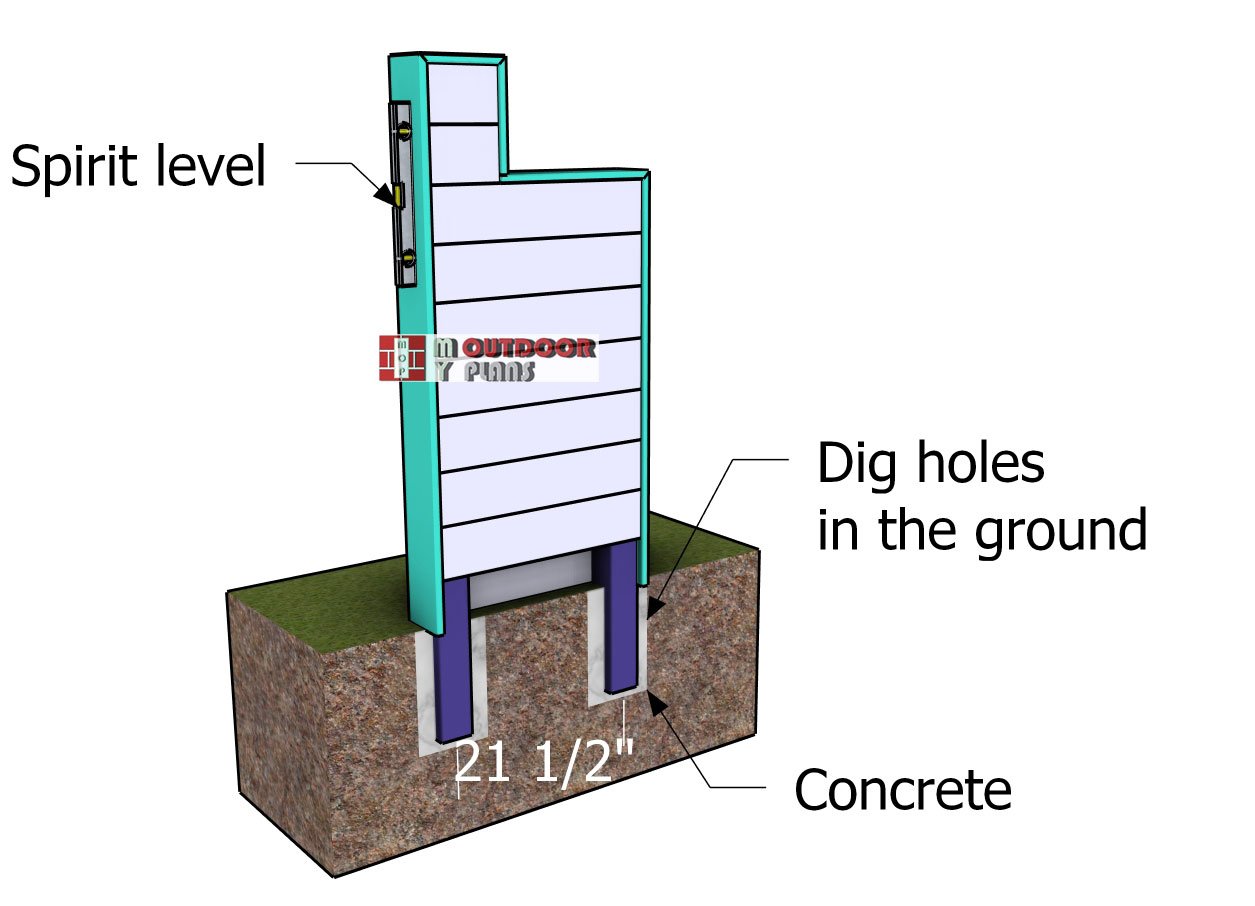
Once everything’s assembled, it’s time to install the mailbox stand in your front yard. Choose your location and mark the ground 21 1/2″ between the centers of the posts. Use a shovel to dig holes 14″ deep and 12″ in diameter.
Pour 2″ of concrete into the bottom of each hole, then set the posts in place, making sure the stand is perfectly plumb. Use temporary braces to hold the stand steady while you fill the holes with concrete. Let the concrete cure for a day before removing the braces.
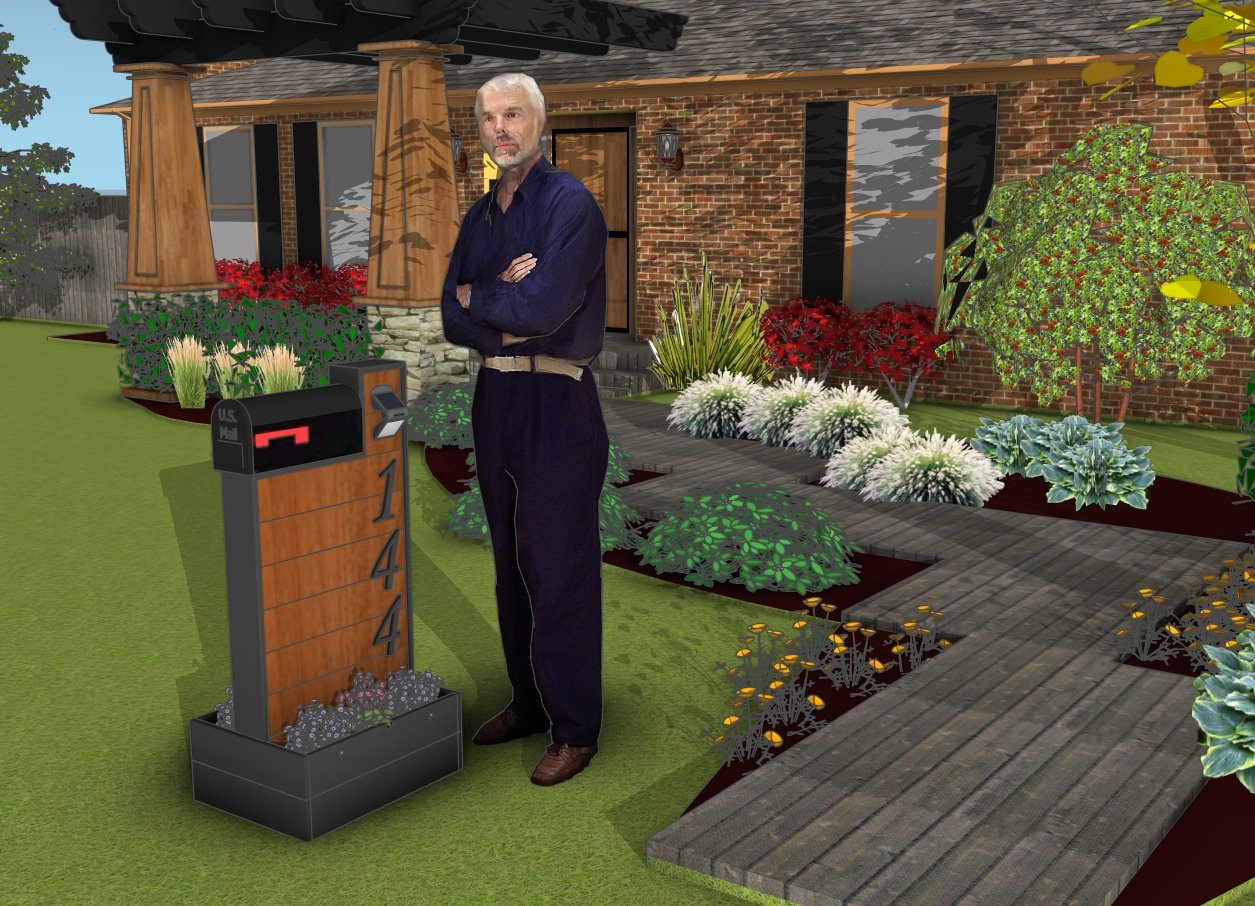
This mid-century wooden mailbox post project brings a touch of classic style to your curb appeal. Using quality materials and clean lines, you’ll create a mailbox post that’s both durable and a standout piece in your front yard.
Fitting-the-numbers
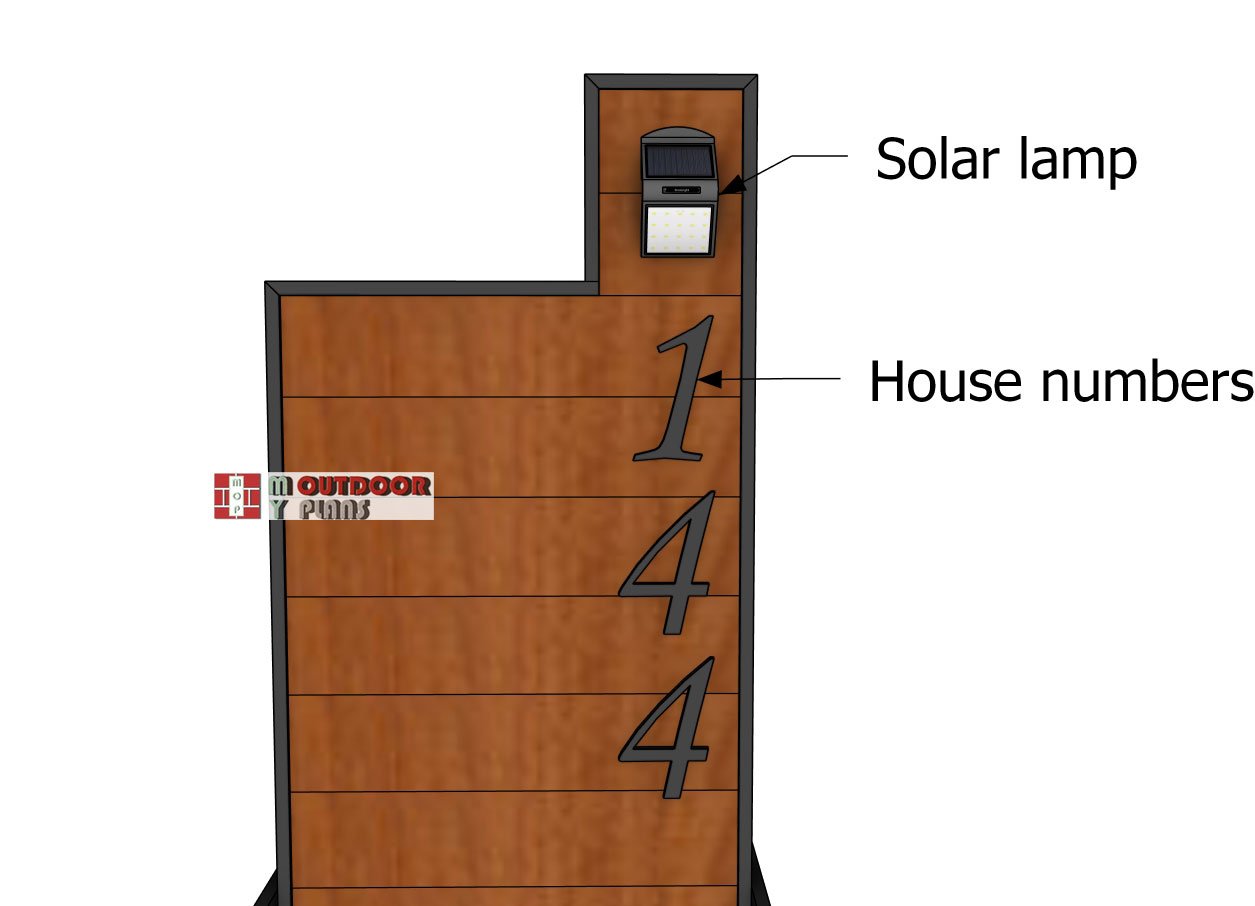
Last but not least, let’s focus on the finishing touches. Fill any holes with wood putty and smooth the surface with 120-220 grit sandpaper. Apply a few coats of stain or paint to enhance the look and protect it from the elements. Now, attach the house numbers and the solar lamp for that extra bit of functionality. Finally, set the mailbox in place following the manufacturer’s instructions.
Building the base planter box
Assembling-the-panels
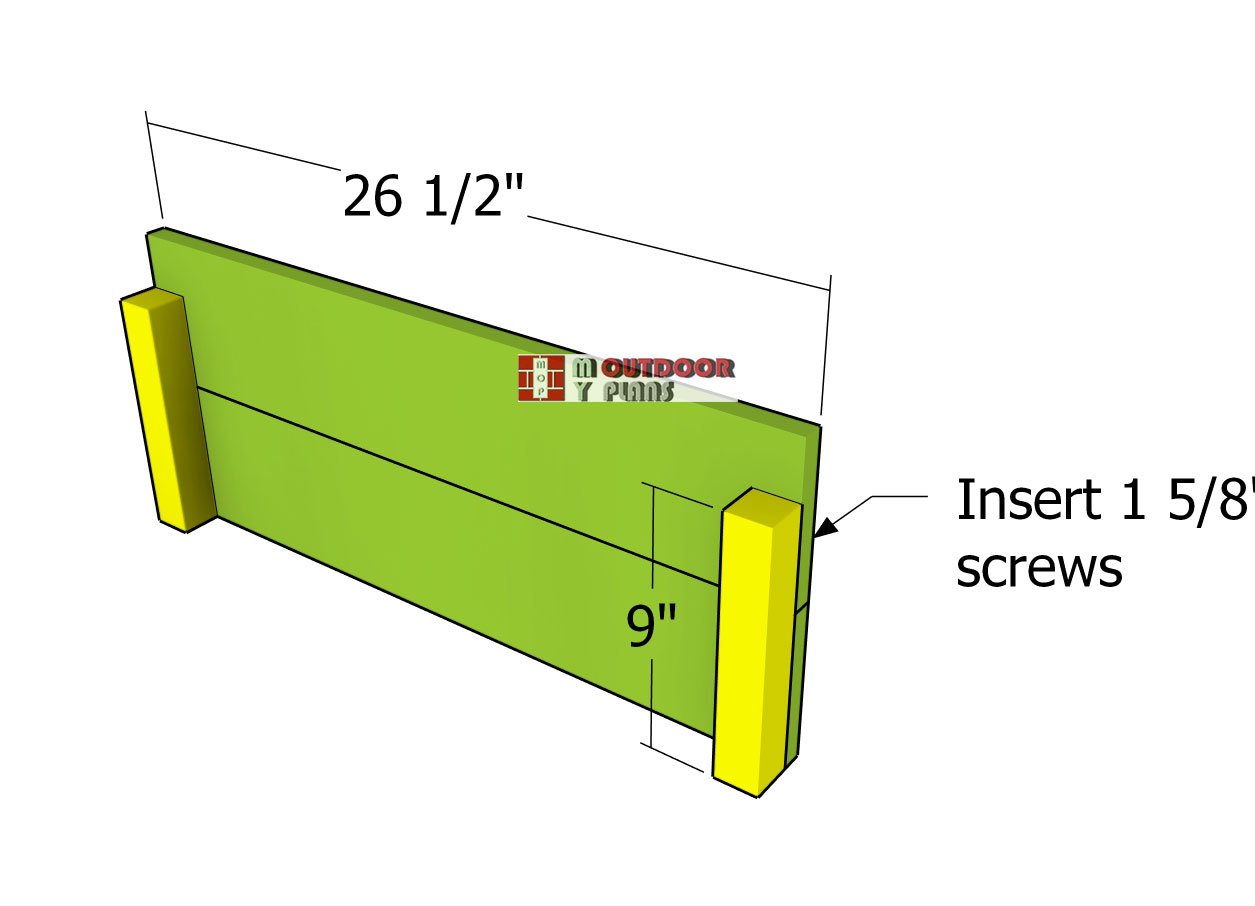
Next up, we’re going to build the planter box. Start by assembling the panels using 2×2 corner supports and 1×6 boards. Drill pilot holes through the boards, then secure them to the supports with 1 5/8″ screws.
Fitting-the-planter-boards
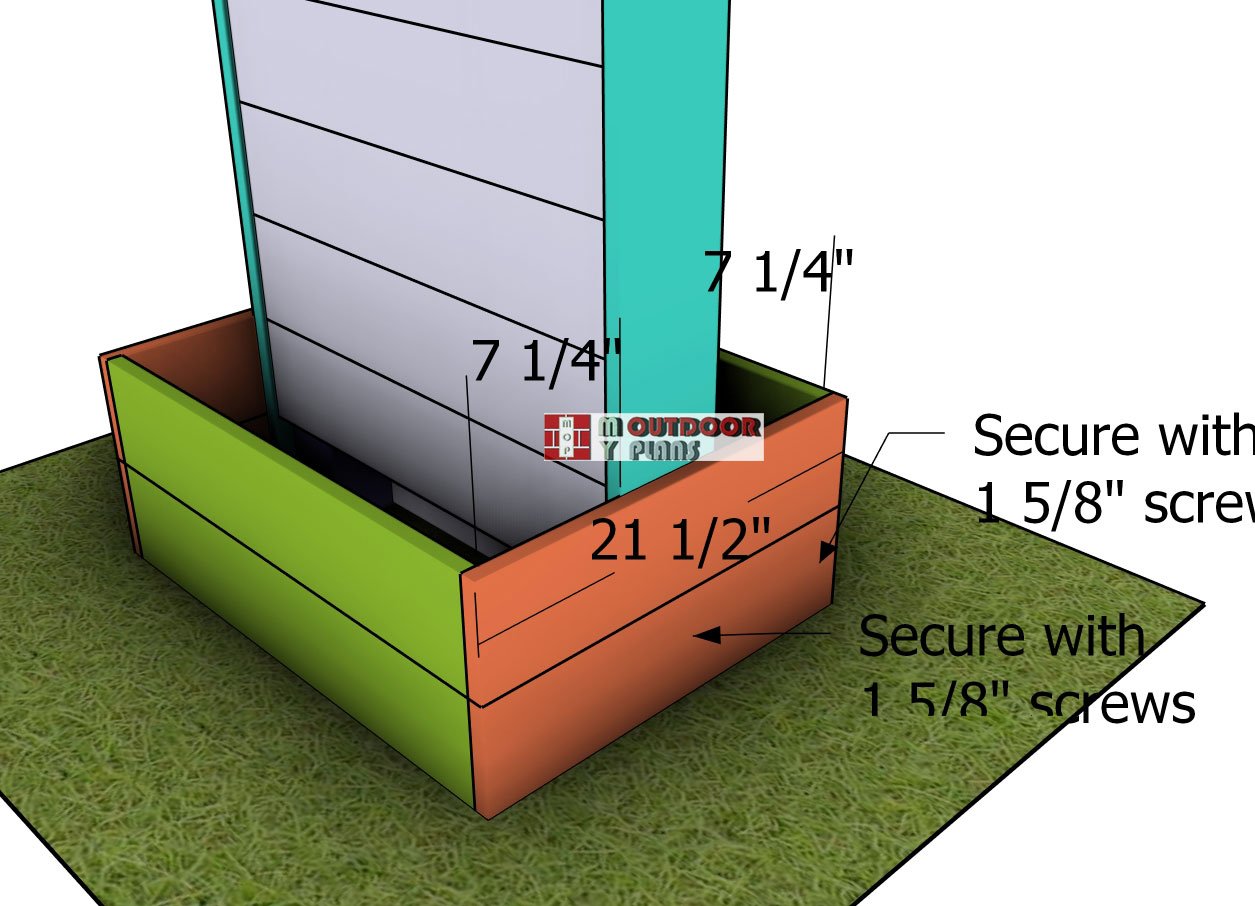
Next, let’s attach the planter box to the base of the mailbox stand by securing the side boards. Center the boards to the trims of the stand and lock them in place with 1 5/8″ screws. Make sure to also insert screws through the side boards into the planter panels for extra stability.
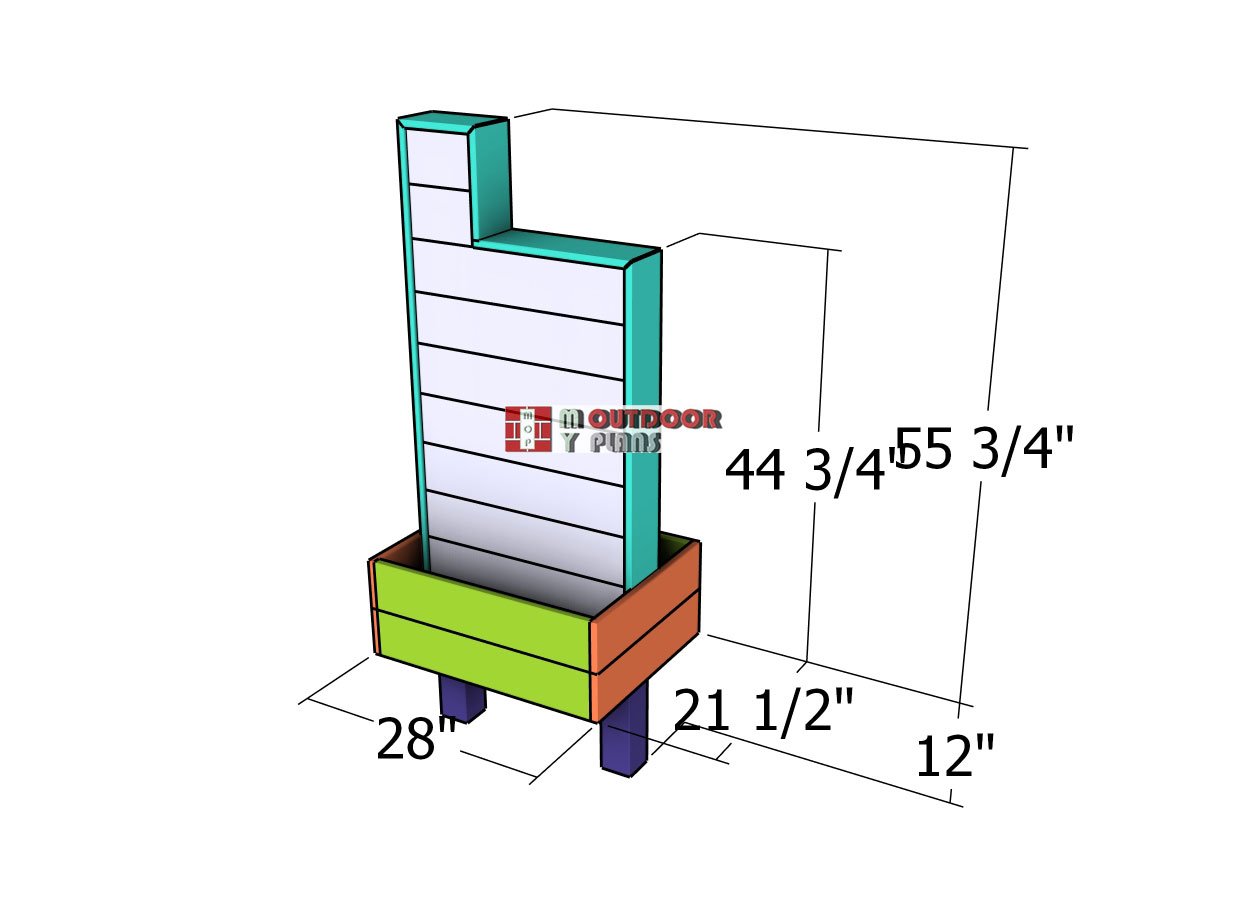
Modern-mailbox-posts—dimensions
To protect a wooden planter box, line the interior with landscape fabric or plastic sheeting to create a barrier between the wood and soil. This prevents moisture from soaking into the wood, which can lead to rot. Additionally, ensure proper drainage by adding a layer of gravel before filling with soil.
Finishing touches for mid century mailbox stand
How to build a modern mailbox stand
If you’re searching for outdoor good-looking mailbox plans, this project is right up your alley. With its sleek design and durable materials like cedar or hardwood, you’ll have a mailbox stand that’s both eye-catching and built to withstand the elements.
DIY mailbox stand plans
And there you have it! Your custom mailbox stand with a built-in planter is ready to add some charm to your front yard. I hope you enjoyed this project as much as I did—now go out there and build your outdoor world!
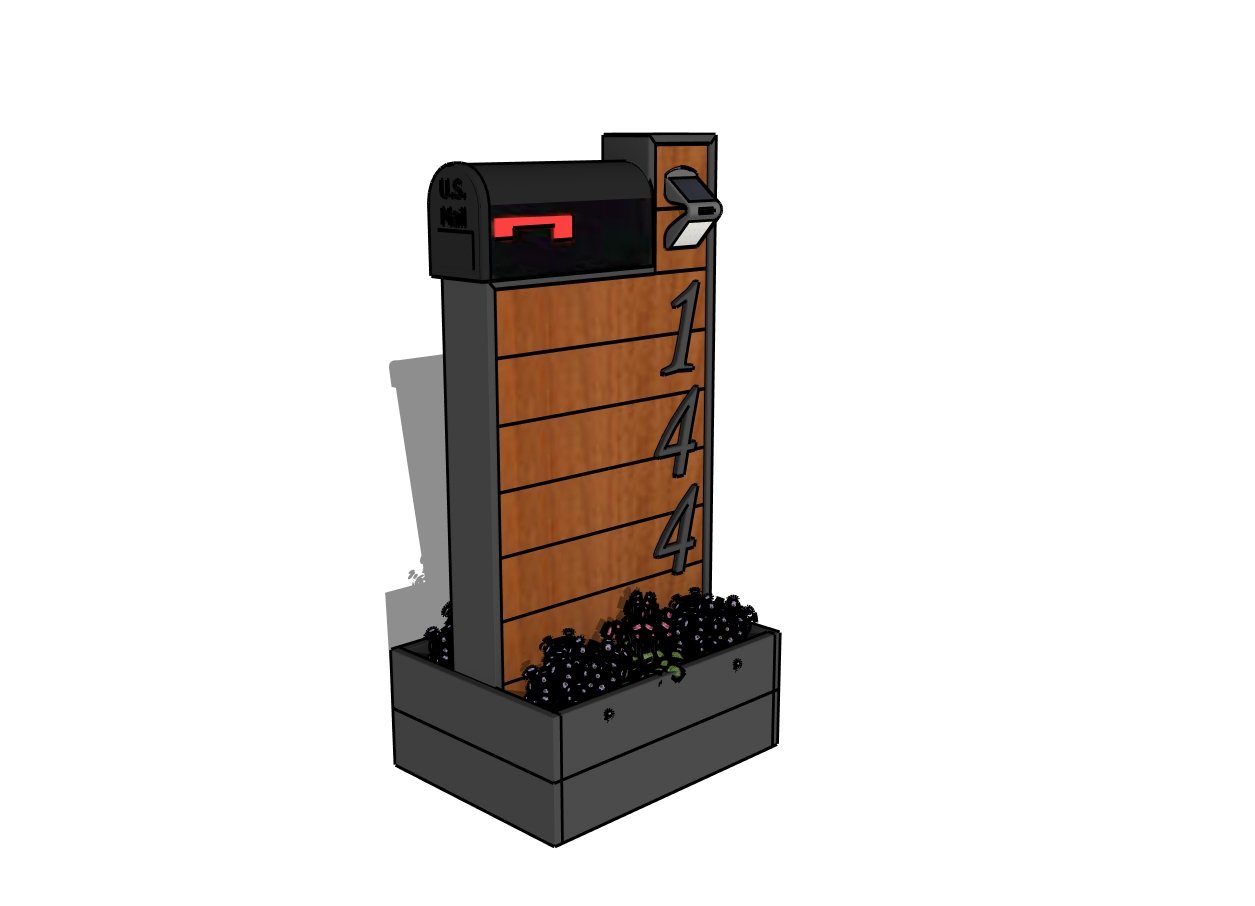
Modern mailbox stand plans
Your stylish new mailbox stand with a built-in planter is all set to elevate your curb appeal. If you enjoyed this project, be sure to check out my other modern DIY builds—there’s plenty more to get inspired by and tackle next!
If you want to get the Premium plans with all the extras, just press the GET PREMIUM PLANS button bellow. If you want to get the free plans, just read the blog FAQs.

This woodworking project was about mid century mailbox post plans. If you want to see more outdoor plans, check out the rest of our step by step projects and follow the instructions to obtain a professional result.